Eyewear Try-On
With the Eyewear Try-On sample project, Lens Developers can create unique glasses AR Try-On experiences at professional level. The Eyewear Try-On sample project offers a quick way for you to get started with Glasses based Try-On experiences.
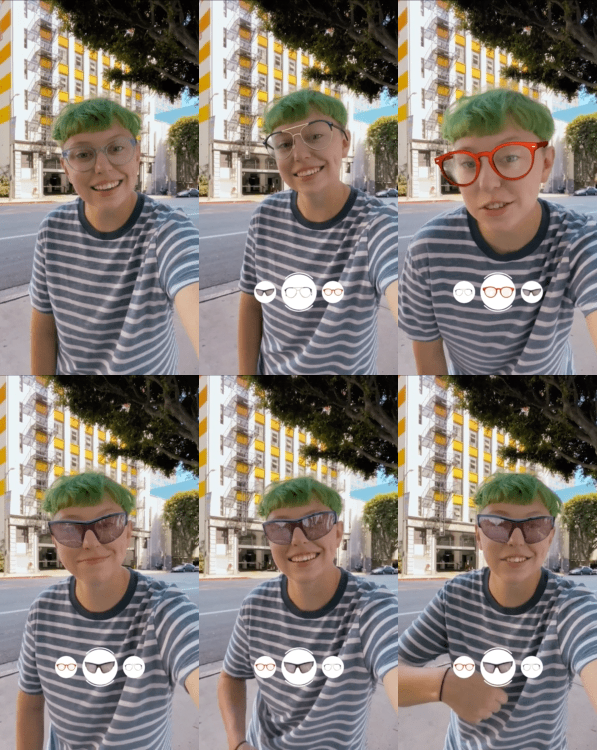
This sample project is available on Lens Studio Home Page.
Sample Project Walkthrough
This sample project is set up so that for most things, almost no coding or additional setup is required.
Under Template controls Scene Object there are 3 scripts that help you set up the project:
Effect Setup
This script controls adding standard effects that enhance overall visuals like face effects, color correction, rendering and toggling the new Glasses Removal component.
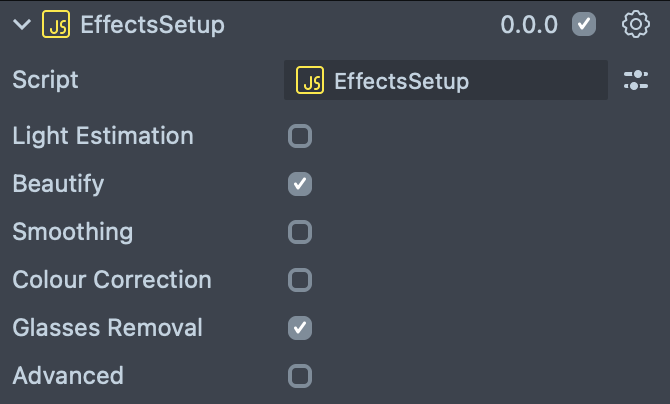
Light Estimation: The Dynamic Environment map generates an environment map in real time from some input – usually the Device Camera Input. This Dynamic Environment map will allow your object to receive lighting from the real world.
Beautify: Adds simple facial effects like light morphine to the entire face area, light eye and lip augmentation, light soft skin and teeth whitening. Effects can be refined or removed by editing objects located under “EffectsBaseBeauty [EDIT_ME]” Scene Object.
Smoothing: Enable smoothing of face skin that is frequently used and removes skin features such as under-eye bruises and scars.
You can change the intensity of the effect by opening the material and changing “Base Color” parameter.
Color Correction: enable color LUT effect. After enabling this effect, you can control it from two new parameters:
- Opacity: changes the mix of the color correction with original image.
- Texture: Add your own color correction instead of the default texture.
- See the color correction docs for more information on how to make one.

Glasses Removal: This is a machine learning component that detects glasses in the frame and will produce a new image without them. This runs automatically, and currently will target regular glasses (not shaded). Use this feature to allow users wearing glasses to easily test the models you offer for try-on.
Switching Items
If you change the glasses 3D models (see below), make sure to change their reference in this script as well. It will connect these models to the Carousel UI and enable smooth toggling of different models.
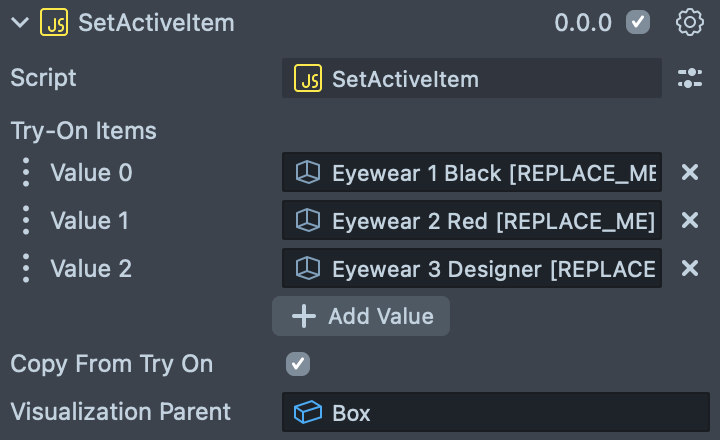
If you use visualization mode as well, copy from try-on will ensure visualization models will show in the same order when using the carousel.
Visualization & Try-On
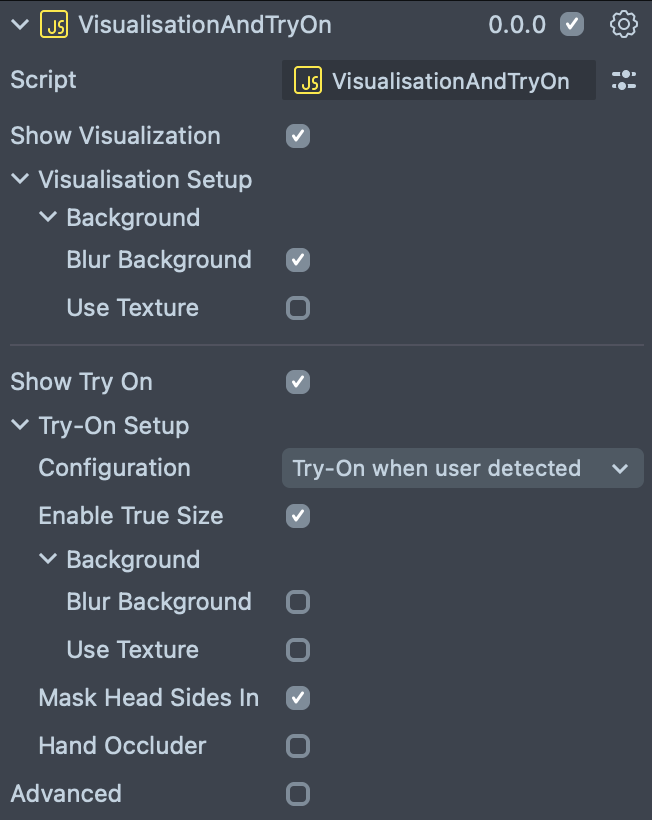
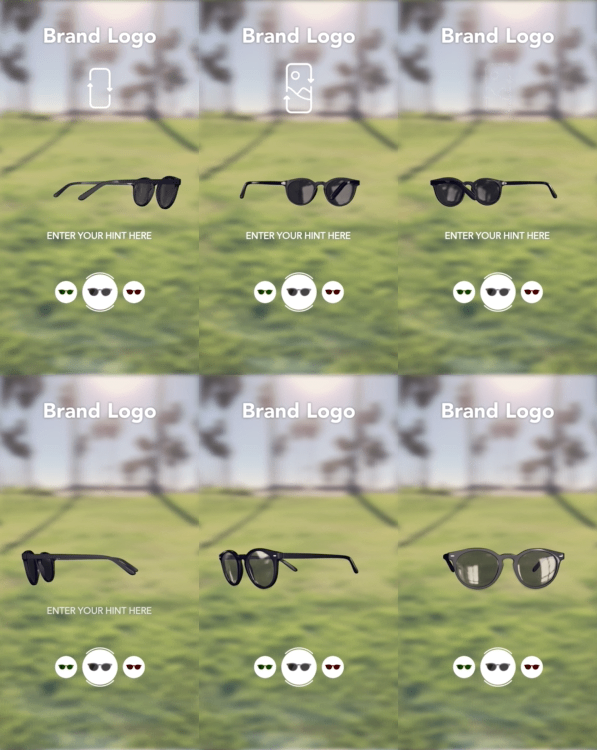
Visualization mode
If “Show Visualization” is on, product visualization will show in cases no face was found or back camera is used (see Configuration below).
This mode allows users to rotate and get a better view of the product similar to holding it in their hands.
Background
Blur background: Use a blurred camera as the background.
Use Texture: Use custom texture as the background for the product visualization.
Try-On mode
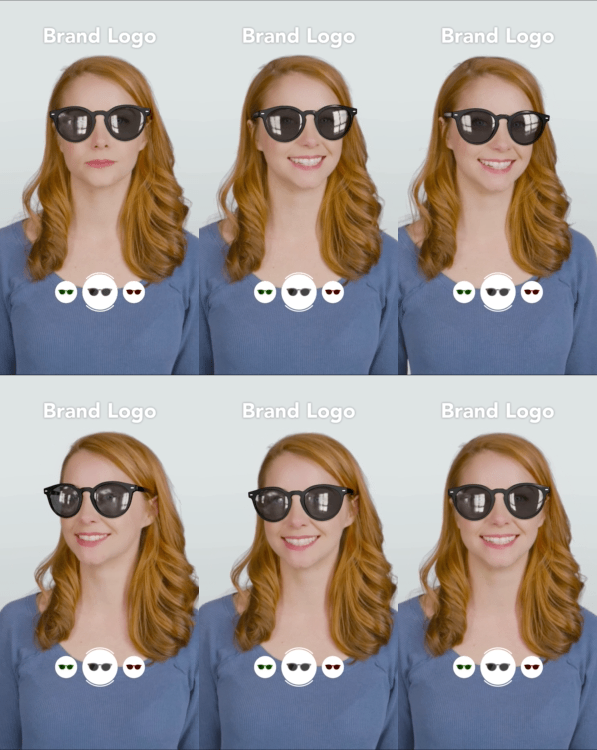
If “Show Try On” is on, glasses will show on users face if one found or front camera is used (see Configuration below).
Configuration: If Both try-on and visualization are on, it’s possible to toggle try-on and visualization automatically when face is detected, or use front camera only for try-on and back camera only for visualization.
Background
Blur background: Use a blurred camera as the background.
Use Texture: Use custom texture as the background for try-on.
Mask head sides: Adds a 3D mask that will improve the occlusion of the glasses especially with hair and ears.
Hand Occluder: Use hand segmentation to occlude the glasses when hands are in front of the glasses, to increase the realism of the experience.
True Size Support
Usually, in Try-On mode, glasses automatically resize to match the user’s face. With True Size mode enabled, the glasses will keep their original 3D model size of 1 unit = 1 cm. This is useful in cases where it’s desirable to check fit.
To Enable "True Size", select Visualization & Try-On Scene Object in the Scene Hierarchy panel located under Template Controls

Then select Enable True Size
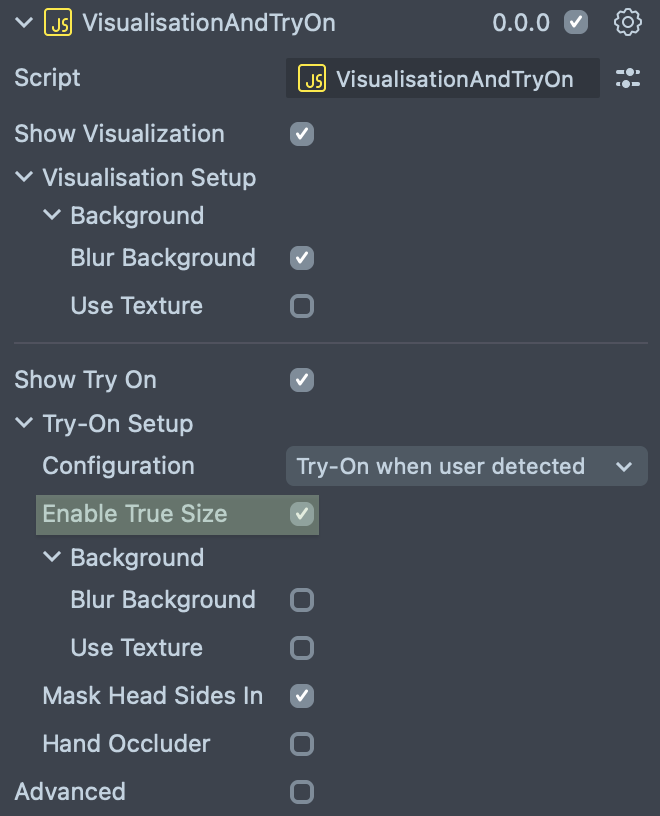
True Size is only supported on Apple devices that support Face ID. Consult this list for supported devices.
Importing and setting up new Items
If you have your own 3D model you would like to add to this template, please follow the standard steps to import a new 3D model.
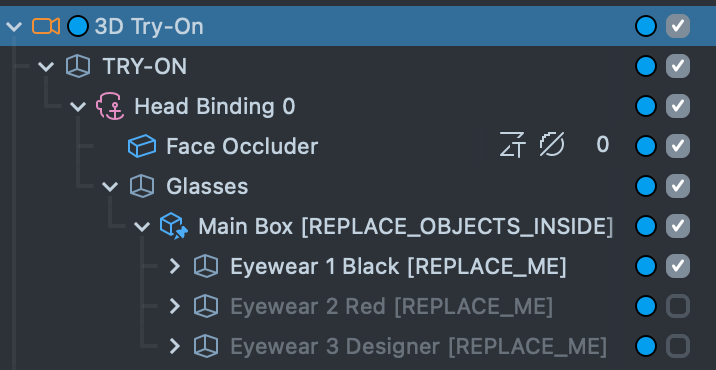
- After importing, add the model to the
Scene Hierarchypanel underMain BoxScene Object. - Adjust your new model transform so it is positioned and scaled correctly on the face occluder
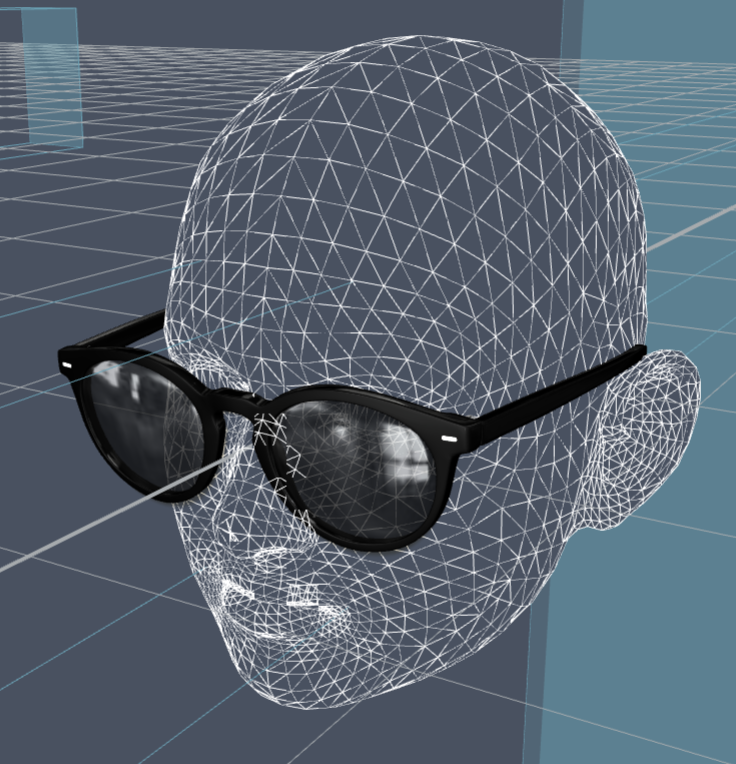
- In order to update the carousel UI, make sure to add your model to the correct place in the
Set Active Itemscript. If you need more items, use theAdd Valuebutton.
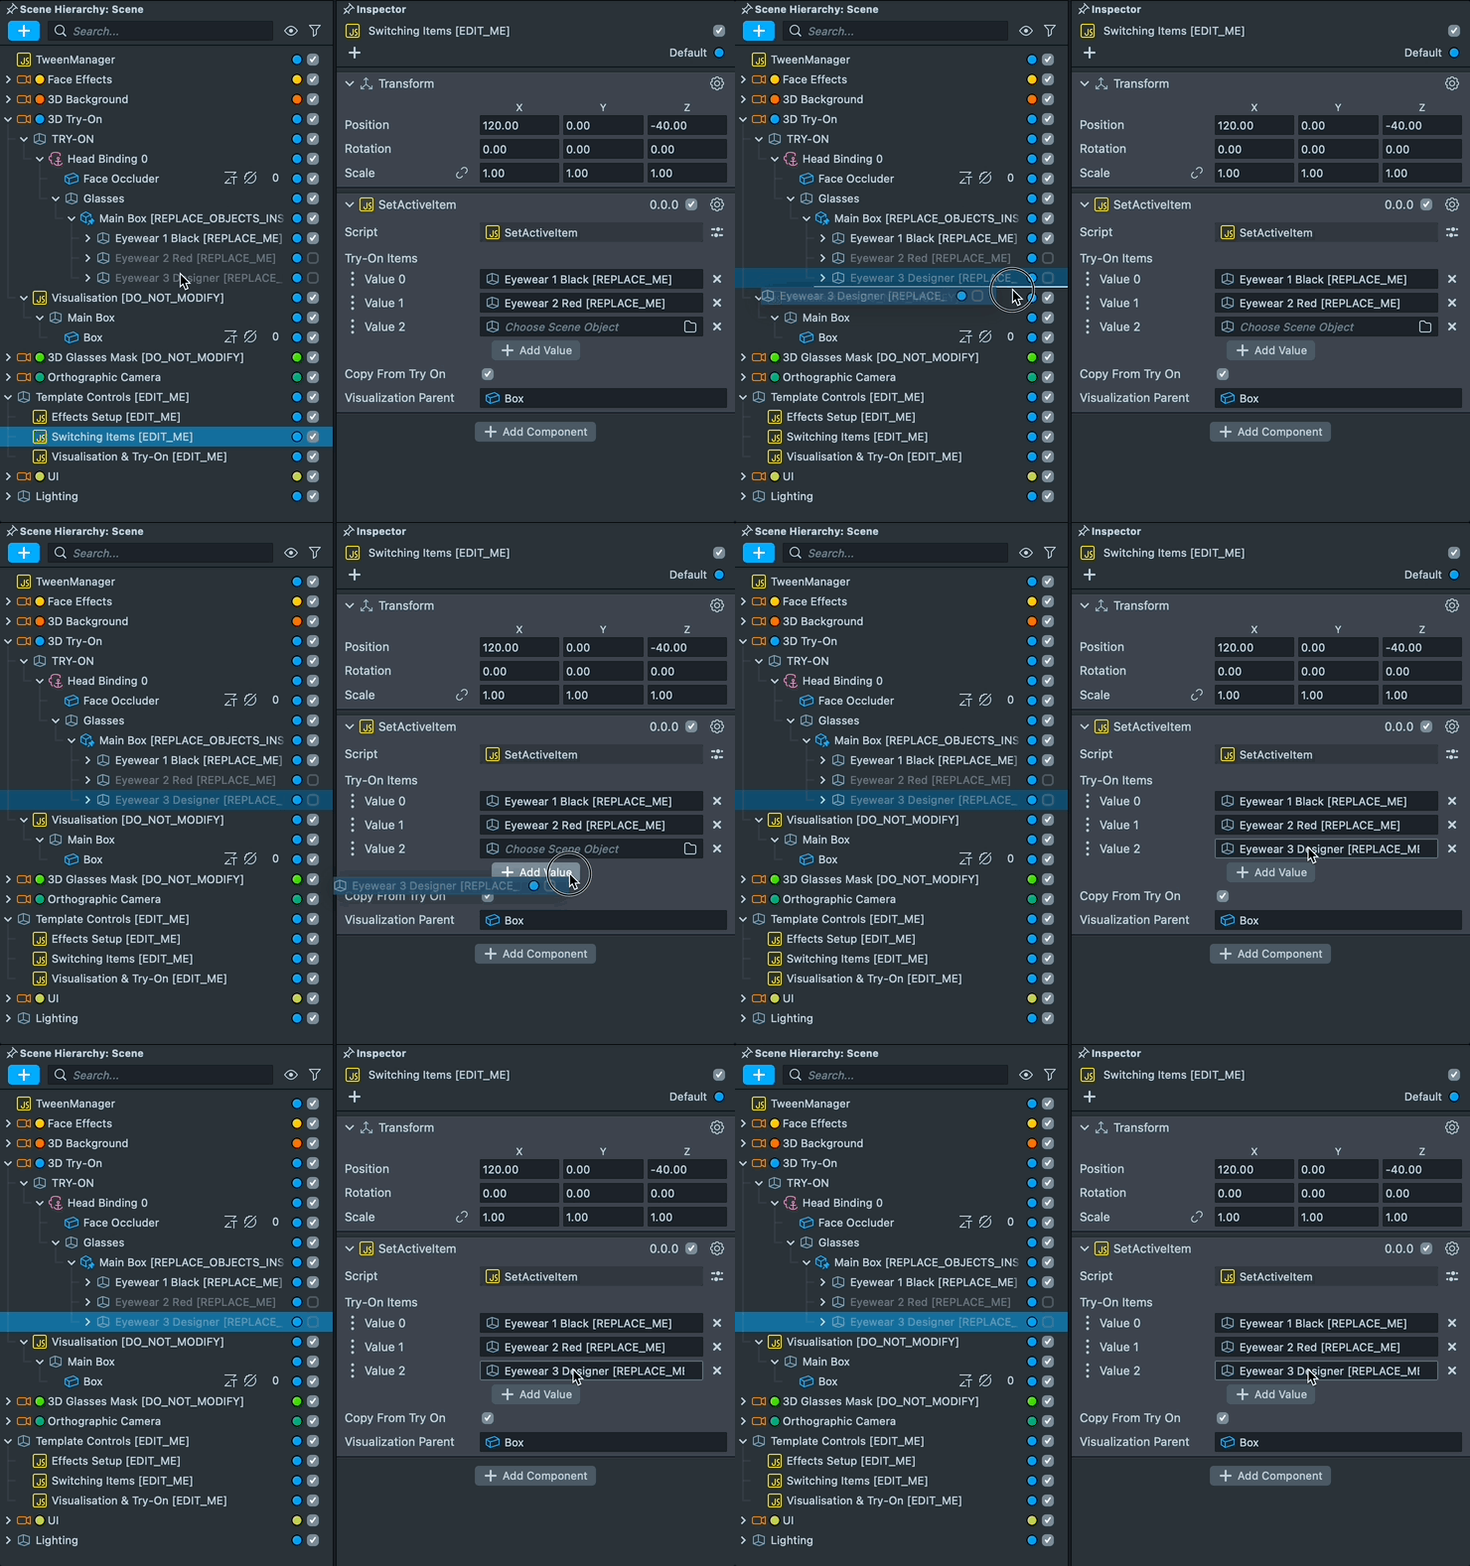
- If you want to change the icons on the carousel, match the position of a new icon texture to the
Horizontal Carousel [EDIT_ME]Scene Object. If you need more items, use theAdd Valuebutton
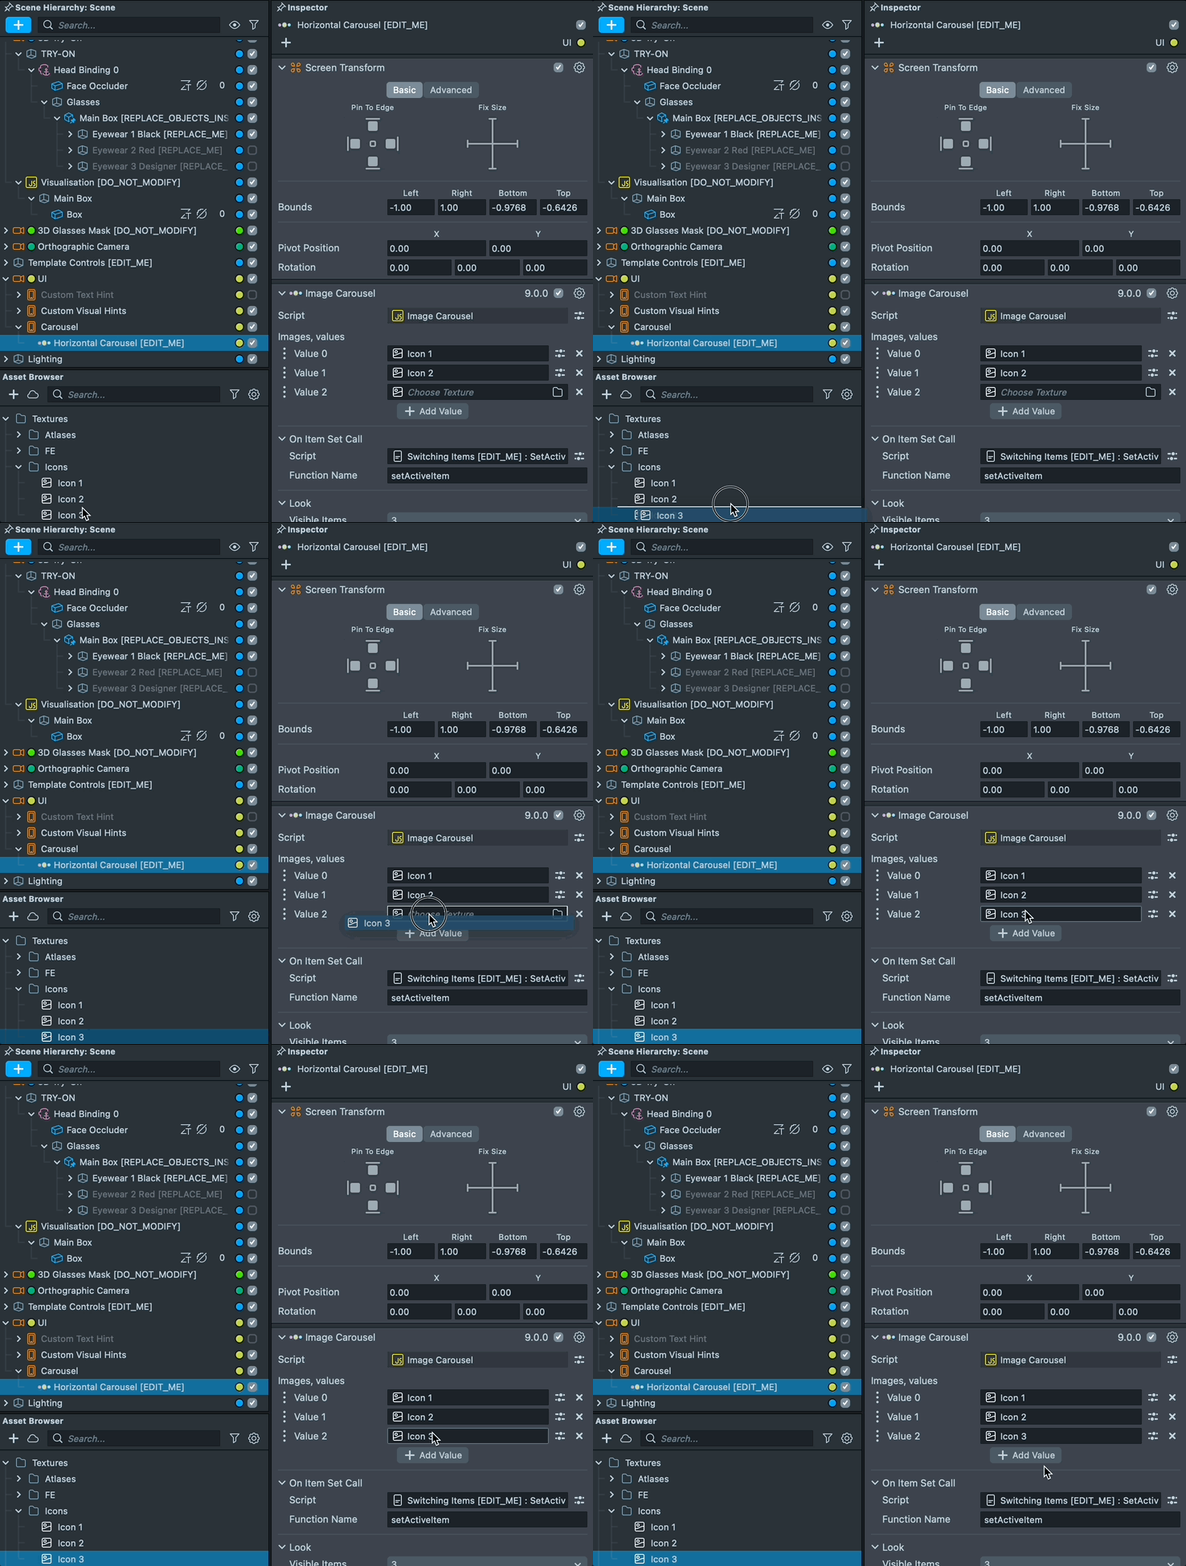
Previewing Your Lens
You’re now ready to preview your Lens! To preview your Lens in Snapchat, follow the Pairing to Snapchat guide.
What's Next?
Now that you have learned about how to create your own Eyewear Try-On Lenses, take a look at some of the other AR Try-On examples.
- Check out the Developing Fashion Lenses for Virtual Try-On using Lens Studio course on how to make your own Fashion Lens.
- Earring Try-On
- Garment Transfer