iOS SDK Setup
Camera Kit brings Snap's augmented reality platform to your application. This section covers the steps for importing and integrating the SDK into your app. If you are just looking for a quick start guide to developing your first Camera Kit app, you might want to check this out:
Repository, Samples and Frameworks
On iOS Camera Kit is housed on GitHub: https://github.com/Snapchat/camera-kit-ios-sdk
Sample apps
This repository contains three sample apps showing how to integrate Camera Kit into your apps. To run the sample apps on you just add your API Token and a Lens group id. To test your setup, you can use the Lens Group "Camera Kit Sample Lenses" found on "My Lenses", under Lens Scheduler.
When testing in the sample app, open CameraKitSample/AppDelegate and set partnerGroupId to the Lens Group ID
CameraKitBasicSampleimplements the bare minimum to show a single LensCameraKitSamplecontains a fully functioning camera capture, Lenses, and preview flowCameraKitAlternateCarouselSampledemonstrates how to build your own carousel and preview screen
Frameworks
All frameworks are on CocoaPods and Swift Package Manager. The core framework bringing Snap's augmented reality technologies to your app is:
SCSDKCameraKit
Two open-sourced frameworks with reusable UI components and utilities, for UIKit and SwiftUI apps, respectively, are:
SCSDKCameraKitReferenceUISCSDKCameraKitReferenceSwiftUI
Frameworks for testing Lenses during development are:
SCSDKCameraKitPushToDeviceExtensionSCSDKCameraKitBaseExtensionSCSDKCameraKitLoginKitAuth
The last three frameworks let you test your Lenses by pushing them immediately to your device, without having to go through a full publishing flow. This testing environment requires additional setup covered in Push-to-Device.
The only thing you need to integrate Snap's augmented reality technology is SCSDKCameraKit. Everything else is optional.
Requirements
- iOS version 13.0+
- Device with 64-bit processor
Size
The iOS version of the SDK is approximately ~12MB increase on your iOS app in the final build published to the App Store.
Physical Devices
The SDK officially supports iPhones and iPads running iOS 13 and later. While it is technically possible to run the SDK on Apple Silicon (M-series) Macs and Macbooks, this environment is not officially supported. To run in this configuration, first, select the "Mac (Designed for iPad)" run destination in Xcode; then disable Metal API validation in the Xcode Scheme settings.
Simulator
Camera Kit does compile on Xcode's Device Simulators. However, because Simulators lack cameras and lack support for AVCaptureSession, Camera Kit does not work as designed on such devices.
Installation
Camera Kit currently supports Swift Package Manager, CocoaPods, and manual installation.
Swift Package Manager
- In Xcode, select "File" → "Add Package Dependency"
- Enter the repository URL:
https://github.com/Snapchat/camera-kit-ios-sdk.git - Select the version and modules you want to use in your project
CocoaPods
If you use CocoaPods to manage your dependencies, simply add the following to your Podfile:
pod 'SCCameraKit'
If you'd like to use Reference UI--the framework of reusable UI components and utilities--in a UIKit app, add:
pod 'SCCameraKitReferenceUI'
To use Reference UI in a SwiftUI app, add:
pod 'SCCameraKitReferenceSwiftUI'
Note: our frameworks are named slightly differently on CocoaPods and, therefore, in podfiles. It is named SCSDKCameraKit in import statements but SCCameraKit in podfiles.
If your project does not have a Podfile and you would like to use CocoaPods to manage your dependencies, follow the instructions on CocoaPods to create one.
After running pod install open you_app.xcworkspace generated in the process, for example, CameraKitSample.xcworkspace if runningCameraKitSample. Do not open the .xcodeproj file directly.
If you get an error "CocoaPods could not find compatible versions for pod "SCCameraKit"", it usually means the pods on your machine aren't up to date. In that case run pod install --repo-update. This updates your pods and install the ones specified in the podfile in your project.
Service Authorization
Your API Token can be found in the Snap Kit Portal and is used to provide authorized access to Camera Kit remote services.

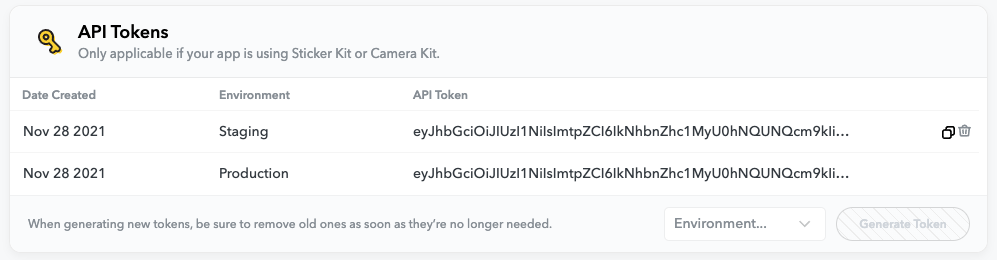
API Token is different for Production and Staging Environment. A watermark will be applied to the camera view when using the Staging API token.
Hover your mouse over API token and click on the copy button on the right to copy the full token.
To gain access to the Camera Kit service you must include your Snap Kit API Token in your app. There are two ways to do this.
You can add SCCameraKitAPIToken (string key), and set it to your application's API Token in your application's Info.plist file.
Alternatively, you can pass it into Camera Kit Session through SessionConfig object:
import SCSDKCameraKit

let sessionConfig = SessionConfig(apiToken: "<YOUR_API_TOKEN>")
let cameraKit = Session(sessionConfig: sessionConfig, errorHandler: self)
Snap App Id was required for SDK version < 1.22. It is no longer required.
Integration
Camera Kit attaches to an existing camera pipeline inside your app. A camera pipeline starts with capture data from a camera, microphone, and other input devices. This data then flows through and is played on a preview view and speakers.
You don't have to build a camera pipeline from scratch. iOS provides AVCaptureSession which lets you configure this flow of data between input device and capture outputs. In turn, AVCaptureSession is a part of large native framework, AVFoundation, for creating and playing video and audio.
You are responsible for configuring and managing an AVCaptureSession, which Camera Kit will attach to. You may start, stop, and reconfigure your session as needed by your app.
Setup the camera pipeline
If you want to setup a regular capture session for the front facing camera you'd do:
let captureSession = AVCaptureSession()

captureSession.beginConfiguration()
guard let videoDevice = AVCaptureDevice.default(.builtInWideAngleCamera, for: .video, position: .front),
    let videoDeviceInput = try? AVCaptureDeviceInput(device: videoDevice),
    captureSession.canAddInput(videoDeviceInput) else { return }
captureSession.addInput(videoDeviceInput)
captureSession.commitConfiguration()
This code initializes an AVCaptureSession. The session is configured as an atomic update inside beginConfiguration() and commitConfiguration() to use the front device camera. It then adds this input device to the AVCaptureSession.
Setup the Camera Kit pipeline
Camera Kit works similarly to AVCaptureSession – it also has inputs and outputs. We'll create a Camera Kit session, and connect it to your existing AVCaptureSession.
To begin, first instantiate a Session. A Session object will be your main entry point into Camera Kit. Through it, you can access components like Lenses.
let cameraKit = Session()
Next, create a Camera Kit input and start your Camera Kit Session with it. AVSessionInput is an input that Camera Kit provides that wraps up Lens-specific details of AVCaptureSession configuration (such as setting the pixel format).
let input = AVSessionInput(session: captureSession)
cameraKit.start(with: input)
DispatchQueue.global(qos: .background).async {
    input.startRunning()
}
input.startRunning() is a blocking call and can make the UI unresponsive if run on the main thread. AVCaptureSession should be started on a serial background dispatch queue instead.
Display the output
To display the processed output of Camera Kit, we provide a PreviewView that behaves similarly to AVCaptureVideoPreviewLayer. The PreviewView is a Camera Kit Output – it receives processed frames and displays them. We'll also set automaticallyConfiguresTouchHandler so that Camera Kit can process touch events and users can interact with Lenses. Add it to the view heirarchy like any other UIView, and connect it to the Session by calling add(output:).
let previewView = PreviewView()
previewView.automaticallyConfiguresTouchHandler = true
cameraKit.add(output: previewView)
At this point, if you build and run your app, you should see your camera input displaying onscreen without any Lenses applied to it. We'll discuss how to activate Lenses in the next section.
Activating Lenses
Camera Kit Lenses are provided by the LensRepository class. You can access this through cameraKit.lenses.respository. Lenses are fetched asynchronously by adding yourself as an observer for a specific groupID or a specific lensID in the repository, and you may wish to hold a reference to the Lenses returned from LensRepository.
func repository(_ repository: LensRepository, didUpdateLenses lenses: [Lens], forGroupID groupID: String) {
    self.lenses = lenses
}

cameraKit.lenses.repository.addObserver(self, groupID: "group_id_here")
The LensProcessor is responsible for applying and clearing Lenses. You can access it through cameraKit.lenses.processor.
We can now take the Lens that we've retrieved from the repository, and apply it to the Lens processor.
cameraKit.lenses.processor?.apply { success in
    // If success == true, the Lens is now applied
}
The preview view should now be showing camera input with a Lens applied.
Clearing Lenses
When you are done with a Lens and want to remove it from the camera input, you can call clear on the Lens processor. It is not neccessary to clear a Lens before applying a new one.
cameraKit.lenses.processor?.clear() { success in
    // If success == true, the Lens has been cleared
}
The preview view should once again be showing the camera input with no Lenses applied.