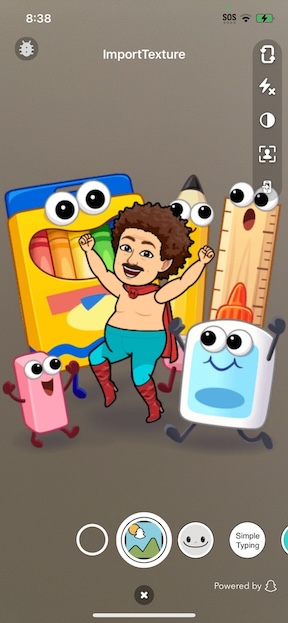
Send Image from App to Lens
Overview
In this tutorial, we will walk through the steps to build out a project which imports an image into a Lens directly from your mobile application. This is a practical application of the Remote API feature available within the Camera Kit SDK and could be extended to pull in additional data or 3D models.
Prerequisites
- iOS configuration completed
- Reviewed Lens Studio compatibility chart
- iOS Push-to-Device implemented (preferred)
Getting Started
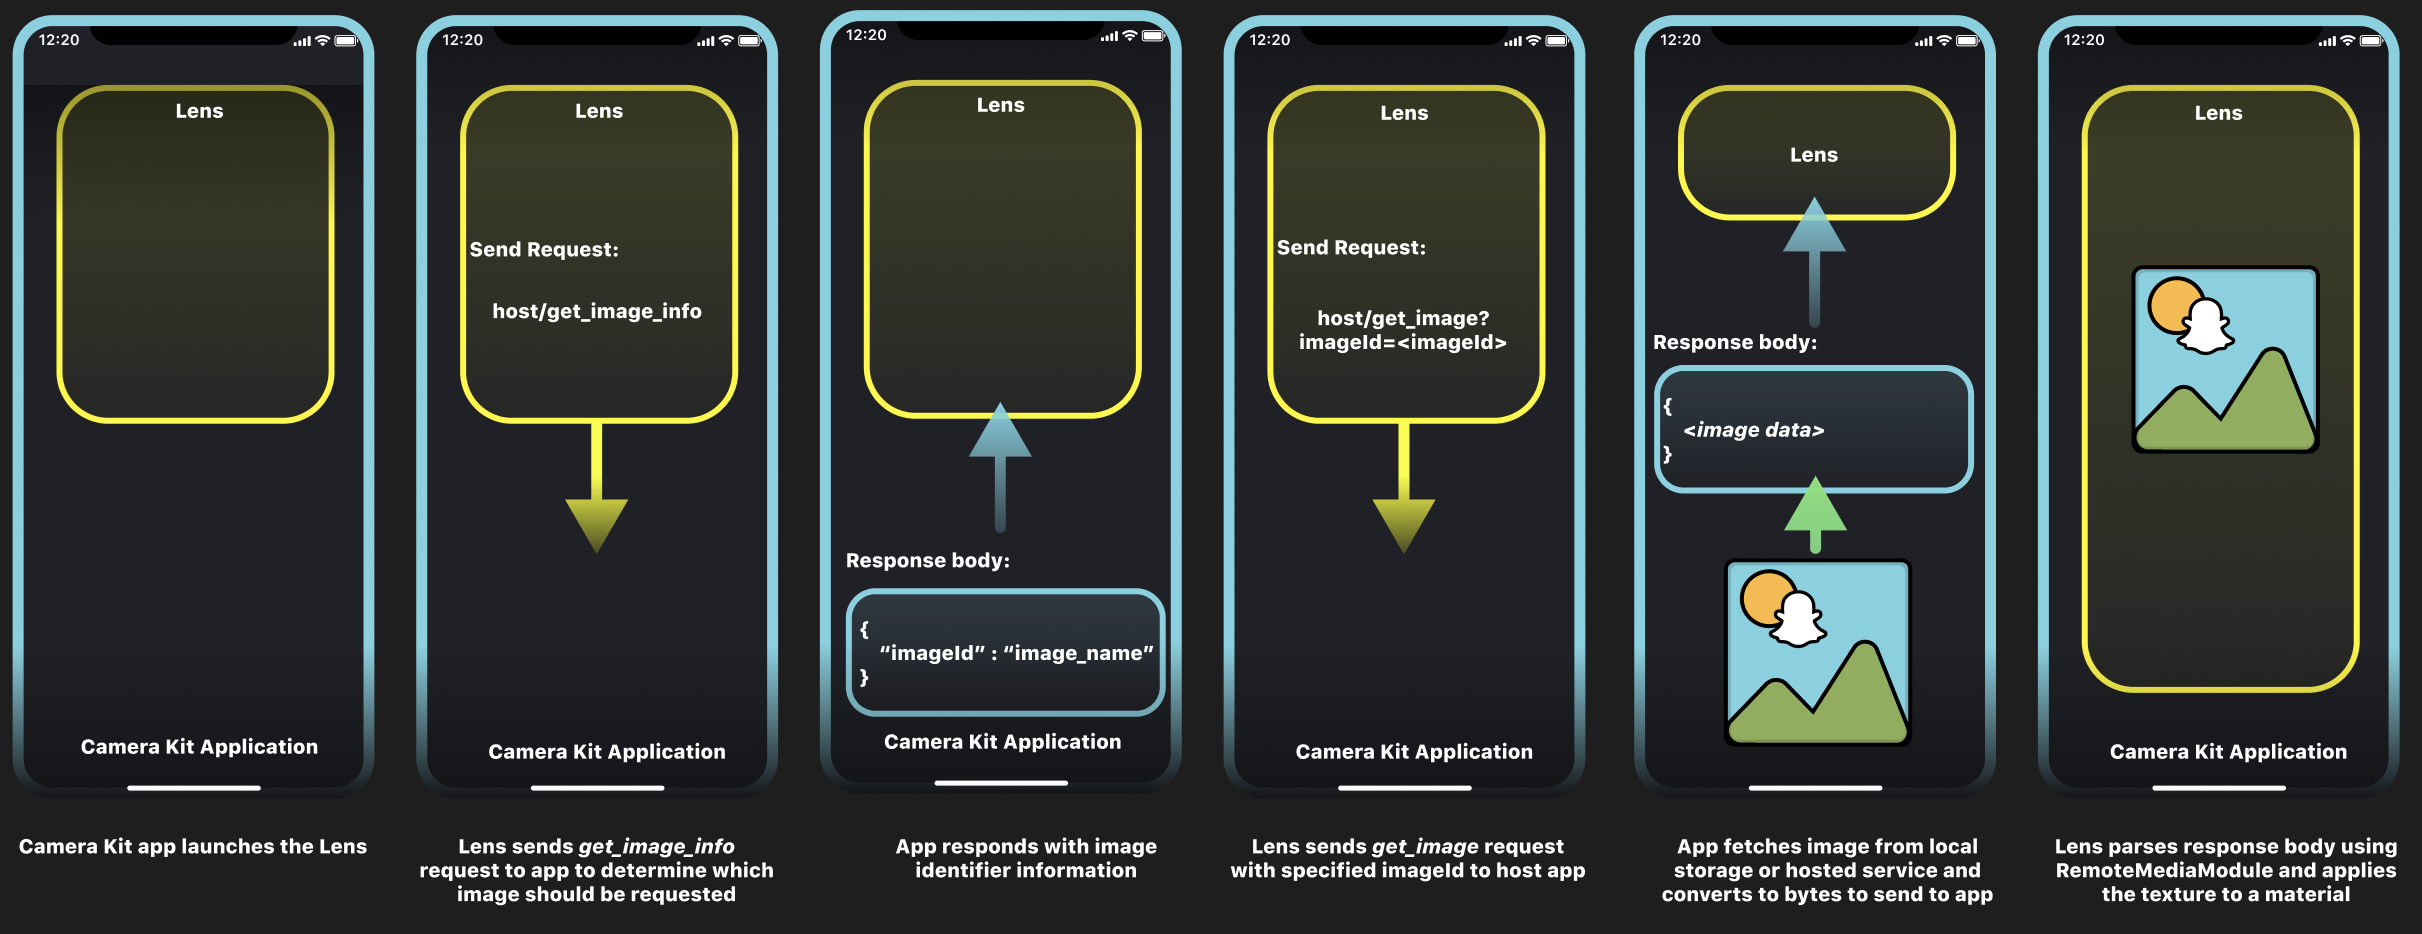
Remote APIs for Camera Kit require all communication to be sent from the Lens with the host application responding to these requests. Additionally, for media assets such as GLB models and images, you can leverage existing APIs within Lens Studio for converting these to Lens assets by sending them as individual responses. That is, importing 10 images would require 10 separate requests. The following image provides an overview of the communication between the Lens and host application that will be covered in this tutorial:
Create an API Spec
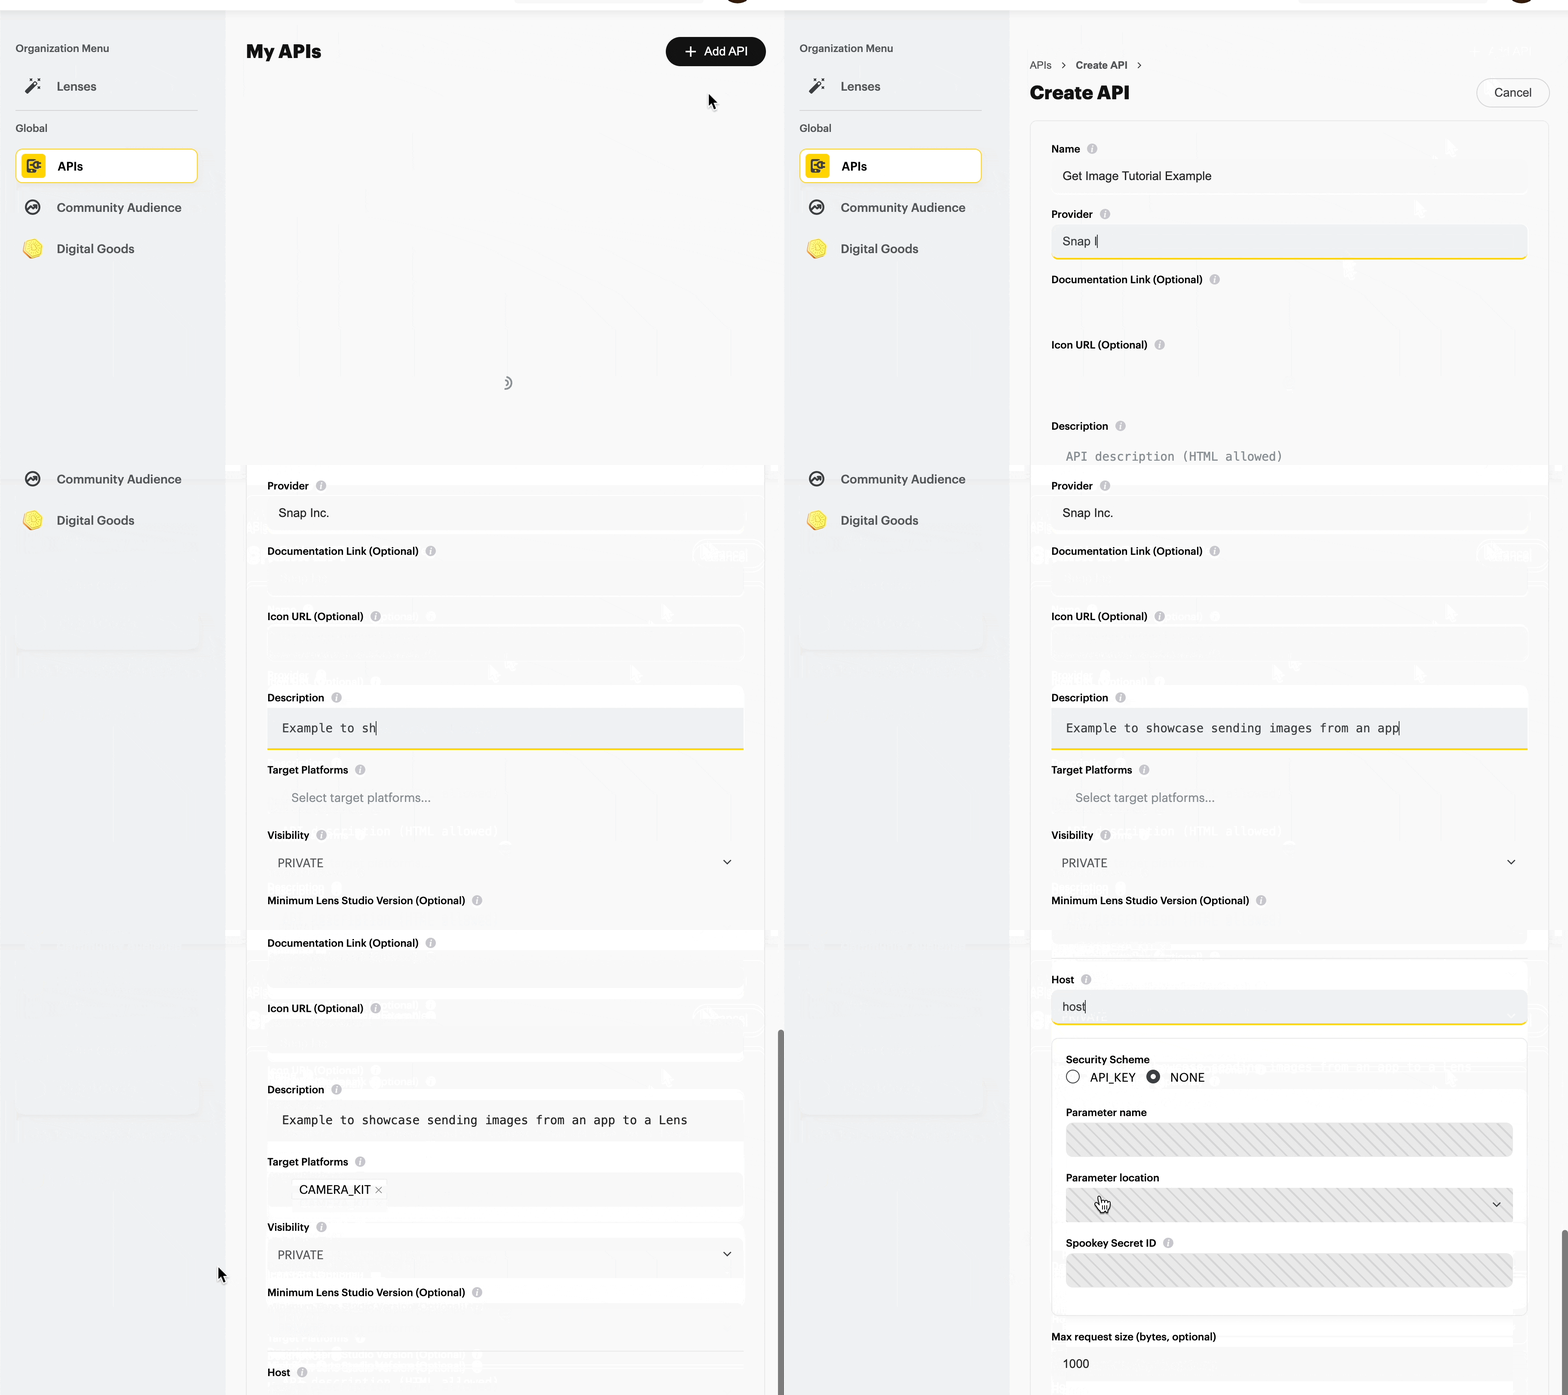
To get started with Remote APIs, you will need to create an API spec to generate an ID which will be used to validate the communication between the Lens and the host application.
- Go to https://my-lenses.snapchat.com/apis
- Select Add API
- Fill out the fields for your API spec, ensuring you select CAMERA_KIT as the target platform
-
Add endpoints to your spec. The Lens will send requests directly to the host app using the parameters you set here. You will also be able to add data to the body of these requests but that will be done manually in the Lens code. In this example we will create a specific endpoint to retrieve the initial information for the image and another endpoint to request the image itself. You could also set up the initial data transfer to the Lens via Launch Parameters if that is your preferred approach.
- Create an endpoint: get_image_info which will be used to get the image identifier for the image being imported
- Create an endpoint: get_image with a parameter to send the imageId being requested. This is the request the app will respond to with the image data.

-
Click Submit and the API spec will be instantly approved if targeting only Camera Kit.
-
Make note of the API Key that is generated here as you will need to use this in your app to communicate with the Lens

Lens Development
- Open an existing or new Lens Studio project and login with the same account that was used to create the API spec.
- Open the Asset Library > Select APIs > and import the API you just created. This will import a Remote Service Module, and two auto-generated files which we will use to create the experience.
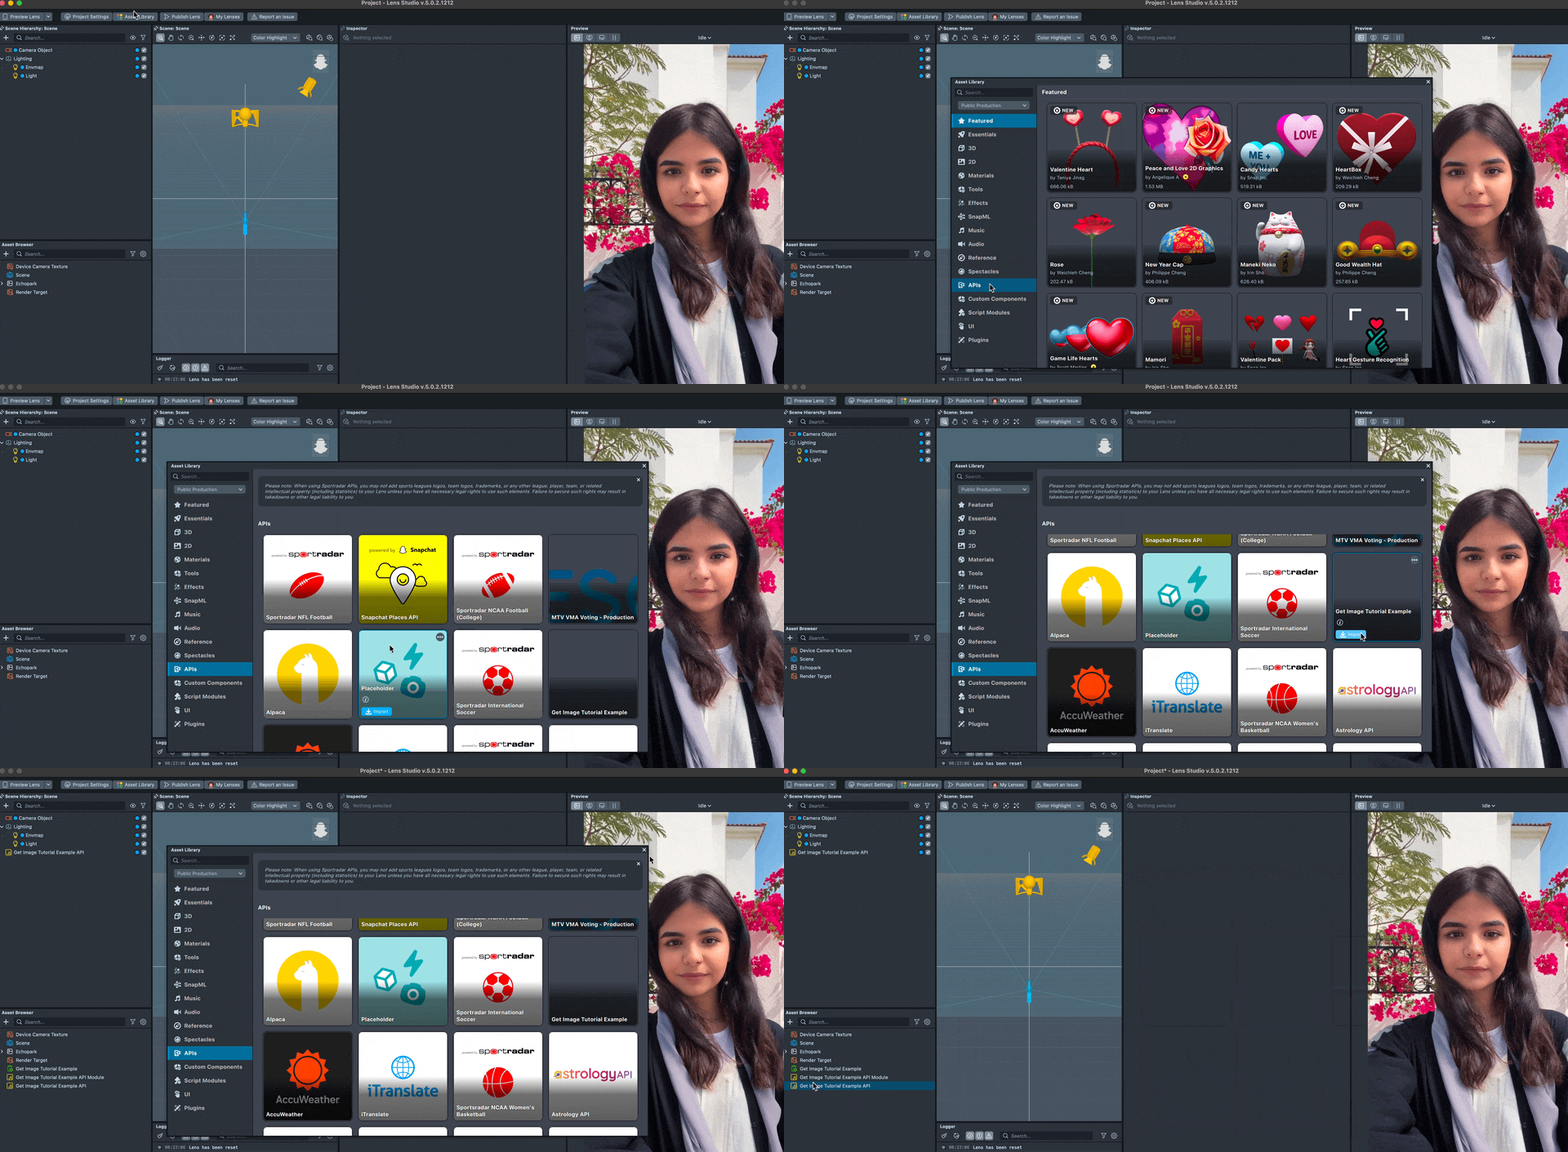
- Open the Get Image Tutorial Example API Module file and review the content that has been generated:
Methods
HandleAPIResponse: A generic callback function which will interpret the responses from the app and send the parsed response body to a callback function. We will use this for the get_image_info request.
getErrorMessage: Interprets the status codes to help identify which areas are not working. Note that since this a local communication between the Lens and host application, all of the requests will fail in Lens Studio and implementing Push-to-Device into your test app is recommended for rapid development
setParameter: A helper function to ensure required parameters are sent in the payload
get_image_info: Used to request the information for the image to be loaded into the Lens.
get_image: Used for requesting the image, we will adjust the callback logic of this function to assign the texture.
Implementation
-
We will be leveraging the Remote Media Module APIs to convert the response of the get_image request to an image Texture. Since this API acts on the whole response object, we will not be utilizing the handleAPIResponse method, and instead will manually handle the response from the app using the loadResourceAsImageTexture method. We will also add another parameter to this function so we can pass in a RemoteMediaModule reference.
ApiModule.prototype.get_image = function (imageId, mediaModule, cb) {
  var req = global.RemoteApiRequest.create();
  req.endpoint = 'get_image';
  var parameters = {};
  setParameter('imageId', imageId, parameters, false);
  req.parameters = parameters;
  this.remoteServiceModule.performApiRequest(req, function (response) {
    mediaModule.loadResourceAsImageTexture(
      response.asResource(),
      function (texture) {
        // if the response was successfully converted to an imageTexture,
        // pass the texture to the callback function
        cb(texture);
      },
      function (error) {
        // handle error
      }
    );
  });
}; -
With that, the API Module is ready for use, and we will setup the rest of the project. Since we are leveraging the RemoteMediaModule APIs, we will need to add a Remote Media Module to our project via the Resources panel.
-
Let’s also add a Screen Image Object via the Objects panel which we will assign the image Texture to.
-
Next, open the Get Image Tutorial Example API file and you will see it is already configured to use the remoteServiceModule. Let’s add a few inputs for the script so we can add functionality to the Lens:
// @input Asset.RemoteServiceModule remoteServiceModule
// @input Asset.RemoteMediaModule remoteMediaModule
// @input Component.Image targetImage -
Next we will add a callback function for the get_image_info endpoint and another method to assign the texture. We will then call the get_image_info method to kick off the sequence:
function handleImageInfo(isError, data) {
  if (isError) return;

  ApiModule.get_image(data.imageId, script.remoteMediaModule, loadImage);
}
function loadImage(texture) {
  script.targetImage.mainMaterial.mainPass.baseTex = texture;
}
ApiModule.get_image_info(handleImageInfo); -
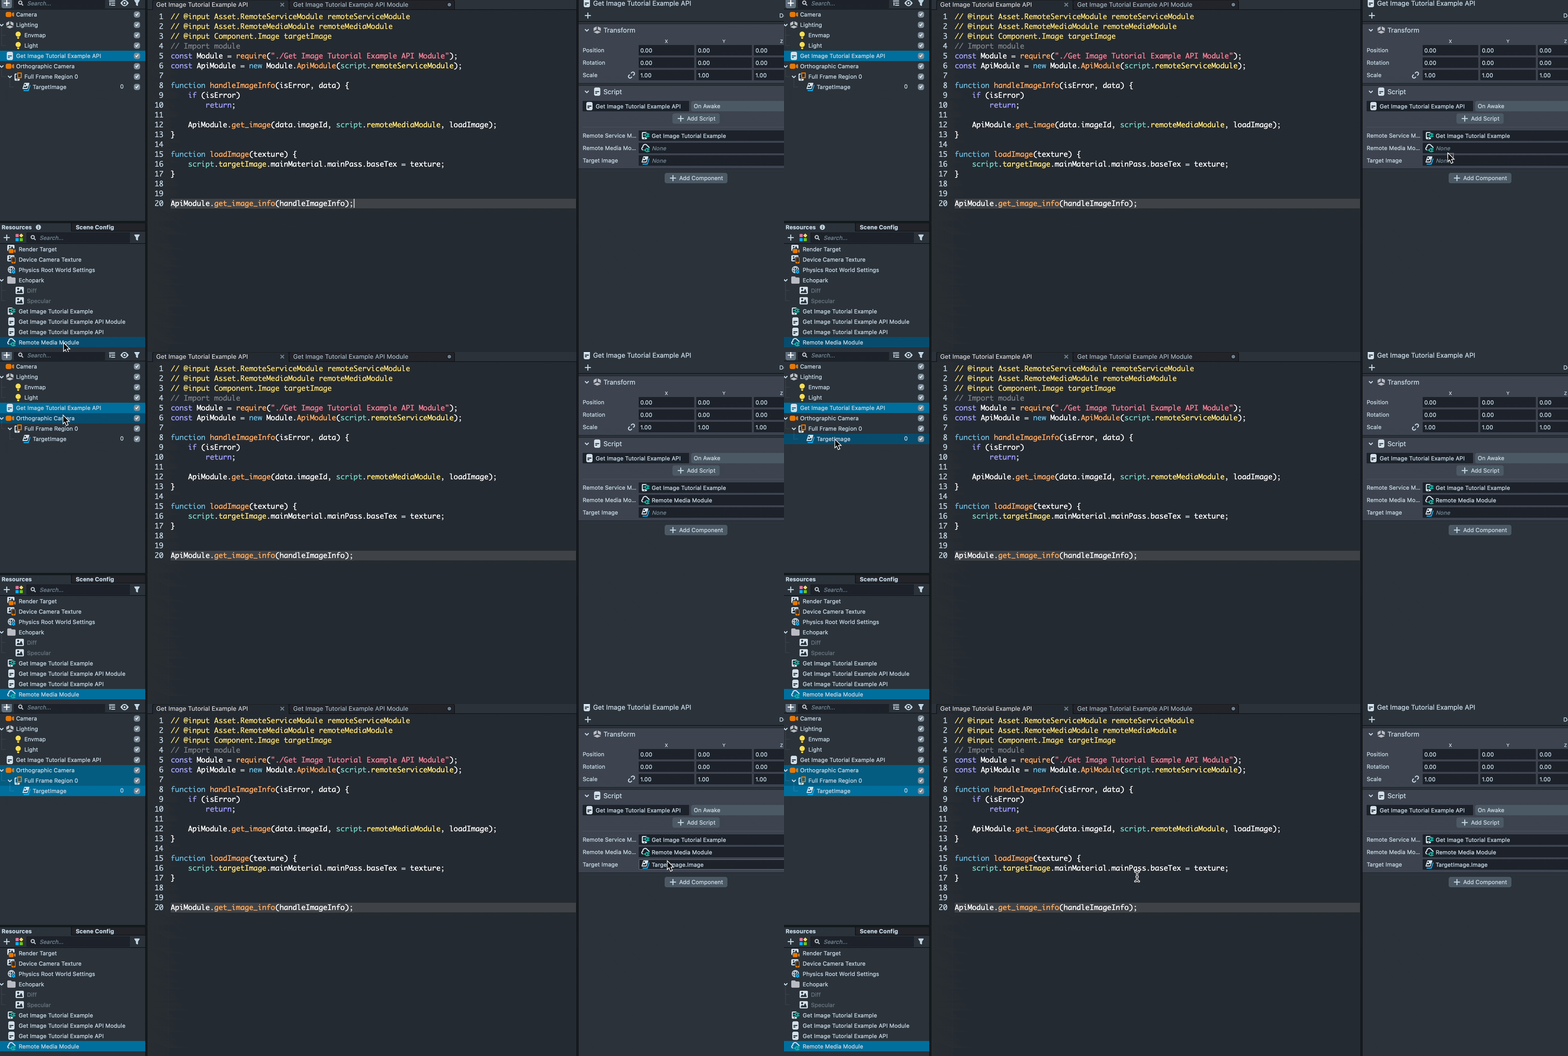
Finally, set the references for the image and Remote Media Module in the Inspector and the Lens will be ready to go:
iOS Development
To respond to the requests from the Lens, we will need to implement the functionality for the LensRemoteApiServiceProvider. An example of this is provided in the Camera Kit Sample app.
- Let’s start by adding a few image files to the Xcode project by dragging them into the Assets folder

-
Right click to create a new swift file and name it ImportImageAPIServiceProvider
-
Create classes in this file which implement the LensRemoteAPIServiceProvider and LensRemoteAPIService interfaces. Be sure to enter your API Key from my-lenses.snapchat.com/apis
import Foundation
import SCSDKCameraKit

class ImportImageAPIServiceProvider: NSObject, LensRemoteApiServiceProvider {
    var supportedApiSpecIds: Set<String> = ["<YOUR-API-KEY"]
    func remoteApiService(for lens: Lens) -> LensRemoteApiService {
        return ImportImageAPIService()
    }
}
class ImportImageAPIService: NSObject, LensRemoteApiService {
    func processRequest(_ request: LensRemoteApiRequest, responseHandler: @escaping (LensRemoteApiServiceCallStatus, LensRemoteApiResponseProtocol) -> Void) -> LensRemoteApiServiceCall {
        // Will implement this next :)
        return URLRequestRemoteApiServiceCall(task: URLSessionDataTask())
    }
} -
Next we will handle the remote api calls to the get_image_info and get_image endpoints in the processRequest function. For the sake of simplicity, we will create the JSON response for get_image_info directly in this file. Be sure to replace the imageId with the name of the image assets added to your project.
func processRequest(_ request: LensRemoteApiRequest, responseHandler: @escaping (LensRemoteApiServiceCallStatus, LensRemoteApiResponseProtocol) -> Void) -> LensRemoteApiServiceCall {
        var responseData : Data?;

        switch(request.endpointId){
        case "get_image_info":
            let jsonObj: [String: Any] = [ "imageId": "Bitmoji3", ]
            responseData = try? JSONSerialization.data(withJSONObject: jsonObj as Any, options: [])
            break

        case "get_image":
            var imageData = UIImage(named: request.parameters["imageId"]!)?.pngData()
            responseData = imageData;
            break

        default:
            break
        }

        // Respond to the request with the required data in the body of the response
        let apiResponse = LensRemoteApiResponse(
            request: request,
            status: .success,
            metadata: [:],
            body: responseData)

        responseHandler(.answered, apiResponse)
        return URLRequestRemoteApiServiceCall(task: URLSessionDataTask())
} -
With the class set up, we must add this Remote API service provider to the list of providers in the data Provider for our Camera Controller.
class CustomizedCameraController: CameraController {
    override func configureDataProvider() -> DataProviderComponent {
        DataProviderComponent(
            deviceMotion: nil, userData: UserDataProvider(), lensHint: nil, location: nil,
            mediaPicker: lensMediaProvider, remoteApiServiceProviders: [ImportImageAPIServiceProvider()])
    }
} -
You can now test the full flow of importing an image from the App to the Lens via Push-to-Device or by referencing a groupID that contains the Lens:
