2D Animated TTS
The 2D Animated TTS template demonstrates how you can utilize the phoneme info in the Text To Speech. The template contains several examples and helper scripts to animate 2D mouth images based on what phoneme is said at what time. With Automatic Voice Style Selector (Auto Style Selector), the voice style will change based on the context.
Guide
The template has several different examples showing how to use Phoneme. When we open the template, we can find the examples in the Objects panel.
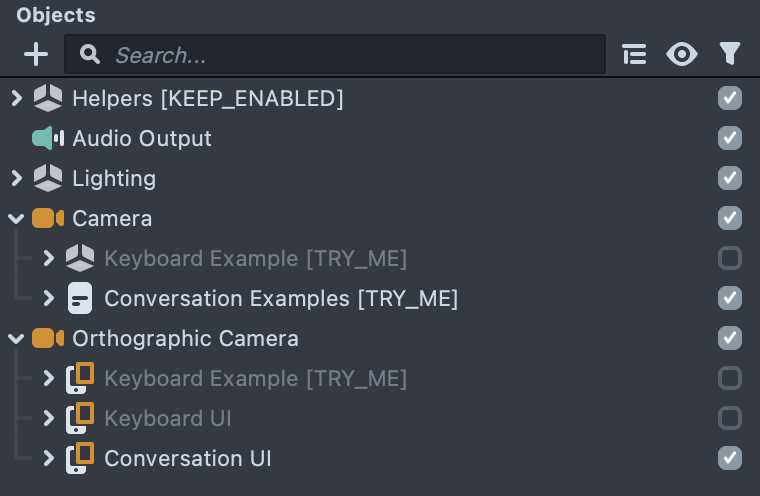
Text To Speech Module
The main asset used for Text To Speech is Text To Speech Module. We can find it in the Resources Panel.
![]()
Currently TTS supports US English with two voices, six different voice styles for both voices and the ability to tweak the pace of TTS speech playback.
Phoneme Controller
The Phoneme Animation is driven by the main helper script PhoneController under each example. Click on the Orthographic Camera then select Talking Image. Select Screen Faces followed by Lips TTS to see the Phoneme Controller Script Component.You can see a Text To Speech Module and an Audio Component connected to the PhoneController Script Component for generating and playing TTS Audio in Lens Studio.
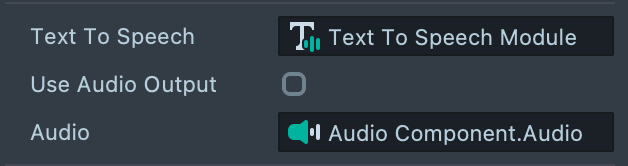
TTS will generate TTS AudioTrackAsset, which can be attached to an Audio Component as the Audio Track asset to play. For more information related to Audio Component, please check out Audio Component and Audio Component API.
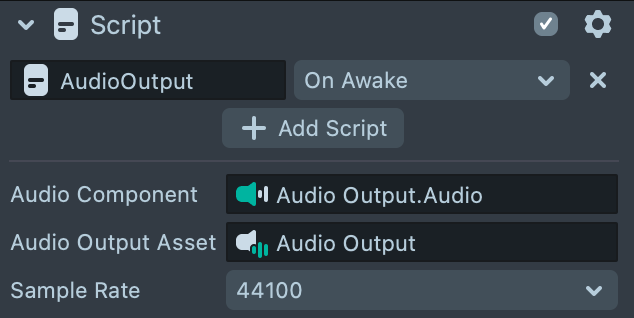
With Use Audio Output enabled, tts audio will play with Audio Output. Click on Helpers and select Audio Output. With the Sample Rate dropdown list, you can then adjust the Sample Rate of the TTS audio.
To learn more about Audio Output, please visit the Audio Output Template.
With TTS Controller, you can choose different options for TTS Voice: Voice Name, Voice Style and Voice Pace.
Automatic Voice Style Selector
With Auto Style Selector enabled, TTS audio will return with a voice style based on the context.
Voice Name
TTS supports two voices: Sasha and Sam.

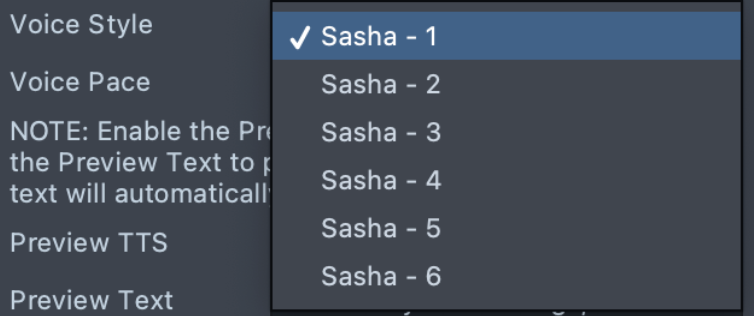
Voice Style
TTS supports six voice styles for Sasha and Sam.
Input Mode
There are two different input modes for the animations as the examples.
- Image: Replace the base texture for the screen image material.
- Mesh: Replace the base texture for the mesh material.
For this example, you can find the Image Component located under the Orthographic Camera -> Talking Image -> Screen Faces -> Lips TTS -> Mouth Screen Image object.
Voice Pace
TTS supports playback speed: 0.75X, 1.0X, 1.25X, 1.5X.

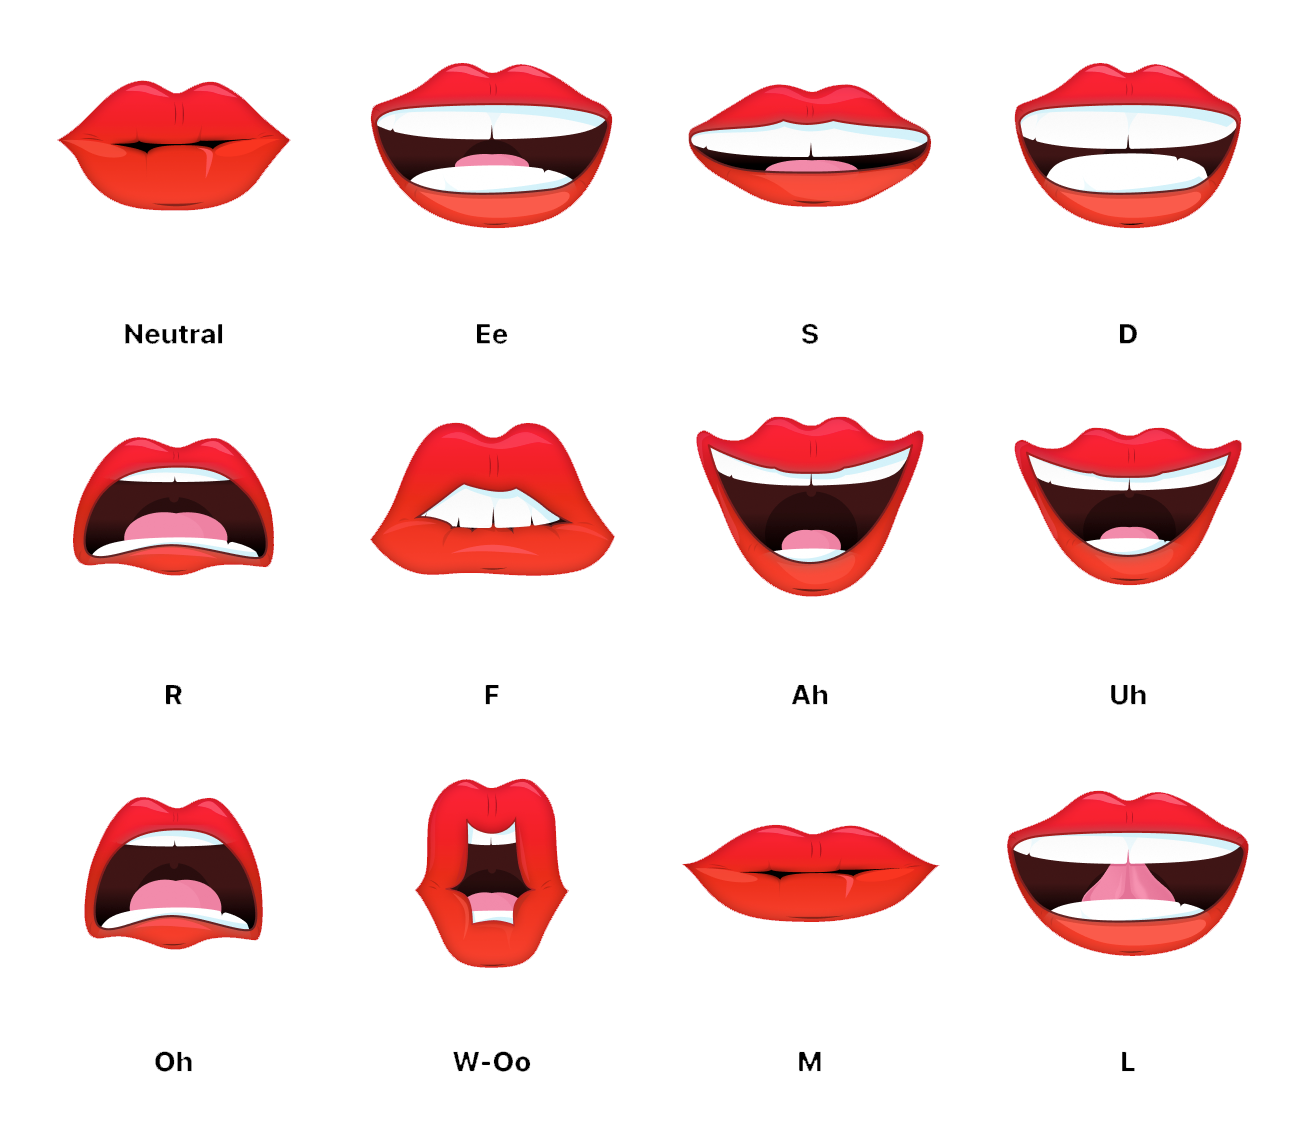
Animation Textures
Currently Phoneme supports twelve different mouth shapes. You can replace the textures with your own assets to see different results.
Take a look at the main functions for generating and playing the TTS Audio and phoneme animation.
Speak: pass input text to generate TTS.
function speak(text) {
  var options = getOptions();
  script.tts.synthesize(
    text,
    options,
    phonemeTTSHandler,
    phonemeTTSErrorHandle
  );
}
phonemeTTSHandler: will be called once the audio generation is completed, and receives four parameters: Audio Track Asset, WordInfos, PhonemeInfos and Voice Style.
Audio Track Asset: TTS Audio File.WordInfos: we can also get word infos for timing details for word pronunciation.PhonemeInfos: phoneme infos to animate textures.Voice Style: TTS Voice Style.
function phonemeTTSHandler(audioTrackAsset, wordInfos, phonemeInfos, voiceStyle) {
...
}
Once phonemeTTSHandler is called, it will play the TTS audio as well as sync the different textures based on the phoneme info and timeline with the UpdateEvent.
phonemeTTSErrorHandler will be called if there is an error and you will receive a message of the error code and its description.
function phonemeTTSErrorHandler(error, description) {
...
}
Keyboard Examples
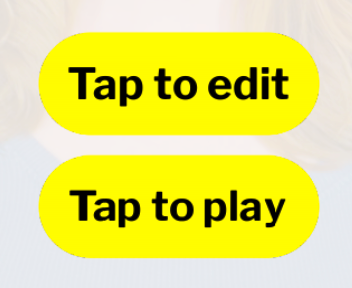
The TTS audio and mouth animation will auto play after resetting the preview. Click the Tap to edit button to edit the text with the keyboard. Click the Tap to play button to play the TTS audio as well as the mouth animation.
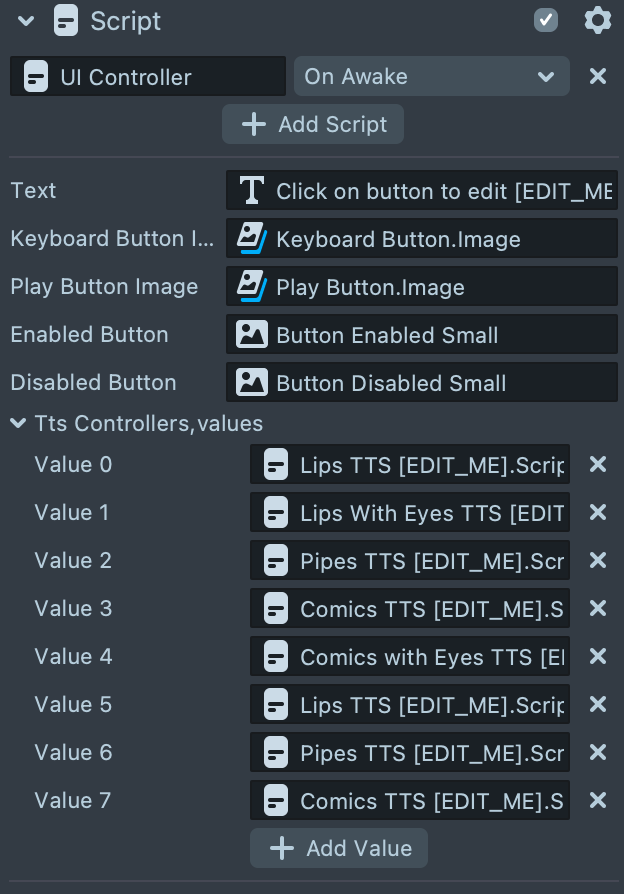
Here the UI Controller Script Component is used to handle the UI interaction.
Click on Orthographic Camera, select UI and then select UI Controller to find the UI Controller Script Component. All the Phoneme Controllers are attached to the UI Controller Script Component. If the Tap to play button was tapped and the phoneme controllers are enabled, the editable text will be passed to the speak function in the phoneme controllers.
To learn more about Keyboard, please visit the Keyboard Template.
To hide the Tap to edit button for image or video capture, use the SnapImageCaptureEvent and SnapRecordStartEvent.
script.createEvent('SnapImageCaptureEvent').bind(function () {
  script.keyboardButtonImage.getSceneObject().enabled = false;
});

script.createEvent('SnapRecordStartEvent').bind(function () {
  script.keyboardButtonImage.getSceneObject().enabled = false;
});
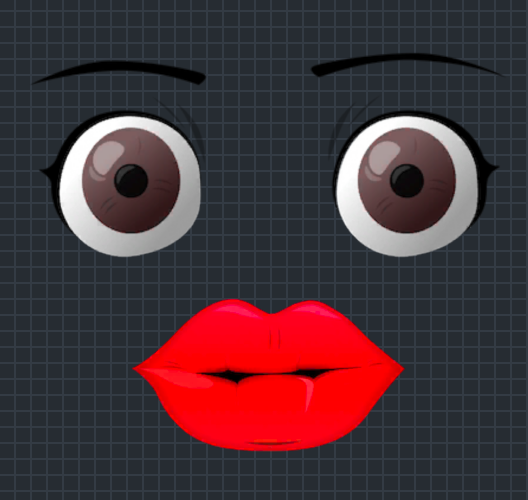
Lips With Eyes TTS Example
In this example, different eyes are included in each texture.
Blink Animation
Blink Animation is achieved with Lips Eye Material and Tween Helper Scripts. Navigate to the Mouth Screen Image object by clicking on the Orthographic Camera and select Talking Image. Select Screen Faces followed by Lips With Eyes TTS. You can find the Lips Eye Material.
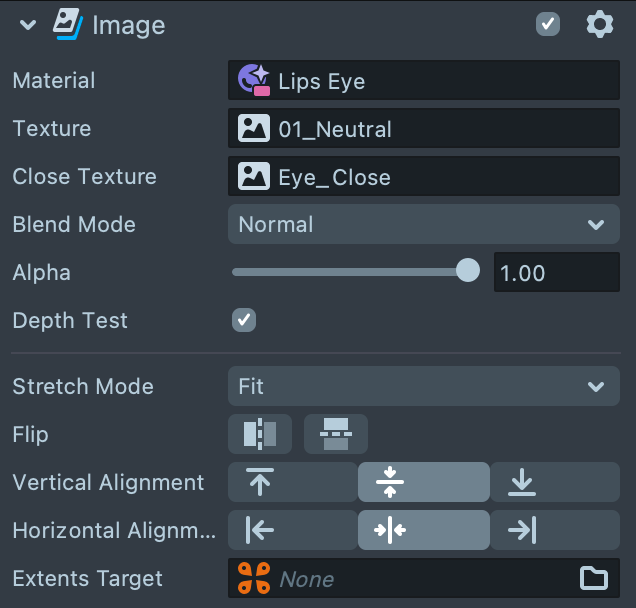
Left-click on the material to select it. The Open Close field represents the open or close state of the eyes. Modify the int from 1 to 0. You can see the eye closed in the Preview panel. With the material, only the upper half of the texture will be replaced by the Eye_Close Texture.
You can check the Material Editor to learn more details about the material.
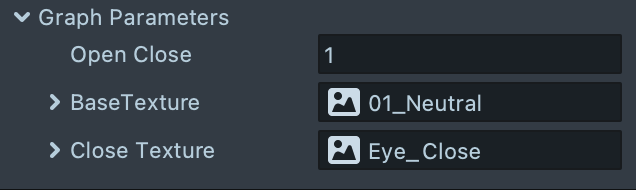
With the Tween Value Script Component located on the Mouth Screen Image object, you can set up a ping pong loop the Open Close Eye value between 0 to 1 to make the blink animation.
Pipes TTS Example
In this example, the eyes are in a separate texture. Enable/Disable the Orthographic Camera -> Talking Image -> Screen Faces -> Pipes TTS -> Eye Screen Image object to show/hide the eyes for this example.
Select the Pipe Eye Material. Try to modify the Open Close field from 0-4 to see the eye blink textures. With the Tween Value Script Component, we ping pong loop the Open Close Eye value between 0 to 5 to make the blink animation.

You can also check the additional examples: Comics TTS Example and Comics with Eyes TTS Example.
Talking Baseball Cap Example
Click on the Camera -> Talking Baseball Cap -> Head Occluder -> Cap_Faces -> Lips TTS to see the Phoneme Controller Script Component. Here the Input Mode is set to Mesh and Cap logo Mesh is attached to the Mesh field. You can find the Render Mesh Visual Component under Camera -> Talking Baseball Cap -> Head Occluder -> Cap_Faces -> Lips TTS-> cap_logo object. Try all the examples to see different phoneme animations.
Conversation Example
In this example, you can modify lines for the two robot characters. Based on the context, the characters will speak with different voice styles. Disable Keyboard example and keyboard UI and enable Orthographic Camera -> Conversationt UI and Camera -> Conversation Examples objects. Reset the preview and click Tap to play button to play the conversation.
You can edit the lines with Conversation script.
global.characters = ['Character1', 'Character2'];
global.messages = [
  new Message(global.characters[0], 'What a bummer'),
  new Message(global.characters[1], 'Cheer up my friend! What a lovely day.'),
  new Message(
    global.characters[0],
    "No the weather is really bad here. It's raining again"
  ),
  new Message(
    global.characters[1],
    "Don't worry the sun will shine on us again and it will be great!"
  ),
];
Click on the Camera -> Conversation Examples -> Physics Objects -> Robot Right -> Pipes TTS and Camera -> Conversation Examples -> Physics Objects -> Robot Left -> Pipes TTS to see the Phoneme Controller Script Component for each character.
The characters are attached to the user's head movement. The limbs are dynamically simulated with real-world physics effects. The characters have Physics Body Component and user's head has Physics Collider Component. With the Physices System, characters are bind to the user's head with Physics Constraint Component in the Camera -> Conversation Examples -> Physics Objects -> Robot Right -> Body -> Constraint object.
To learn more about Physics, check out Physics Template.
Previewing Your Lens
You’re now ready to preview your Lens! To preview your Lens in Snapchat, follow the Pairing to Snapchat guide.
Don’t forget to turn on the sound on your device!
Related Guides
Please refer to the guides below for additional information: