Audio Analyzer
Audio Analyzer template allows you to drive different effects based on the power of the audio signal in certain frequency ranges
Choosing the Audio Input
When you first open the template - the project is set up to analyze audio data from the File Audio Track. Select the Audio Analyzer[EDIT ME] scene object the Objects Panel to explore all the options of the Audio Analyzer script in the Inspector panel.
Audio from Microphone
Set Input Type to Microphone, set Microphone Audio with the Audio From Microphone asset if it’s not set already.
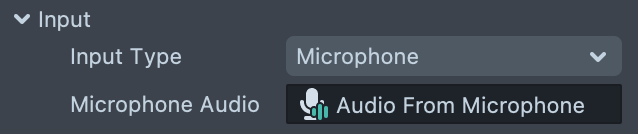
You can add Audio From Microphone asset to the project by clicking on the + button in the Resources panel.
Make sure to provide access to your microphone in Lens Studio by clicking on the microphone button at the bottom of the Preview panel.
Then try making some sound to see the reaction of the scene objects.
Audio From File or Sound
Set Audio Track input with the imported audio file or a Licensed Music from the Asset Library
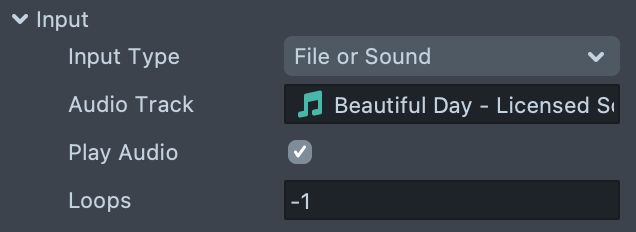
Enable Play Audio checkbox to create audio component and play specified audio track.
Set a number of loops to play.
Please match sample rate with your audio track sample rate, (44100 for Licensed Music)

Audio From Audio Component
Another way is to specify Audio Component to get audio data from. In this case audio analyzer will process the audio track of this audio component, stop and start as the audio component starts or stops.
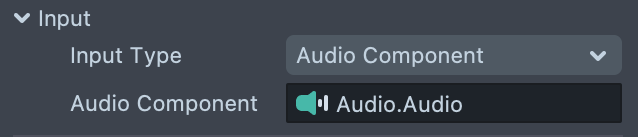
Play or stop this audio component as needed, for example with a Behavior script.
From Script with API
You can even generate your own audio buffer and set a custom script with certain api as an input.
script.api.getAudioFrame(Float32Array audioFrame) : vec3 - function that writes audio samples into audioFrame array and returns it shape
script.api.sampleRate : Number - sample rate of this audio buffer
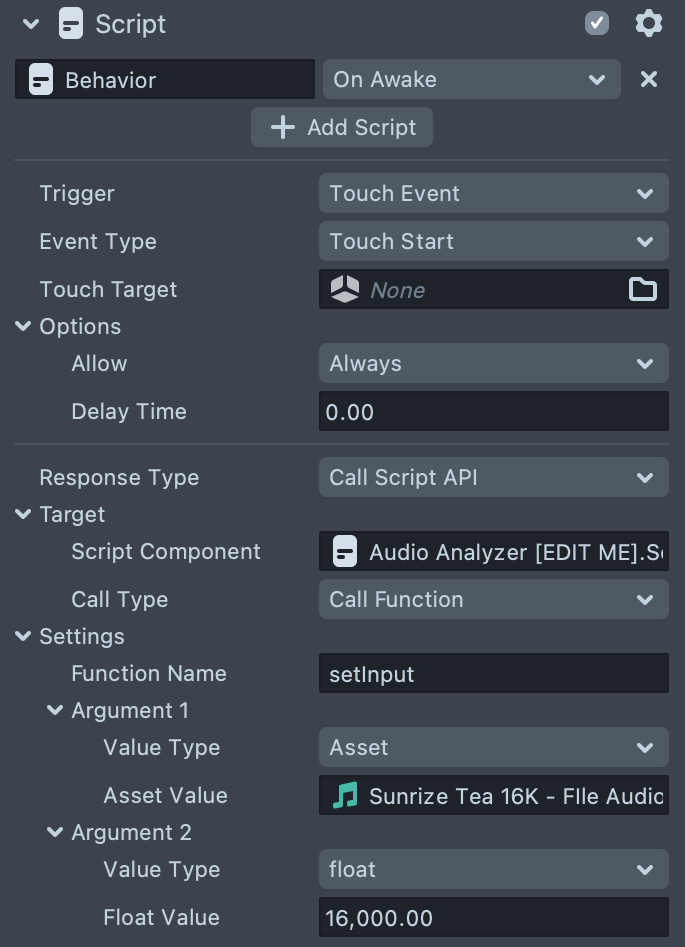
Set input via api
You may also choose not to set Input and do it later from script:
audioAnalyzerScript.api.setInput(input, sampleRate);
Or using Behavior script : Call Script API response by setting setInput as a Function Name, and passing input asset/component and Sample Rate as arguments:
Mel Spectrogram Settings
Sample Rate: Set number of samples per second (has to match your audio input sample rate).
Frame Size: Length of the window, which is the length of frameSize and then padded with zeros to match fftSize.
Hop Size: Set number of samples between successive fft segments.
Fft Size: Set length of the fft window.
Num Mel: Set number of mel bins.
Min Frequency: Set min frequency.
Max Frequency: Set max frequency.
Driving Effects based on Audio Analysis
By default the template analyzes audio data and outputs power of signal in all frequency bands in the range from 0 to 1.
The bands (or bins) are defined by splitting the interval from the minimal frequency to the maximum frequency into a certain amount of bins on the mel (logarithmic) scale. This scale is used as it better represents the way the human ear perceives the sound.
Template comes up with a universal AudioAnalyzerHelper script that allows it to perform certain responses to the change of band value.
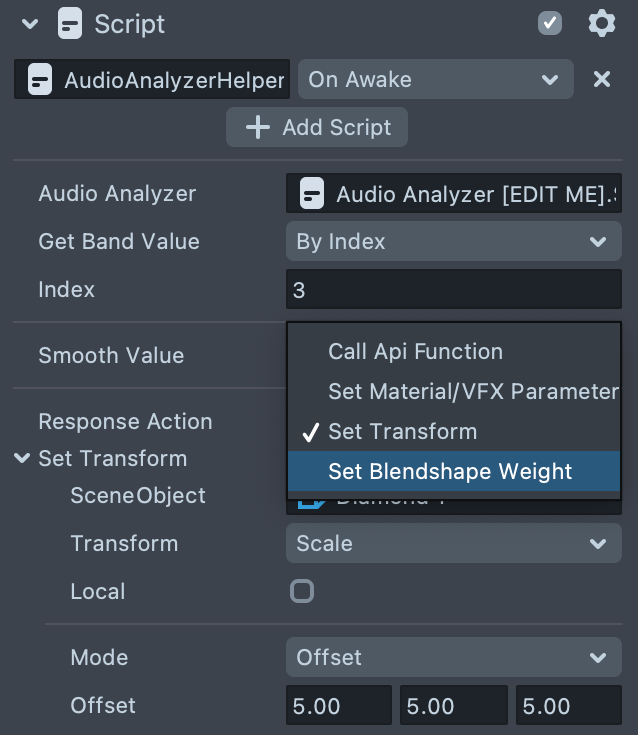
Audio Analyzer: reference to the audio Analyzer script.
Get Band Value: specifies which value to take.
- By index: get band value by index.
- Average: get average value across all bands.
- All Bands: get all band values. Can be used to set the array property of the Material or VFX asset or passed as parameter to the script component api function.
Smooth Value: allows to blend band value with previous value.
- None: no blending.
- Fixed step: each band value fades off by a fixed step per update.
- Lerp: interpolate between previous and next value.
Response Action: perform certain actions based on the selected band values
Call Api Function: allows to interpolate between start and end values and pass result to the api function.
- Value Type: set the type of value.
- Start Value: start value that corresponds to band value =
0. - End Value: start value that corresponds to band value =
1. - Script: script with api.
- Function Name: api function name.
Example -Screen Transform example under the Orthographic Camera, that sends an array of vec2 to the SetScreenTransformApi script that sets screen transform anchors.

Set Material VFX Parameter
VFX or Material: asset to set property of
- Parameter Name: asset parameter, if you select All Bands - this expected to be array parameter
- Value Type: set the type of value
- Start Value: start value that corresponds to band value = 0
- End Value: start value that corresponds to band value = 1
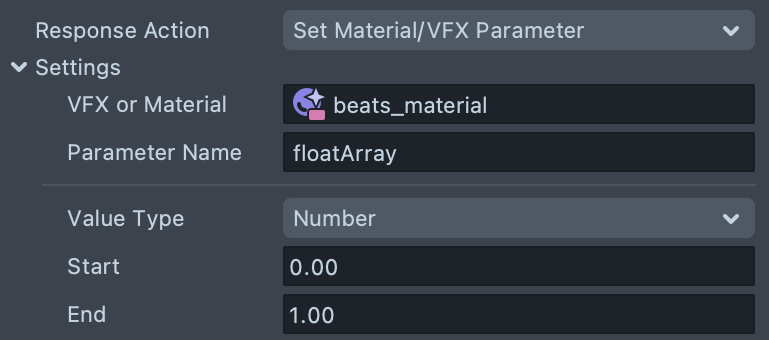
Example: script on the Beats scene object that sets float array parameter from the band values
Set Transform: Allows to set scene objects transform
- Scene Object: scene object to set transform
- Transform: set Position, Rotation or Scale
- Local: if enabled sets local transform, otherwise - global
- Mode: allows to specify Start - End values or Offset from the current transform value
![]()
Example: Expand the 3D Object Examples scene object’s hierarchy. Each child object has a Script Graph Attached that controls one of this object's properties : position, rotation, scale
Using Script Graph
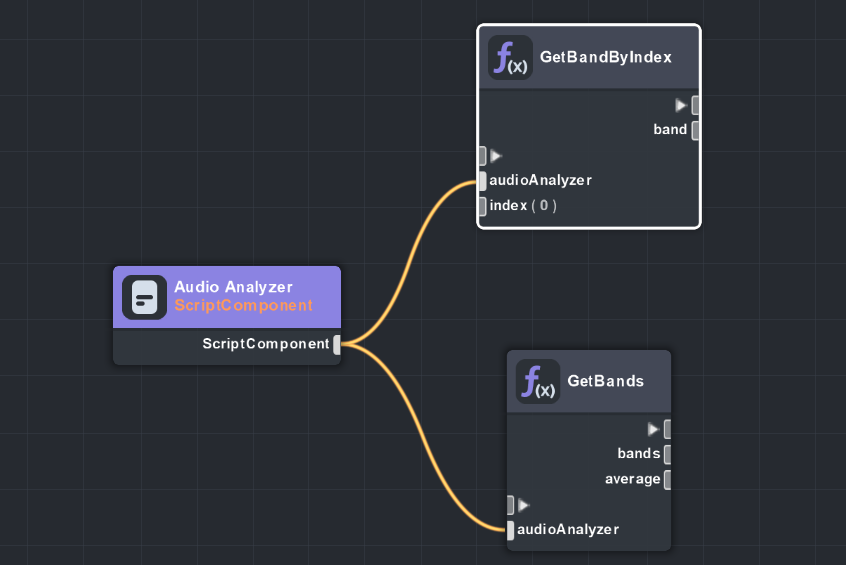
Template comes up with a couple examples of the Script Graphs and Custom Script Graph Nodes that allow access to values of the bands.
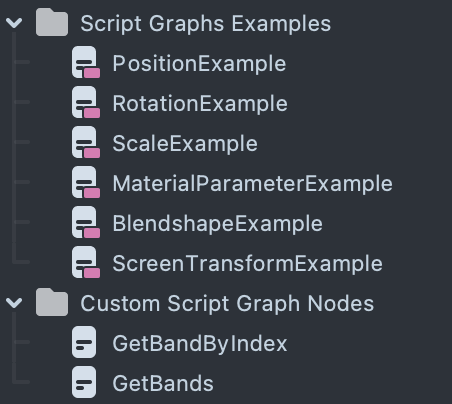
The result values from the audio analyzer can be referenced in a Script Graph with the help of the Custom Script nodes
Using Audio Analyzer Api
Open AudioAnalyzer.js file to see available api functions. You can call them from a different script by referencing Audio Analyzer script component
// @input Component.ScriptComponent audioAnalyzerScript
var bands = script.audioAnalyzerScript.getBands();
var numMel = script.audioAnalyzerScript.getNumMel();
AudioFrameToTexture script provides an example of how to write current audio frame into a texture and use it in the material or VFX editor.
Previewing Your Lens
You're now ready to preview your Face Lens. To preview your Lens in Snapchat, follow the Pairing to Snapchat guide.