Scripting Example
Introduction
This guide will walk you through the process of creating a simple script in Lens Studio. You'll learn how to create a Script resource, connect your script to a Scene Object using the Script Component, and finally trigger the script from a Lens Event.
The script you create in this guide will add an oscillating bounce movement to a 3D object.
Related Guides
This walk-through touches on concepts from the following guides:
Project Setup
To follow this guide, you'll need to set up a Lens Studio project that has a Scene Object with a Mesh Visual component. You can use any mesh you like.
Prepare the Script Asset
With our Scene Object ready, we can now prepare a Script Asset.
To learn more about Script Assets, visit the Scripting Introduction.
Create a Script Asset
In the Asset Browser panel, select + -> JavaScript.
Give the newly created script a name that describes what the script does. Rename it to Bounce.

Open the Script
You can open the Bounce script in either Lens Studio's internal editor, or the external text editor of your choice.
Internal Editor
To open your script in the built-in Lens Studio editor, double-click your Script in the Asset Browser panel. This will open up the Script Editor.

External Editor
To open your script in an external editor, click on your script in the Asset Browser panel and press Open in External Editor.

Connect the Script
Scripts in Lens Studio are triggered by assigning them to Events on a Script Component.
Add the Script Component
Select your Scene Object.
In the Inspector panel, select Bounce from under the Project Components category.
Write the Script
We can now write the code for our project. This code will continuously bounce a 3D object up and down.
This section breaks down each part of the script's code. The completed script is provided at the end of this guide.
Define the Script Input Fields
Script Input Fields are variables used by a script that can be edited live in the Lens Studio Inspector panel.
For this script, we will define two properties:
speed: (float) The speed at which the object will bouncerange: (float) The range of the object's bounce
Add the following line to your script:
//@input float speed = 1.0
//@input float range = 10.0
The Script Component you added to your Scene Object should now be updated with these two inputs. Note that the Inspector panel view reflects the default values defined in the script.

To learn more about script input fields, visit the Script Introduction page.
Create Property Widgets
It's possible to create a custom Inspector interface for your Script Component inputs. This is especially useful when you have inputs that need tuning.
In the case of the Bounce script, it would be handy to adjust the speed and range inputs of the bouncing motion using sliders.
To create the custom UI, update the property definitions in your script as follows:
//@input float speed = 1.0 {"widget": "slider", "min": 0, "max": 10.0, "step": 0.01}
//@input float range = 10.0 {"widget": "slider", "min": 0, "max": 30.0, "step": 0.01}
You should now see the speed and range properties represented as sliders in the Inspector panel.

To learn more about the different UI elements you can add to Script Components, visit the Custom Script UI guide.
Complete the Script
Let's complete the script. Add the following code to your Bounce script, below the inputs definitions:
function bounce() {
  // Calculate the new height of the Scene Object and store it in newY.
  var newY = Math.sin(getTime() * script.speed) * script.range;
  // Set the new local position of the Scene Object to [0, newY, 0].
  script
    .getSceneObject()
    .getTransform()
    .setLocalPosition(new vec3(0, newY, 0));
}
Bind Script to Event
Because we bound this script to the Frame Updated event, this code will run every frame, adding an incremental change in position to the Scene Object's transform.
var updateEvent = script.createEvent('UpdateEvent');
updateEvent.bind(bounce);
To learn more about the lifecycle of script events, visit the Script Events page.
Preview the Lens
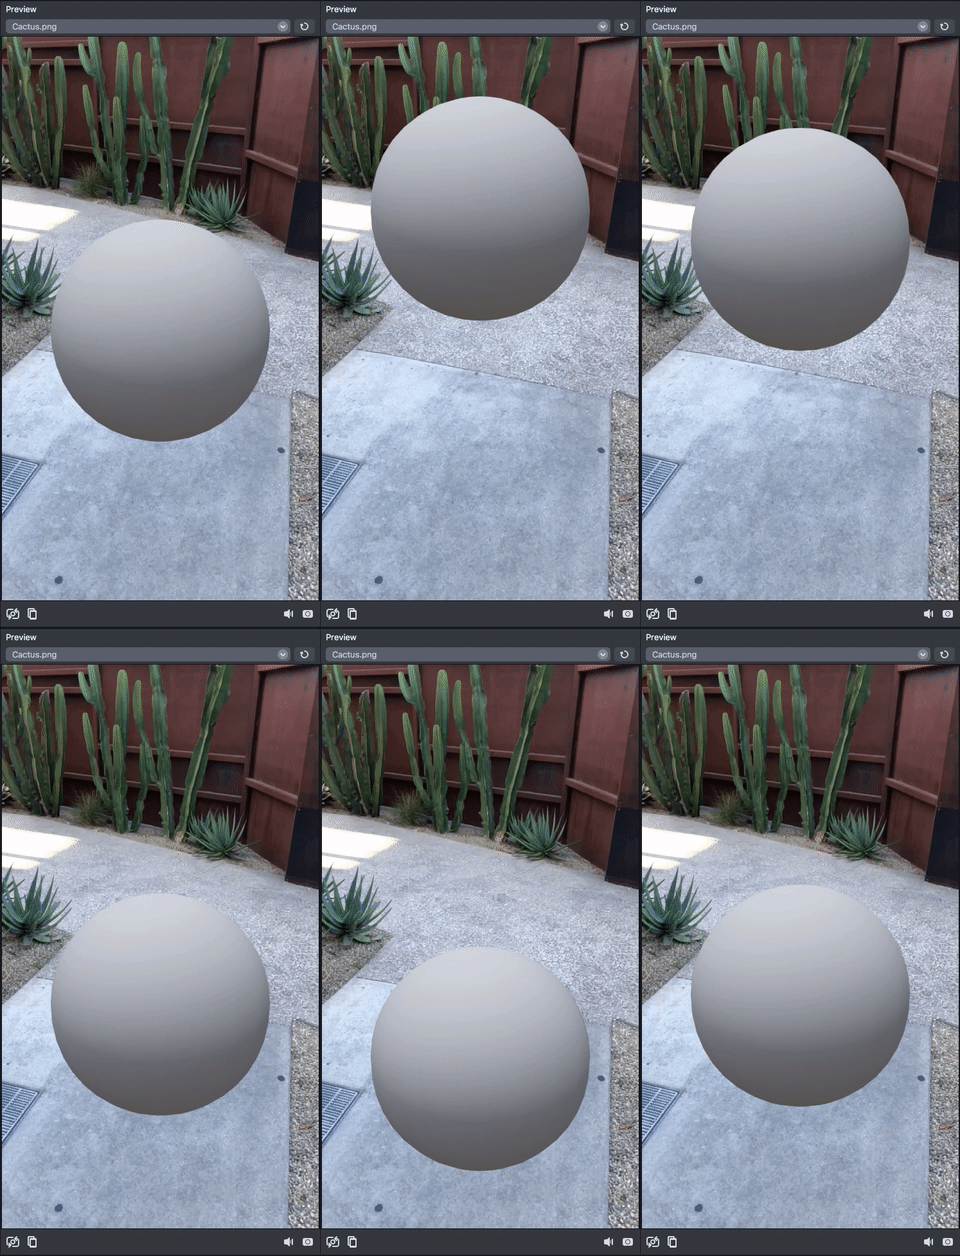
Press the Refresh button in the Preview panel to reload the scene. You should now see the Scene Object bouncing up and down in the Preview panel.

Completed Script: Bounce.js
Here's the completed Bounce.js script.
// Bounce.js
// Properties:
//@input float speed = 1.0 {"widget": "slider", "min": 0, "max": 10.0, "step": 0.01}
//@input float range = 10.0 {"widget": "slider", "min": 0, "max": 30.0, "step": 0.01}

function bounce() {
  var newY = Math.sin(getTime() * script.speed) * script.range;
  script
    .getSceneObject()
    .getTransform()
    .setLocalPosition(new vec3(0, newY, 0));
}

var updateEvent = script.createEvent('UpdateEvent');
updateEvent.bind(bounce);