Custom Nodes
Custom nodes can be written just like normal scripts in Lens Studio, with some small differences.
Adding a Custom Node
To create a new custom node, create a new Script in the Resources panel as you normally would, for example through the + button. To add a custom node to your script graph, drag the script from the Resources panel into the Script Graph Editor panel.
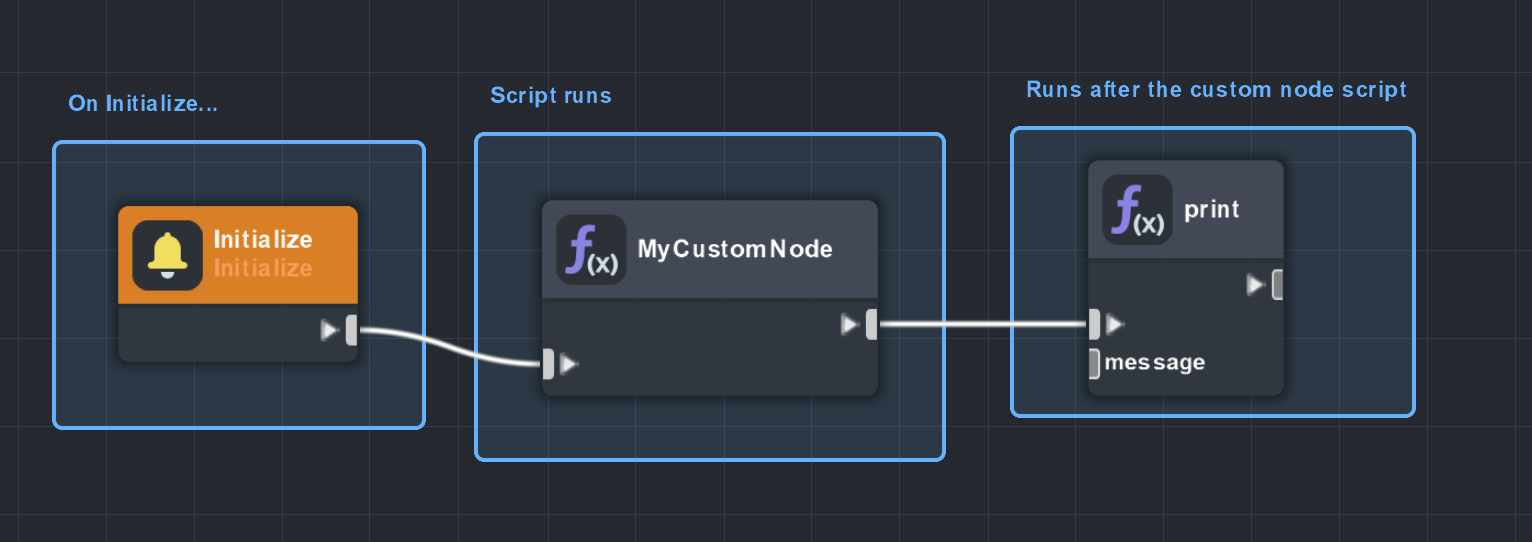
Custom Node Execution
In Visual Scripting, custom nodes only run when they are executed. They always have an execution input on the left side, and an execution output on the right side. When execution flow reaches the node’s execution input, the script will run. After the script runs, execution will continue flowing through the node’s execution output.
Input Ports
Just like normal scripts, custom node scripts can use the //@input format to add input properties to the node. For example, this script:
// @input float myNumber
// @input string myString
Will result in:
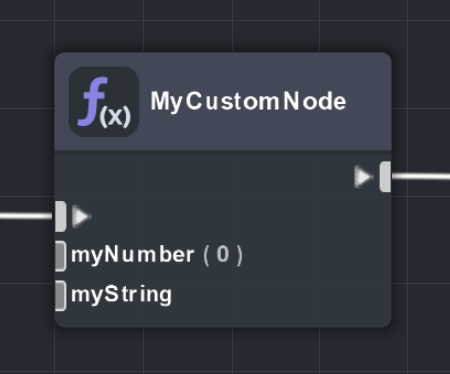
These can be accessed through the script object just like normal scripts. So, in our script we can access these inputs using script.myNumber and script.myString:
// @input float myNumber
// @input string myString
for (var i = 0; i < script.myNumber; i++) {
  print(script.myString);
}
Output Ports
Unlike normal scripts, custom node scripts can also declare output properties. These work very similarly to inputs, but instead of reading them, the script writes them.
You can declare output ports using the //@output format. For example:
// @output string myOutString
// @output int myOutNumber
Will result in:
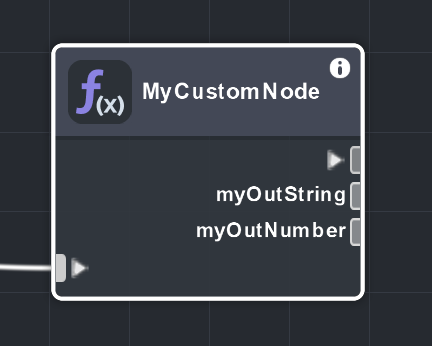
Outputs are also accessed through the script object, just like inputs. But the script is responsible for setting the output values instead of reading them. We can add to our example script like this:
// @output string myOutString
// @output int myOutNumber
script.myOutString = 'this string will be output!';
script.myOutNumber = Math.random();
And now, let’s test these outputs using a Print node to print out the results.
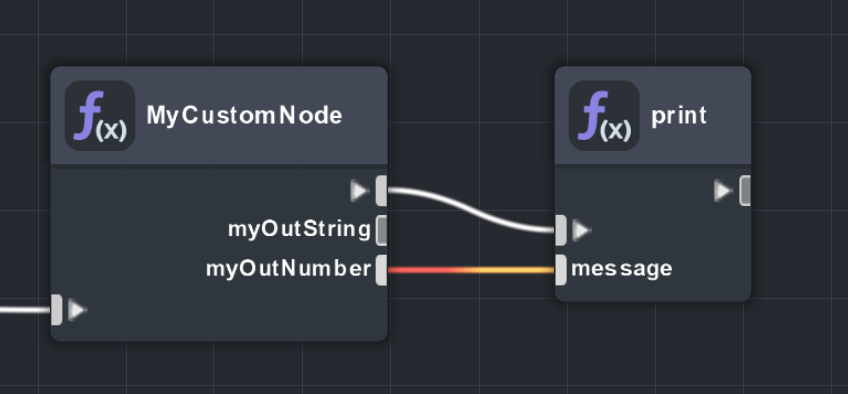
Make sure that your node has executed before another node tries to access its output ports. Just like normal scripting, your script has to run first before other scripts can access its values.
Special Types
Custom node scripts support a few special types that normal scripts do not.
Object ports
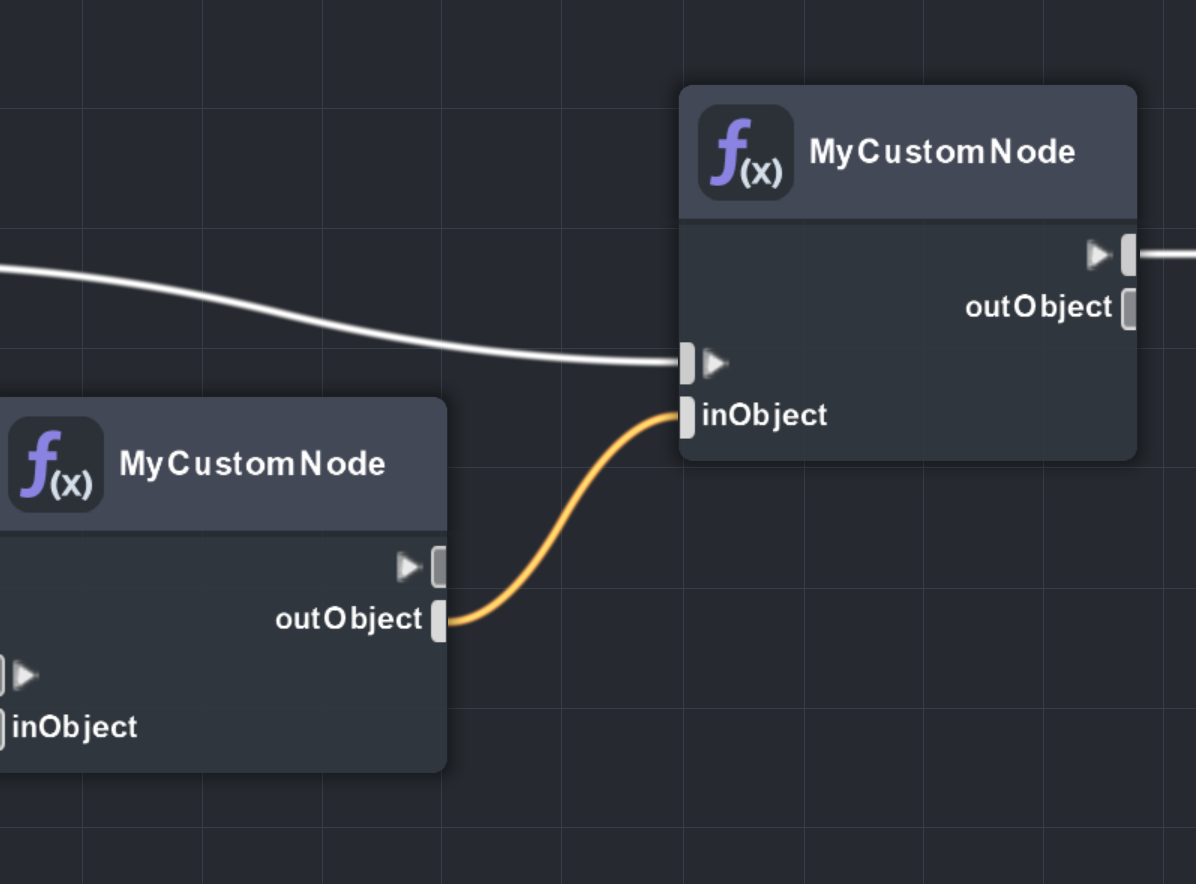
// @input object inObject
// @output object outObject
Useful for passing a complex object between two custom nodes. For example, one custom node could pass a dictionary or class instance to another.
Function ports
// @input function void() inFunc
if (script.inFunc) {
  script.inFunc();
}
Callable functions that can be passed in or out of the node. Function inputs can be hooked up to the Callback node to define a function in graph:
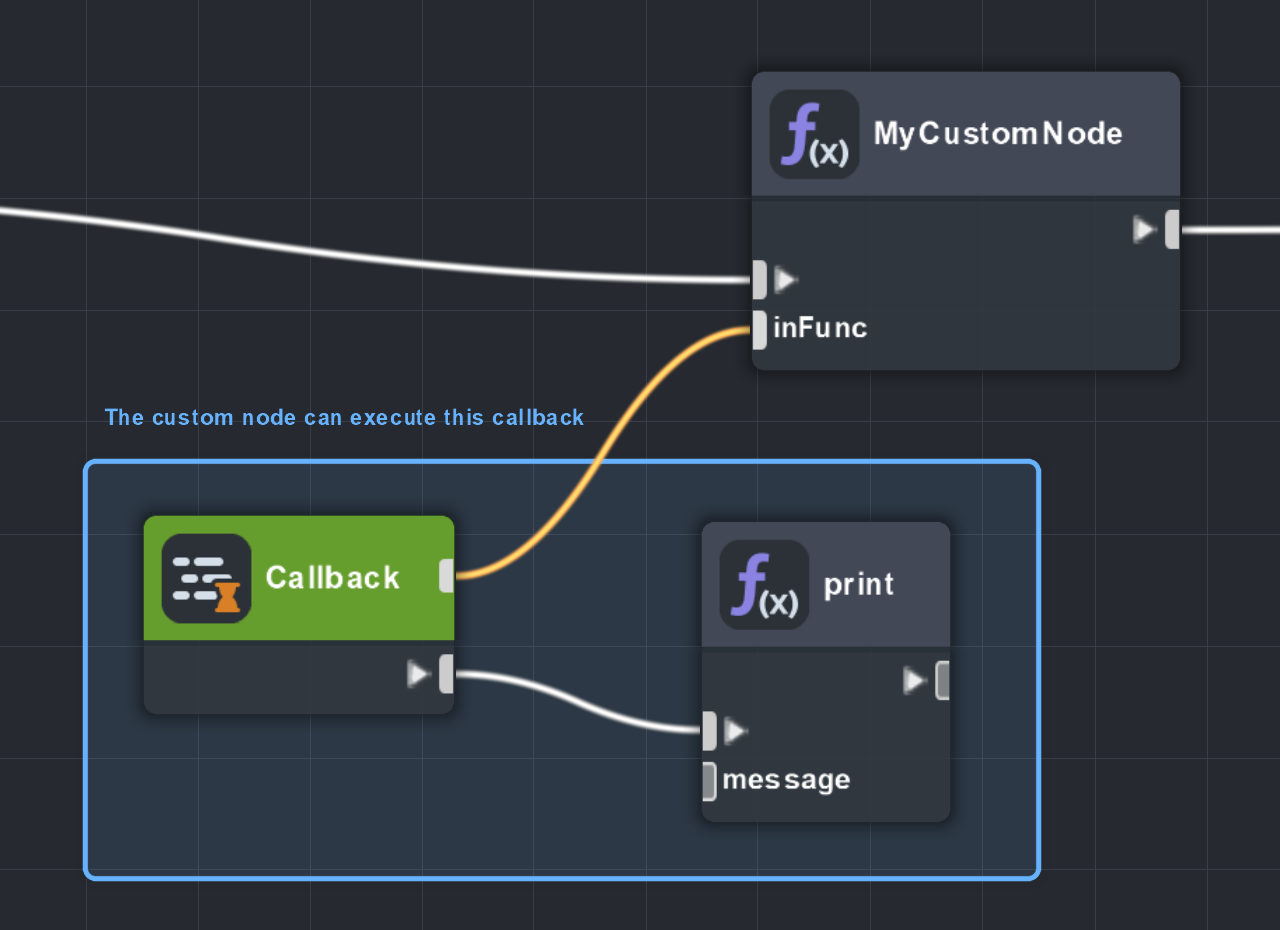
This is really useful for connecting complex scripting with more simple and flexible graph responses.
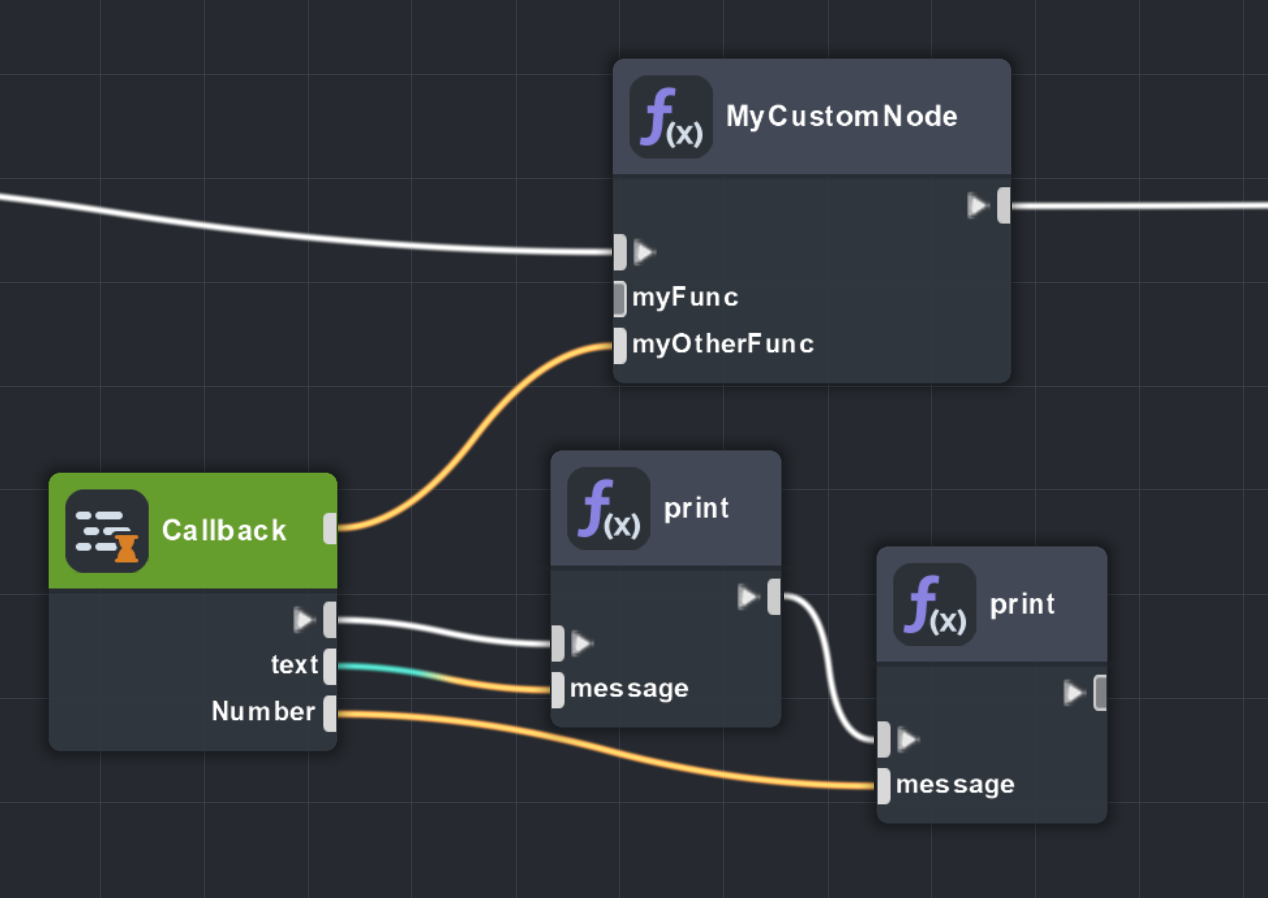
A signature can also be defined for functions. The format is:
// @input function <returntype>(<arguments>)
<arguments> can be blank, or a comma separated list of type / name pairs. For example:
// @input function void(bool toggle) myFunc
// @input function void(string text, int number) myOtherFunc

if (script.myFunc) {
  script.myFunc(true);
}

if (script.myOtherFunc) {
  script.myOtherFunc('this is text', -1);
}
Callback nodes will automatically match the signature of the function they are hooked up to. So if the function has arguments, the Callback node will supply those too.
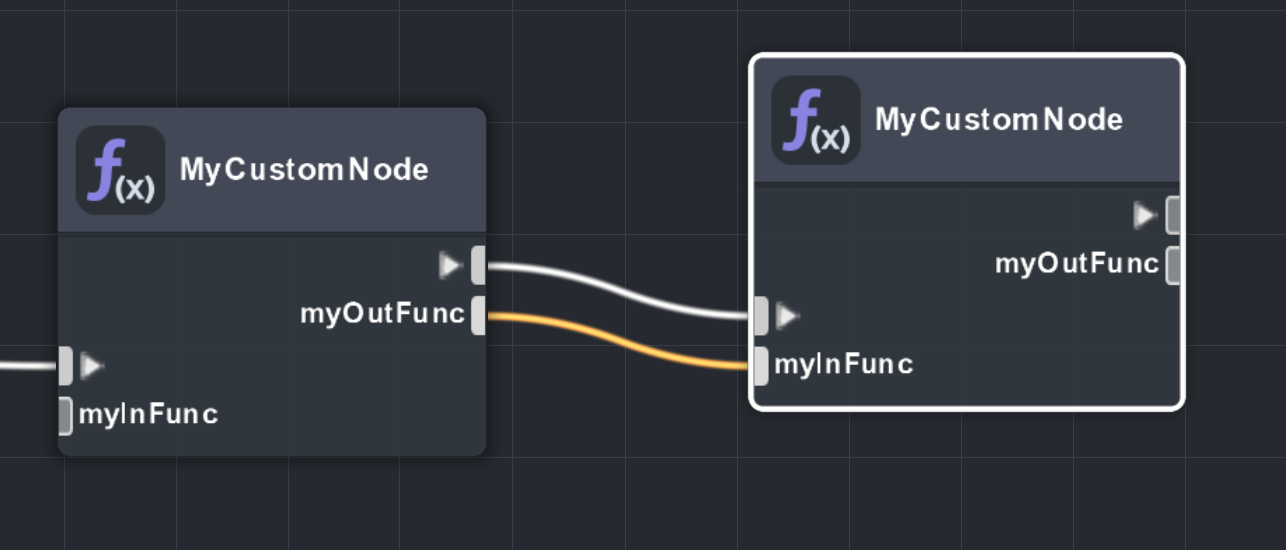
Functions can also be passed out of the node through an output port.
// @input function void(bool toggle) myInFunc
// @output function void(bool toggle) myOutFunc
script.myOutFunc = function (toggle) {
  print('here is the toggle value: ' + toggle);
};
if (script.myInFunc) {
  script.myInFunc(true);
}
Function outputs can be connected to the input port of another custom node, as long as the types in the signatures match.
Execution Ports
Execution ports work just like the execution output port that always appears on the right side of custom nodes, except in this case you can choose when they get called.
// @output execution myExec
if (script.myExec) {
  script.myExec();
}
They can be hooked up to other nodes just like a regular execution flow.
Execution ports can also be defined with a signature, just like function ports.
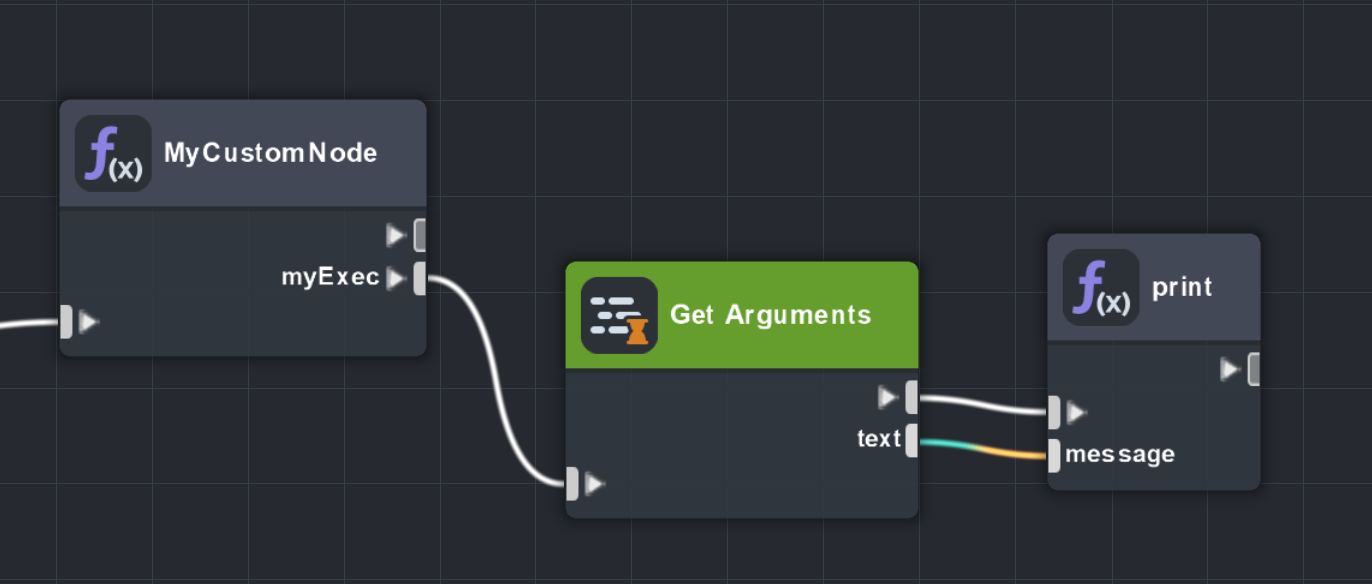
// @output execution void(string text) myExec
if (script.myExec) {
  script.myExec('here is text');
}
If an execution port defines a signature, it needs to be hooked up to the Get Arguments node, which continues the execution while providing the argument values passed to it.
Here’s a great example case for usage of the execution port:
// DelayedCall.js
// @input float delay
// @output execution callback
if (script.callback) {
  var evt = script.createEvent('DelayedCallbackEvent');
  evt.bind(script.callback);
  evt.reset(script.delay);
}
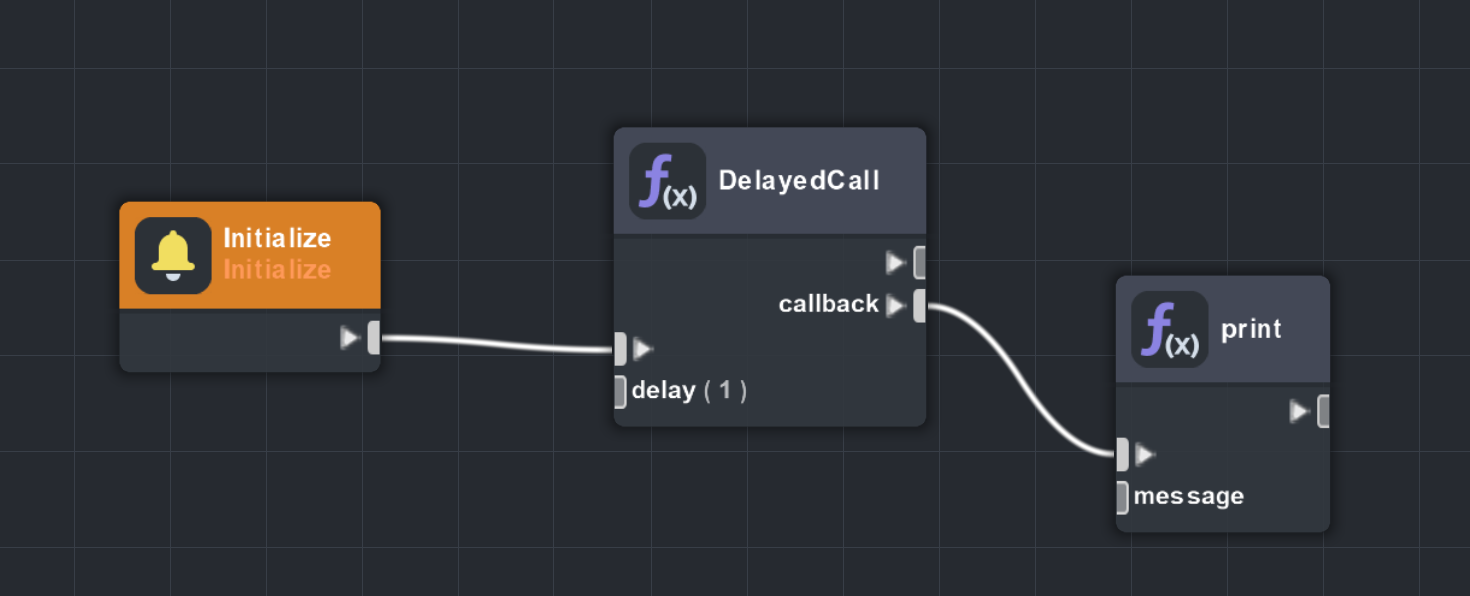
This custom node executes the callback after the delay time in seconds. It’s a really easy way to hook up some timed effects in your script graph.