Scene Manager Template
The Scene Manager template showcases the use of the Scene Manager Custom Component to break down large complex Lenses into its smaller scenes in order to improve performance and speed up Lens Start up time, and simplify development.
It show cases some of the most common Lens experiences:
- Separate scenes for front and back camera.
- Switching scenes via a carousel UI.
- Toggling scenes on top of existing scenes.
- Showing a loading screen while waiting for another scene.
- Animating before a scene disappears.
Overview
In this Lens, the user is able to switch between a front and back Lens experience:
- In the back Lens experience, "Dreamy Fox" is show on the ground. A camping scene can be toggled to give the fox a home.
- In the front Lens experience, glasses are shown on the user's face. The user can swipe through a carousel to change the glasses that they are trying on.
To enable faster Lens loading and keep a tidier project, this Lens is broken down into several scenes.
Project Overview
When you open the template, you can find the Scene Manager custom component placed at the top of the Objects panel. Its registry is already prefilled with many scenes which compose the Lens' experience. Remember to prefill, or register your scene in the registry before you load them. Each scene comes with a custom name which will be used to refer the scene when being loaded and unloaded.
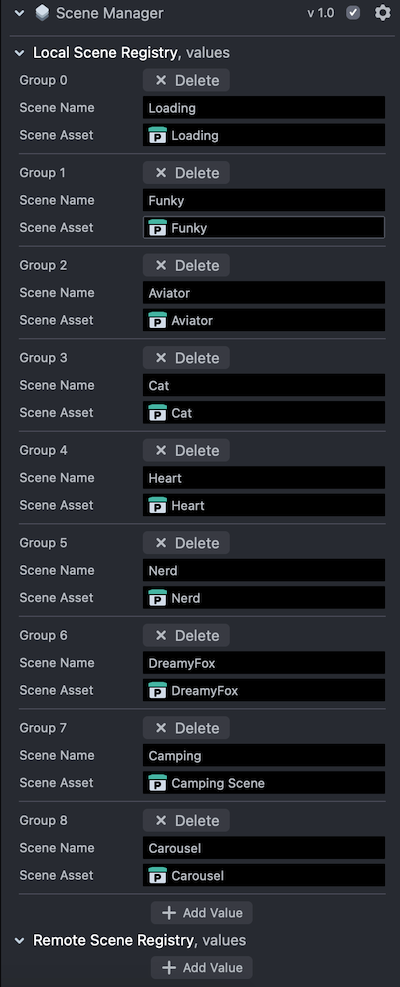
Utilizing remote assets as remote scenes is supported. However, since remote assets are per account, remote assets are not bundled within the default template. You are encouraged to integrate and test remote assets using the Remote Scene Registry listed below the Local Scene Registry.
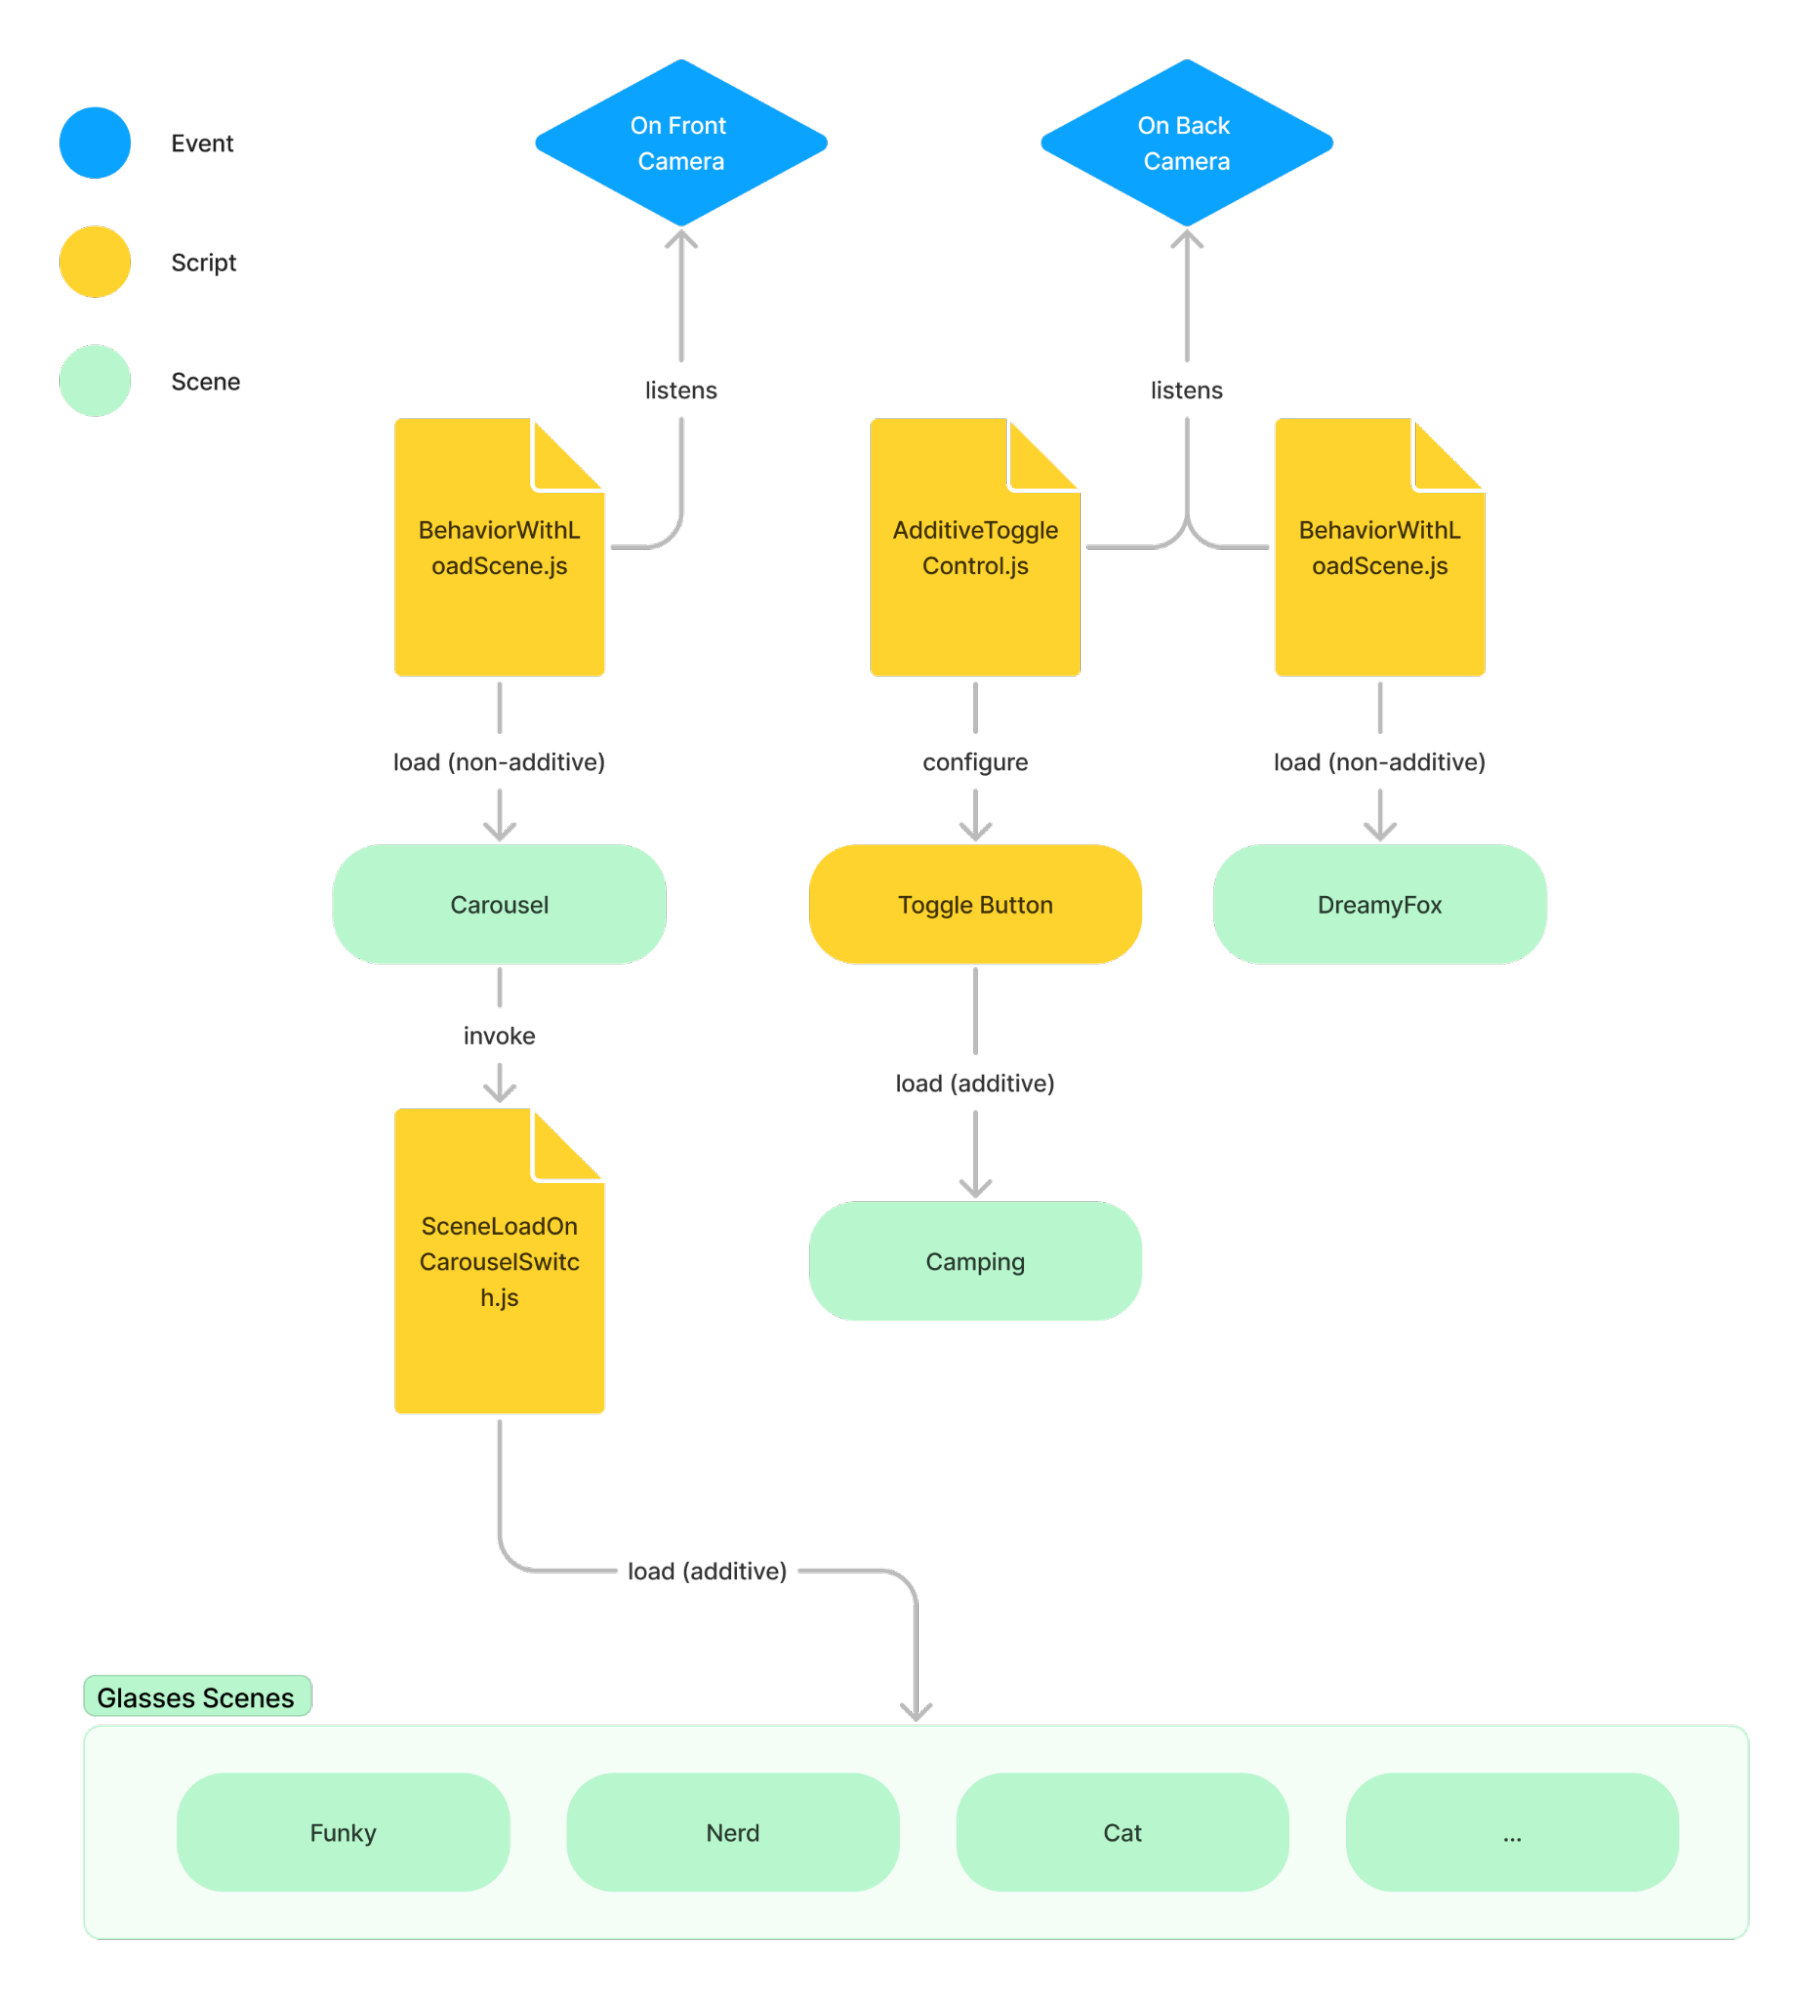
This flow map provides an overview of the template, highlighting the various scenes and their loading methods. It indicates whether each scene is loaded additively or non-additively. Notably, all scenes are loaded asynchronously, with the exception of the “Camping” scene.
Let's break down the component based on its features and use the examples within the template to explain these usages and concepts.
Modifying Scenes
As described in the Scene Manager guide, a "scene" is just an Prefab.
In this project, all our scenes can be found in the Resources panel > Scenes.
To check out some of the scene in this project, simply drag one of the prefab (look for the icon with the letter p) into the Objects panel.
Learn more about working with Prefabs in the Prefab guide.
Key Concepts and Examples
Non-additive Scenes
At any given moment, only one non-additive scene can be active. Upon the loading of a new non-additive scene, any previously active non-additive scene is automatically unloaded. You can think of this mechanism similarly to game levels, where only one level is playable at a time.

In the template, consider the "Carousel" scene, which features the Image Carousel custom component situated at the bottom of the Lens. This scene is loaded non-additively when the front camera is engaged.
Similarly, the "DreamyFox" scene is set to load non-additively when the back camera is activated. This setup implies that when the DreamyFox scene loads, the Carousel scene is automatically unloaded, given that both operate in a non-additive mode.
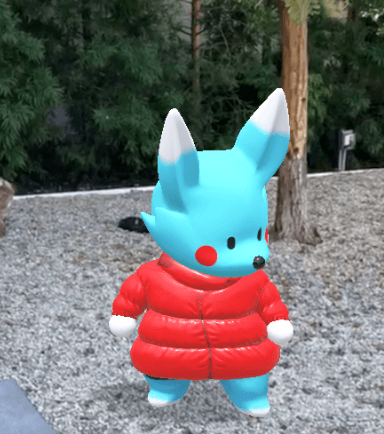
The “DreamyFox” scene, which consists of the arctic blue fox model, which is loaded automatically when the back camera is activated. This scene is also loaded as a non-additive. That means the “Carousel” scene will get unloaded when the fox is loaded, as they are both non-additively scenes.
Additive Scenes
Additive scenes are like layers; you can stack them atop existing scenes without removing any. For the loadSceneSync and loadSceneAsync methods.
A scene is loaded additively by default if the additive parameter is not indicated explicitly.
Additive scenes often serve as add-ons, VFX or post processing effects, UI elements, and other enhancements. They complement and augment the primary non-additive scenes, enriching their functionality and presentation.
In the template, the glasses are loaded as additive scenes, the loading is called by the SceneLoadOnCarouselSwitch script, which listens to the Carousel component's item switch event and calls the Scene Manager to load the glasses onto the head of the user.
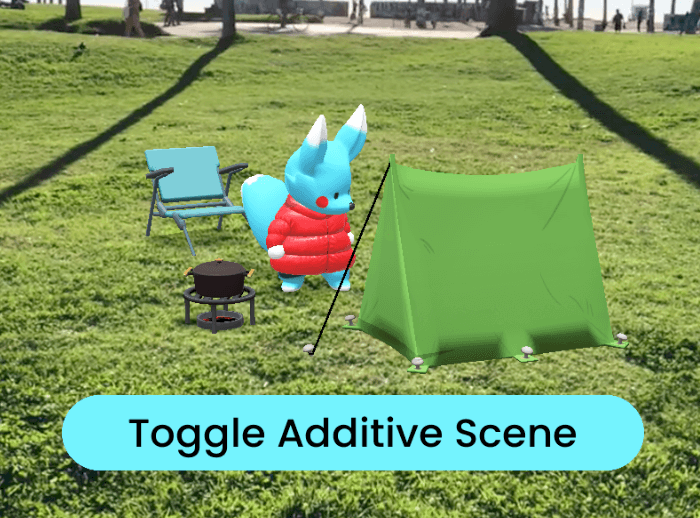
When you switch to the back camera, you'll see a blue button at the bottom of the Lens. Clicking on it loads the “Camping” scene around the fox, introduced as an additive scene. This is a practical way to showcase additive scenes: they add layers that enhance both the user experience and the story's depth.
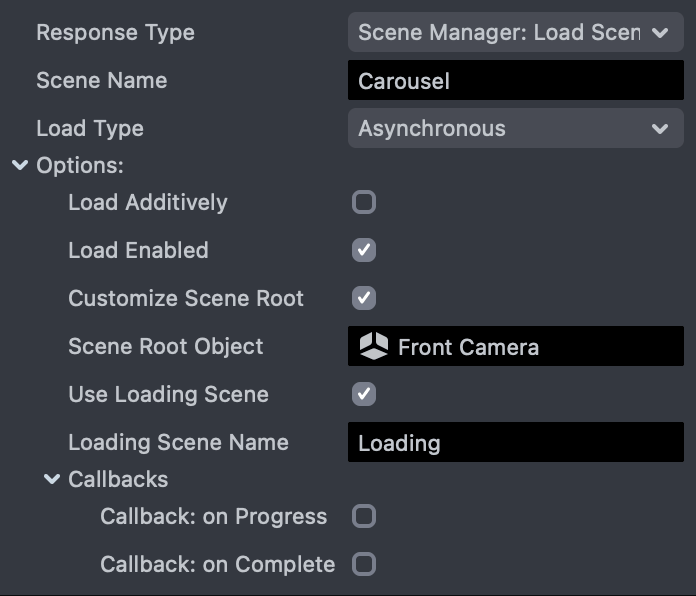
Customizing Scene Root
By default, the Scene Manager uses itself as the parent for the loaded scene. However, users have the flexibility to change the parent scene object to suit their structural preferences.
For example, in the template, the “Carousel” is loaded under the Front Camera object instead. This is to ensure a clean hierarchy for organizational purposes. Sometimes a scene needs to live under a specific camera in order to function properly (e.g. Screen Transforms under Orthographic Camera). That is also a good case for customizing the scene’s parent.
If you are interfacing with the Scene Manager through scripting, you can pass a SceneObject as the value of the parent parameter like this:
global.sceneManager.loadSceneSync('scenename', {
  parent: mySceneObject,
});
You can easily set the scene’s parent by using Behavior's Scene Root Object field. Take a look at the Behavior section below.
Using Loading Scenes
One of the powerful features of the Scene Manager is its ability to load scenes asynchronously. This opens up the possibility of using a splash screen or loading scene as a placeholder while a larger, main scene loads in the background. The Scene Manager makes adding a loading scene very easy.
A loading scene is just a regular scene that needs to be registered in the scene registry before it is loaded.
If interfacing with the Scene Manager through scripting, you can add your loading scene as a parameter while performing any of the load scene method:
global.sceneManager.loadSceneAsync('scenename', {
  loadingScene: 'loadingSceneName',
});
You can add a loading scene through the Behavior script's Use Loading Scene and Loading Scene Name fields.
Understandably, you can only use a loading scene when loading a scene asynchronously.
However, note that a loading scene is meant to be lightweight, minimal and static. An animated loading scene will take longer to load, defeating the purpose of having one. In the template, the included loading scene is simply text under an orthographic camera. You could also use an image as a loading scene too, but make sure the image file is compressed and optimized.
The Scene Manager will automatically unload the loading scene when the main scene finishes loading. You can also set a minimum display time in seconds for the loading scene by changing this float value:
global.sceneManager.minLoadingTimeInSeconds = 1;
Consider the necessity of loading scenes with caution. Loading scenes may not be needed for small to mid-sized scenes that load instantly, as they can cause confusion. Implement loading scenes only for large, complex scenes that require additional loading time, or to display a splash screen for branding purposes before the experience begins.
Scene Hooks
Sometimes you need to clean up a few things before a scene gets unloaded, or play a dissolve animation when the scene is removed. This is where Scene Hooks come in. Currently, only one type of hook is processed - the pre-unload hook. As its name suggests, pre-unload hook executes before a scene is unloaded.
For example, the Camping scene has a simple shrinking animation as its pre-unload hook. Whenever the scene is unloaded through the Scene Manager, it plays this shrink animation first.
Adding a hook is straightforward. To add a pre-unload hook to a scene, you need to add a function to a script component attached to the scene's root object. The hook function must return a Promise. When the Promise resolves, the Scene Manager considers the preUnloadHook finished and proceeds to fully unload the scene.
As a minimal example, assume we have a script component hookContainer.js on the scene root. Note, the function must be called exactly preUnloadHook and registered directly on the script object for the Scene Manager to find it.
// hookContainer.js
// this script is attached to the root scene object of the scene

script.preUnloadHook = function () {
    return new Promise((resolve){
        //do something
        resolve();
    });
}
Use Behavior as a no-code option
In most cases you don't need to write any of this script at all! The Behavior script has a new response type - "Scene Manager: Load Scene" that allows you utilize Scene Manager custom components without writing any code.
Learn more about using Behavior in the Behavior guide.