Skeletal
The Skeletal asset allows you to track images to specific joints of the user's body. You can set your 2D images to track the user's head, neck, shoulders, elbows, and hands. Each image can be toggled on and off, as well as offset or resized. Additionally, you have the option to smooth out the tracking of each joint.
Importing the Asset
Find the 2D Skeletal asset in the Asset Library and import it into your project. Click here to learn more about how to use assets in the Asset Library.
Once you import the asset from the Asset Library, you can find the package in the Asset Browser.
Follow the instructions and drag the prefab 2D Skeletal__PUT_IN_ORTHO_CAM into the Scene Hierarchy to create a new Scene Object. If your scene doesn't have an Orthographic Camera, you can create one by clicking the + button at the top left corner of the Scene Hierarchy panel, typing "Orthographic Camera" to find the Orthographic Camera object, and clicking on it to add it to the scene.
You can right-click and select Unpack for Editing from the drop-down menu to unpack all assets stored in the bundle. Click here to learn more about Asset Packages. Once you unpack the package, you can then edit its content.
Walkthrough
Switching Preview Video
When working with the Skeletal asset, you’ll want to switch the preview video to one with a person’s body. In the Preview panel, select the Videos button.
Then, in the drop-down at the top of the Preview panel, choose the Skeletal video under the category "Object Tracking".
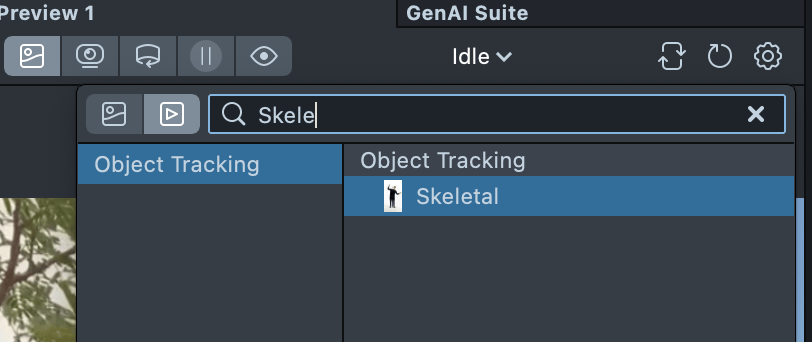
You should now see the content tracked to the body in the video. You can also switch to Webcam Mode to see the content attached to yourself.

Add a Resource
To use the template, we’ll first need to import the images we want to attach to the joints. To do this, drag and drop a PNG, JPG, or GIF into the Asset Browser panel from your computer.
Configure Skeletal Controller
Next, we will assign our imported content to each joint.
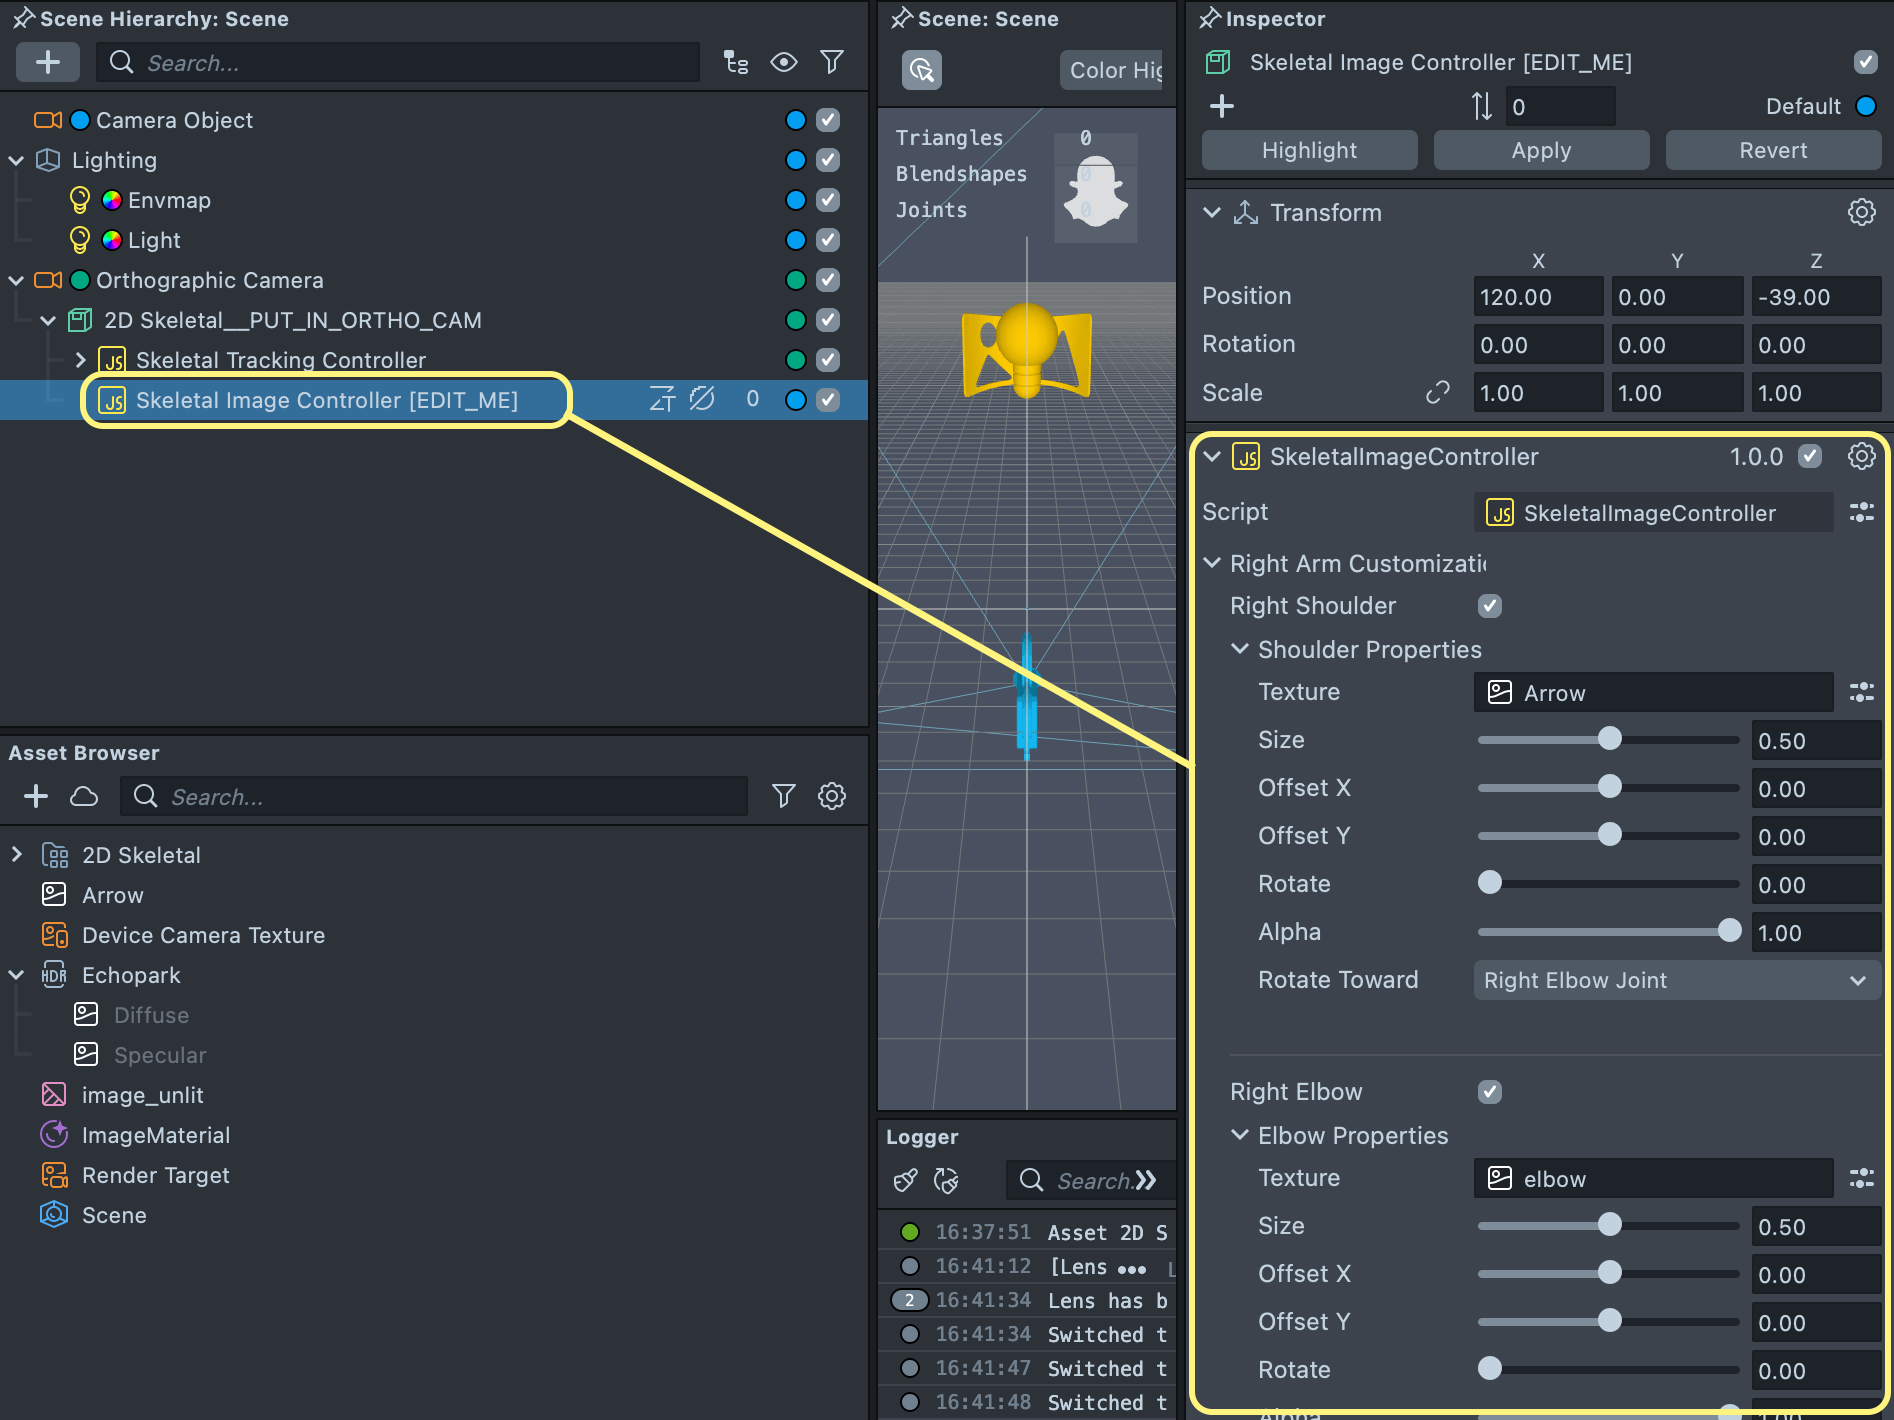
First, select the Skeletal Image Controller [EDIT_ME] object in the Scene Hierarchy panel to see its settings in the Inspector panel.
Configure Content
The Skeletal asset allows you to attach and tune an image to the following joints:
- Head
- Neck
- Right Shoulder
- Left Shoulder
- Right Elbow
- Left Elbow
- Right Hand
- Left Hand
You can enable or disable tracking of a joint by toggling the checkbox to the right of the joint's name.
When enabled, you can assign the custom texture that you imported to the joint’s Texture field.
You can also adjust the size, offset, rotation, and alpha of your image with the corresponding sliders.
Finally, you can set your image to look at a specific joint by setting the Rotate Toward drop-down menu.
Configure Tracking Types
The Skeletal assets comes with two tracking modes:
- Smooth: Smooth mode focuses on tracking the content with the least amount of jitter. In other words, tracking in Smooth mode is less bumpy, but it may result in a delay.
- Precise: Precise mode focuses on tracking the content with the highest accuracy and the least amount of delay, but it may result in occasional jitter.
By default, the tracking type is set to Smooth. To change the tracking type, select the Skeletal Tracking Controller in the Scene Hierarchy panel under the Orthographic Camera object.
![]()
Then, you can change the tracking type by changing the “Tracking Type” drop-down menu.
In most cases, you will want to use Smooth mode to track your content.
When smooth mode is selected, you can change the smoothing amount by changing the Smoothness slider.
You can export the Skeletal Tracking Controller object and add it to your own Lens project to get the same smoothing effect in your own Lens.
Object Tracking and 3D Objects
You can attach 3D Objects to Object Tracking by adding a helper script. Please refer to the Object Tracking & 3D Objects section of the Object Tracking guide for more information.
Previewing Your Lens
You’re now ready to preview your Lens. To preview your Lens in Snapchat, follow the Pairing to Snapchat guide.