Cloth Simulation
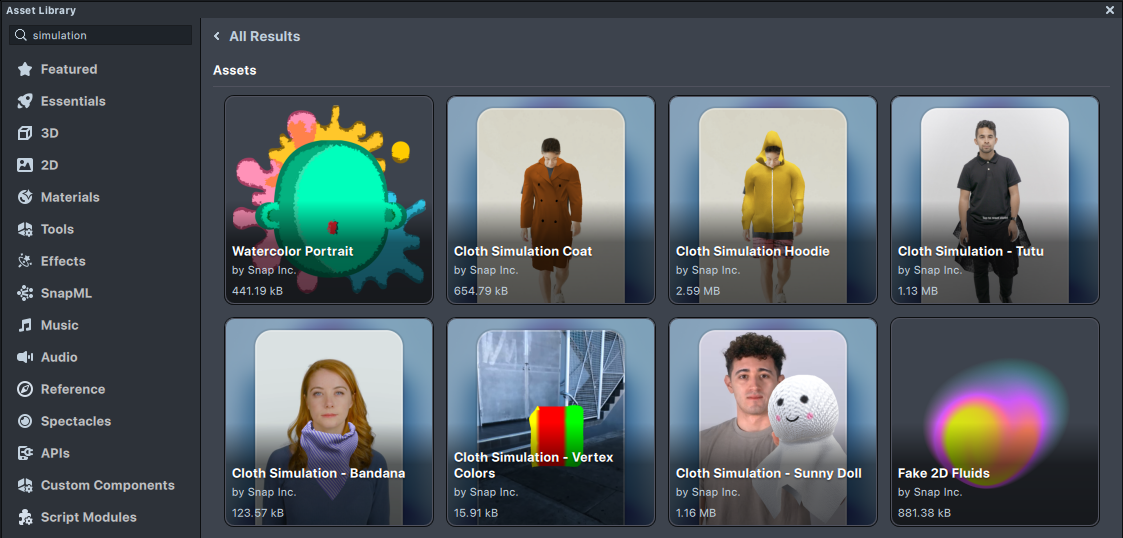
Cloth Simulation - Tutu, Cloth Simulation - Bandana, Cloth Simulation - Vertex and Cloth Simulation - Sunny Doll examples are available in the Lens Studio Asset Library .
The cloth simulation examples demonstrate realistic cloth simulations with custom meshes and include helper scripts to customize your meshes.
Cloth simulation allows you to make cloth move with human actions (move, stretch and bend), collision, gravity, air friction, etc. Each single point on cloth can move in different directions based on a combination of different forces.
Cloth Simulation Assets
Find the example assets in the Asset Library and import it into your project. Click here to learn more about how to use assets in the Asset Library.
- Cloth Simulation - Bandana
- Cloth Simulation - Vertex
- Cloth Simulation - Sunny Doll
- Cloth Simulation - Tutu
In the Asset Library, there is also a Vertex Color Debug material, which can show the vertex color embedded on a mesh. This is helpful when working with Cloth Simulation to see how the mesh is setup.
Head Bandana Example
Once you import the asset from Asset Library, you can find the package in the Asset Browser panel. Next, drag the prefab inside the package to the Scene Hierarchy panel to add it to the scene.
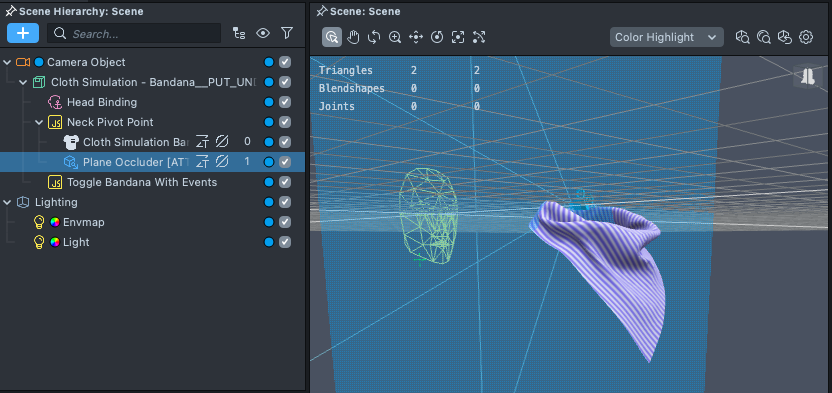
This example shows a bandana cloth attached to the user's neck. The bottom of the bandana will react like a cloth as the user's move their head.
Cloth Component
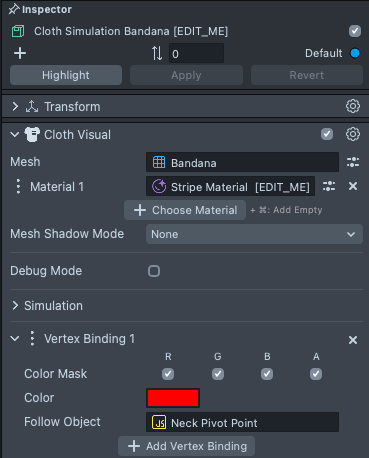
Clothes are added to a scene using a Cloth Visual Component added to an object. Click on the Cloth Simulation Bandana Object in the Scene Hierarchy panel to see the components attached to the object in the Inspector panel.
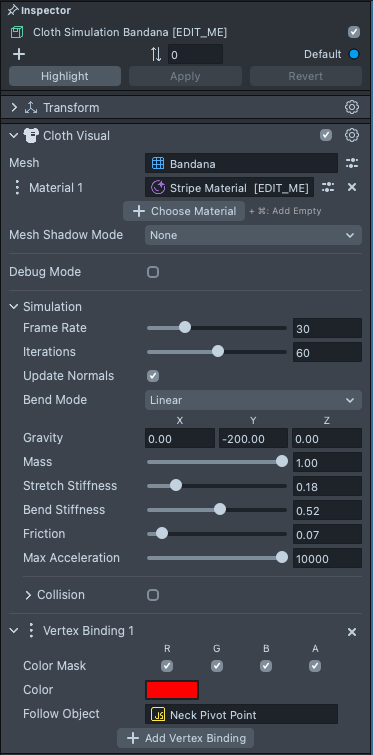
Cloth Mesh
Use the Cloth Mesh field to assign the Cloth Mesh. Note that you can import your own mesh.
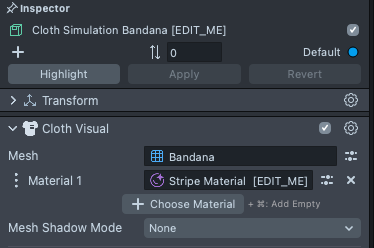
You must paint at least one vertex color on your own customized mesh for cloth simulation. For more details on importing your own cloth mesh, see the Cloth Simulation Guide.
Cloth Material
For example, you can modify the material used with the Cloth component to make your own bandana!
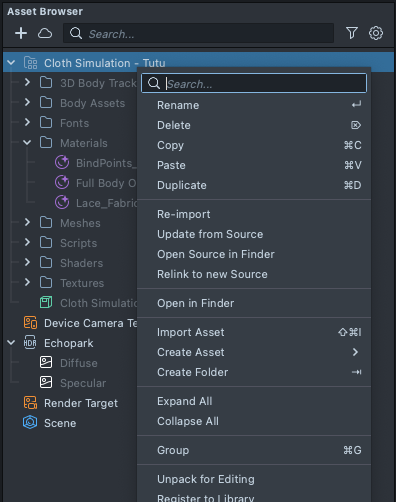
In the Scene Hierarchy panel, you can right-click to unpack the imported package to enable editing by pressing the Unpack for Editing item.

Next, in the Inspector panel, right click the material and choose select to select the material end edit it.

Finally, you can modify the material settings as you'd like.

Alternatively, you can replace the material completely and use your own! To learn more about Materials and Material Editor, check out the Material Editor guide.
Debug Material for Cloth
If you'd like to learn more about how the Bandana is binded, in the Asset Library you can find the Vertex Color Debug material. Click on the Material 1 field to set the cloth material to the newly imported material.

With the debug material, You can render vertex colors for the Bandana model in Lens Studio.

Simulation Settings
Below the mesh and materias, you can find the Simulation Settings for the bandana. Try playing around with them to see how they work.
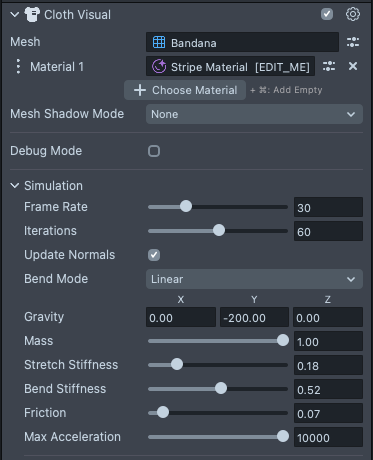
See the Cloth Simulation Guide for simulation setting details.
Vertex Bindings
For the bandana, red vertex color binding is added (as shown with the debug material above). Set the vertex color as red on the bandana model to follow the user’s head with the Neck Pivot Point object.
Each vertex in a 3D model can have a color assigned to it using the 3D modeling software (Vertex Color).
Here, bind red vertices in the mesh to the Follow Object. With different vertex colors, you can bind vertices to pivot points in Lens Studio. The bind parts won’t be affected by cloth simulation, but are stationary relative to pivot points. For example, you can bind the red part of the mesh bandana to the Neck Pivot Point object. Thus, the red part of the bandana remains relatively static to the Neck and the black part will have the cloth simulation effect.
You can also bind multiple vertex colors to different Follow Objects. Lens Studio allows a single cloth mesh to bind to a maximum of 12 objects. See the Ribbon and Jacket examples for more information.
Occluding parts of the cloth
Notice the bandana is occluded with the body with Plane Occluder under the Neck Pivot Point. The Plane Occluder Prefab is located in the Resources > Prefabs.
This prefab contains a plane displaying the body segmentation, so that the parts of our cloth that is behind the user would be occluded. To learn more about body segmentation, check out the Body Segmentation template.
Hiding the cloth when the user isn't there
Notice that the bandana is under the Neck Pivot Point and not under the Head Attachment itself. This is because we don't want to shift the entire bandana based on the user's head--only it's pivot point (aka how the bandana is anchored to the neck, but NOT it's cloth).
Usually, the Head Attachment component will automatically hide objects when a head is not visible. Since we're not attaching our object underneath it, we need to enable and disable the bandana on our own. We can do this using Behavior!

Vertex Color Example
Now that you understand Cloth Simulation at a high level, the next example shows you how to make a more complicated clothing item with the Vertex Controller.
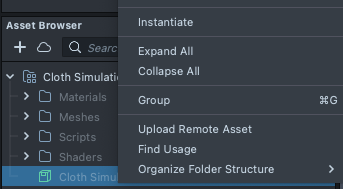
Like before you can import this asset from the Asset Library. You'll find the imported asset in the Scene Hierarchy panel. You can right clean on the prefab inside the package to instantiate an object.
In the preview panel, you will see a cloth which show various vertex colors (yellow, red, green). This object uses the debug material mentioned above. Each color represents the vertex color on the mesh. We will make each vertex color will have a different cloth setting.
In the Scene Hierarchy panel and select the Cloth Simulation object to see the VertexColorController Script Component after the Cloth Component.

If you select the Vertex Controller object you will find several scripts that define how each vertex behaves. Try playing around with different settings to see how they work.
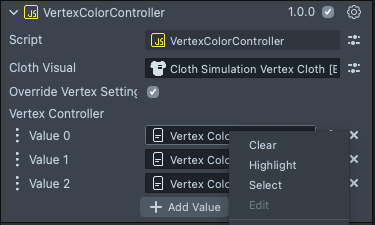
You can select the vertex color you want to modify based on the available vertex colors in your mesh. In this case, the cloth material has yellow, red, and green vertices.
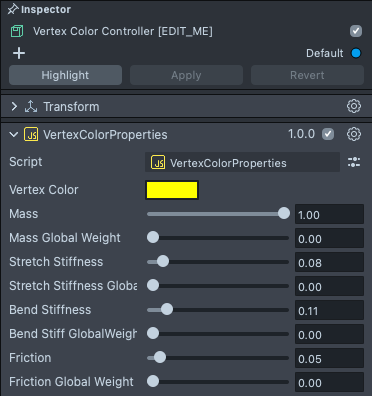
For each vertex simulation property, you have the global weight property. Global Weight is how much the global settings influence the Cloth Simulation script. Set Global Weight to 0.0 the absolute value of the property in the Vertex Controller on this vertex. Set Global Weight to 1.0 to ignore the property value in the Vertex Controller. When you disable the vertex controller, all vertex properties are 0.0 by default. The mesh is simulated by all global simulation settings.
The following is the Bend Stiffness example.
let G = globalSimulationSettings.bendStiffness
let G.VertexWeight = globalSimulationSettings.bendStiffnessVertexWeight
let V[i] = perVertexSimulationSettings[vertexIndex].bendStiffness
let V[i].GlobalWeight= perVertexSimulationSettings[vertexIndex].bendStiffnessGlobalWeight
In the simulation, the final result for Bend Stiffness is bendStiffness[i] = G _ V[i].GlobalWeight + V[i] _ G.VertexWeight;
This example also uses a Debug material to display the Vertex Colors of your mesh!
Hand Sunny Doll Example
Hand Sunny Doll Example shows you how to attach the cloth to 3D hand tracking. Enable the Hand Sunny Doll Single Follow object in the Scene Hierarchy panel. Instead of binding the cloth with a fixed pivot point in the Scene, the cloth is a child of the Left hand tracking object.
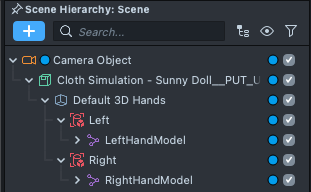
In this example, a sphere collider is used to fill the sunny doll. Try to scale the sphere collider size up or down to see different results. In order to keep the basic shape for the doll, both the head top and the neck vertices on the doll mesh are painted red.

To learn more about hand tracking, see the 3D Hand Tracking.
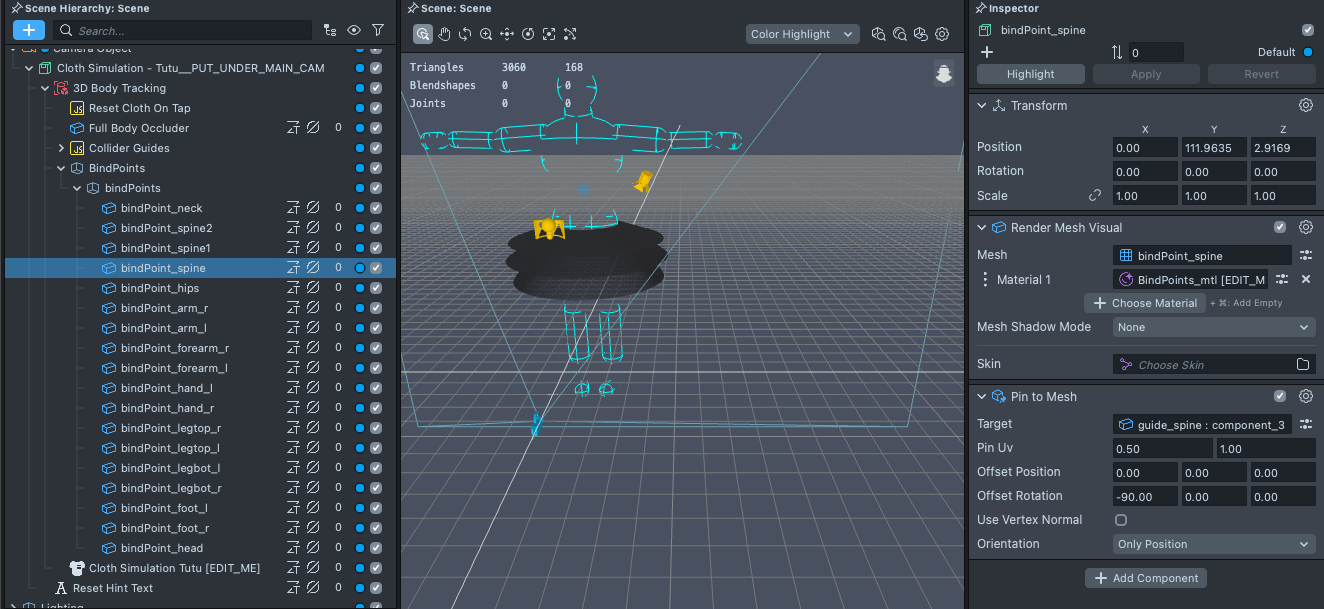
Tutu Example
The tutu example shows how to attach the cloth to a single bind point with 3D body tracking. Enable the Tutu Single Follow object in the Scene Hierarchy panel.
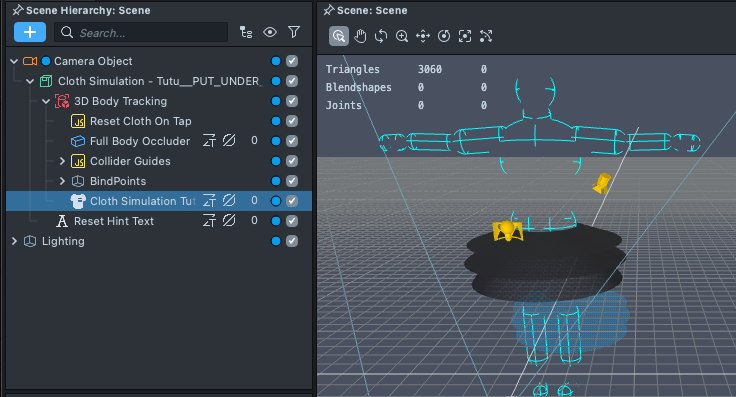
In this example, note that this 3D body tracking object has an Object Tracking component which has a mapping of the Collider Guides joint to the tracker’s.
To learn more about 3d body tracking, see the 3D Body Tracking Template.
There is also a Reset Cloth On Tap object. The Cloth Reset Script is called when you tap the screen. With this script, you can reset the cloth.
The Full Body Occluder object uses the full body mesh as the body occluder. With this object, the body will occlude with cloth. Note that the render layer is set to 0 to occlude with cloth mesh.
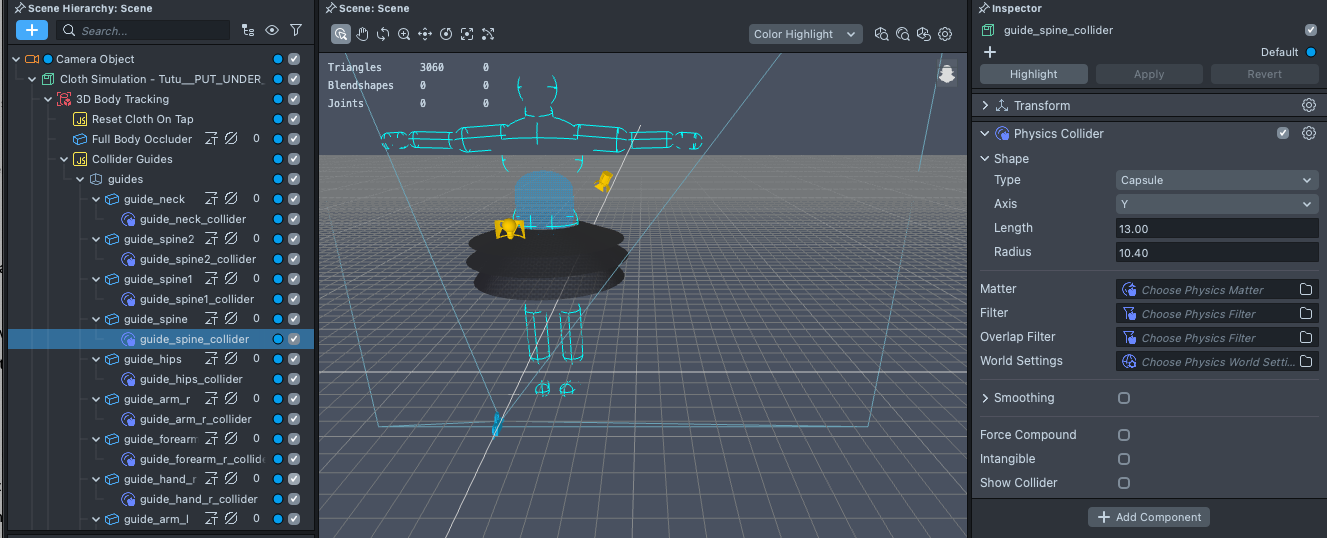
The Collider Guide object includes all collisions for body parts. Both the guides and collision are tracked to the body joints.
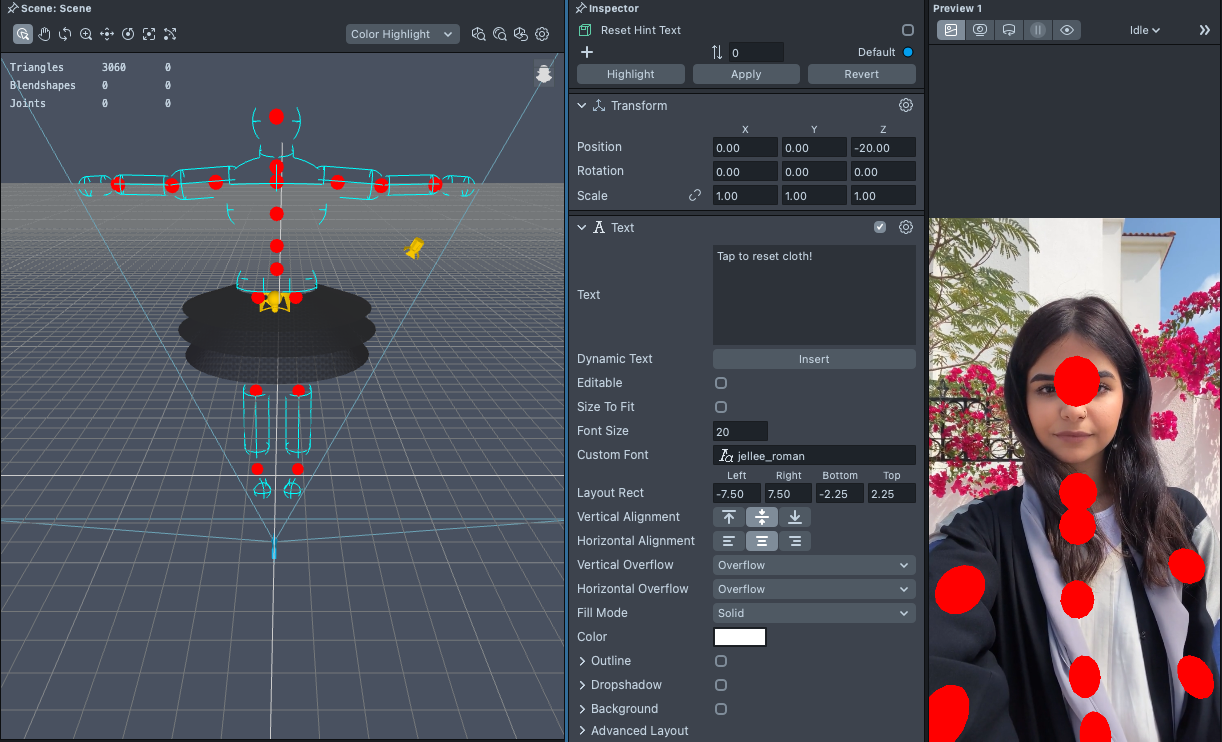
The Bind Points object has bind points for cloth. You can attach the cloth to the bind point to follow different body parts.
Modifying to understand deeper
To further understand this example, we can toggle the debug mode.
First, we will unpack the package so that we can modify the various settings in the example.
Click on any of the bind points. Note that the bind point is pinned to the collider guide.
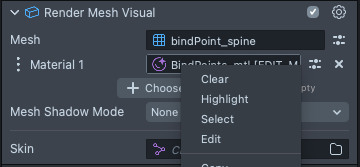
Now Select the bind point material.
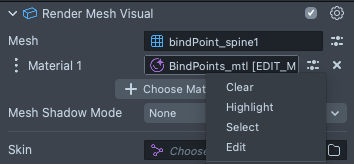
All the bind points uses the same material, so we only need to do this once.
Enable the IsDebug field.
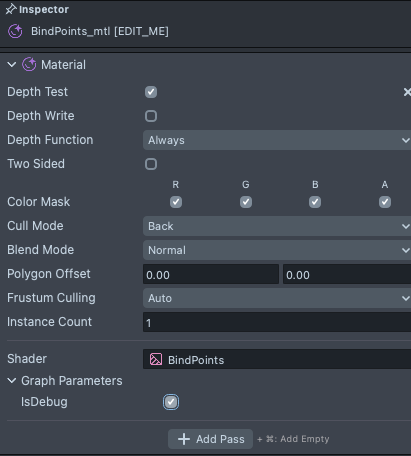
With the deubg on, we can see that the bind points are now rendered in the Scene and Preview panel!
To learn more about creating cloth mesh for 3d body tracking, see the Cloth Simulation Guide.
Save a template to your computer, and open up the Assets folder in the project folder to find the assets in your project!
When creating cloth mesh for 3D body tracking, use the FBX files as the reference for cloth transform. In order to have the right binding and occlusion, click here to see how to export and import 3D objects into Lens Studio.
Previewing Your Lens
You're now ready to preview your Lens experience in Snapchat! To do so follow the Pairing to Snapchat guide.