Style Transfer
The Style Transfer example allows you to use a Style Transfer model to visually change how the camera feed looks based on another image. The example allows you to choose between always running it in real time, running it on demand, or automatically choosing between the two for the best user experience.

Guide
If you have your own style transfer model, you can skip down to the Importing Your Model section below.
Creating a Model
The Style Transfer example relies on a machine learning model to define how the camera feed should be visually changed. The example comes with an example model, but you’ll want to create your own to make your unique style transfer Lens.
To learn more about Machine Learning and Lens Studio, take a look at the ML Overview page.
Prerequisites
To create a model, you’ll need a
- Style reference image: any image that has the style you want
- Machine learning training code: code that describes how the model is trained (this is sometimes referred to as a notebook). Please find our example notebook here.
- Data set: collection of data that our code will use to learn from (in this case we will use the COCO data set)
Try using your own reference image! You can use the same training code and dataset.
When using a data set to train your model, make sure that you adhere to the usage license of that dataset.
Training Your Model
There are many different ways you can train your model. For our example, we will use Google Colaboratory. To see other ways of training, take a look at the ML Frameworks page of the guide section.
Head over to Google Colaboratory, select the Upload tab, and drag the notebook to the upload area.

The example notebook is well documented with information about what each section of the code is doing. Take a look at the notebook to learn more about the training process itself!
Once your notebook has been opened, you can add your style reference image. You can also add an image to test your results on:
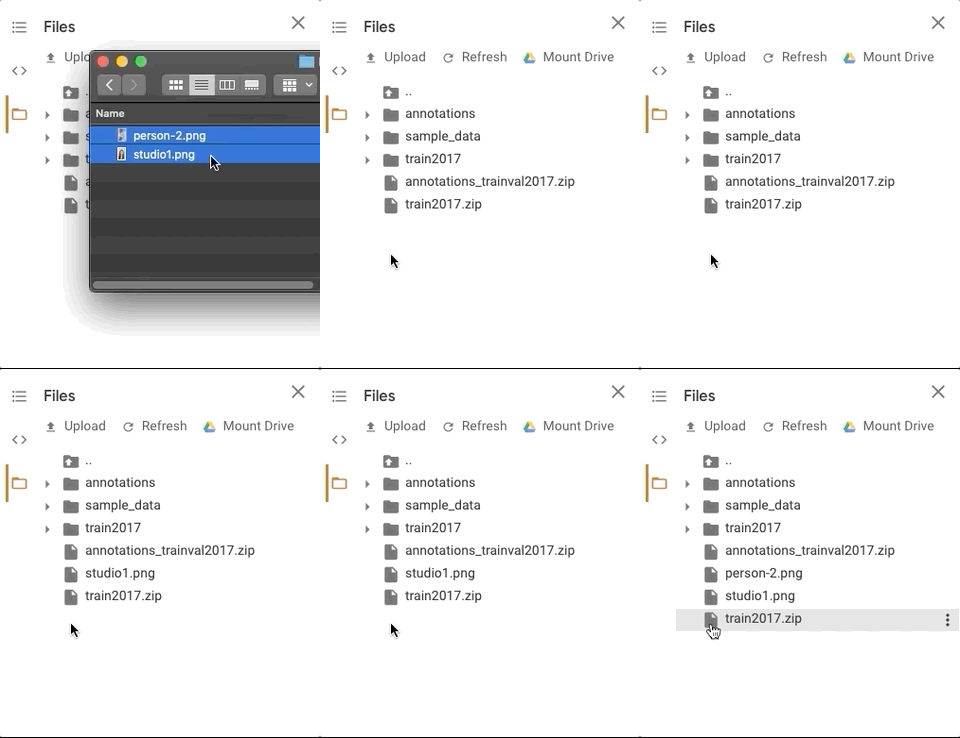
Don't forget to upload a style reference image style_image.png and the image you want to test on test_image.png``
With our files added, you can run the code by choosing Runtime > Run All in the menu bar. This process may take a while to run, as creating a model is computationally intensive.
Downloading your Model
You can scroll to the Train Loop section of the notebook to see how your machine learning model is coming along.
Once you are happy with the result, you can download your .ONNX model!
Getting the Example
Open the Asset Library, and look for Style Transfer, and press the Import button to bring it into your project.
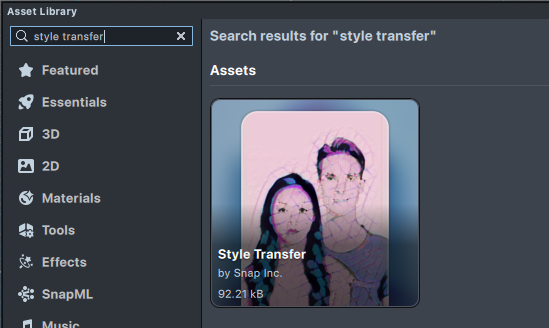
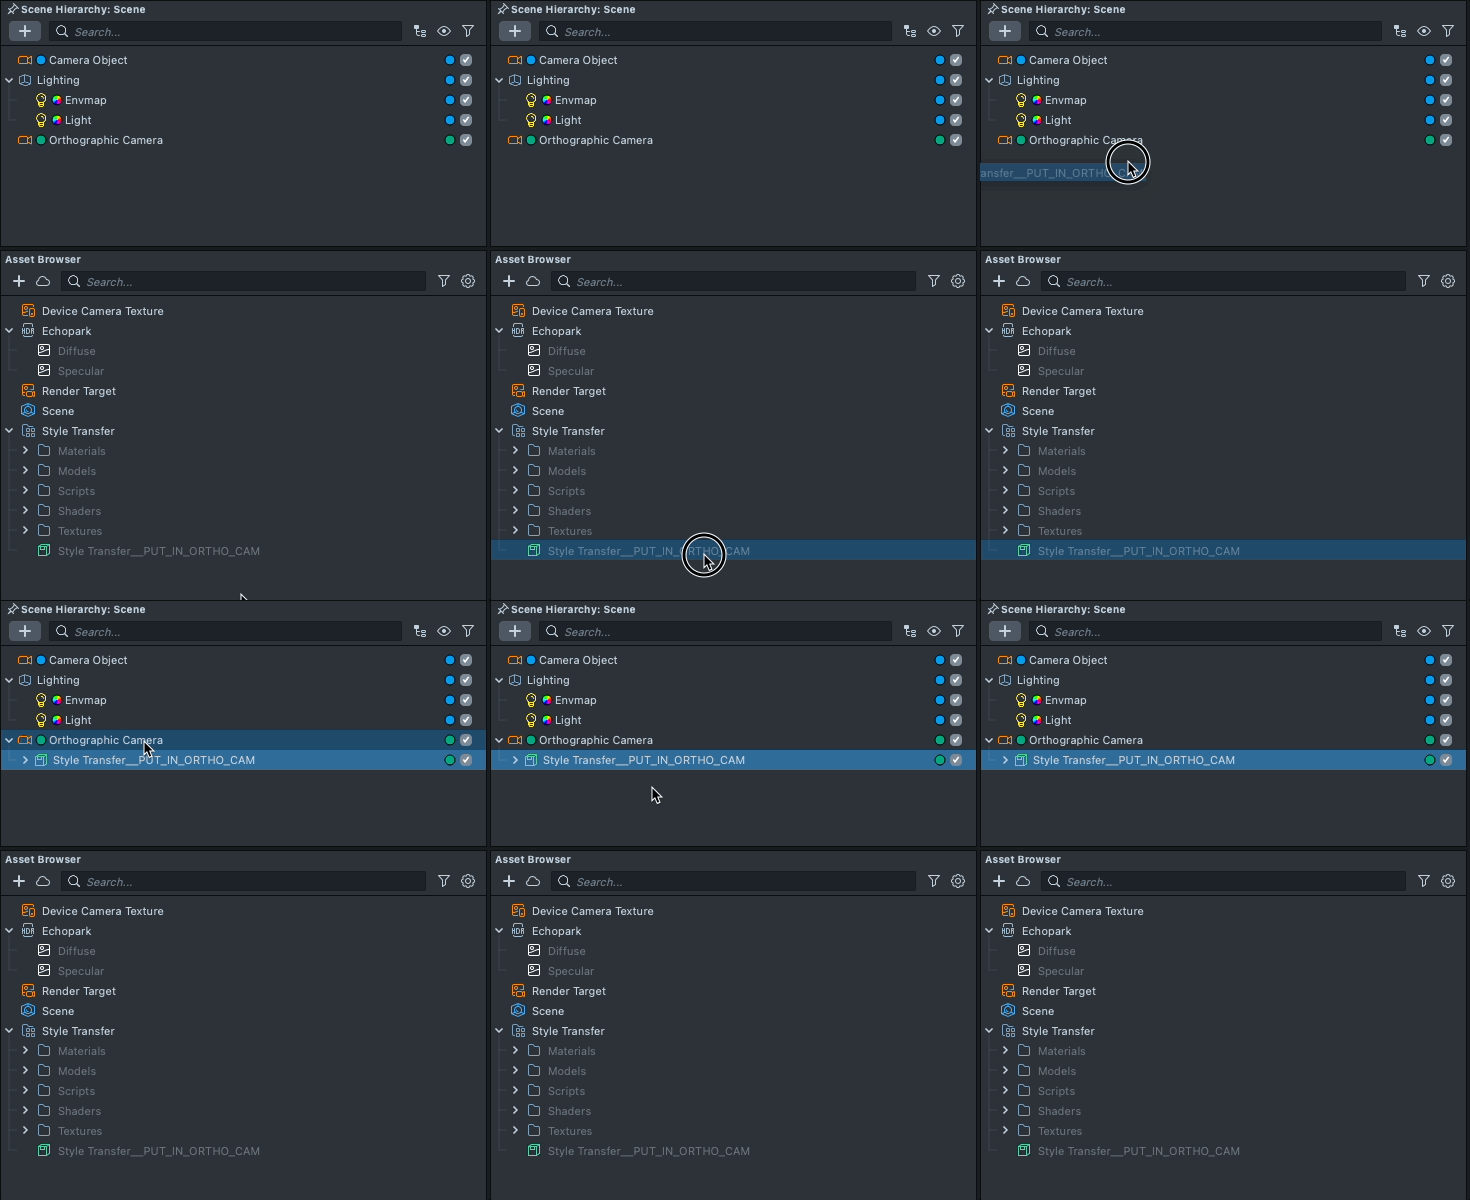
Once you import the asset from Asset Library, you can find the package in the Asset Browser panel. Follow the instructions and drag the prefab Style Transfer into Scene Hierarchy panel under an Orthographic camera to create a new Scene Object.
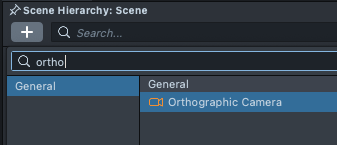
Orthographic Cameras are used to show effects on the screen. If you do not have one yet, you can press the + button in the Scene Hierarchy panel, and add the Orthographic Camera.
Importing your Model
Now we’ll import our model into Lens Studio.
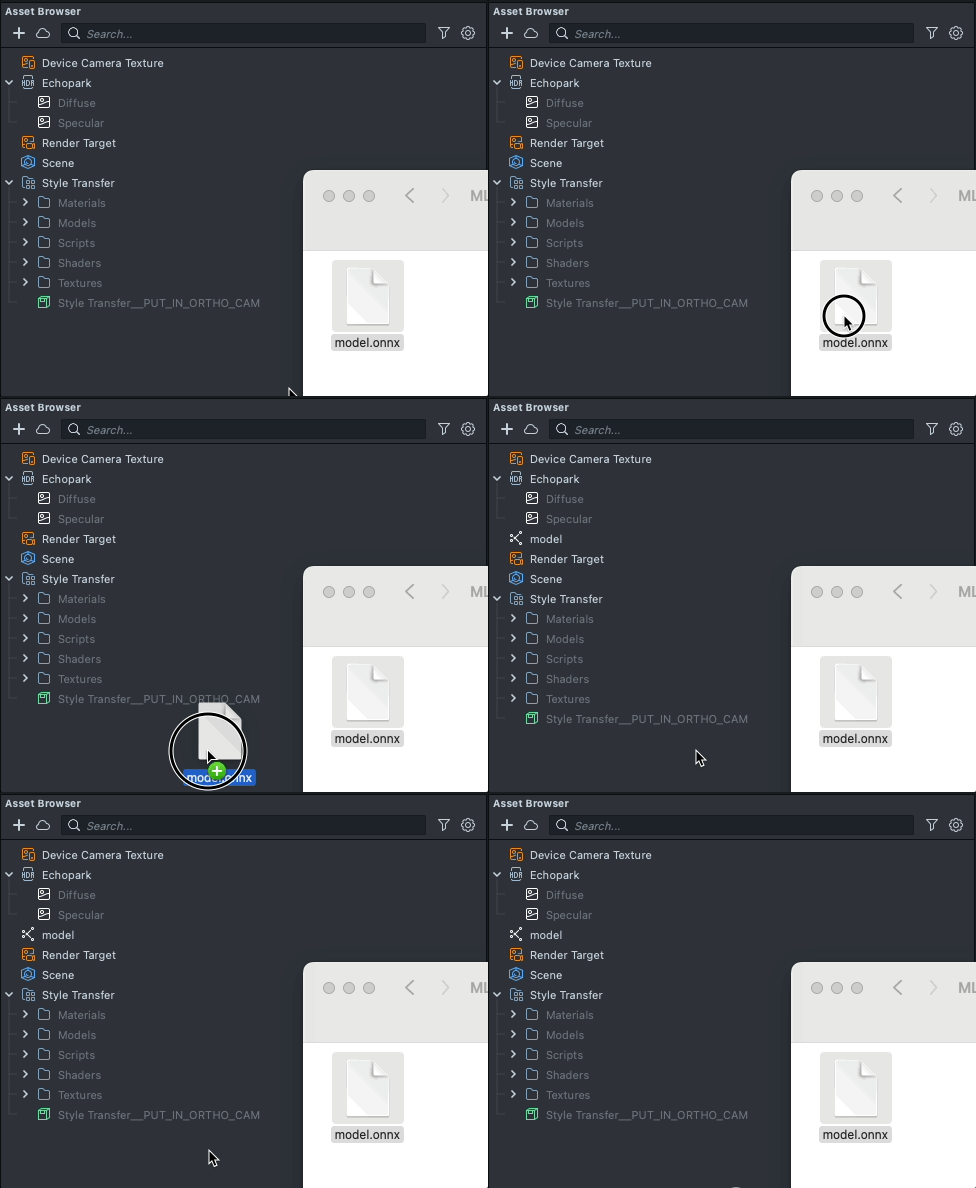
You can drag and drop your .ONNX file into the Asset Browser panel to bring it into Lens Studio.
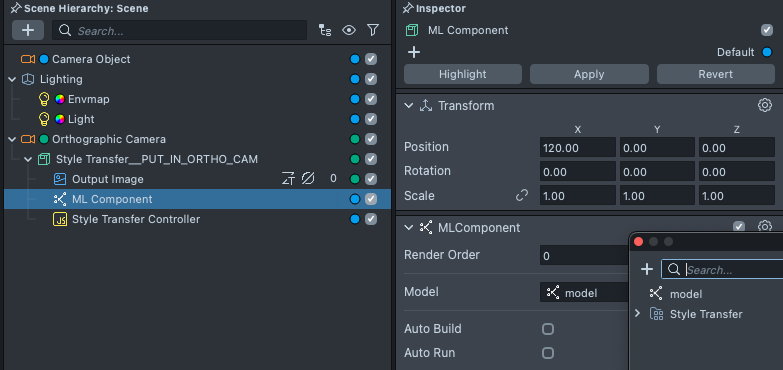
Next, we’ll tell the example to use this model. In the Scene Hierarchy panel, select ML Component. Then, in the Inspector panel, click on the field next to Model, and then in the pop up window, choose your newly imported model.
Connecting your Model
With our model hooked in, what we need to do now is to tell the Style Transfer Controller to connect to our Style Transfer model.
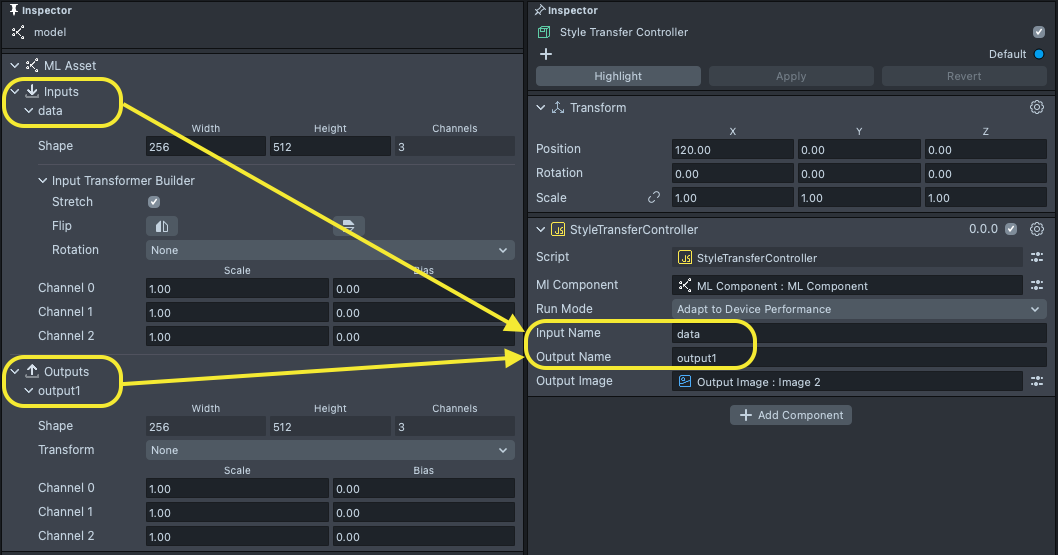
First, take a note of the input and output parameter in the ML Component. This should be the same as what the notebook has specified. Select the model in the Asset Browser panel, and in the Inspector panel, take note of its input and output.
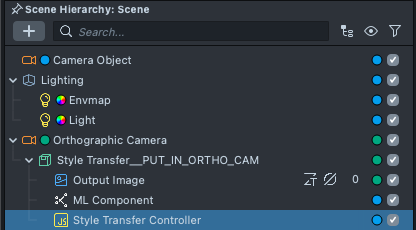
Then, select the Style Transfer Controller object in the Scene Hierarchy panel to modify how the style is controlled.
Next, in the Inspector panel, type in Input name and Output name as it is shown in the ML Component.
You should now see the Preview panel showing a result similar to what you saw earlier!
Customizing your Lens Experience
With your style transfer working, you can preview and publish your Lens! However, you can customize your Lens even more!
Changing Run mode
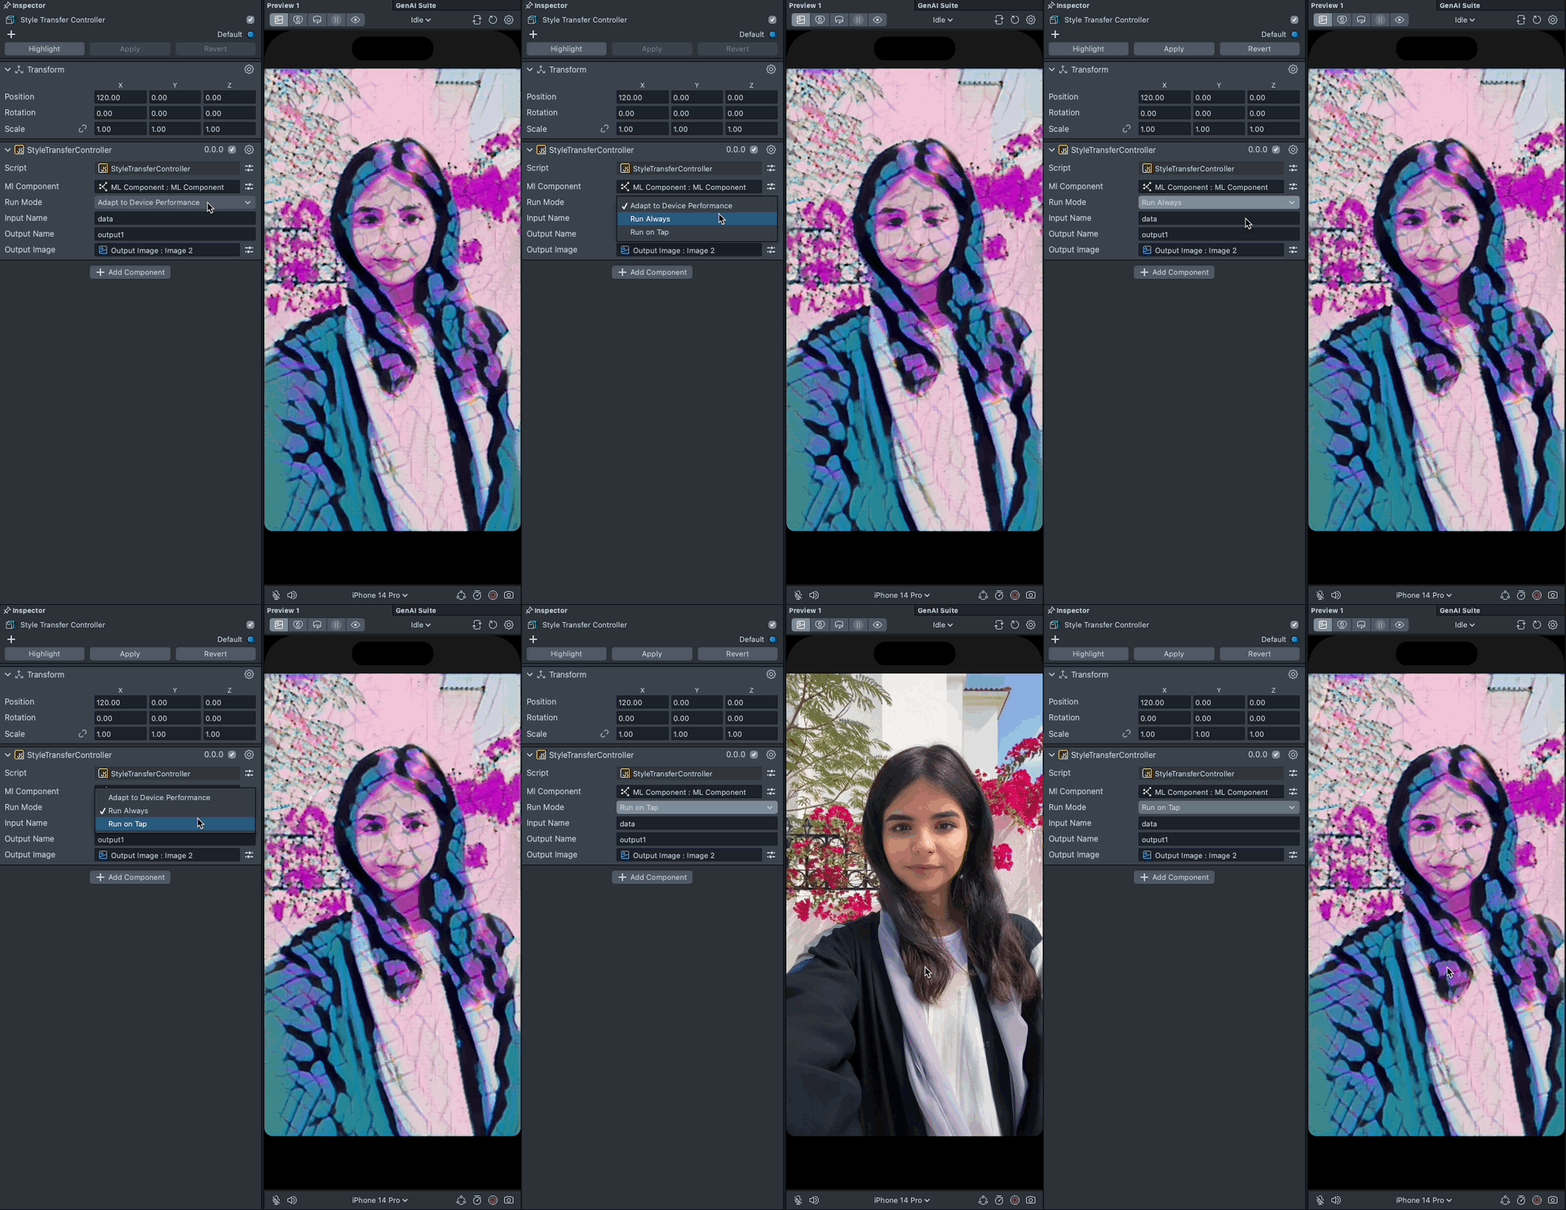
By default the Lens will adapt to running your model in real time or on demand depending on the device it is running on. This is the best option as it will try to optimize the Lens for your users.
To change this, select the Style Transfer Controller object in the Scene Hierarchy panel, and choose one of the options:
- Adapt to Device Performance: Depending on the device, the style transfer will run in Realtime or On Demand
- Realtime: Style transfer will run every frame on every device (may result in lower frame rate for some devices)
- Run on Demand: Style transfer will run when the user presses a button.
Changing Output Image
By default, the Style Transfer result is displayed as a full screen image. However, you may want to change how it is displayed. To change this, in the Scene Hierarchy panel, press the down arrow next to the Orthographic Camera, then Style Transfer Output, and finally select the Output Image. Then, in the Scene panel, you will be able to modify your Output image.
To learn more about laying out your image on the screen check out the Screen Transform guide.
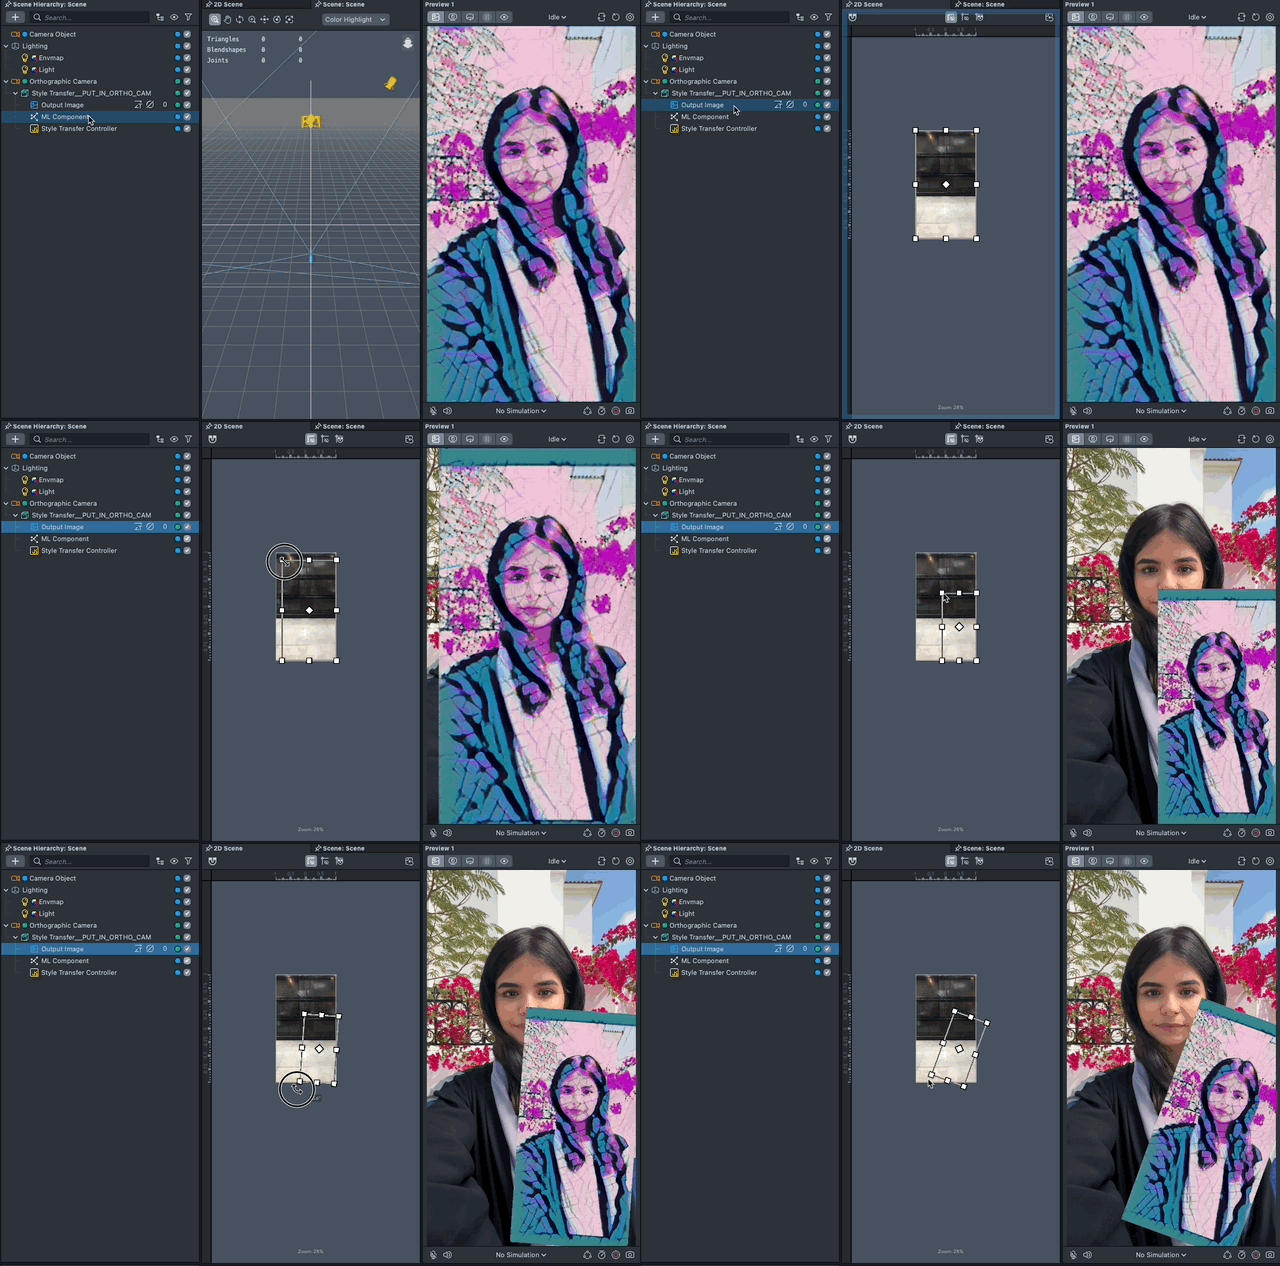
This image is referenced in the Style Transfer Controller in the Output Image field. You can set your own image in this field as well.
Previewing Your Lens
You’re now ready to preview your Lens! To preview your Lens in Snapchat, follow the Pairing to Snapchat guide.