Configuration
The Configuration Template utilizes the User Interface helper to create a Lens that can be modified by the Snapchatter on their phone. By allowing the Snapchatter to modify the parameters of their Lens, they can personalize the effects to their liking in real time.
The template demonstrates an example try-on Lens where users can modify a virtual hat, but you can also use it to allow the Snapchatters to control many different things like: the strength of a color filter, the augmentations they want, and more!
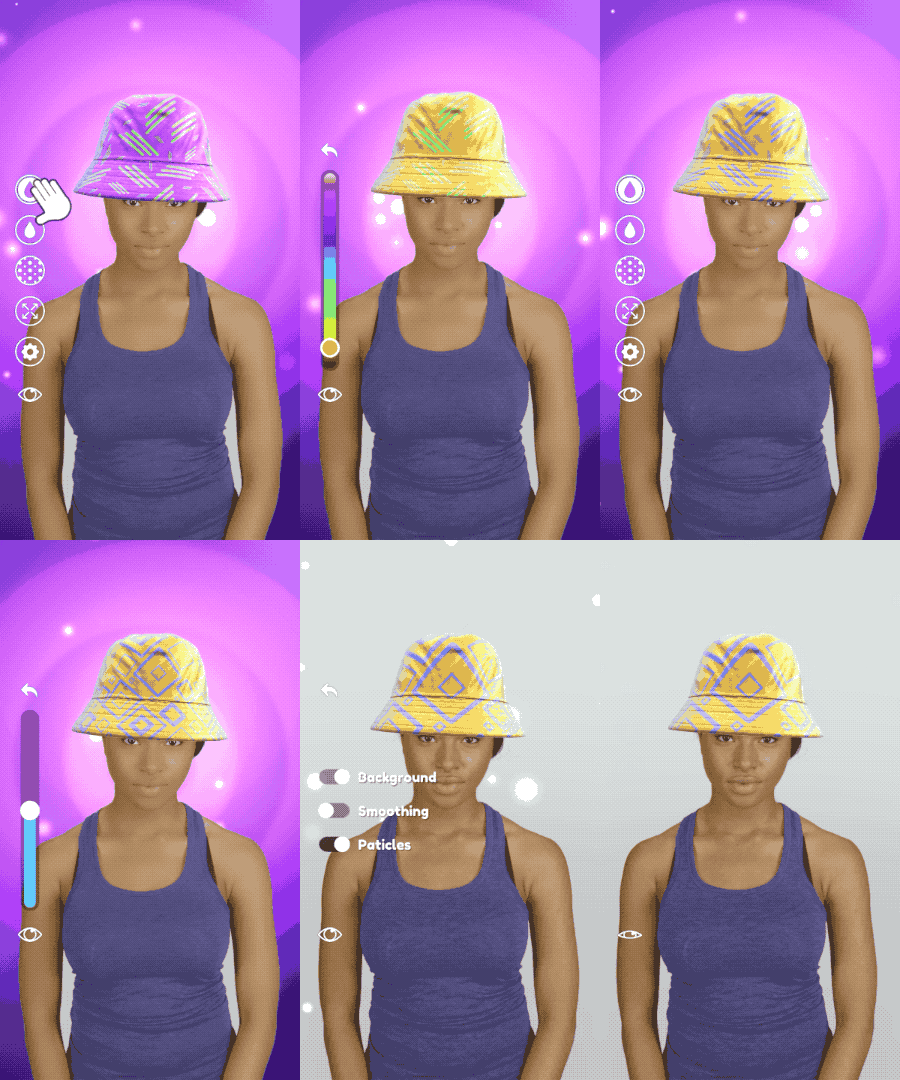
Tutorial
Guide
The Configuration template comes with several helpers and examples that can help you build your configurable Lens. Toggle the checkbox next to their name to try them.
- UI Widget Examples - Demonstrates all the helper UIs
- Panel With Layout Example - Demonstrates a layouting helper script
- Complex Menu Example - The UI setup used in the Try-on demo
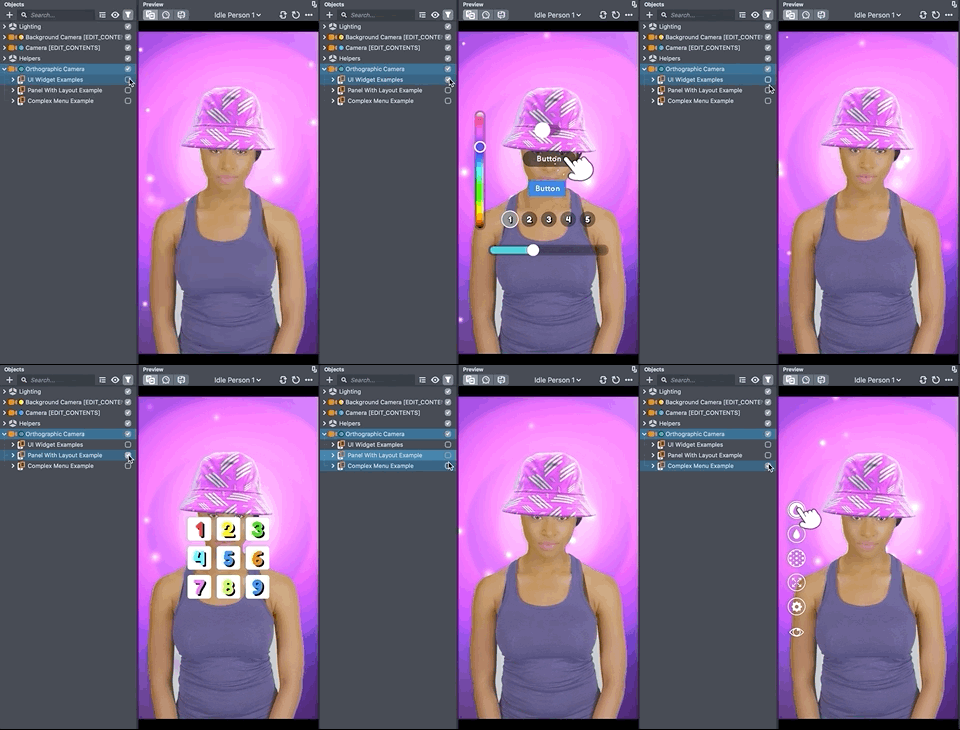
UI Widget Examples
This template is based on the UI helper script, which allows you to add custom UIs to your Lens and connect them to Behavior, or your own custom script. This example object provides you with a convenient way to access these different UIs. You can learn more about how it works in the User Interface guide.
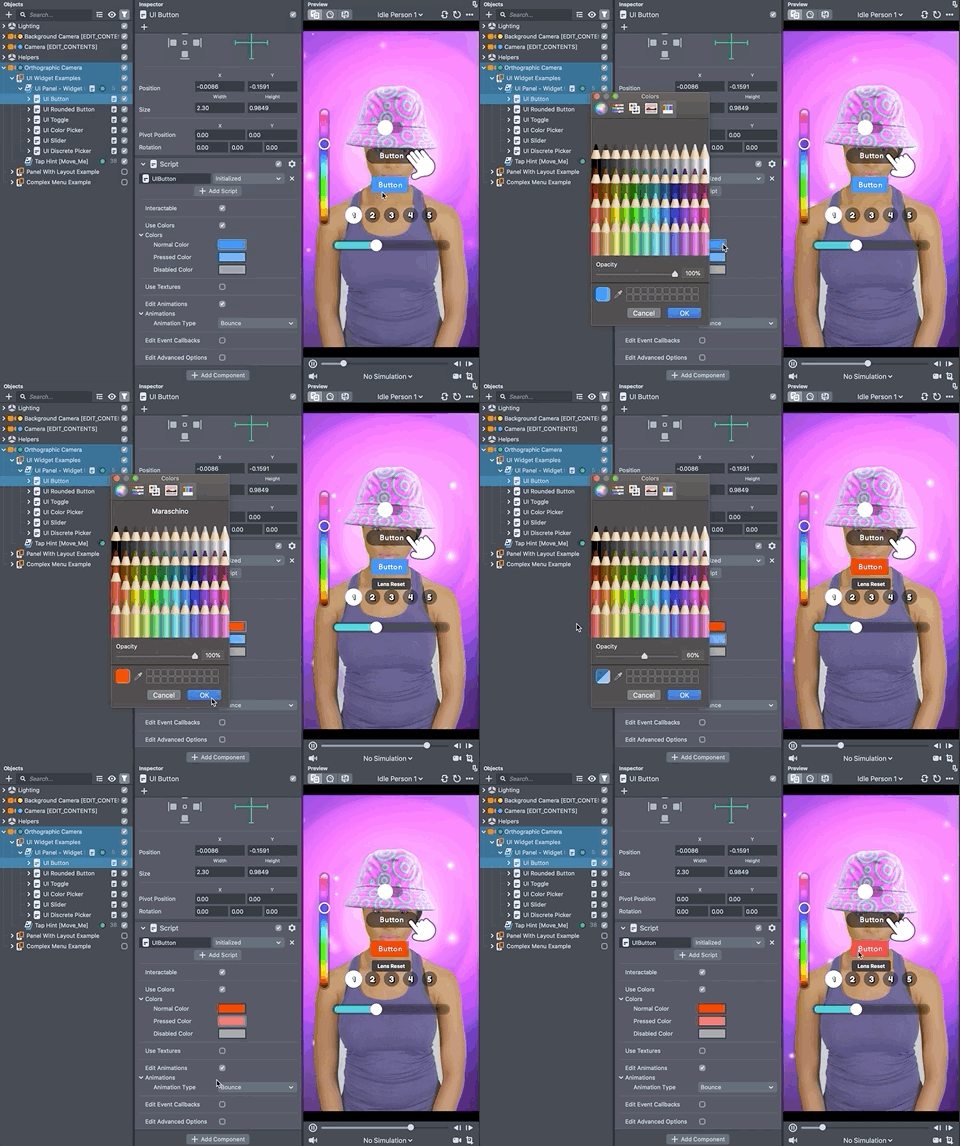
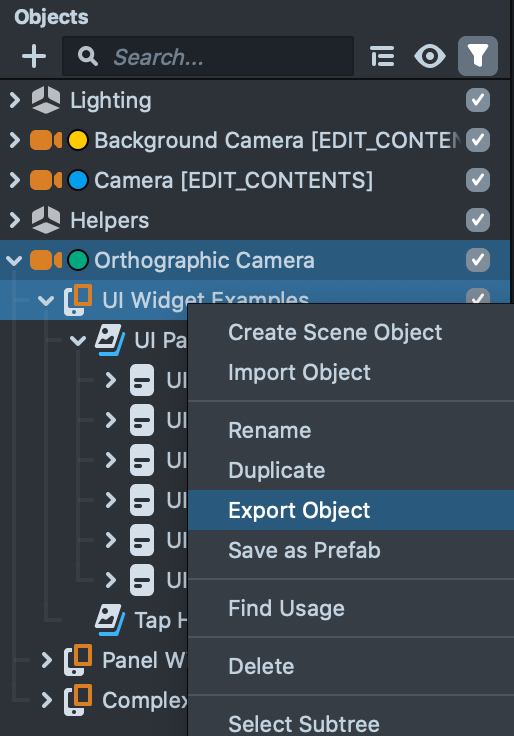
You can export any of the UI Panels to add UIs to your own Lens! To do this right-click on a UI Panel and press Export. Then in your project, right click on the Objects panel and press Import.
Panel With Layout Example
This example demonstrates the LayoutGrid helper script. This script automatically layouts any children object based on the properties listed in this script.
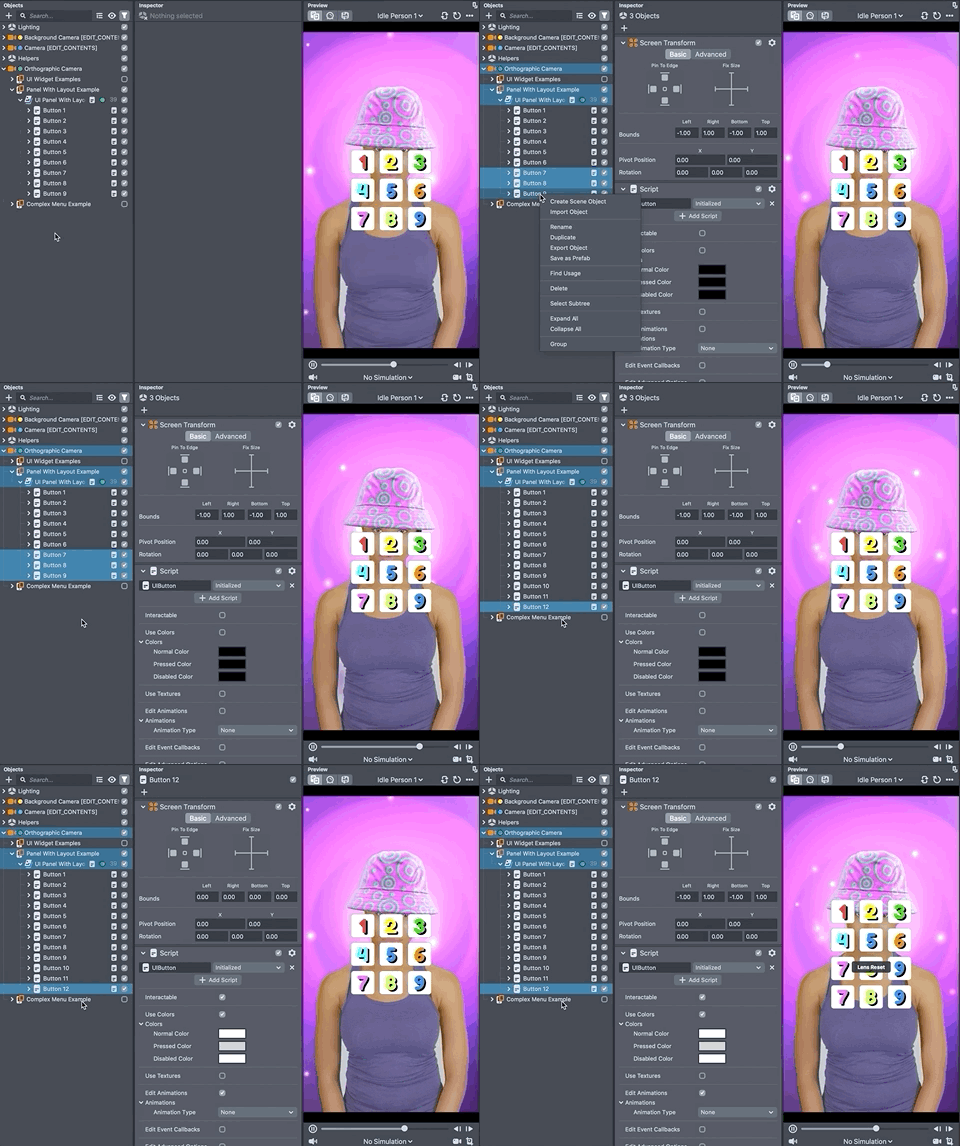
To modify the layout, select the UI Widget Examples object in the Objects panel. Then in the Inspector component, on the Layout Grid Script component, modify the values. Notice how the layout changes.
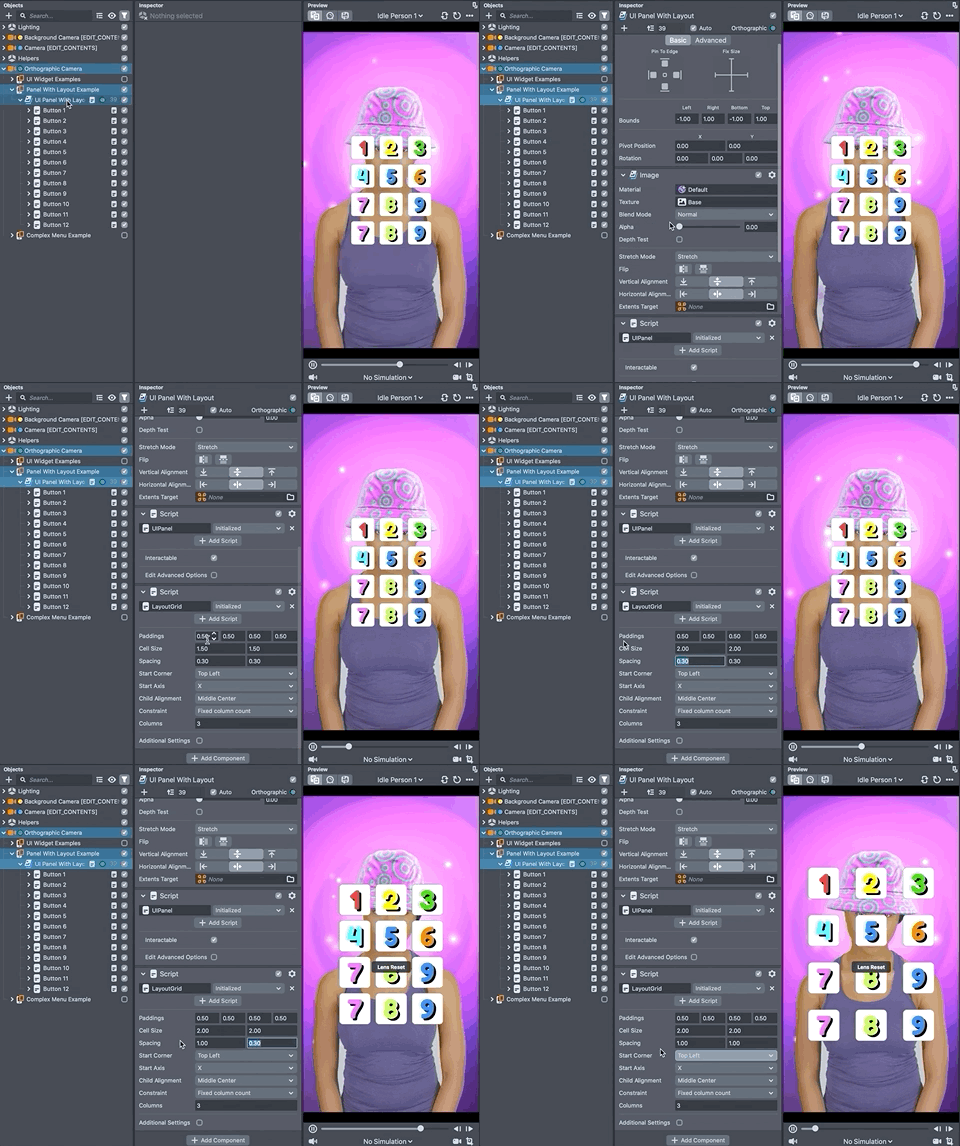
Try adding your own object under the UI Widget Examples object and see how it modifies the layout. By default all the objects are Buttons similar to the one found in the UI Widget Examples
This script is used in the Face Expression template to layout the large number of expressions available
Complex Menu Example
This example demonstrates how you can leverage the UI Widgets to create a customizable Lens.
This example has three parts:
- the visuals (screen images) which make up the UIs.
- the behavior that is triggered by said UIs.
- the augmented reality (AR) effects being modified by the widgets.
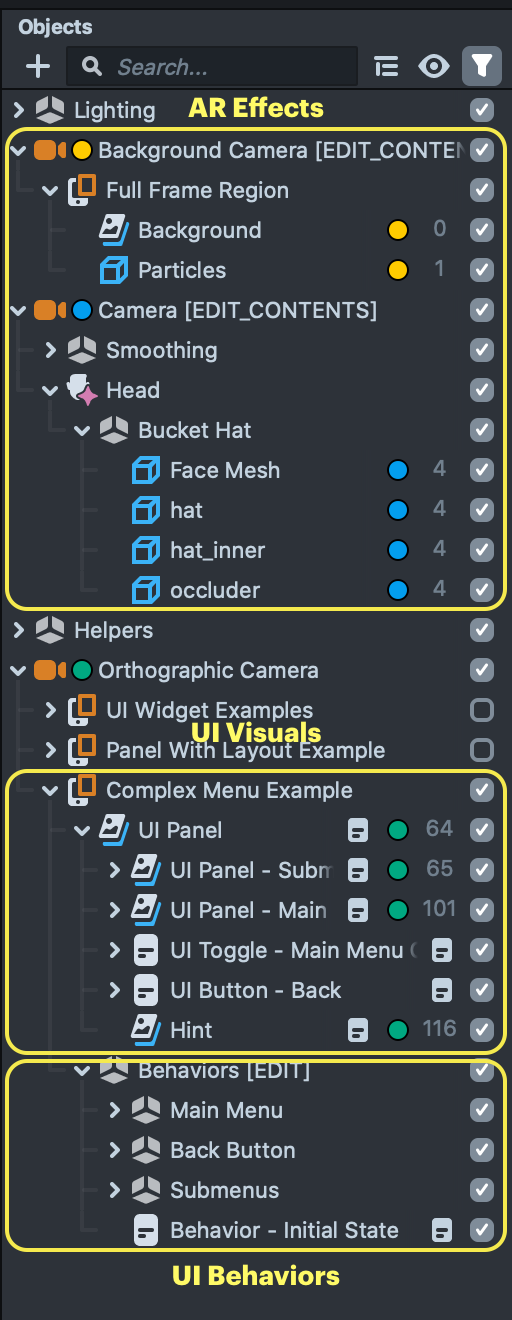
You can find the UIs and Behaviors underneath the Complex Menu Example, and you can find the effects under the objects labeled [EDIT_CONTENTS].
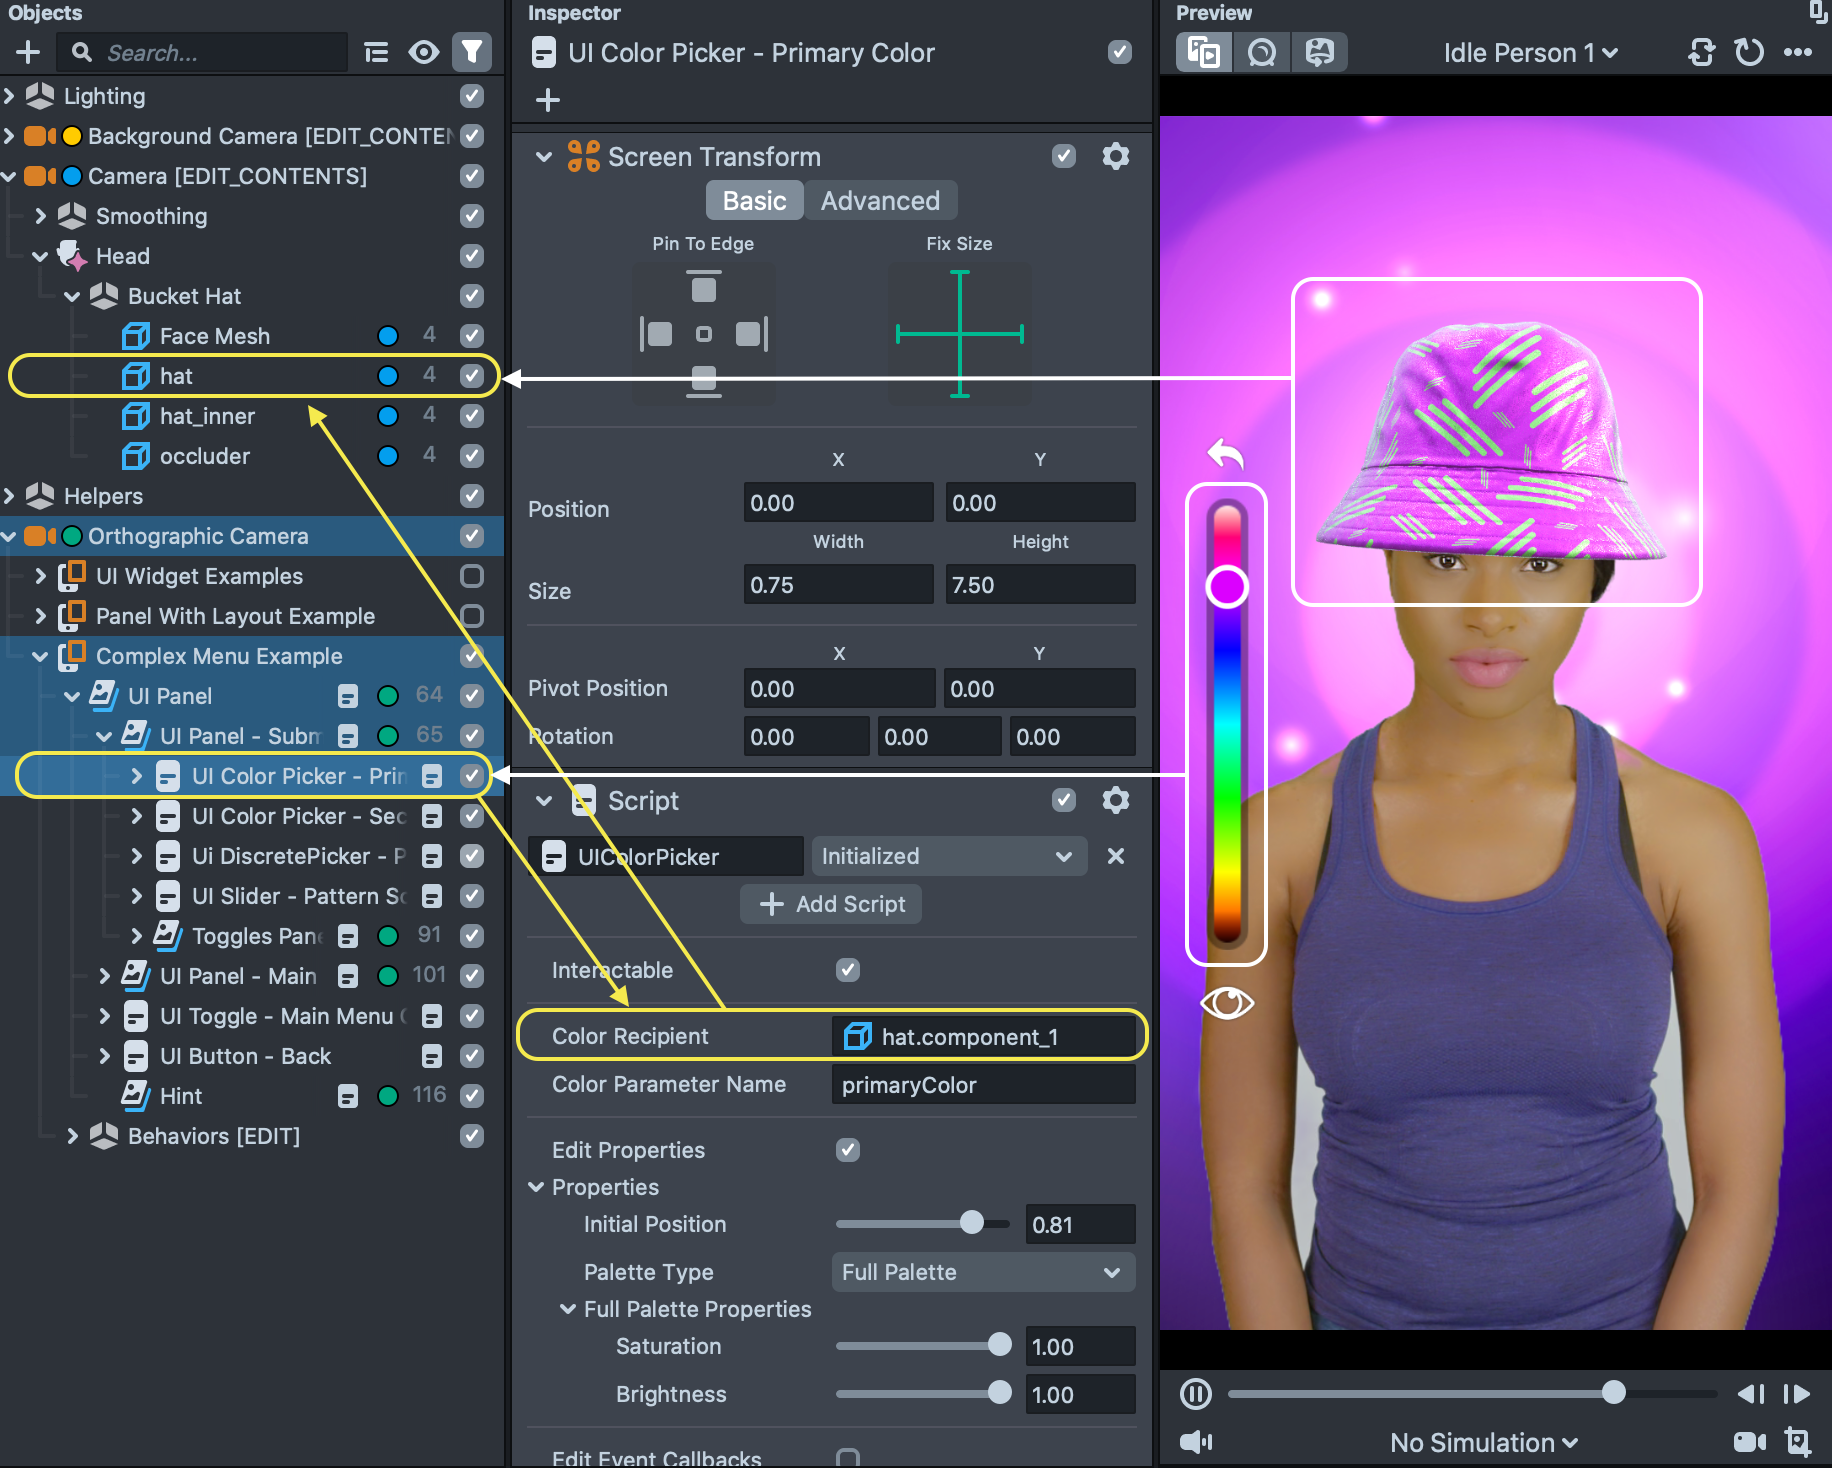
The UI Panels are sorted and separated logically underneath the UI Panel object. For example, the color picker used to change the hat’s color can be found under the UI Color Picker - Primary Color object. Clicking on the UI Color Picker - Primary Color you will find the same color picker helper object found in the UI Widget examples and you can modify it as such.
Some UIs trigger actions with the help of a Behavior. For example, take a look at the UI Toggle - Main Menu On/Off object. This button triggers a Behavior (such as HIDE_MAIN_MENU) which can be found underneath the Behaviors [EDIT] > Main Menu > Behavior - Hide Main Menu object.
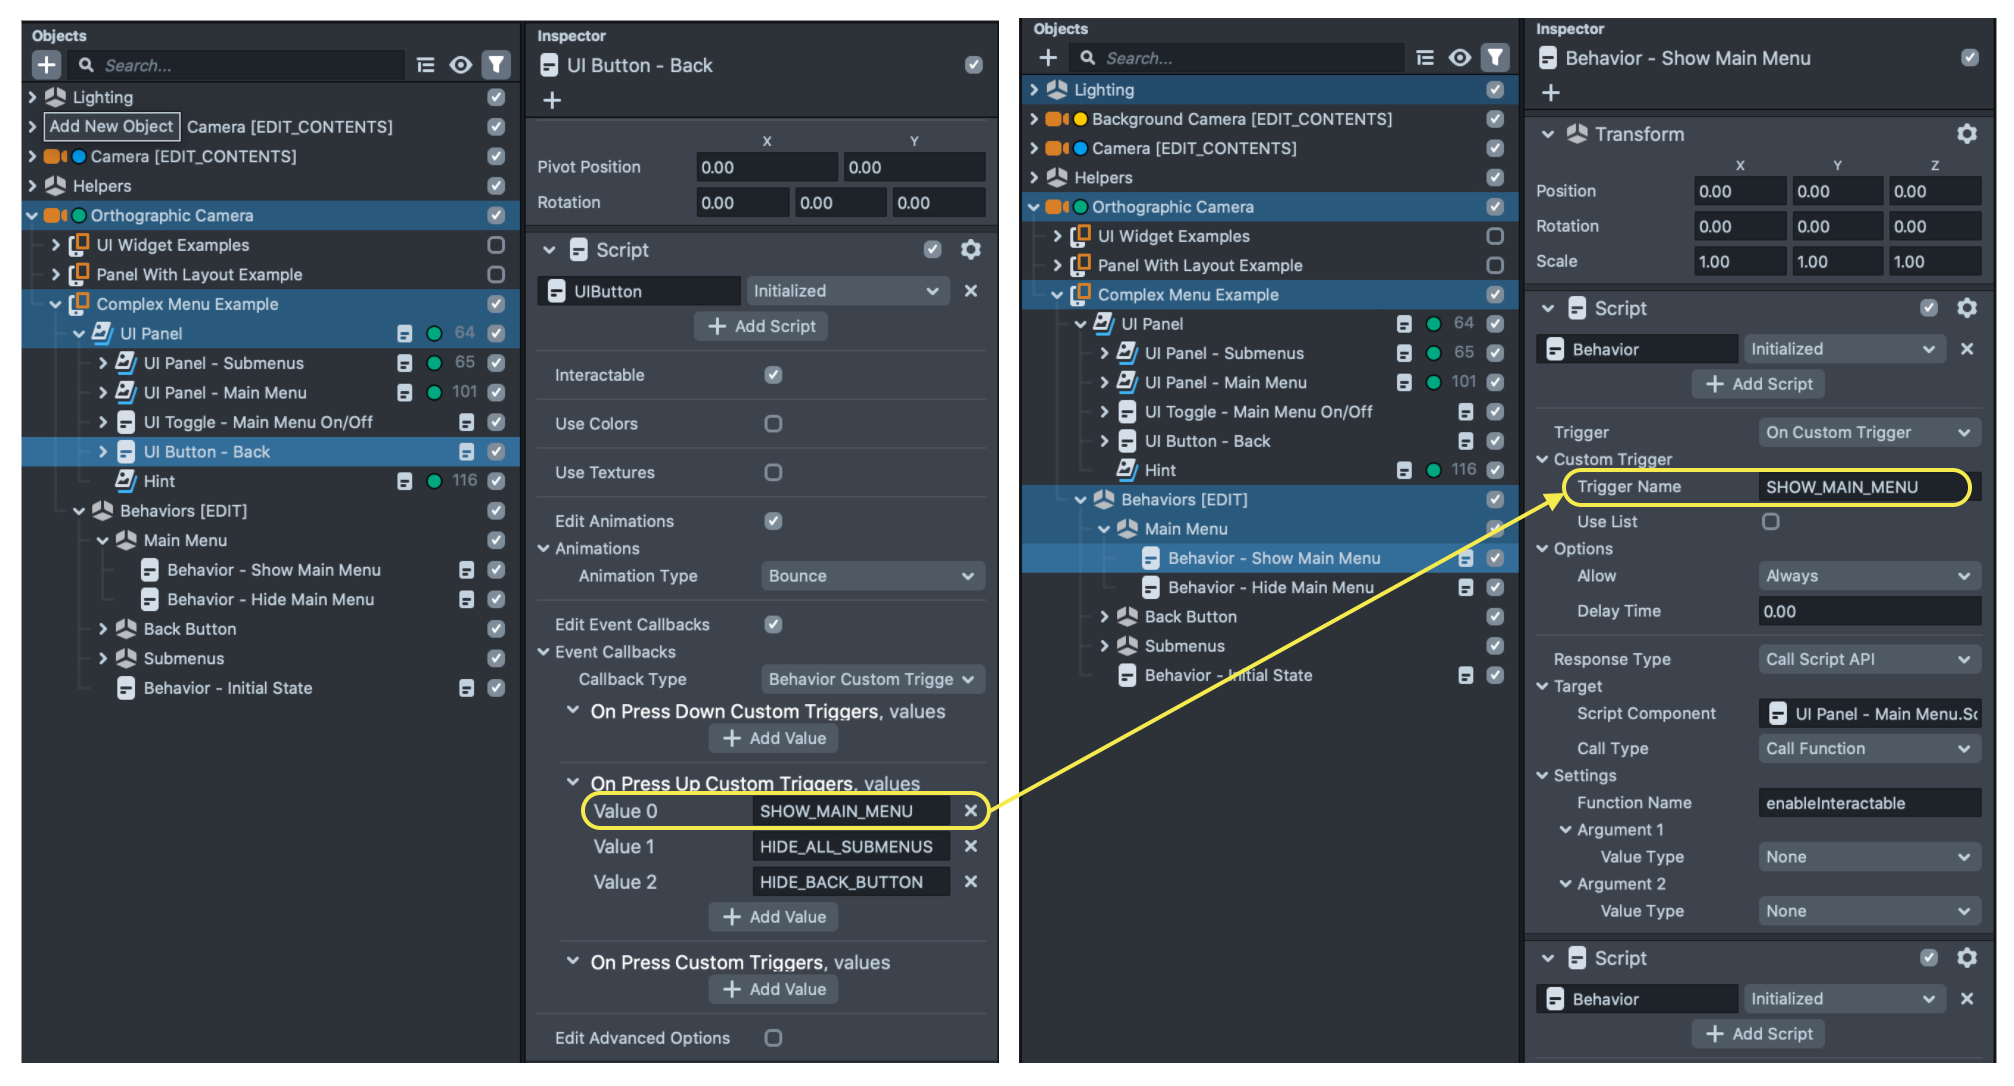
Take a look at the Behavior guide to learn more about what actions you can call using Behavior.
Some UIs trigger actions with the help of a custom script. For example, in the object UI DiscretePicker - Pattern , the discrete picker calls the function of a script found in the Custom Material Helper. If you open the CustomMaterialController script in the Resources panel, you will see that the script being referenced has the setPattern API which the discrete color picker is using to change the pattern of the hat!
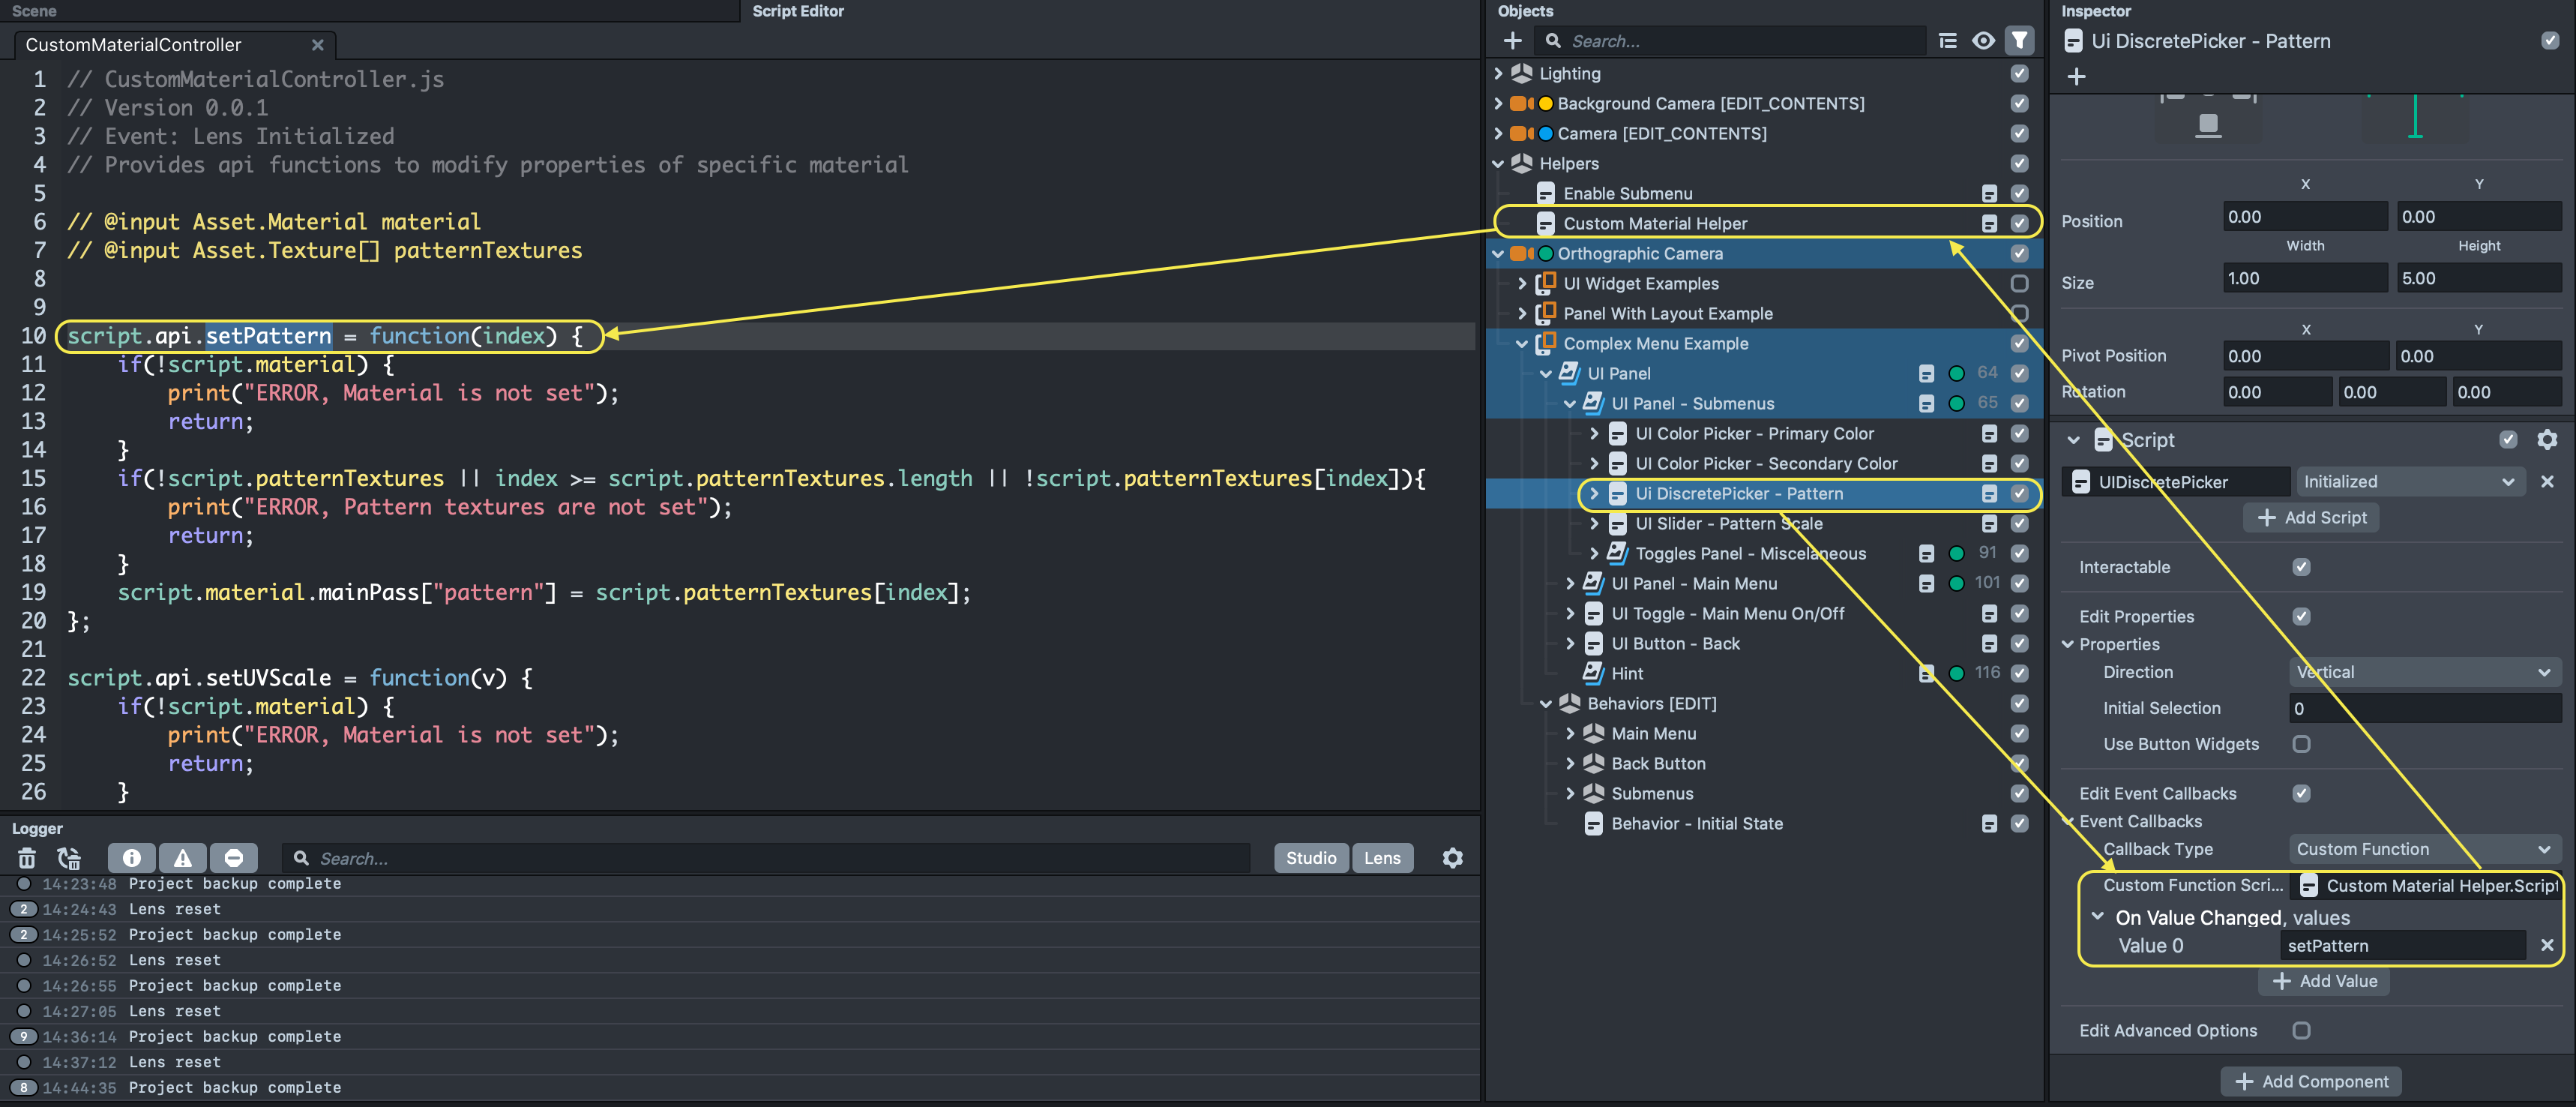
One way to easily discover the object being referenced is to right click the field next to Custom Function Script, and choose Select.
Try looking at the different UIs found in this example to see how they work together to create this customizable Lens. When you have a good feel of how they work, try customizing try making your own!
Previewing Your Lens
You're now ready to preview your Face Lens. To preview your Lens in Snapchat, follow the Pairing to Snapchat guide.
Related Guides
Please refer to the guides below for additional information: