Preview Your Lenses on Device
Overview
Lenses in development can be previewed directly in your Camera Kit integration using the Push-to-Device feature. Once implemented in your Camera Kit app, the testing and workflow for the Lens will follow that of the traditional Send to Snapchat process that Lens developers are familiar with. This feature requires Login Kit integration which is outlined below. Note that this feature should not be shipped to end-users, as it is meant for Lens development only.
Push-to-Device for Sample Apps
Refer to the provided sample projects for step-by-step guidance on adding Push-to-Device support.
Configure SnapKit Portal
First you will need to ensure that your Camera Kit application and Snapchat accounts are setup to use Login Kit:
Add Accounts as Demo Users
- Open
kit.snapchat.com - Scroll down to Demo Users
- Add any Snapchat usernames that will be used to test the Lenses in your app
Enable Login Kit and add Redirect URIs
- On
kit.snapchat.comselect the version of your app you are adding Push-to-Device to. - Scroll down and enable Login Kit by selecting the Toggle
- Under
Redirect URIs for OAuthsection of Login Kit, add the URIs which you will later configure in your app as well. For example, add myapp://snap-kit/oauth2 in the text box and click on + Add URI button on the right.
Android
Push-to-Device Integration
-
Add the Push-to-Device extension and Login Kit dependency to your build configuration.
debugImplementation "com.snap.camerakit:camerakit-extension-lens-push-to-device:$cameraKitVersion"
debugImplementation "com.snap.camerakit:camerakit-extension-auth-token-provider-loginkit:$cameraKitVersion" -
Add the following array where scopes are requested, typically under
/res/values/arrays.xmlfile. The below example includes the scope required for Push-to-Device. [Optional] You can learn more about Login Kit scopes here<array name="snap_kit_scopes">
<item>https://auth.snapchat.com/oauth2/api/camkit_lens_push_to_device</item>
</array> -
You can either hardcode values directly in
AndroidManifest.xmlfile or defineloginKitClientId,loginKitRedirectUri,loginKitScheme,loginKitHost, andloginKitPathin your application'smanifestPlaceholdersto be later referenced inAndroidManifest.xmlfile (if hardcoding then fill outandroid:valuefields of step 4 and skip below code). The information for these fields can be retrieved and/or configured from the Snap Kit portal.manifestPlaceholders = [
...
loginKitClientId : <fill_in>, //same as Public OAuth 2.0 Client ID under Staging on Snap Kit portal
loginKitRedirectUri : <fill_in>, //eg. myapp://snap-kit/oauth2 , this must match with the Snap Kit portal entry under Redirect URIs for OAuth
loginKitScheme : <fill_in>, //eg. myapp
loginKitHost : <fill_in>, //eg. snap-kit
loginKitPath : <fill_in>, //eg. /oauth2
] -
In your application's
AndroidManifest.xml, add the followingmeta-datafields under the<application>tag. Also, add a newSnapKitActivityactivity to handle Login Kit redirect. This allows your application to properly receive auth results.- Add the following metadata:
<meta-data
    android:name="com.snap.kit.clientId"
    android:value="${loginKitClientId}"
    />
<meta-data
    android:name="com.snap.kit.redirectUrl"
    android:value="${loginKitRedirectUri}"
    />
<meta-data
    android:name="com.snap.kit.scopes"
    android:resource="@array/snap_kit_scopes"
/>- Add new
com.snap.corekit.SnapKitActivity:
<activity
  android:name="com.snap.corekit.SnapKitActivity"
  android:launchMode="singleTask"
  android:exported="true" >

  <intent-filter>
      <action android:name="android.intent.action.VIEW" />

      <category android:name="android.intent.category.DEFAULT" />
      <category android:name="android.intent.category.BROWSABLE" />
      <!--
           Enter the parts of your redirect uri which you configured on Snap Kit portal
           e.g., if your redirect uri is myapp://snap-kit/oauth2
               android:scheme="myapp"
               android:host="snap-kit"
               android:path="/oauth2"
      !-->
      <data
          android:scheme="${loginKitScheme}"
          android:host="${loginKitHost}"
          android:path="${loginKitPath}" />
  </intent-filter>
</activity> -
Now you can use Login Kit as such:
val loginKitAuthTokenProvider = LoginKitAuthTokenProvider(applicationContext)
-
Configure the Push-to-Device extension using either the
scopedorunscopedAPI.-
Use the
scopedAPI if you have theLensesComponent.Buildercontext:configureLenses {
configurePushToDevice {
authTokenProvider(loginKitAuthTokenProvider)
}
} -
Use the
unscopedAPI if you do not have theLensesComponent.Buildercontext:val globalConfigurationCloseable = LensPushToDeviceService.configure {
authTokenProvider(loginKitAuthTokenProvider)
}
-
-
Subscribe for the Push-to-Device Lens groupId:
private val LENS_GROUPS = arrayOf(
    LensPushToDeviceService.LENS_GROUP_ID
)
Push-to-Device Workflow
- Once Push-to-Device and Login Kit are integrated, you should see a new movable floating icon in your app:
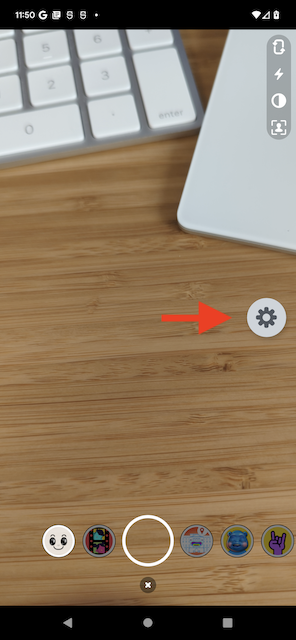
- Tap the icon to bring up the Push-to-Device menu, which can be used to start the pairing process:
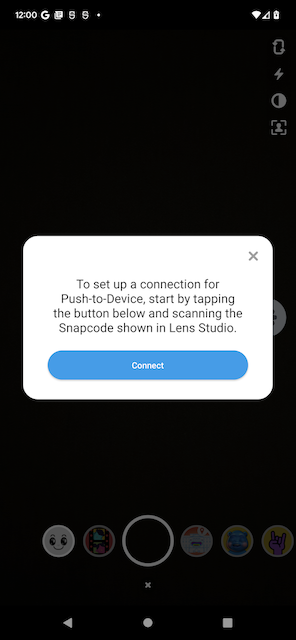
- Scan the Snapcode presented by Lens Studio after you click on Pair Snapchat account:

-
Enter the Snap credentials, and then pairing should succeed. Push-to-Device floating icon should turn green to indicate success.
-
When you are ready to test your Lens, kick off the push flow from Lens Studio:

Troubleshooting
I tapped connect\gear icon, but nothing happens
- After tapping connect\gear, you should see the icon change to a purple scanning icon. Make sure to point your camera at Lens Studio's Snapcode to scan it. Request will timeout in 10 seconds. You have to restart the connection flow if it timeouts by tapping the icon again.
Failure when attempting to log in
- Make sure your device has internet connectivity.
- Make sure you have added your username to the
Demo Userslist onkit.snapchat.com/manage/apps/<your-app-id>. - Make sure you have added redirect URI on Snap Kit portal as well as in your app correctly.
I tried to push a Lens, but nothing is received on my device
- Make sure that your device has internet connectivity.
- Ensure that you have paired successfully. The Push-to-Device icon should be a green gear icon.
- If pairing is successful, tap on the gear icon to see if any error occurred. This may happen sometimes, for example when Lens Studio and your Camera Kit application versions are incompatible.
- If the push succeeded (for example, system notification) but the Lens is not showing up in your carousel, ensure that your application is subscribed to
LensPushToDeviceService.LENS_GROUP_ID
I don't see the Push-To-Device icon
- Currently Push-to-Device is only supported if your application uses the built-in Lenses carousel.
How do I log out and use another Snap account for Push-to-Device?
- Clear your app's storage. Then:
- If auth was via web browser, clear its cookies. If you have multiple browsers installed, make sure to clear the correct one.
- If auth was via the Snapchat app, log out of the original account and log in to the new account that you want to use.