Body Segmentation
The Body Segmentation Template provides several examples of using segmentation texture to create different visual effects. The template comes with different Graph Material examples that you can use, modify or mix and match. It also gives examples of couple interactive experiences.
Tutorial
Guide
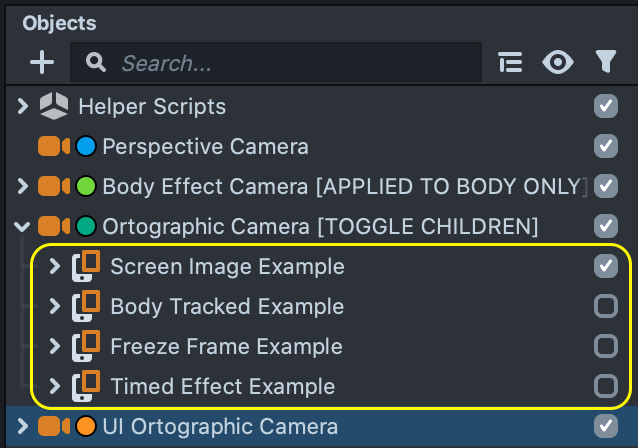
The Body Segmentation template contains several examples on how you can utilize the Body Segmentation texture. You can enable or disable each example by pressing on the Checkbox next to them in the Objects panel.
We will go through each example in the sections below.
Screen Image Example
Lets expand the Screen Image Example [START HERE] object's children. You can think of this example as a collage, where each screen image is placed on the top of another.
Try to select an object in the Objects panel and drag them in the Scene panel.
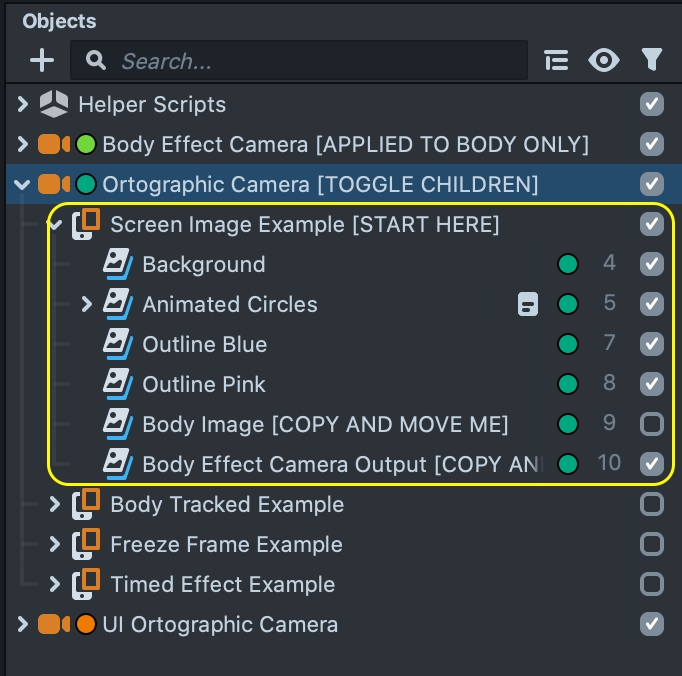
Two of the children here are different from others as they contain special textures that displays the body:
- Body Image - is an image created by masking a camera input with the Segmentation Texture
- Body Effect Camera Output - is using default material and
Render Targetof aBody Cameraas a texture to allow us to modify the Body Image before displaying it.
Let’s look deeper into how the Body Camera and Render Target works.
At the top of the Objects panel, there is a Body Camera which renders to the Body Render Target. It is a helper camera that allows us to apply some effects only to the user body.
Try adding more Post Effects from the Objects Panel and see how it affects the result in the Preview. After adding new post effects drag and drop them under the Body Effect Camera.
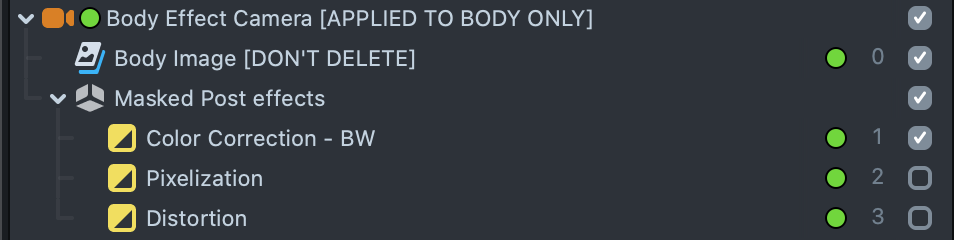
Make sure that the effects have the same Render Layer as your camera.
You can also duplicate a Body Image orBody Effect Camera Output and place them on the screen to create copies of a person in the video!
We are mostly using Screen Images (Full screen) and Post effects with segmentation texture since they both create full screen experiences.
Body Tracked Example
Another way to use the segmentation mask is to cut out things so that they show up behind the user. Let’s expand the children of a Body Tracked exampleand find a Right Wing to see an example.
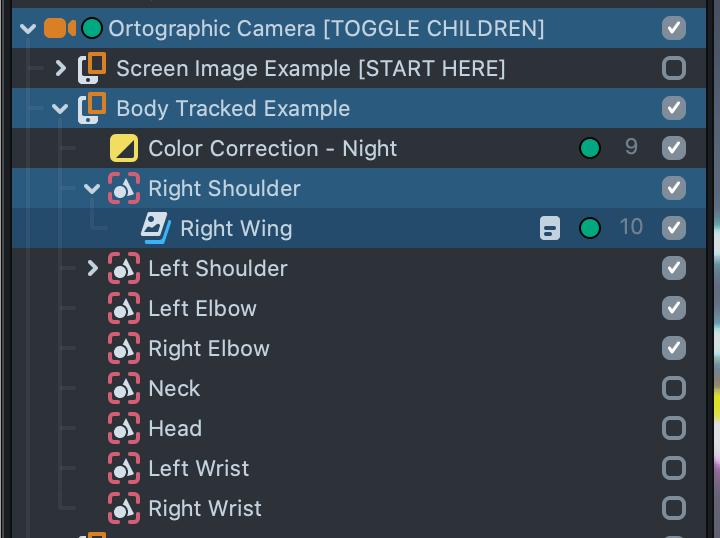
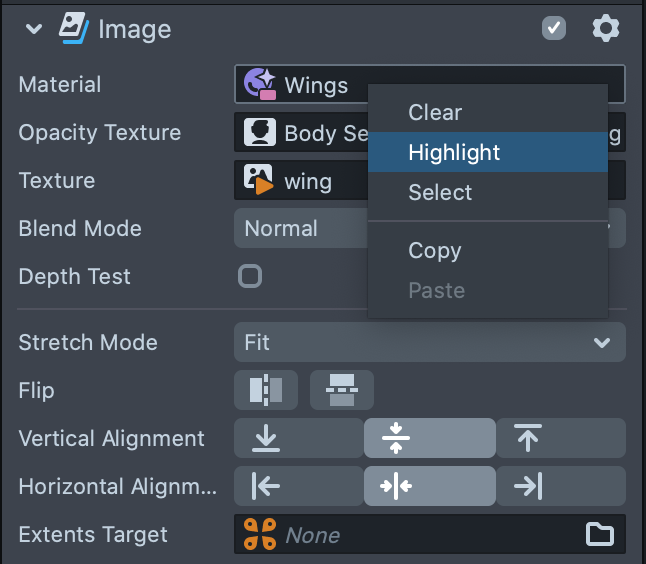
In the Inspector panel, see the Image component displaying the wings seen in the preview. Notice that this object has a texture Wing, as well as an Opacity Texture`` Body Segmentation. In other words, this object displays the wing image, which is cut out by the body.
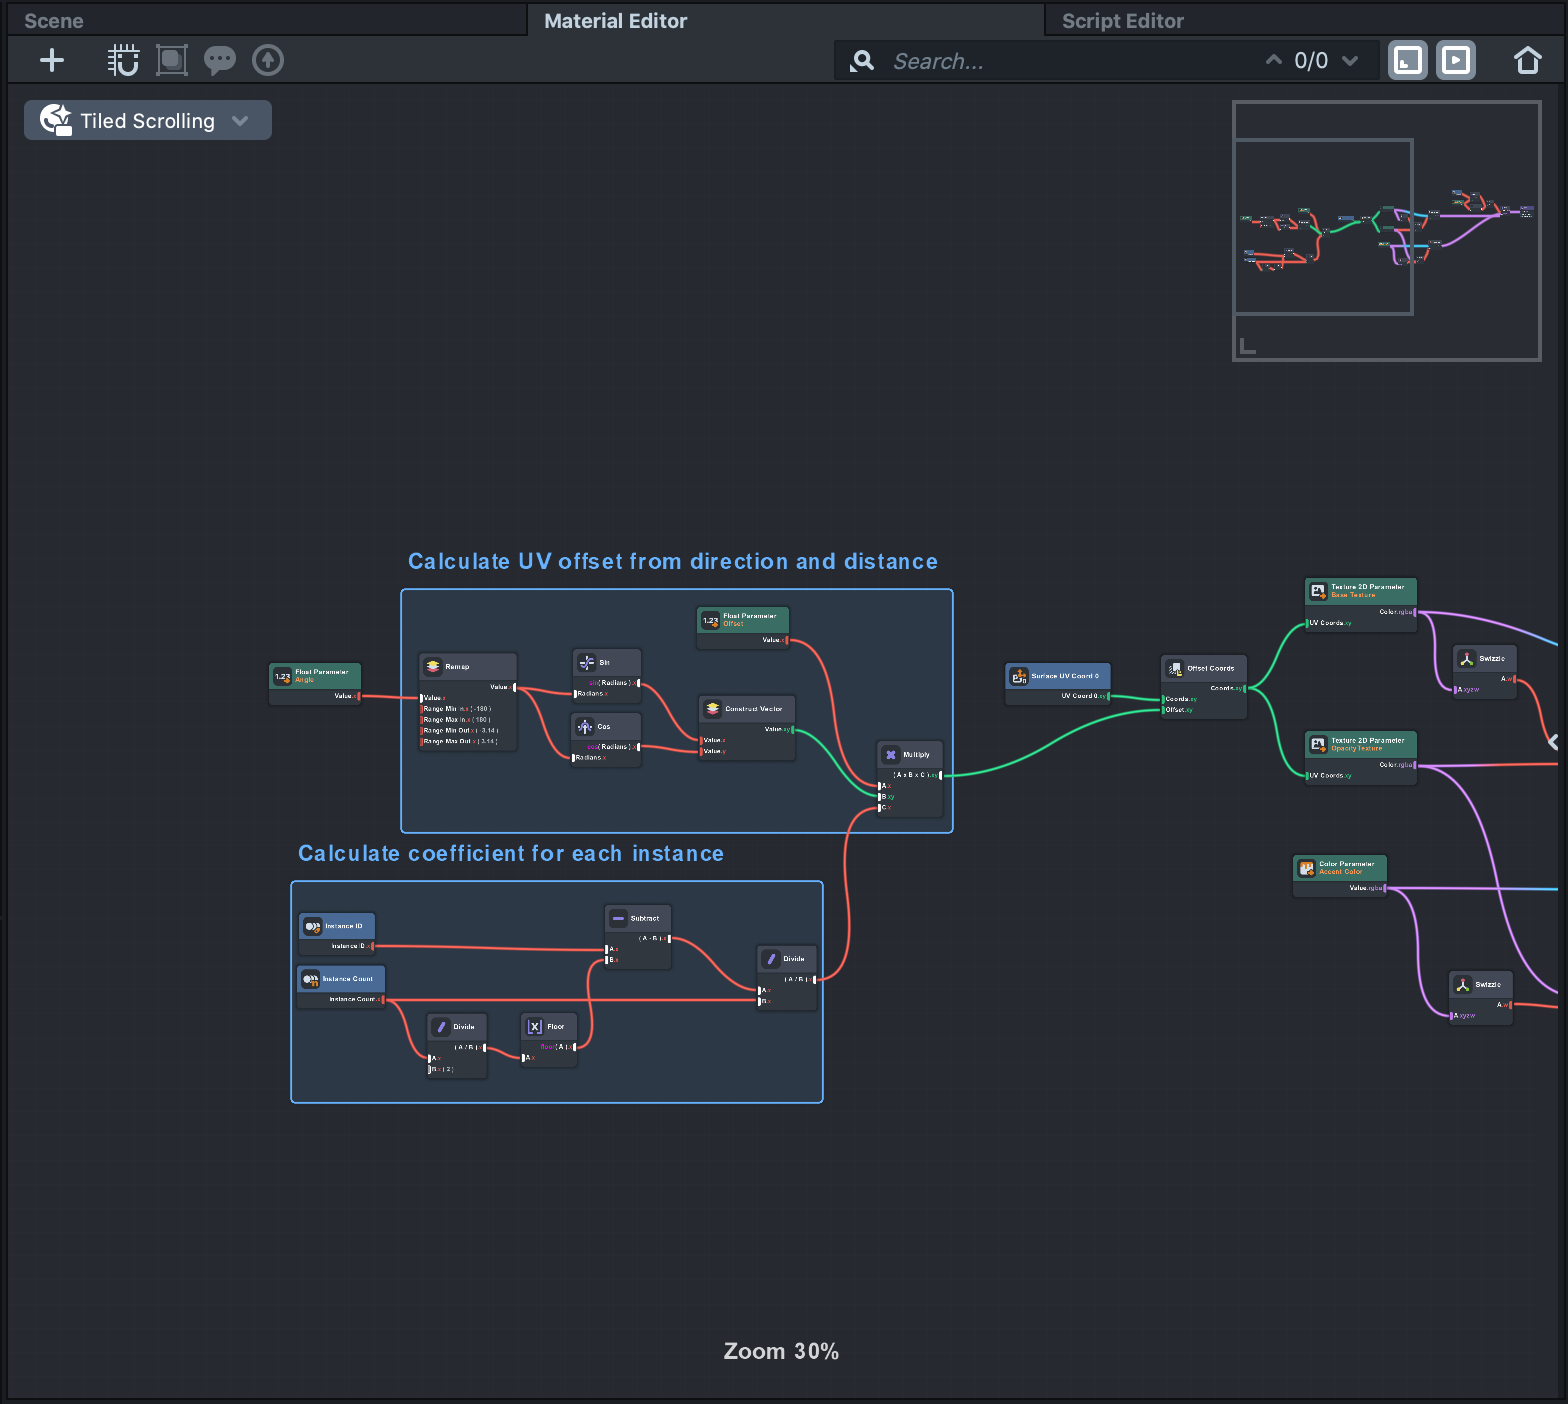
You can dive deeper into how this cut out work by opening the material. Right click on the Material input field of the Image component and select Highlight. Then double click on the selected Material to open Material Editor.
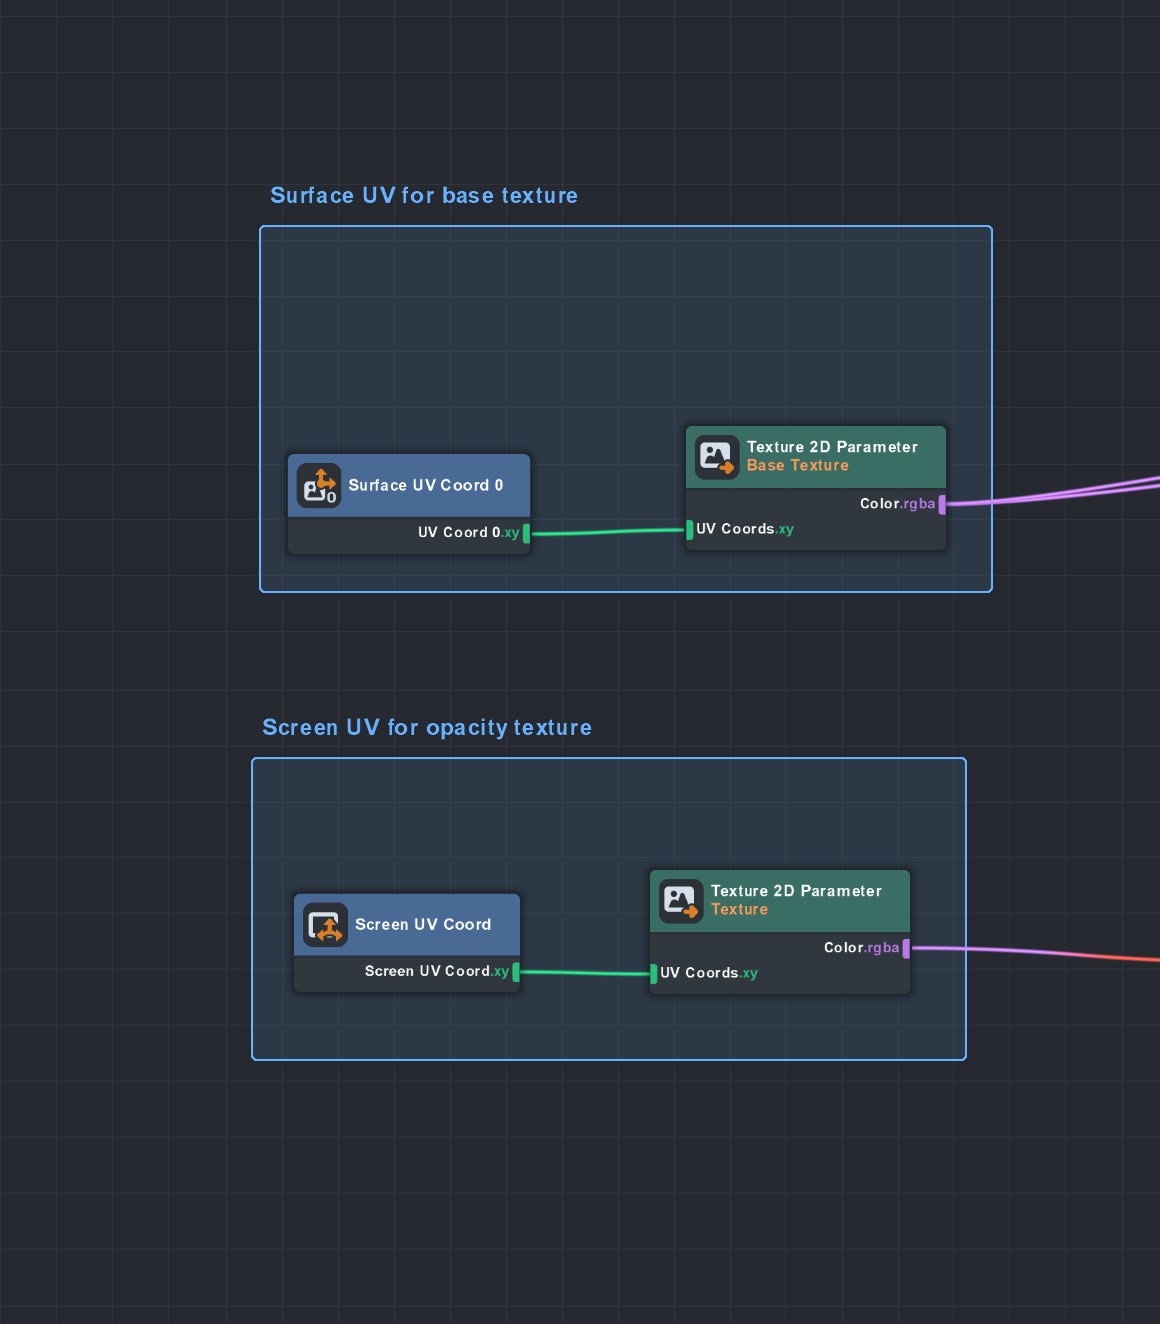
Notice how the two textures are combined to form the final result. Notice also, that they use two different UV coordinates to display the texture. The Base Texture uses the Surface Coord, since we want the texture to be displayed on the Image component, whereas the Opacity Texture uses the Screen Coord, since the segmentation texture is of the whole screen.
Learn more about how materials are created in the Material Editor guide.
Let’s now make another Screen Image like this. On the Objects panel select the BodyTracked Example scene object. Then press “+” -> Screen Image. Then let’s make a copy of a wing material and call in Circle Mat. Now assign this material by dragging and popping it to the Material field of the newly created Screen Image. Drag and drop a texture of choice.
Now as we drag the screen image on the screen, you can see how it is being masked. The circle moves with the Screen Image, but the Opacity Mask stays the same. Lastly, you can change the order of composition by changing the order of objects in the Objects panel.
This example contains a RotateTowardsTarget script which allows you to rotate your images towards another object (in this case it moves the wing based on the elbow
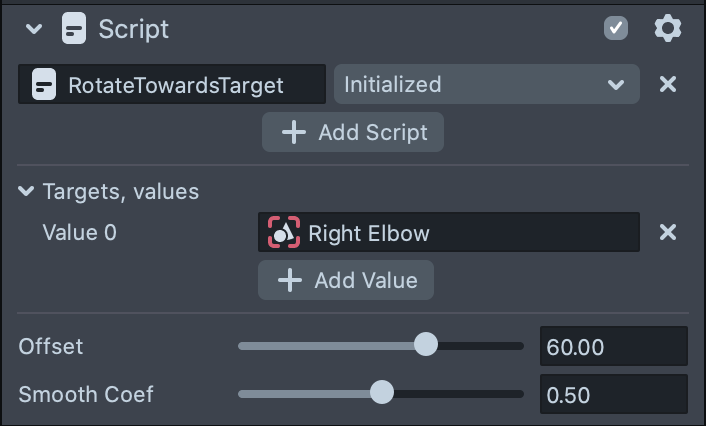
Targets - a list of sceneObjects, current transform will be rotated towards the median point of the positions of the objects
Offset - the offset in degrees from the target angle
Smooth Coef - a smoothing coefficient applied to the object’s rotation
Freeze Frame Example
The next example showcases how to create a cool animated poster with a person cut-out. It creates this poster by doing the following:
- Composing the poster with screen images (like in example 1)
- Disabling a camera, to freeze the current frame
- Using a script to trigger step 1 and 2 with a timer
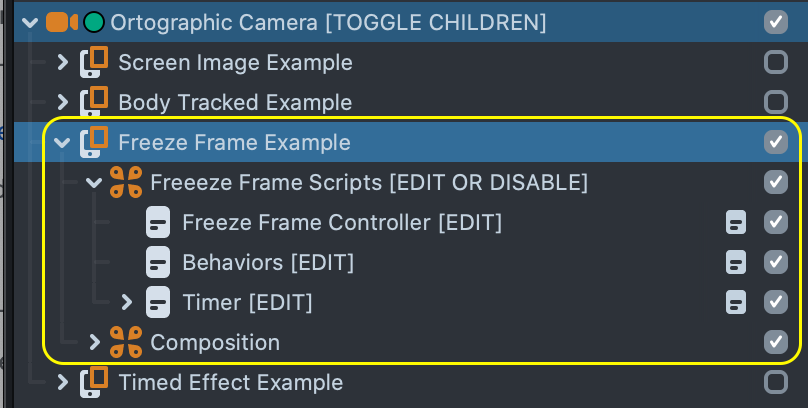
You can see two child objects under the Freeze Frame Example Scripts and Composition.
Let’s first disable scripts and take a look at the composition. Same components we saw before are used here (screen images for background and body image, for additional elements) as well as particles and tween scripts that will add movement to the composition after the frame is frozen. Try doing the following:
- Swap background image by clicking on the texture field of the image component.
- Select particles and right click on a material field to highlight and edit particle materials.
- Swap textures and move additional screen images on the screen.
- Modify tween script settings on Body Image and Text sceneObjects.
Next, let’s take a look at the children of Freeze Frame Scripts.
Timer
The Timer object contains an interaction helper, and can be easily reused for other delayed interactions with countdown. It uses a Text Component to show a prompt to do some action, then the script waits for itself to be called. When called, it starts a countdown and calls another custom Behavior trigger at the end of it.

- Start Timer on - call this Custom Behavior Trigger to start timer.
- Reset Timer on - call this Custom Behavior Trigger to reset timer to initial state.
- Countdown Length - sets countdown length.
- Step - sets the time between countdown iterations.
- Countdown Text - sets the Text Component to display instruction and countdown.
- Hint - sets the instruction text to be displayed. Can be empty
We are using this timer script to create a delayed response for the Freeze Frame Example so the user has time to step back from the Camera.
Freeze Frame Controller
This object contains a script that enables certain objects, while disabling others when another script calls it. In this case, we use it to enable our Composition from earlier, while disabling a camera to freeze the current frame it's on.
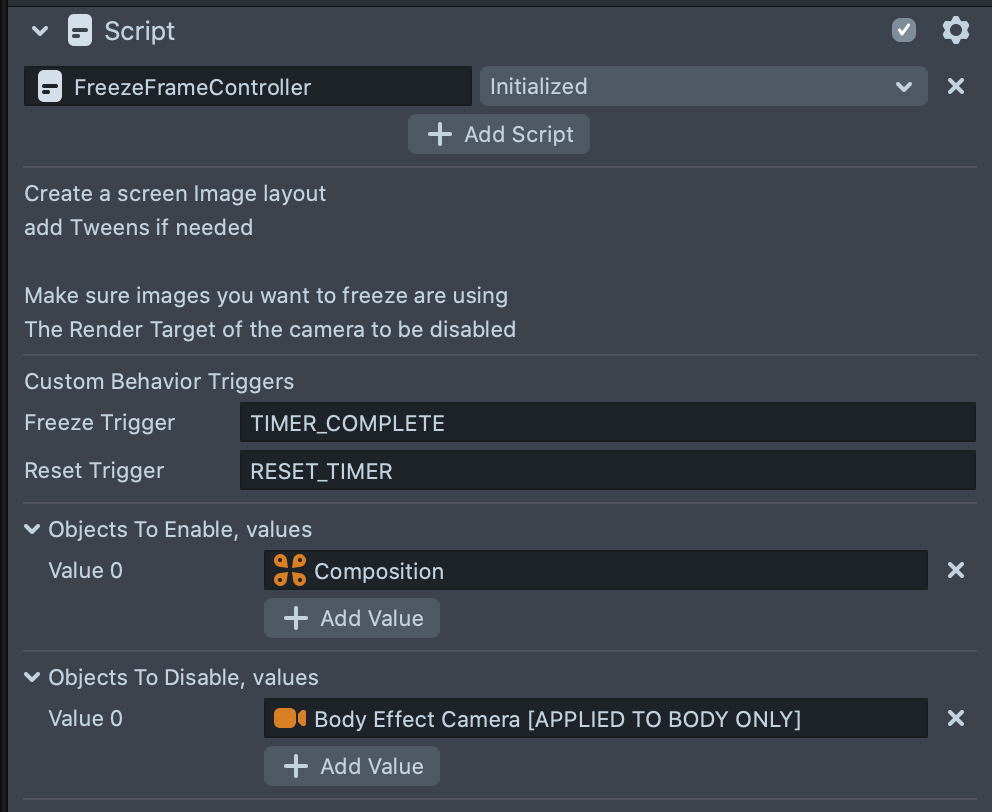
- Freeze Trigger - the Custom Behavior Trigger Name that is used to trigger freeze frame and .
- Reset Trigger - the Custom Behavior Trigger Name that is used to trigger un-freeze frames.
Behaviors
Lastly, the Behaviors [EDIT] object has a 3 behavior script that takes care of the interactions.
The first behavior script toggles between two custom triggers on Tap Event. We saw their names before in the previous scripts. Try tapping on the Preview panel screen and see what happens.
The second Behavior script is called on Lens Turn On and it sets the initial state of this example.
The third Behavior script calls our timer from earlier when the user starts recording.
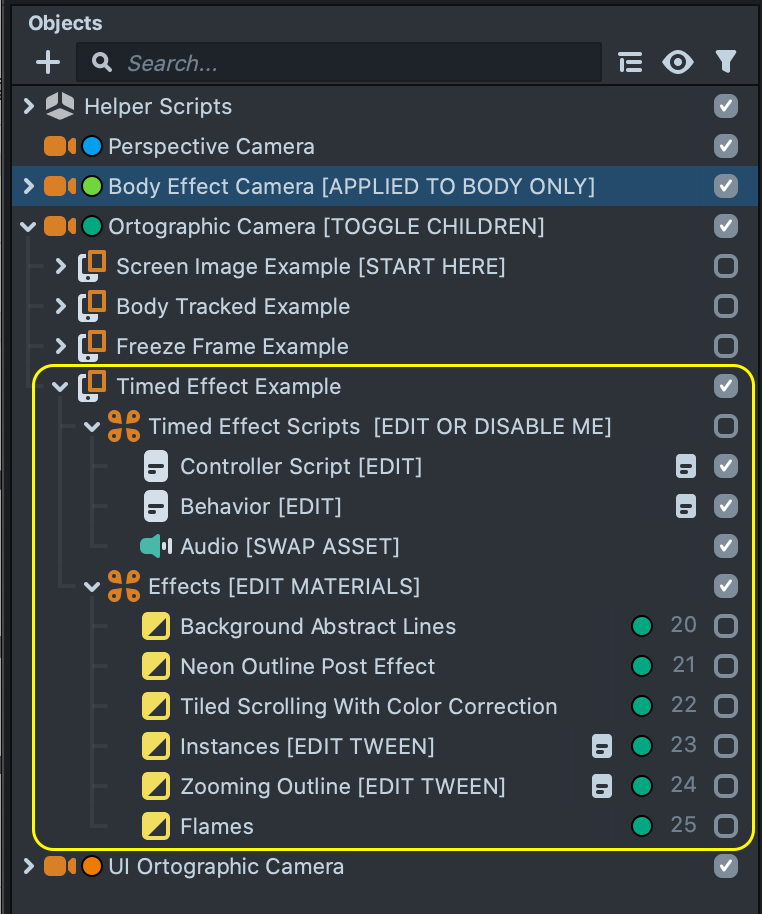
Timed Effect Example
The last example allows us to create a sequence of different effects tied up to the audio clip timestamps.
When you select the Controller Script, you'll find anAudio Attached Sequence script in the Inspector panel. This script defines what should be done, when certain time has passed on an audio.
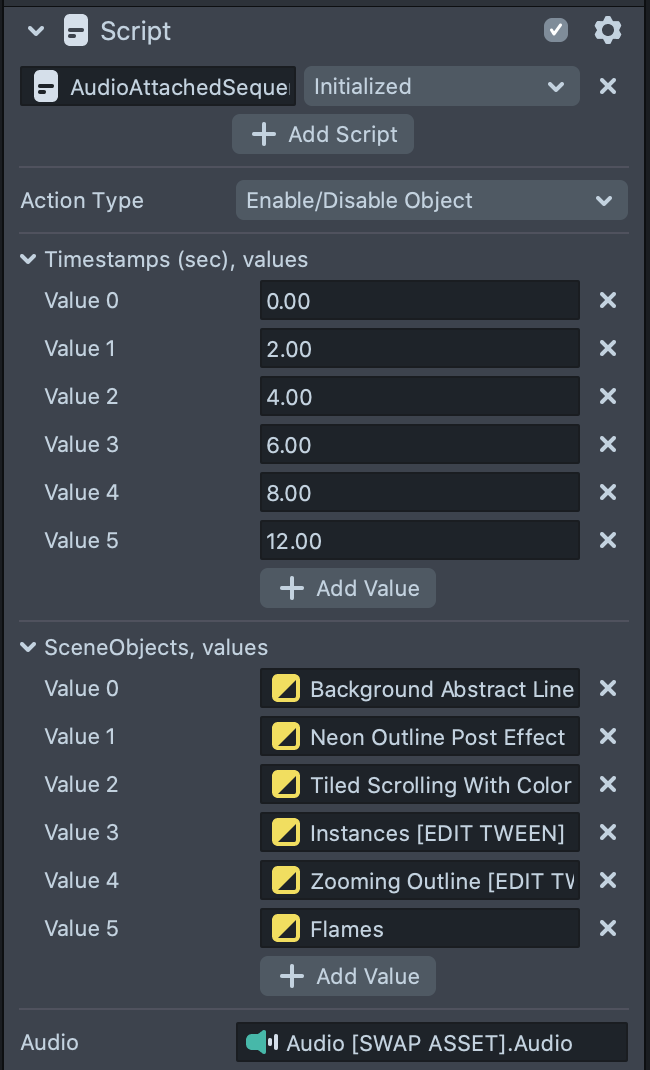
Action type - specifies one of the three types of sequences :
- Enable one scene object from a SceneObjects list at a time and disable the previous.
- Call start tween on one scene object from a SceneObjects list at a timestamp, and call stop tween on the previous one.
- Call a “Start function name” script api function on one scene object from a SceneObjects list at a timestamp, and call “Stop function name” script api function on the previous one.
If you want to have more than one type of action - create another script component with Audio Attached Sequence with different settings.
If you wan’t to enable more than one scene object at a time try grouping them into hierarchy and use parent object as an input.
Scene Objects - scene objects to toggle between/call tween on/or call api function on
Audio - This is the Audio Component used to drive the effects. In other words, the time on this Audio component, decides when the effects should be called.
Playing the Audio
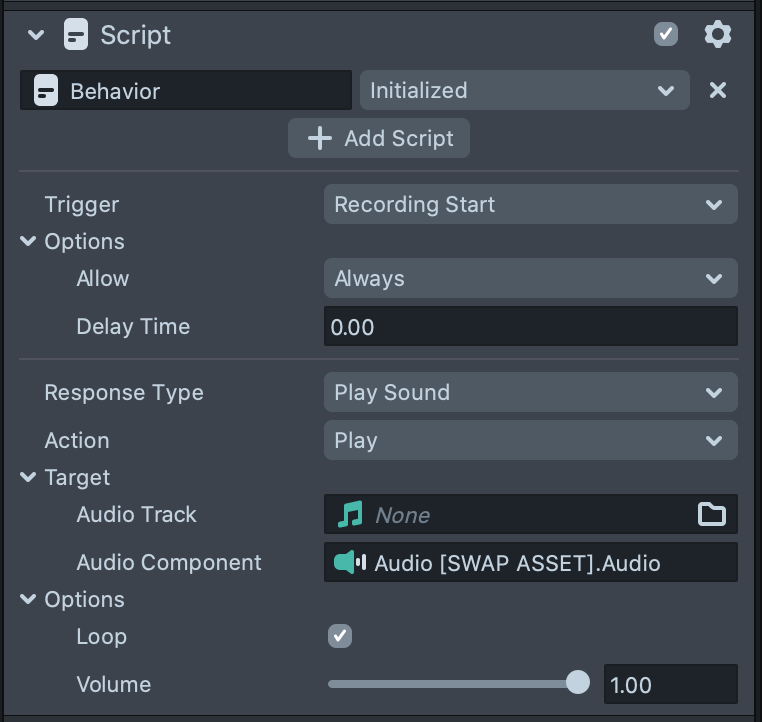
In this template, the Audio field is connected to the Audio [SWAP ASSET] object. Click on the Audio Track field of the Audio component to swap the asset.
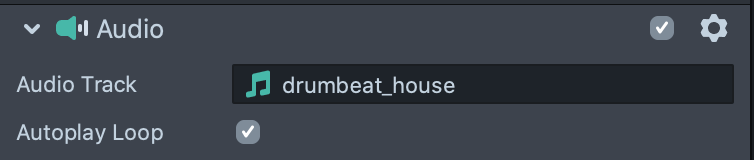
We are using the Autoplay Loop checkbox on an Audio Component to play audio when lens starts and a Behavior script to restart audio when Recording Starts.
You can easily integrate a Timer helper script from the previous example for this one too!
Effects Being Called by The Audio Attached Sequence
Under the Effects scene object you can see some Post Effect examples that showcase what you can do with body segmentation texture with Material editor.
To see how they work, select one of the objects in the Objects panel, then in the Inspector panel, right click on the Material field and select Highlight.
Modify materials to your liking by changing material properties in the Inspector panel.
To do deeper customization, double click on the highlighted material in the Resources panel to open the Material editor and edit the shader.
You can even drive the material in real time when the Lens is being used! Add dynamics to the material by driving a material property value with a Tween Value script. Take a look at the Flames example to see how this might work.
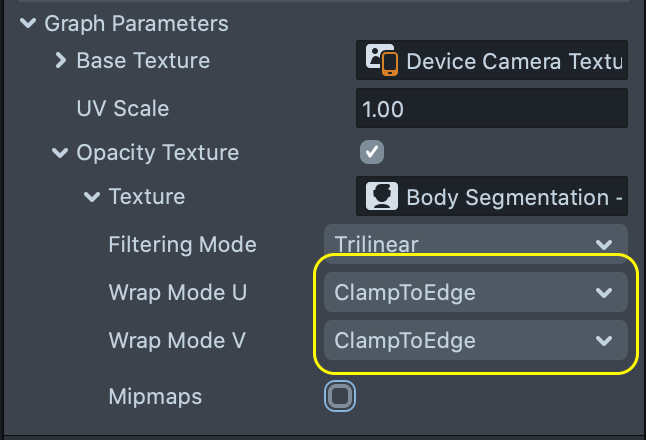
You can use two segmentation textures to create an outline by having one be feathered, while the other ones refined. we are using two instances of the Segmentation Texture to create both smooth and precise masking.

Use ClampToEdge Setting for the Segmentation texture to avoid undesired texture repeating.
Previewing Your Lens
You're now ready to preview your Face Lens. To preview your Lens in Snapchat, follow the Pairing to Snapchat guide.
Related Guides
Please refer to the guides below for additional information: