Portal
The Portal template lets you enter a portal or doorway into another world. It uses upgraded native tracking which allows the user to more freely move and look around the entire scene. The template shows you how to trigger animations by tapping objects in the portal. It also includes custom events to trigger interactions when the user enters or leaves the portal.
Tutorial
Guide
Remove Example Content
First, remove the example content. Find the scene object City [REPLACE_ME] in the Objects panel and remove it from the scene.
Exporting 3D Content
The Portal template assumes that you have 3D content which you'll be importing into Lens Studio. First you must export your object or objects to be Lens Studio ready. To do this, follow the 3D Object Export guide.
Importing 3D Content
Once you have your 3D object or objects exported, import them into Lens Studio by selecting File -> Import from the menu bar. Then, parent your objects under the scene object labeled Portal [EDIT_ME]. You can do this by dragging and dropping your 3D object(s) on top of the Portal [EDIT_ME] object in the Objects panel.
Setup the Occluder
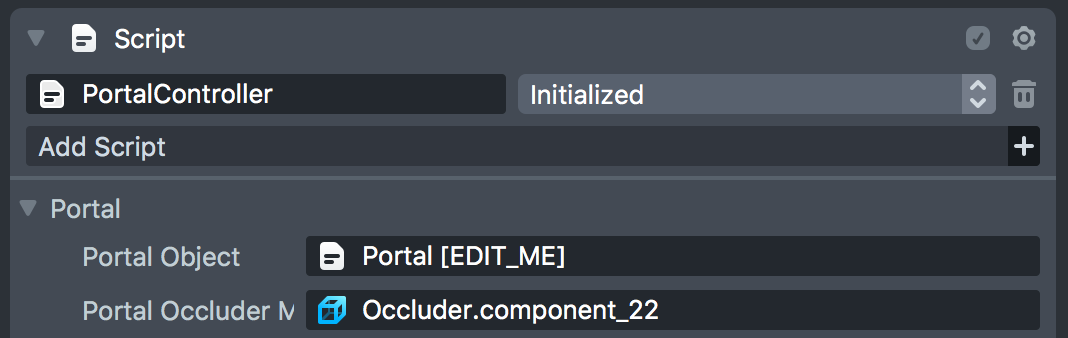
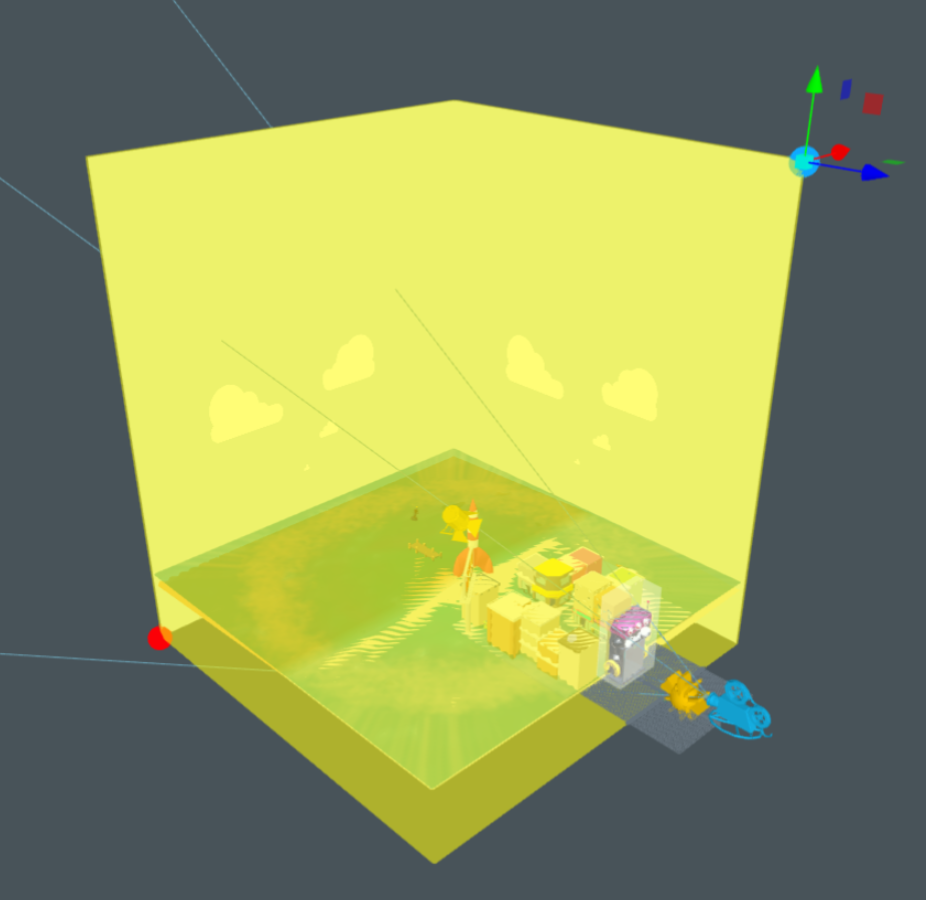
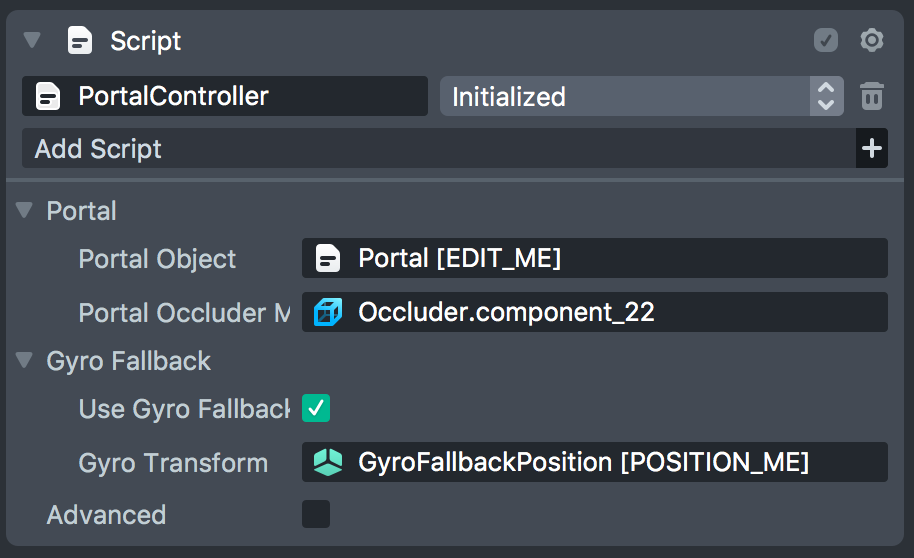
Your 3D content should include an occluder mesh. It's purpose is to completely surround and hide the inside of the portal. Your occluder mesh should have a hole in it where a user can enter. To assign the occluder, select the PortalController [EDIT_ME] object in the Objects panel. Then, set the Portal Occluder Mesh field to your occluder mesh.

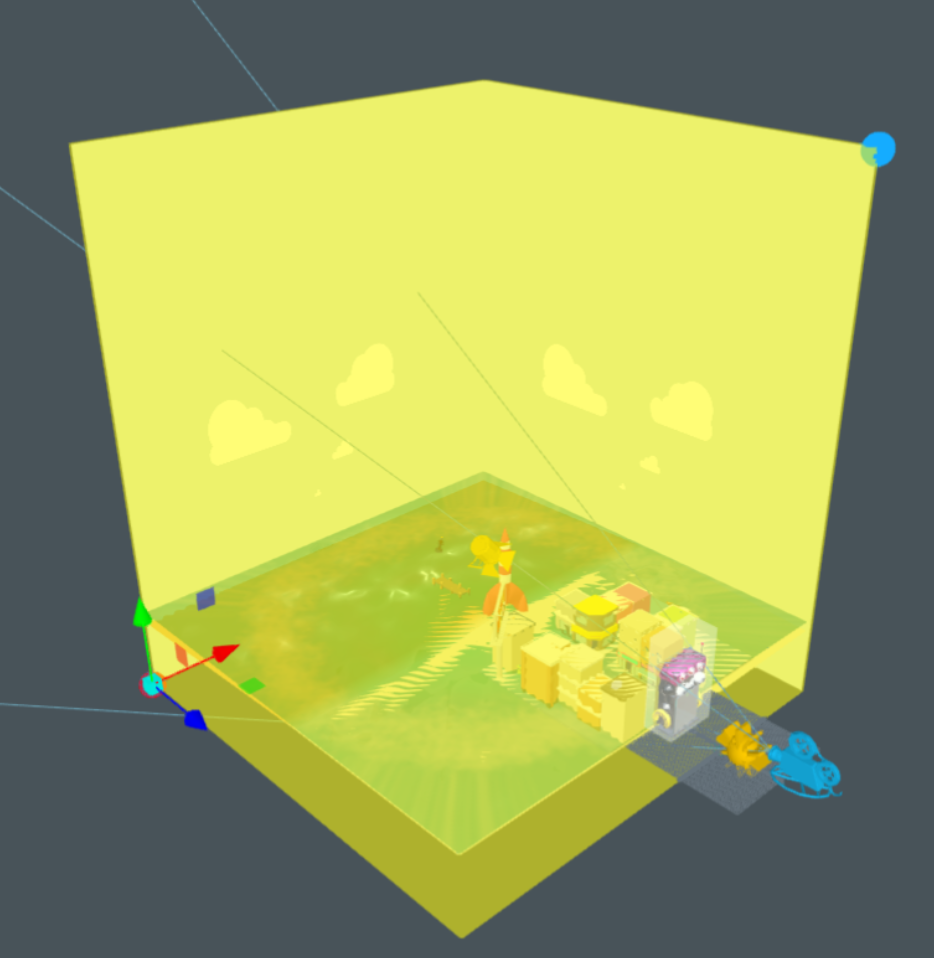
In the above example, the occluder mesh is visualized in yellow and has an opening where the portal door is. This will hide everything from view except through the doorway opening.
To help visualize your occluder in the Scene panel, we recommend assigning it the included portal_bounds material which is semi transparent. During run time, the selected mesh will automatically be assigned an Occluder material overwriting whatever material was assigned to it (e.g. the portal_bounds material).
Approach Interaction (OPTIONAL)
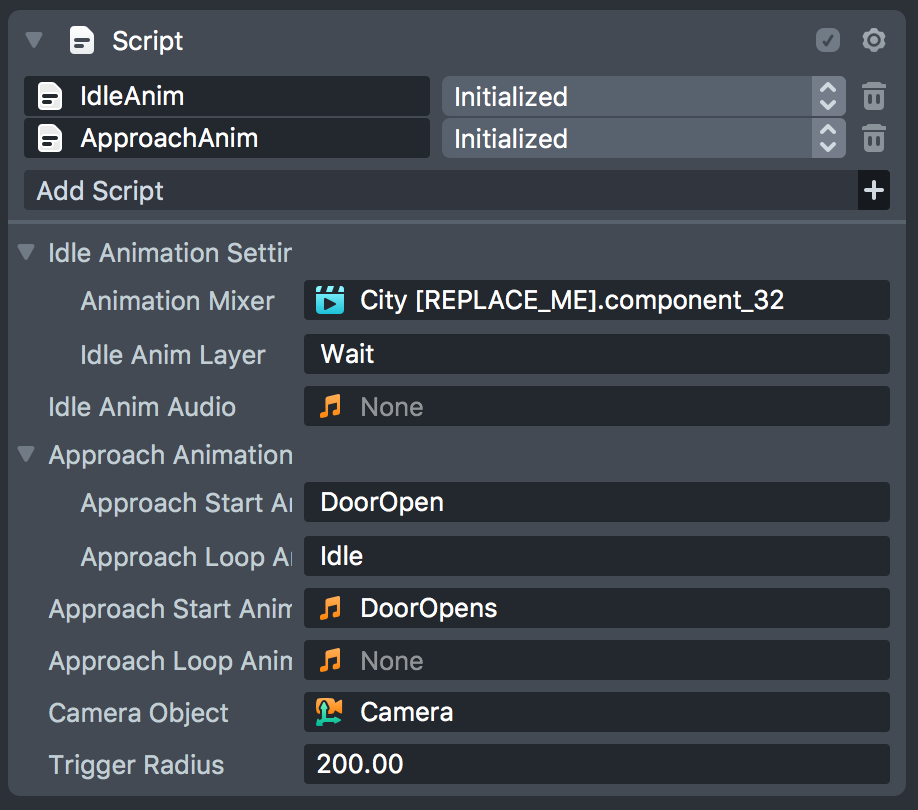
The template includes an example of triggering an animation by approaching the portal. Select the object Portal [EDIT_ME] in the Objects panel. There, you'll see both an IdleAnim and ApproachAnim script. In the Inspector panel, you can configure an idle animation, a triggered approach animation and a trigger radius. For more information on triggering interactions on approach, refer to the Interactive Approach Template.
Tap Interaction (OPTIONAL)
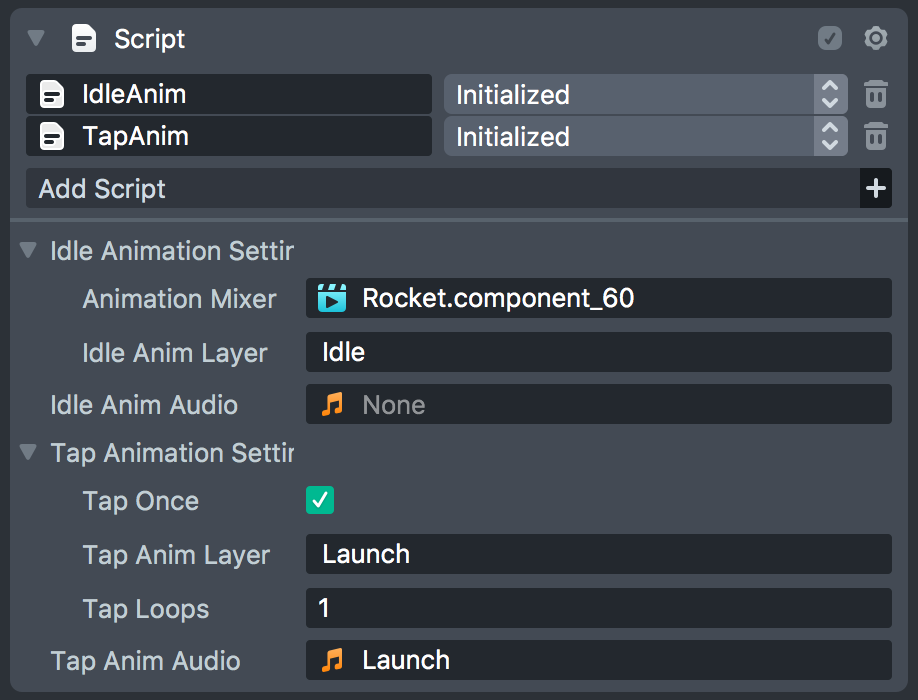
The template also includes an example of triggering an animation by tapping an object in the portal. Select the object RocketBoxCollision underneath City [REMOVE_ME] in the Objects panel. There, you'll see both an IdleAnim and TapAnim script. In the Inspector panel, you can configure an idle animation and a triggered tap animation.
For the TapAnim script to work, you also need to add a Touch component to the same object. Make sure the Touch component's Mesh Visual field is assigned to whatever mesh you want to tap to trigger the interaction. For more information on triggering interactions on tap, refer to the Interactive Tap Template.

Setup Portal Corners (OPTIONAL)
The portal corners are important if you want to trigger anything in the scene when the user enters or exits the portal. These two pins are used to define the bounding areas of the world and control how the scene knows if a user is inside the world or not.
If you don't need to trigger an interaction when the user enters or exits the portal, you can ignore the portal corners.
The object named PortalCornerMin [POSITION_ME] needs to be placed at the most negative Z and negative X position of the occluder mesh with respect to the camera (furthest bottom left corner of your portal).
The object named PortalCornerMax [POSITION_ME] needs to be placed at the furthest positive Y and positive X position of the occluder mesh with respect to the camera (closest top right corner of your portal).
Enter / Exit Portal Events (OPTIONAL)
The PortalEvents script handles events when a user enters and exits the portal as defined by the above Portal Corners. This script is meant to be customized with unique functionality when the users enters and exits. As an example, we’ve added a script that plays music when the user enters the portal and stops the music when the user exits the portal. Additionally, the example script disables the rocket ship's button from being pressed when the user is outside of the portal.
If you don't need to trigger an interaction when the user enters or exits the portal, you can ignore the PortalEvents script and remove the PortalEvents [EDIT_ME] object from your scene.
The below events in the PortalEvents script can be modified to trigger custom interactions when the user enters or exits the portal.
OnPortalEnter - This event is triggered when the user enters the portal
function onPortalEnter() {
  print('Entered Portal');
  // Enable the rocket button
  if (script.rocketButtonCollider) {
    script.rocketButtonCollider.enabled = true;
    playPortalAudio(audioComponentPortal, -1);
  }
}
OnPortalExit - This event is trigger when the user exits the portal
function onPortalExit() {
  print('Exited Portal');
  // Disable the rocket button
  if (script.rocketButtonCollider) {
    script.rocketButtonCollider.enabled = false;
    stopPortalAudio(audioComponentPortal);
  }
}
OnUpdate - This event is triggered once every frame. The template includes a conditional check called isCameraInPortal which returns true if the camera is inside the portal
function onUpdate(eventData) {
  // Check whether camera is in portal every frame
  if (
    script.portalControllerScript &&
    script.portalControllerScript.api.isCameraInPortal()
  ) {
  }
}
Gyro Fallback (OPTIONAL)
The portal template utilizes Surface tracking with Use Native AR enabled. When available, the tracking is enhanced by the device's native tracking which allows the user to move more freely around, experience larger scale content and still move while looking away from the surface. If native tracking is not available, the experience will fall back to normal surface tracking by default.
Instead of falling back to surface when native tracking is not available, you have the option to instead fallback to a rotation / gyro based experience. This will place the camera at a specified position in the world and allow the user to look around (but not move around). To enable gyro fallback, select the PortalController [EDIT_ME] object in the Objects panel and enable Use Gyro Fallback. Then, you can edit the fallback position by adjusting the position of the GyroFallbackPosition [POSITION_ME] object.
We recommend not enabling Use Gyro Fallback for most portal experiences as the default Surface fallback tends to work well. Only enable if you require your experience to utilize native tracking
Previewing Your Lens
You're now ready to preview your world Lens experience. To preview your Lens in Snapchat, follow the Pairing to Snapchat guide.
Related Guides
Please refer to the guides below for additional information: