Face Morph
The Face Morph template demonstrates the External Face Mesh feature which allows you to bring in your own custom mesh which the Snapchatter’s Face Mesh can morph into.
The template comes with several examples that you can play with, as well as adjustable settings to change the strength of the effects.

Tutorial
Guide
The External Face Mesh feature allows you to morph between the face mesh to another custom mesh which has the same UV map as the standard Face Mesh.
In the Objects panel, you’ll find three examples of how you can use this external face mesh feature. You can enable or disable a template by clicking on the checkbox next to them.
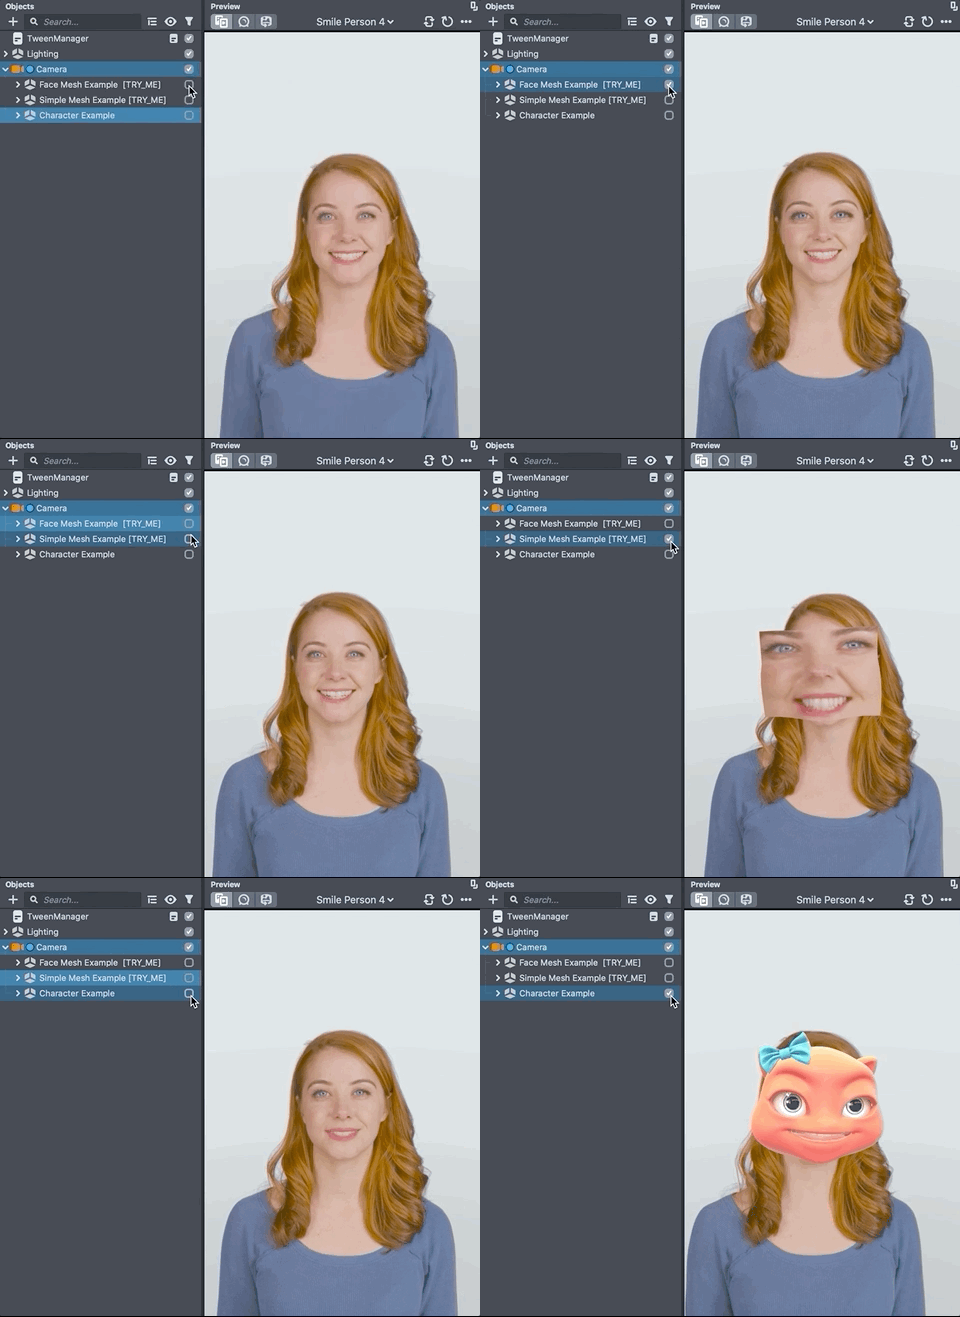
Get the external face mesh example 3D model in the Face Mesh guide. You can modify it in the 3D editor software of your choice
Face Mesh Example
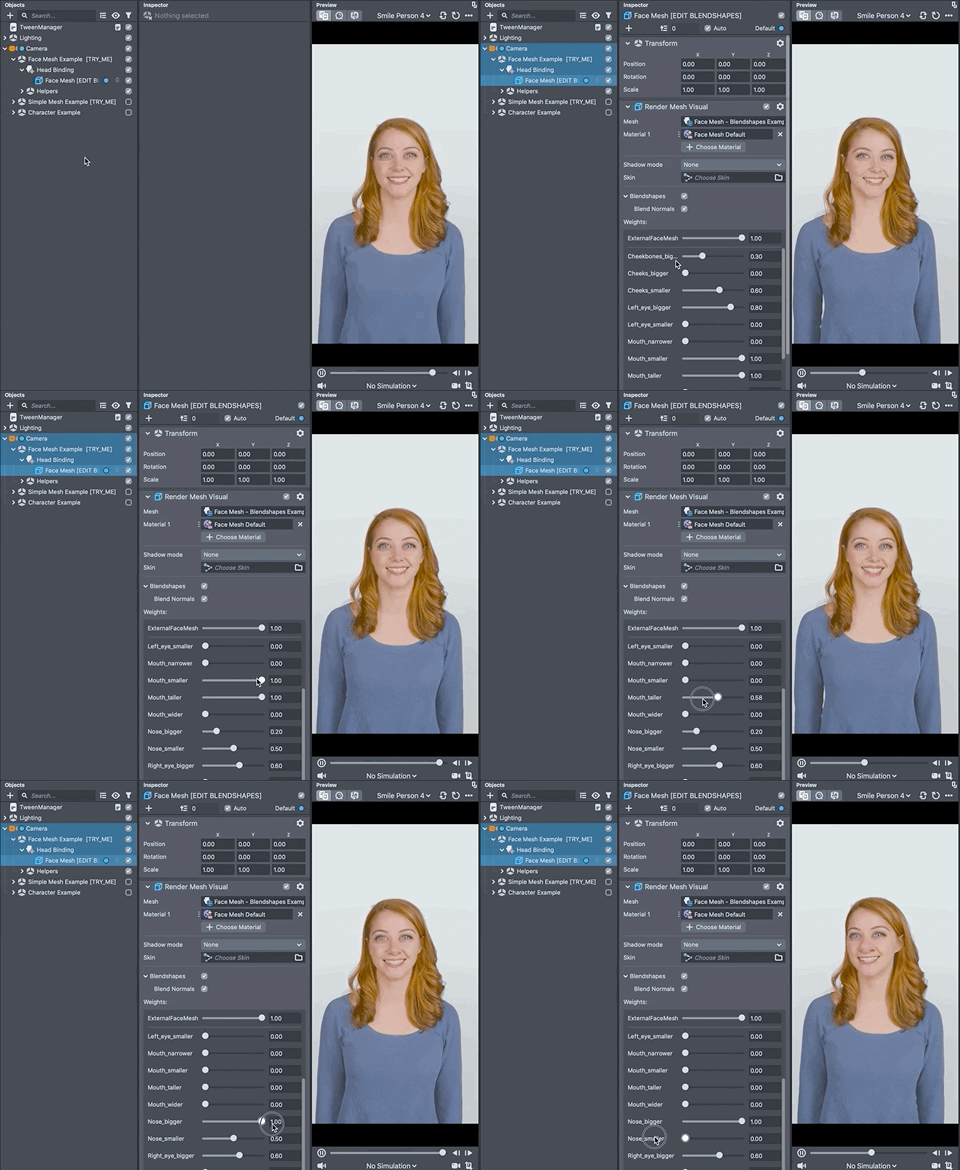
In this example, the external face mesh used is a modified version of the standard face mesh model. Rather than using a completely new mesh, the modified face mesh has additional blendshapes that adds modification to the face.
To adjust the strength of the Blendshapes, in the Objects panel, select the Face Mesh Example > Head Binding > Face Mesh [EDIT BLENDSHAPES]. Then, in the Inspector panel, modify the slider next to the blendshapes name.
This example also demonstrates the Face Reprojection script found in the Reproject Face Texture to Mesh object that you can find under the Helper object. This script reprojects the texture of the face onto the specified Mesh. It takes in the following parameters
- Input Texture - The texture to get the face texture from
- Output Texture - A standard Render Target resource which the reprojection texture will be rendered to
- Mesh - The mesh which we want to reproject to
- Face Index - The face to reproject--should be the same as the one on the Head Binding component
Simple Mesh Example and Changing the External Face Mesh
In this example, a completely separate mesh is used as the External Face Mesh. In the Objects panel, under the example, select the Face Mesh [SWAP EXTERNAL MESH ON MESH RESOURCE] object to find the Face Mesh being used here.
You can modify how much the External Face Mesh is used by modifying the Weight slider in the Inspector panel. Here the External Face Mesh weight matters because the mesh is completely different.
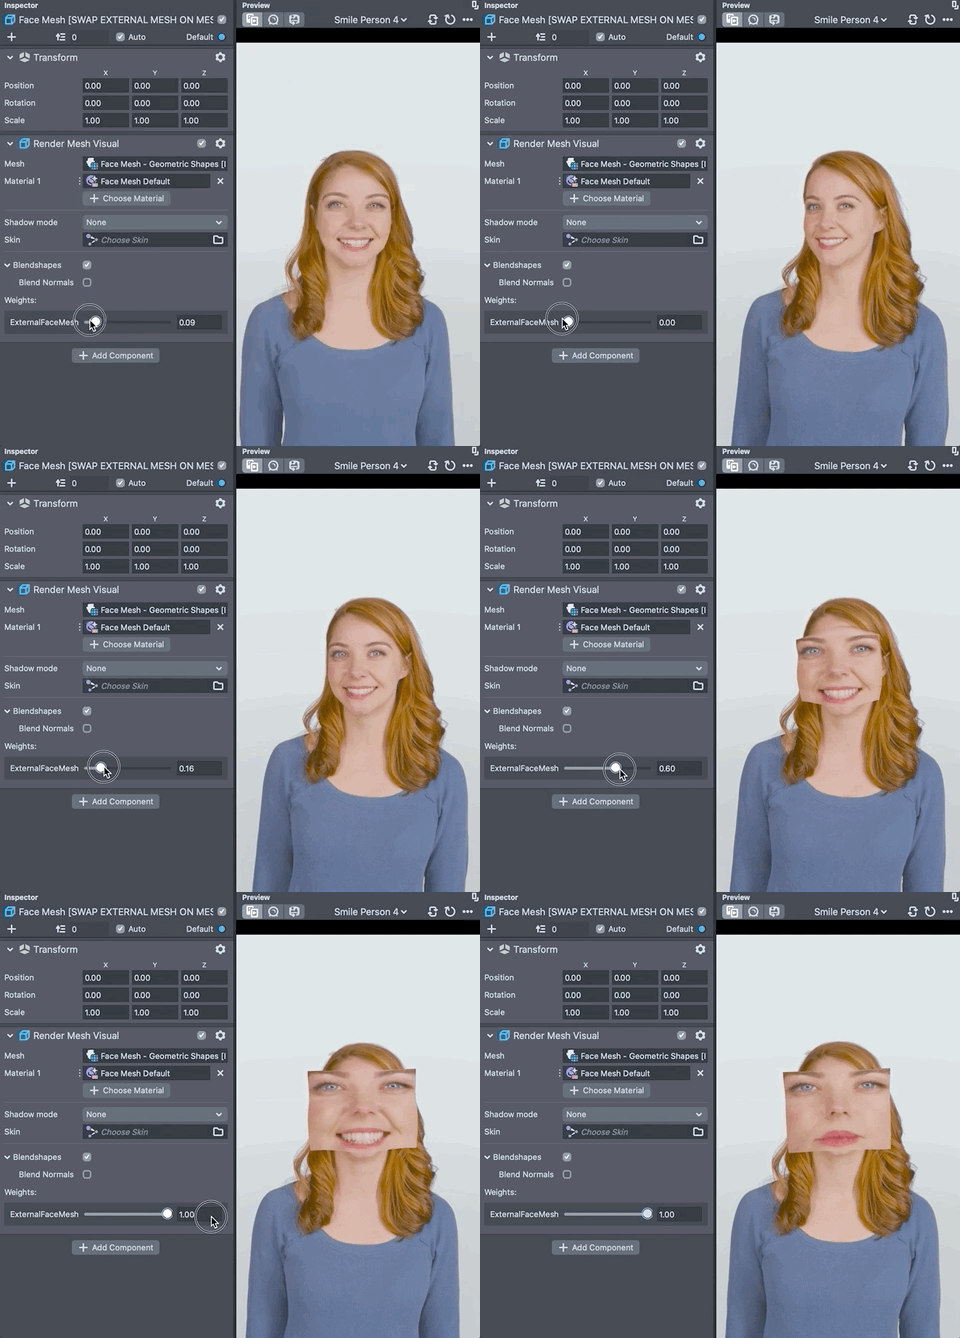
The template also comes with another simple mesh that you can try. You can try it by switching the external face mesh resource attached on this Face Mesh. To do this, right click on the Mesh field and press Select. Next, select the External Face Mesh field, and in the search field, search for the Sphere mesh.
This also uses the re-projection script from before.
Character Example
In this example, the External Face Mesh is used with other features to create a new character. Try using what you learned before to modify this example. In addition, take a look at the following pieces that make this character transformation possible!
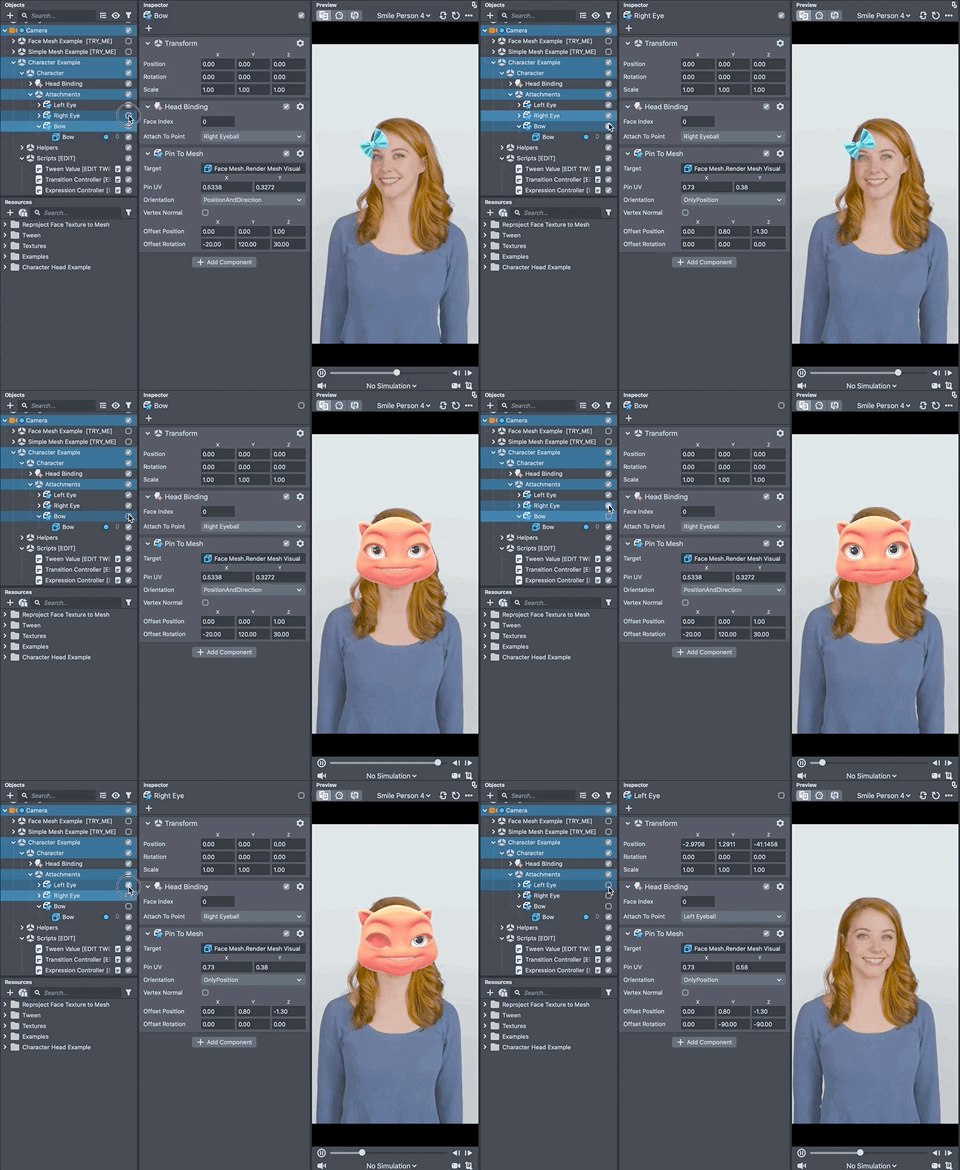
- Pin to Mesh is used to add the big eyes and ribbon to the character. Notice that the ribbon moves with the mesh as it transforms!
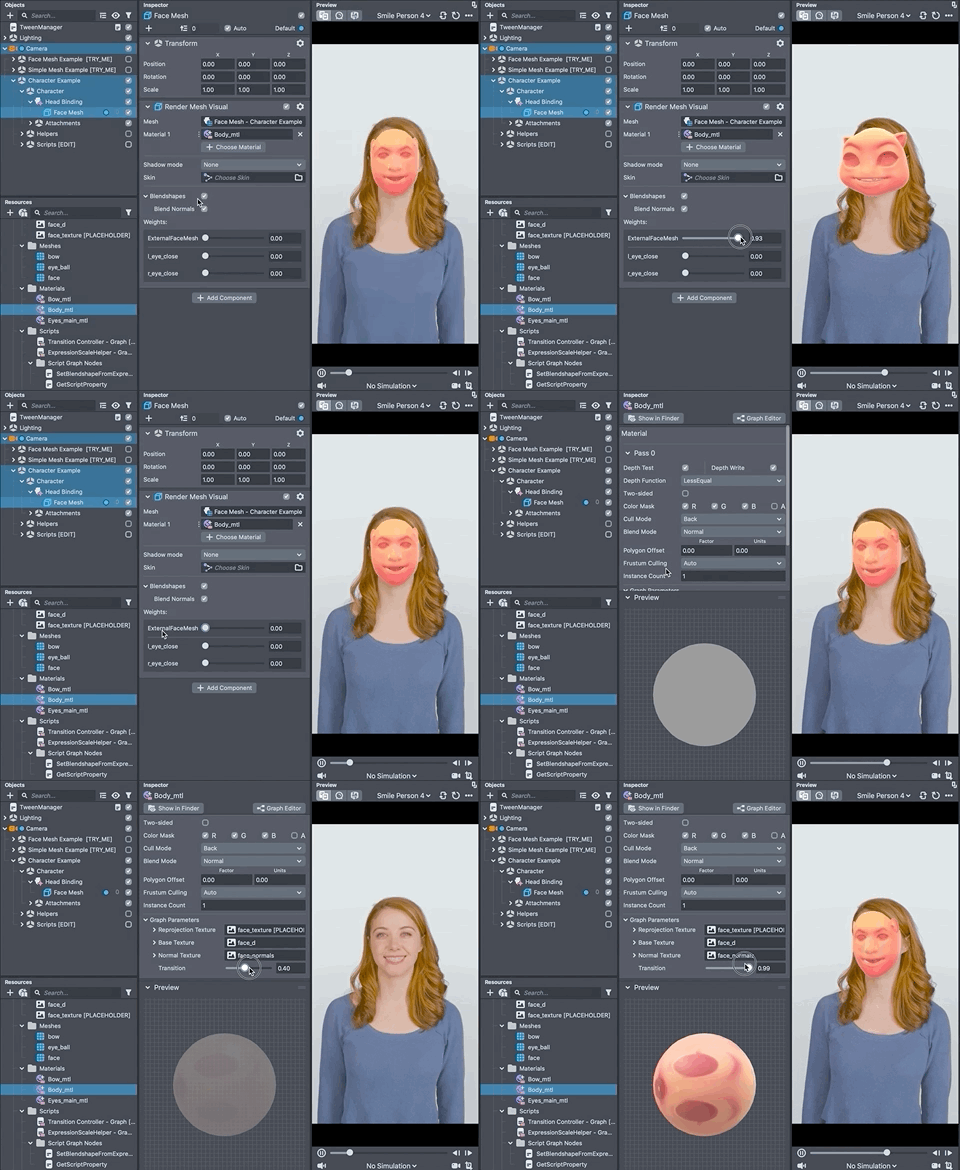
- Tween Value is used to transition between the Character state and the standard Face Mesh weight
- Face Reprojection is used here as well, however it’s used in a material which can transition between the reprojected face texture, and the character’s skin
- Script Graphs are used to pass the value from Tween values to the Character and it’s material.
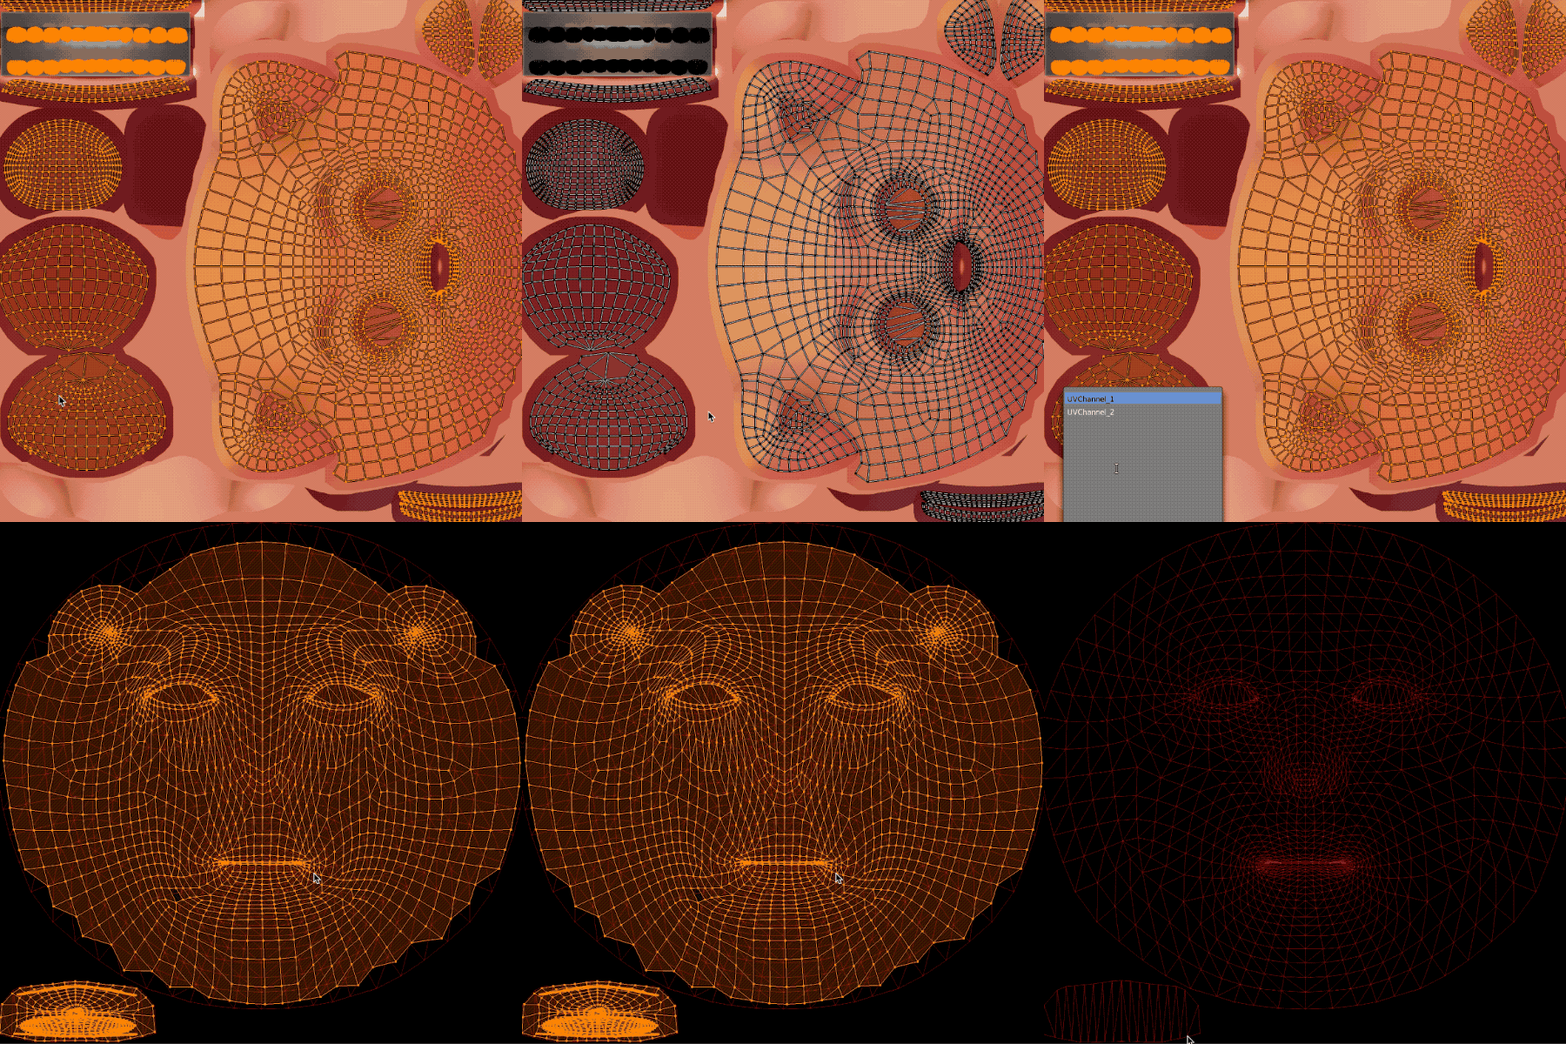
You can map your mesh's texture on a different channel than the one used to map your mesh to the Face Mesh UV.
Previewing Your Lens
You're now ready to preview your Face Lens. To preview your Lens in Snapchat, follow the Pairing to Snapchat guide.
Related Guides
Please refer to the guides below for additional information: