Paper Head
The Paper Head Template lets you create a customizable head that reacts to facial movement. The template tracks the user’s eyes, mouth and the direction the head is facing to drive 2D textures and 2D animations.
Tutorial
Guide
Select Paper Head Controller
To edit the Paper Head template, first select the Paper Head Controller [Edit Me] object in the Objects panel on the left side of Lens Studio. With the object selected, we can configure its settings in the Inspector panel.
Add Resources
For the Paper Head template, we should first import your 2D textures or animations into the Resources panel that you want to apply to the face. To do this, drag and drop a PNG, JPG or GIF into the Resources panel from your computer.
Configure Mouth
The Mouth Face element has three different types of Mouths selectable via the Mouth Type drop down.
The sections below walk through each Mouth Type.
Mouth Type, Texture Sequence
In this Mouth Type, the Mouth Textures array is filled with various textures that represent a mouth starting as closed and ending as opened. As the user opens their mouth, the Texture Sequence will select an image for the mouth based on how wide the mouth is opened. Fill the Mouth Textures fields to your own custom textures. Press the Trash icon to remove frames and the Add Value button to add frames.
Mouth Type, Animated Texture
In this Mouth Type, an animated texture of a mouth is played back based on how open the user’s mouth is. Set the Animated Texture field to your own custom animated texture. For more information on importing a 2D Animation, follow the 2D Animation guide.
Mouth Type, Sliding Mouth
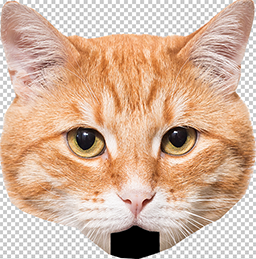
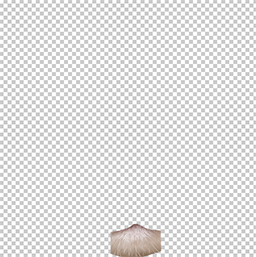
The last Mouth Type is unique to Mouth. It requires two textures. One texture of the entire head and another texture of the lower jaw. In creating these textures, think of a ventriloquist’s puppet. In the Inspector panel, set the Head Texture field to your custom head texture and the Mouth Texture field to your custom mouth texture. The Mouth Texture will slide based on the user’s mouth movement. The Mouth Offset and Slide Amount can be configured in the Inspector panel via the corresponding sliders.
Below is an example of a Head Texture (without mouth) and the Mouth Texture (without head).
Tuning the Mouth
Each mouth type has sliders to tune the mouth.
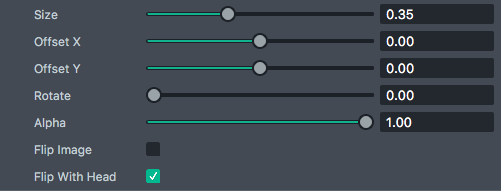
- Size - How big the mouth is
- Offset X - The offset of the mouth horizontally
- Offset Y - The offset of the mouth vertically
- Rotate - Apply a rotation to the mouth if needed
- Alpha - How transparent the mouth is
- Flip Image - Will mirror the texture horizontally
- Flip With Head - Based on the direction the head is facing, the texture will flip to face that direction. This gives the 2D texture a quasi 3D effect
Configure Nose
Enable the Nose by checking the Nose checkbox. Unlike the mouth, it does not have different Types. That said, if you do want an animated nose, the Nose Texture field does support an animated texture. The tuning settings as described in the Mouth section above (Size, Offset, Rotation, Alpha, Flip Image and Flip With Head) are also available for Nose.
We recommend using the Flip with Head option on the Nose to give it an effect that responds to facial movement
Configure Eyes
Enable the Left Eye or Right Eye by checking the Left Eye or Right Eye checkbox. The Eyes both support the Texture Sequence and Animated Texture types which are selected from the Eye Type drop down. The tuning settings as described in the Mouth section above (Size, Offset, Rotation, Alpha, Flip Image and Flip With Head) are also available for Left and Right Eyes.
Submitting Your Lens
You’re now ready to submit your Lens! Follow the guides below: