Distort
The Distort Template provides a base for creating Face Lenses that stretch, liquify, and duplicate your facial features. The Distort Template allows you to create a compelling Face Lens without importing any additional resources. The template contains a few preconfigured effects which you can edit or delete. This guide covers how to modify the template’s effects, as well as how to add more.
Tutorial
Guide
Editing the Face Liquify Effect
The Face Liquify Effect can bulge and pucker any region of the face. The Distort Template includes two Face Liquify Points, attached to the eyes. You can find them in the Objects panel under the Distortion Effects object.
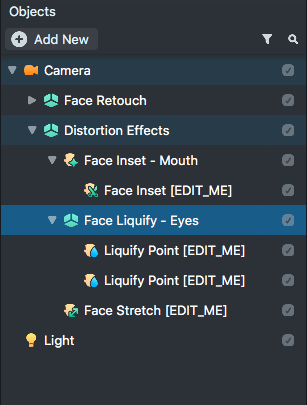
Select one of the Liquify Points to modify it. In the Scene panel, you can change the position of the Face Liquify Effect by dragging the blue circle.
You can adjust the radius and intensity of the Face Liquify effect by setting the values under the 2D editor.
Adding a Face Liquify Effect
To add a new Face Liquify Effect, select + -> Face Effects -> Face Liquify in the Objects Panel.
Editing The Face Stretch Effect
The Face Stretch Effect distorts the shape of the face by manipulating points mapped to the face. The Face Distort Template includes a Face Stretch Effect, used to shrink the head and round out the overall shape of the face. You can find it in the Objects panel under the Distortion Effects object.
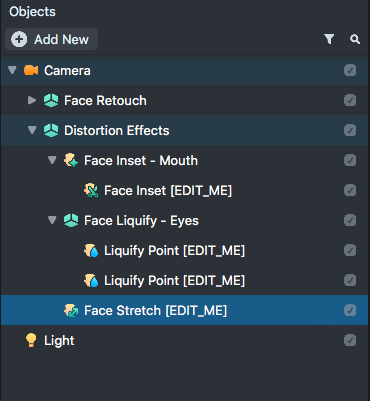
Select the Face Stretch object to modify it. In the Scene panel, you can drag the Face Stretch points to change the shape of the face.
You can change the strength of the Face Stretch Effect by adjusting the Face Stretch Component’s Feature slider in the Inspector panel.
Adding a Face Stretch Effect
To add a new Face Stretch Effect, select + -> Face Effects -> Face Stretch in the Objects panel.
Editing The Face Inset Effect
The Face Inset Effect creates an image with a cropped texture of a facial feature. This effect is great for adding extra eyes, mouths, or noses to a face. The Face Stretch Template includes a Face Inset Effect, used to create a comically large mouth that tracks the user’s face. You can find it in the Objects panel under the Distortion Effects object.

Select the Face Inset object to modify it. In the Scene panel, you can drag and resize the Mouth to any part of the face. Holding Alt while dragging the Face Inset will rotate the Face Inset.
You can adjust the appearance (including feathering, blend mode, mirroring, and more) of the Face Inset Effect by adjusting the properties of the Face Inset Component in the Inspector panel. Here, you can also change the part of the face used in the effect.
Adding a Face Inset Effect
To add a new Face Inset Effect, select + -> Face Effects -> Face Inset in the Objects Panel.
Previewing Your Lens
You're now ready to preview your Face Lens. To preview your Lens in Snapchat, follow the Pairing to Snapchat guide.
Related Guides
Please refer to the guides below for additional information: