Ground Segmentation
Ground Segmentation is available in Lens Studio Asset Library. Import the asset to your project, create new Orthographic camera and place the prefab under it.
The ground segmentation example allows you to modify the ground by using a ground segmentation mask provided by the ML Component. Additionally, objects in the scene can be occluded when they are placed beyond the ground
Guide
Adding Ground Segmentation
Find the Ground Segmentation asset in the Asset Library and import it into your project. Click here.
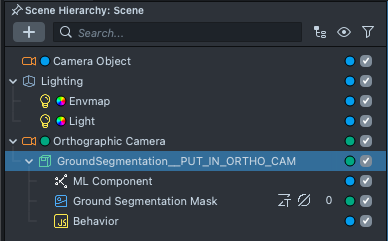
The newly imported package can be found in the Asset Browser panel. Notice that it says that it should be placed on the Orthographic camera.
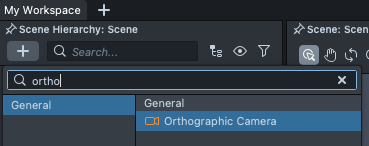
To do this, in the Scene Hierarchy panel, press + and choose Orthographic camera.
Since segmentation happens in screen-space (i.e. a 2D texture), we need an orthographic camera to dipslay that texture in the Lens (as opposed to the default Camera which uses a Perspective view).
Next, drag the GroundSegmentation__PUT_IN_ORTHO_CAM from the newly imported asset in the Asset Browser panel, underneath the newly created Orthographic Camera.
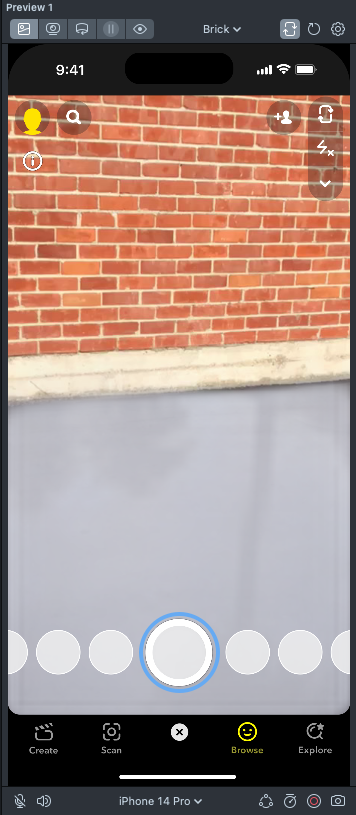
In the Preview panel, with the camera showing a preview with a ground, you should now see a white pixel where there's ground, and black pixels, where it's not ground.
| Scene | Ground Segmentation |
|---|---|
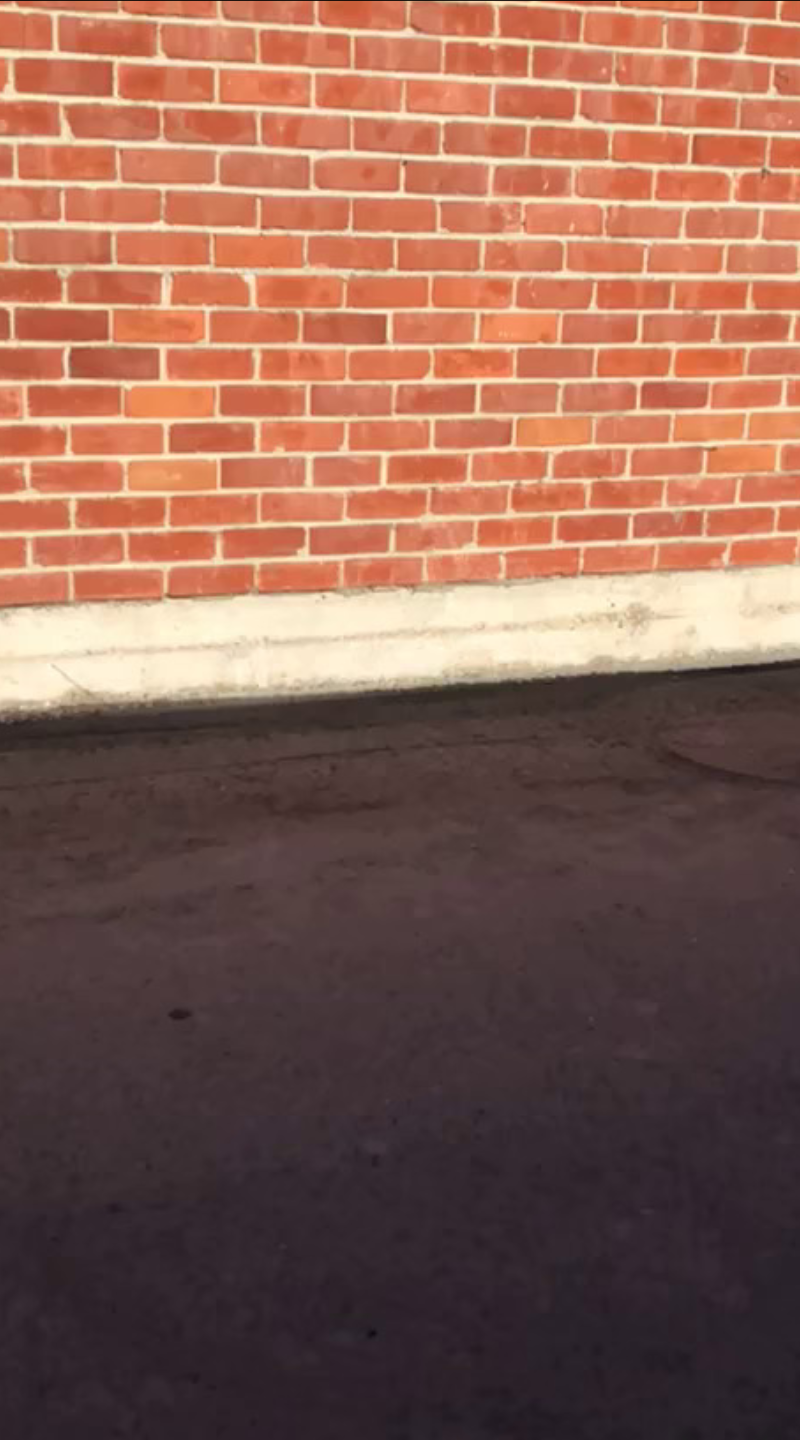 | 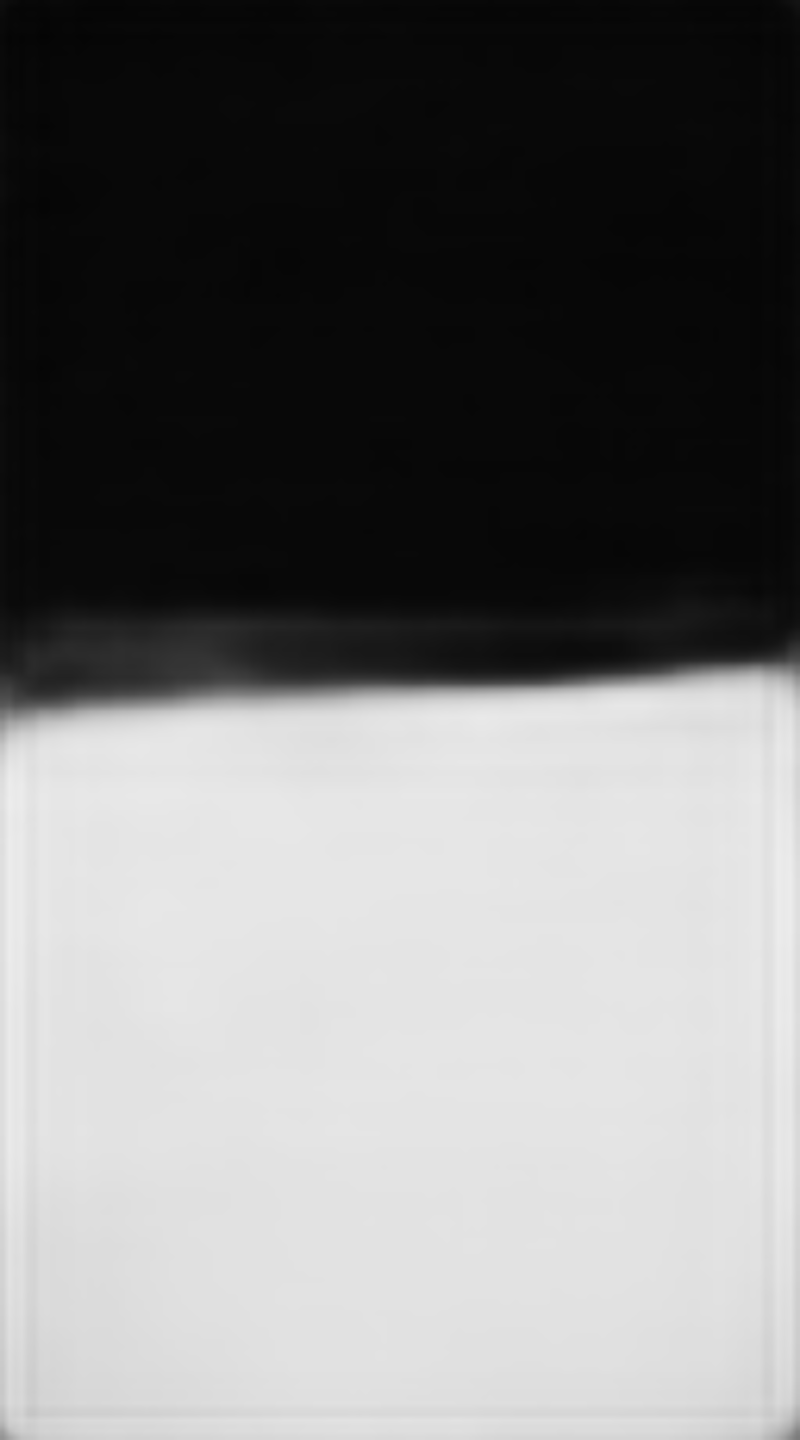 |
If you don't see the ground, make sure you change the preview image to one which includes a ground.
![]()
Using the Ground Segmentation
Now that the Lens can understand what's the ground and not the ground, we can use this as a mask--that is: show our effects. only where the pixels are white.
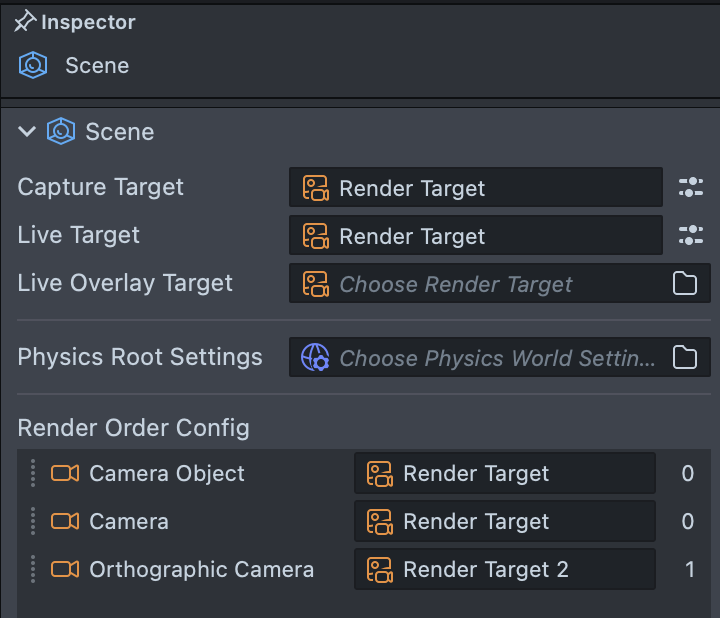
We can select the Orthographic Camera, and in the Inspector panel, notice that it has a Render Target. This Render Target is where we output the result of the camera to. We can make a new Render Target by selecting the field, and in the picker, press the + button and selecting Render Target.
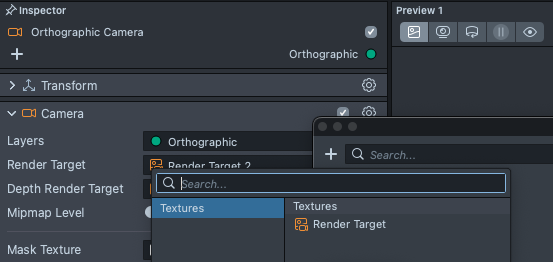
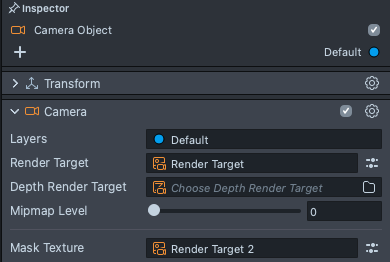
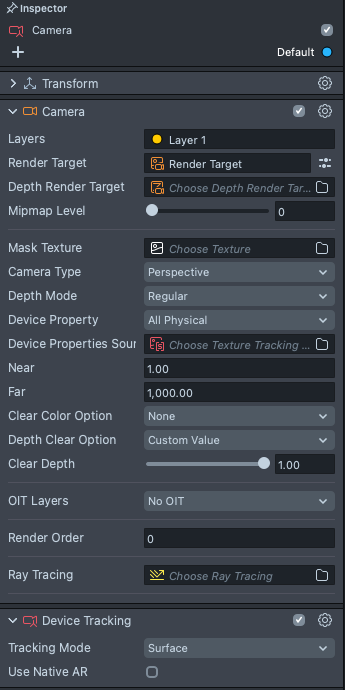
At this point, you won't see the mask anymore--which is what we want. Instead, we will use this as a mask for our default Camera Object, which will render our effect. Select the Camera Object, and in the Inspector panel, select the Mask Texture field, and select the newly added Render Target.
Now, when we render things on the Camera Object, it should not show up when it isn't ground!
Example Ground Effect
For example, let's add a floor to the ground.
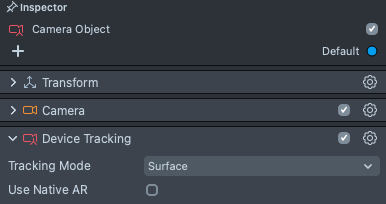
On the Camera Object, in the Inspector panel, press Add Component and choose Device Tracking. We do this, because we want our AR floor to track the ground--that is our virtual camera should follow the device's camera movement.
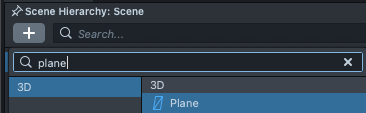
Next, in the Scene Hierarchy panel, with nothing selected, press + and choose Plane. This should add a new plane mash at the root of your Scene Hierarchy.
Now, try expanding the size of the plane: with the Plane selected, in the Scene panel, press the Scale tool at the top (keyboard shortcut: R), and drag one of the boxes out. In the preview panel, you should see the plane only showing where the ground is!
Adding a Camera That is Not Masked
At this point, any object you add will be rendered by the Camera Object which is masked--meaning you can't have anything that's not on the ground!
To fix this, we can add a new camera which will render things not on the ground.
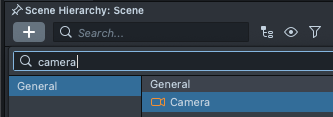
In the Scene Hierarchy panel, press the + button, and select Camera. Like before, we will also add Device Tracking component on this camera.
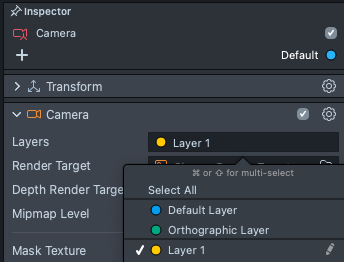
Since we want this new Camera to see different things than our default Camera Object, in the Inspector panel, in the Camera component, select the Layers field, press Add New Layer, then choose the new Layer.
Lastly, we also want this camera to show its results. To do this, assign the Render Target from the Asset Browser to the camera's Render Target field.
Every project will have a Render Target which is used for the final output. You can see these by selecting the Scene asset in the Asset Browser panel. Take a look at Scene Asset guide to learn more.
You should have something that looks like this:
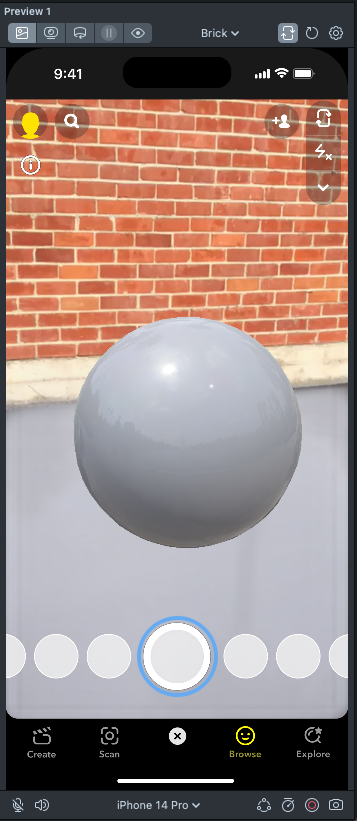
Adding an Object That is Not Masked.
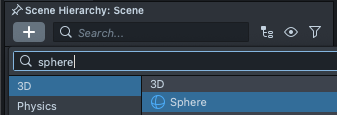
Finally, let's add a Sphere at the root of our scene to be rendered by our newly adde camera. In the Scene Hierarchy panel, press the + button and choose Sphere.
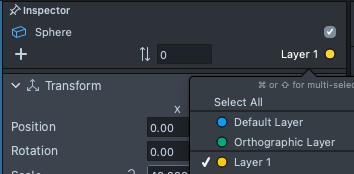
Then, with the Sphere selected, in the Inspector panel, in the top right corner, you can choose the layer it's on. Make sure it's on the same layer as the Camera you've just added so that it can be seen by that camera.
You can resize the sphere as before, and notice how the Sphere isn't masked by the ground segmentation!
Previewing Your Lens
You’re now ready to preview your Lens! To preview your Lens in Snapchat, follow the Pairing to Snapchat guide.