Get Started with Mobile Kit
Prerequisites
- Lens Studio v.5.15 or later
- Spectacles SnapOS v.5.64 or later
- Spectacles App v.0.64 or later
About Spectacles Mobile Kit
Spectacles Mobile Kit is a SDK that enables seamless communication between mobile applications and Lenses running on Spectacles via Bluetooth Low Energy (BLE). It empowers creators to build rich, interactive experiences that bridge mobile and Spectacles. Whether you're developing Lenses that respond to mobile input or enhancing your application with Spectacles integration, Spectacles Mobile Kit simplifies connectivity and enables two-way communication, unlocking new possibilities for dynamic, cross-device AR experiences.
SpectaclesMobileKitModule
SpectaclesMobileKitModule serves as the primary entry point for the Spectacles Mobile Kit, enabling interaction with a specific mobile application, such as requesting data or receiving events.
You can access the Spectacles Mobile Kit through the SpectaclesMobileKitModule asset like this:
- TypeScript
- JavaScript
private module = require('LensStudio:SpectaclesMobileKitModule');
const module = require('LensStudio:SpectaclesMobileKitModule');
Best Practice: Only one SpectaclesMobileKitModule should be used per Lens.
Bonding
Before accessing any other functionality, a security bonding process must be completed to establish a secure and trusted relationship between your mobile application and the Lens running on Spectacles.

- Your mobile application initiates a bonding request.
- Spectacles App on the same device responds by prompting the user to grant access to your mobile application.
- Once permission is granted, Spectacles App coordinates with the Spectacles device to create a bond between your Lens and your mobile application.
- This bonding process only needs to be completed once and establishes the foundation for all future communication.
Session
Once bonding is complete, your mobile application and the Lens on Spectacles can establish a secure communication session and begin exchanging messages. Each session is both encrypted and authenticated using the bonding credentials.
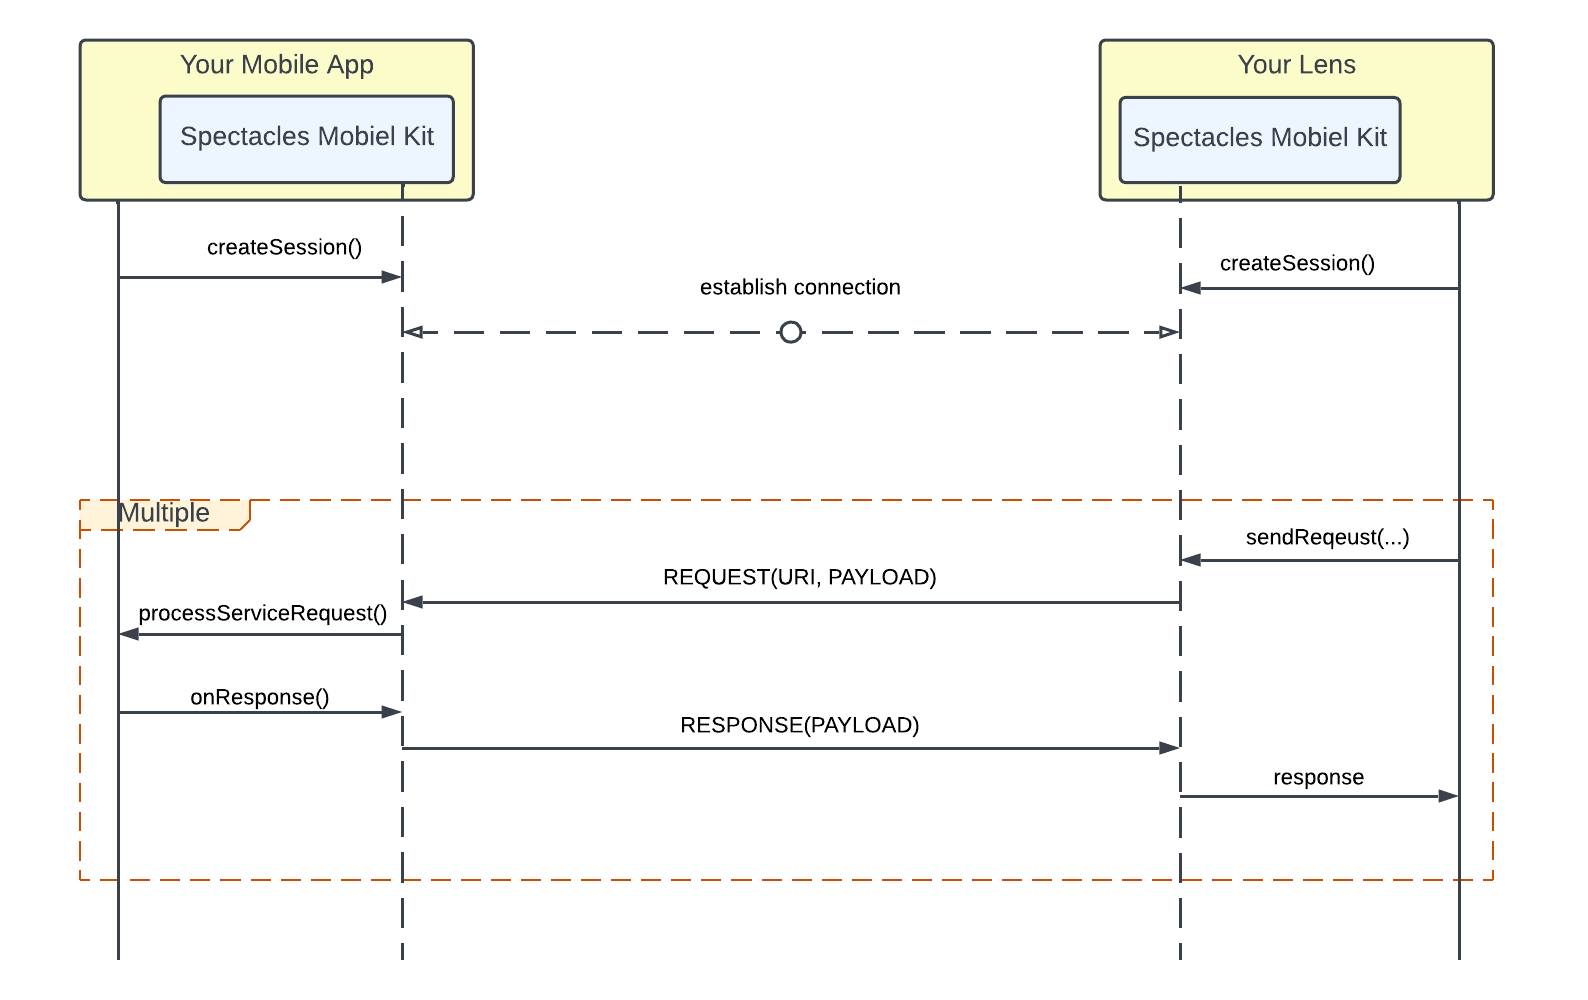
- Your mobile application and Lens both call createSession() to initiate the connection.
- Once a connection is established, the Lens can begin sending requests and events to your mobile application, which can respond accordingly.
- The Lens can begin subscribing to messages from the mobile application as well.
const session = mobileKitModule.createSession()
session.onDisconnected.add(() => {
    print('disconnected!')
})
session.onConnected.add(() => {
    print('connected!')
})
session.start()
Sample Project
Setting Up Environment
- Install Lens Studio
- Install Spectacles App on your mobile device
- Pair your Spectacles with the Spectacles App
Launch Sample Lens (Spectacles)
- Open the sample Lens project in Lens Studio.
- Go to the Project Settings and ensure the Lens Name is set to
“SpecsMobileKit”
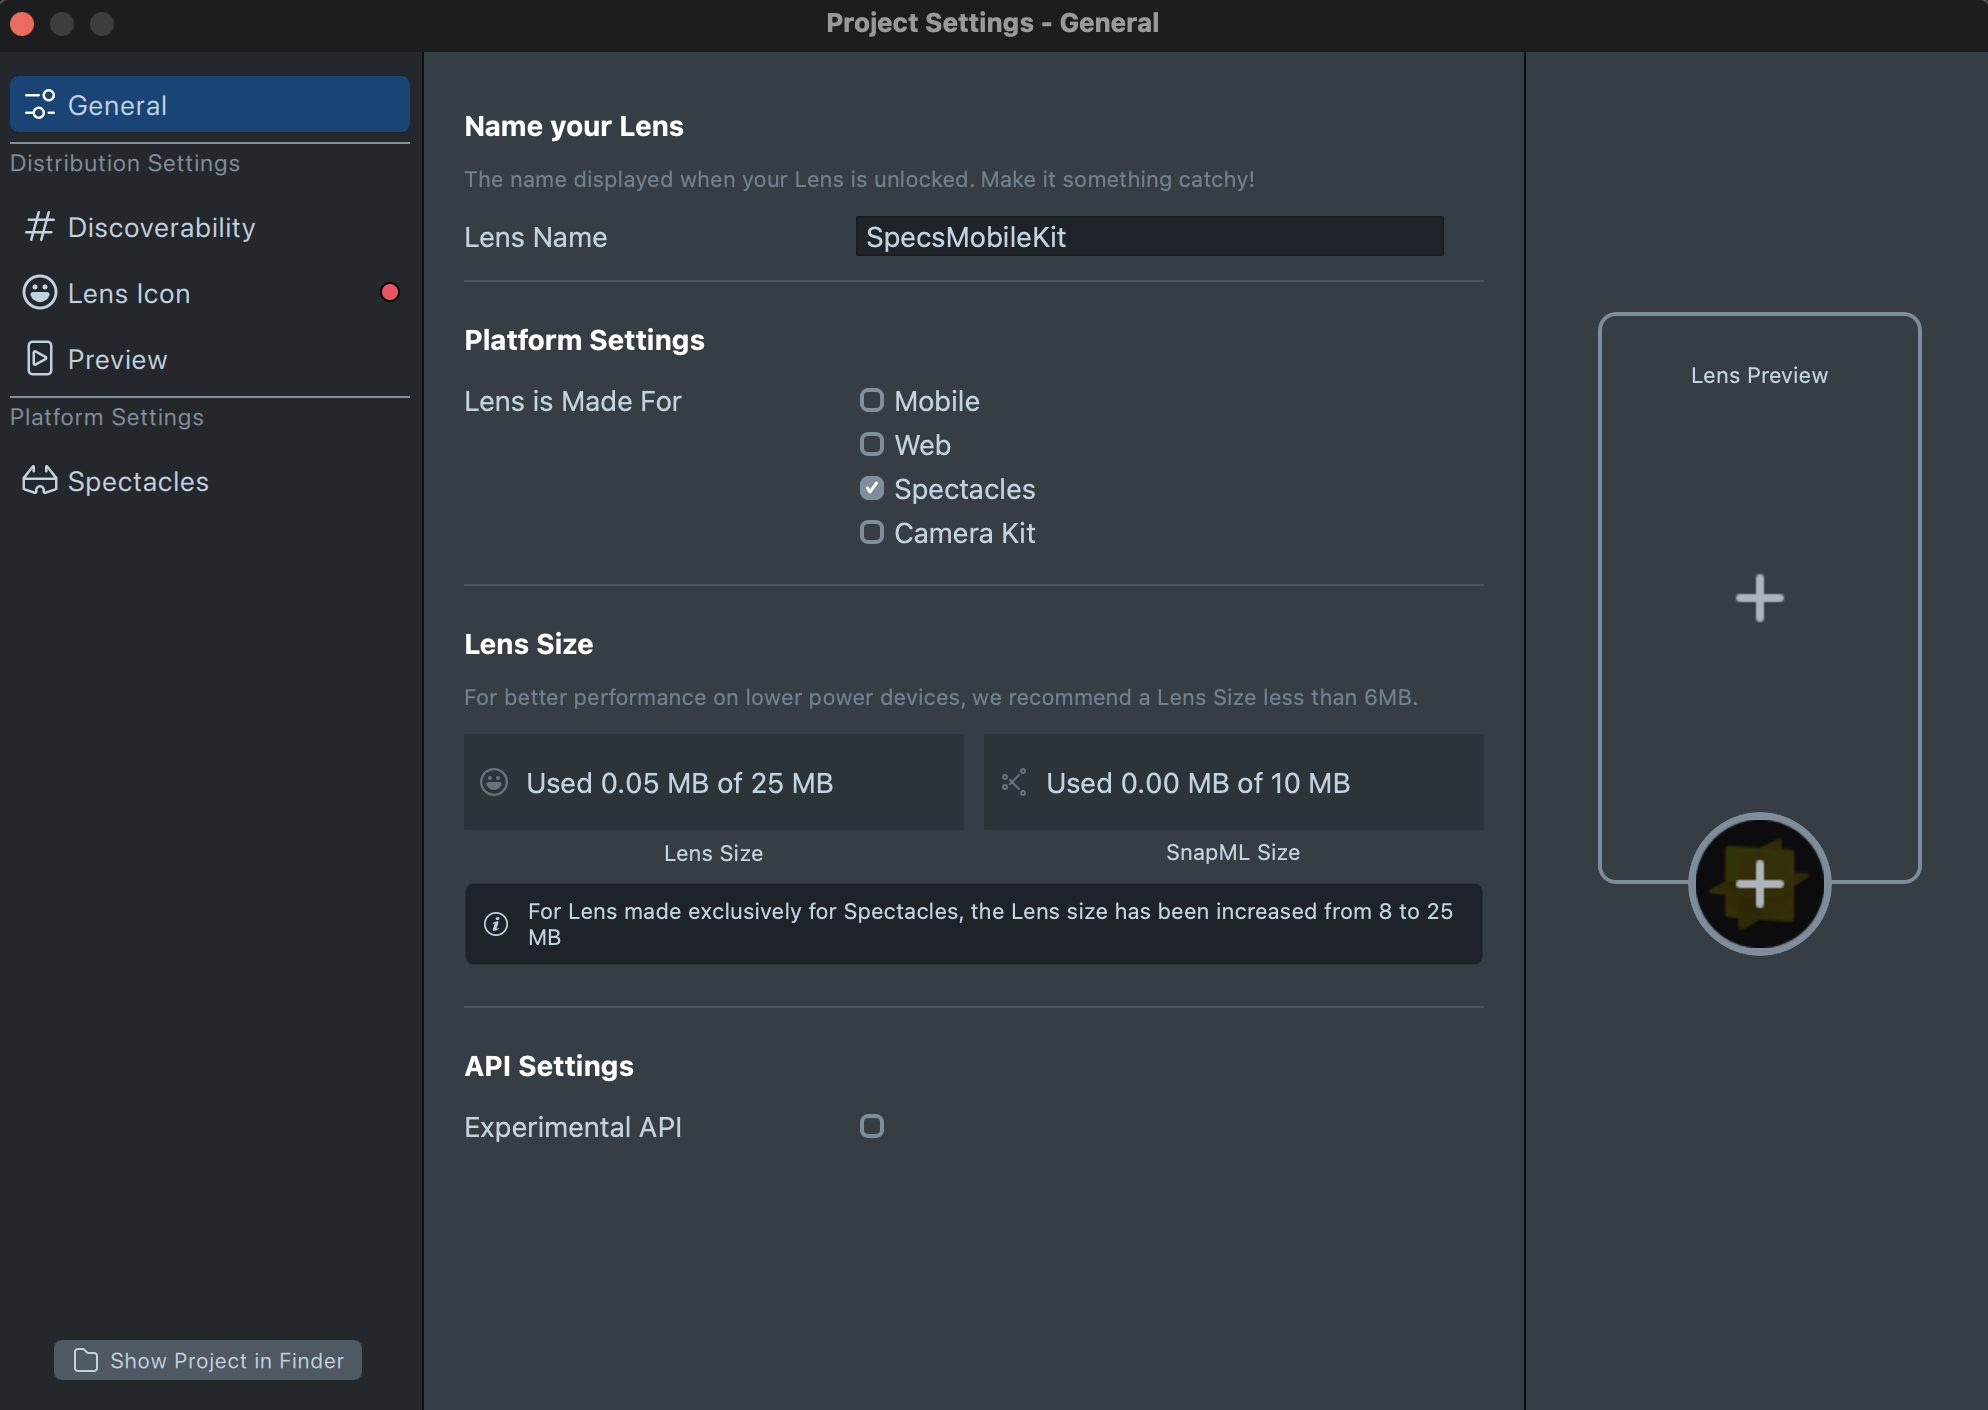
- Click Preview Lens to install and launch the lens on your Spectacles.
Launch Sample App (Mobile)
iOS
- Open the iOS sample app project in Xcode 16 and run it on a physical iPhone device.
- Enable Bluetooth on your iPhone. Grant Bluetooth access when prompted.
- Tap SpectaclesKit bind in the sample app, this will open the Spectacles App for user consent.
- In the Spectacles app, wait for device connection, and tap Continue to return back to the sample app.
- In the sample app, tap the binding result cell to open the session details page.
- Tap Start Session button to connect to the sample Lens.
- Enter text in the text box and tap Send.

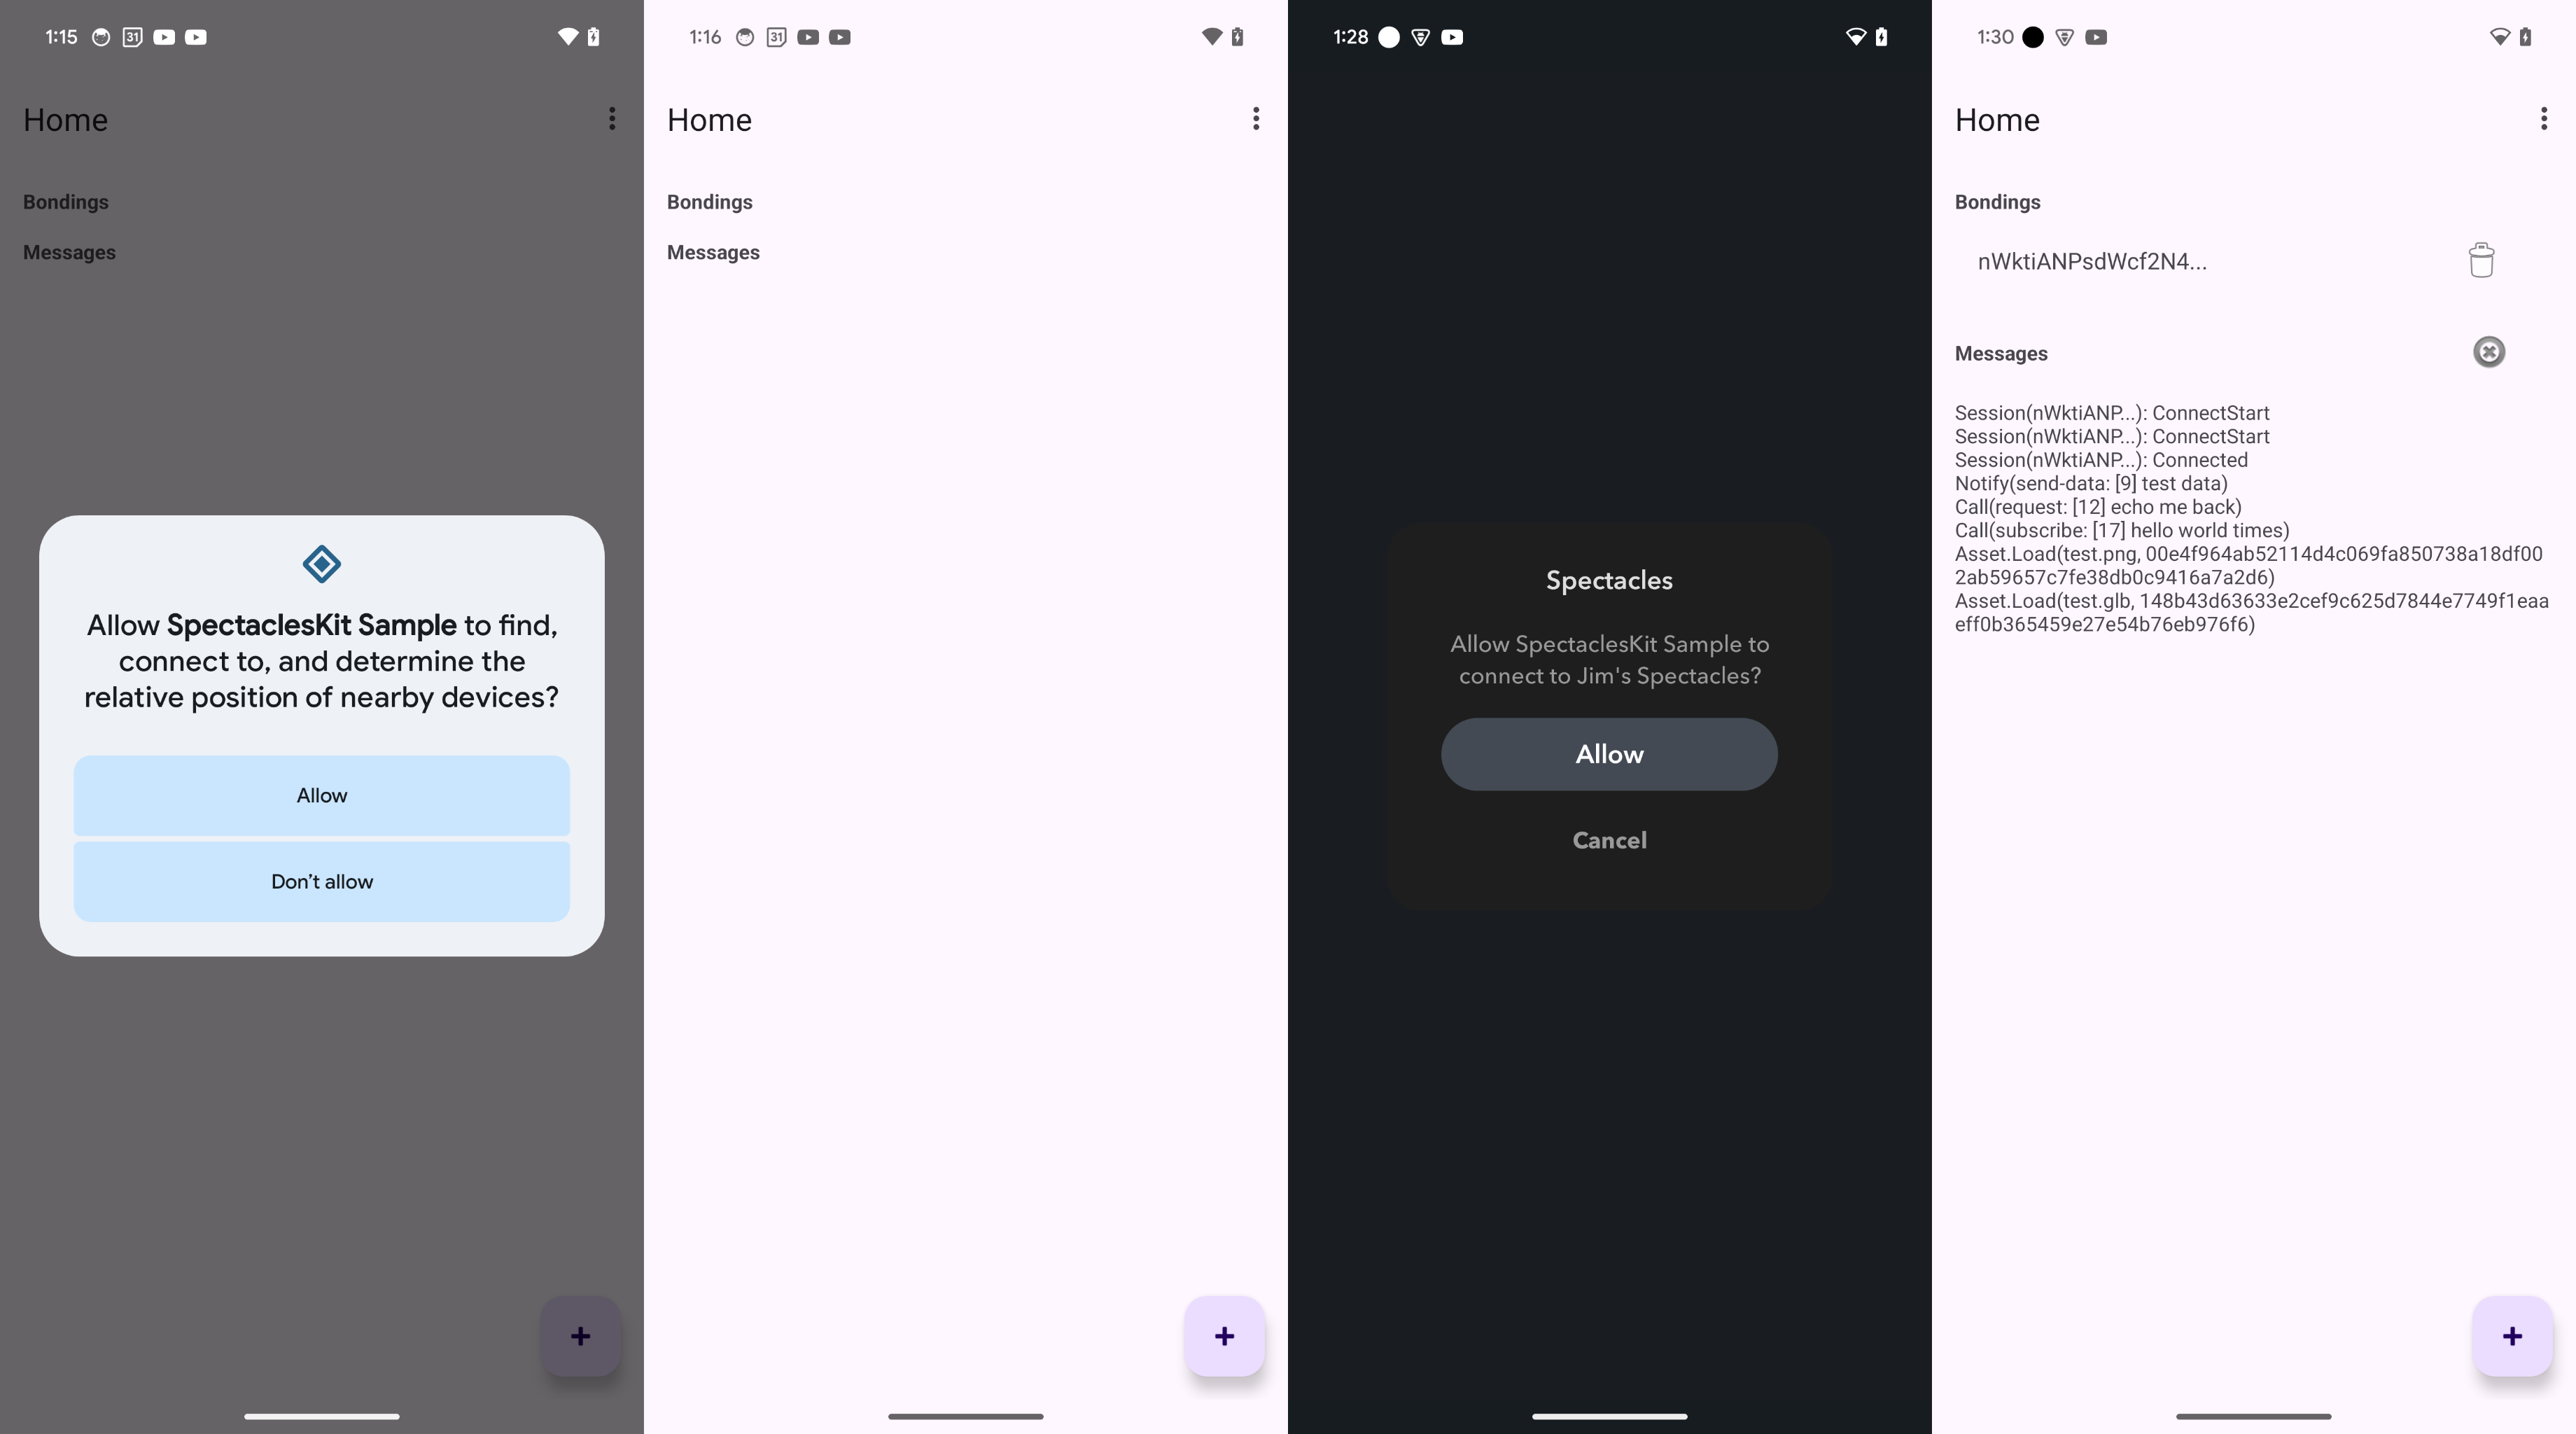
Android
- Import the Android sample app project using Android Studio.
- Launch the sample app and grant all required permissions. If you accidentally deny the permission request, manually enable permissions in your phone’s settings.
- Ensure the sample Lens is active on your Spectacles.
- For the first run, tap the "+" button at the bottom-right corner, which will redirect you to the Spectacles App for user consent.
- In the Spectacles App, tap the “Allow" button to return to the sample app.
- The sample app will connect to the Spectacles and respond to
requests from the sample Lens.
Lens ID Configuration
- For local development and testing, ensure the
lensIdmatches the Lens Name in the Project Settings of Lens Studio. For example, if the Lens Name isSpecsMobileKit, set thelensIdtoSpecsMobileKitin mobile app. - For production deployment, set the
lensIdto the Lens ID assigned when you submit your Lens for review.
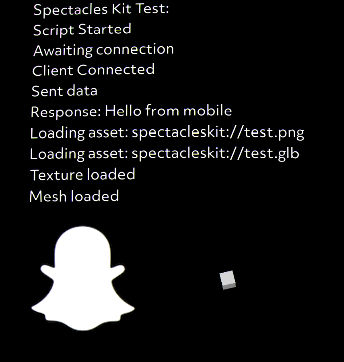
View Result
The sample lens will display the message sent from the sample app, along with the requested image and mesh.