Using Connected Lenses
SnapOS provides multiple entry points for Connected Lenses on Spectacles. A Connected Lens session can be created or joined from Lens Explorer.
Creating a New Session
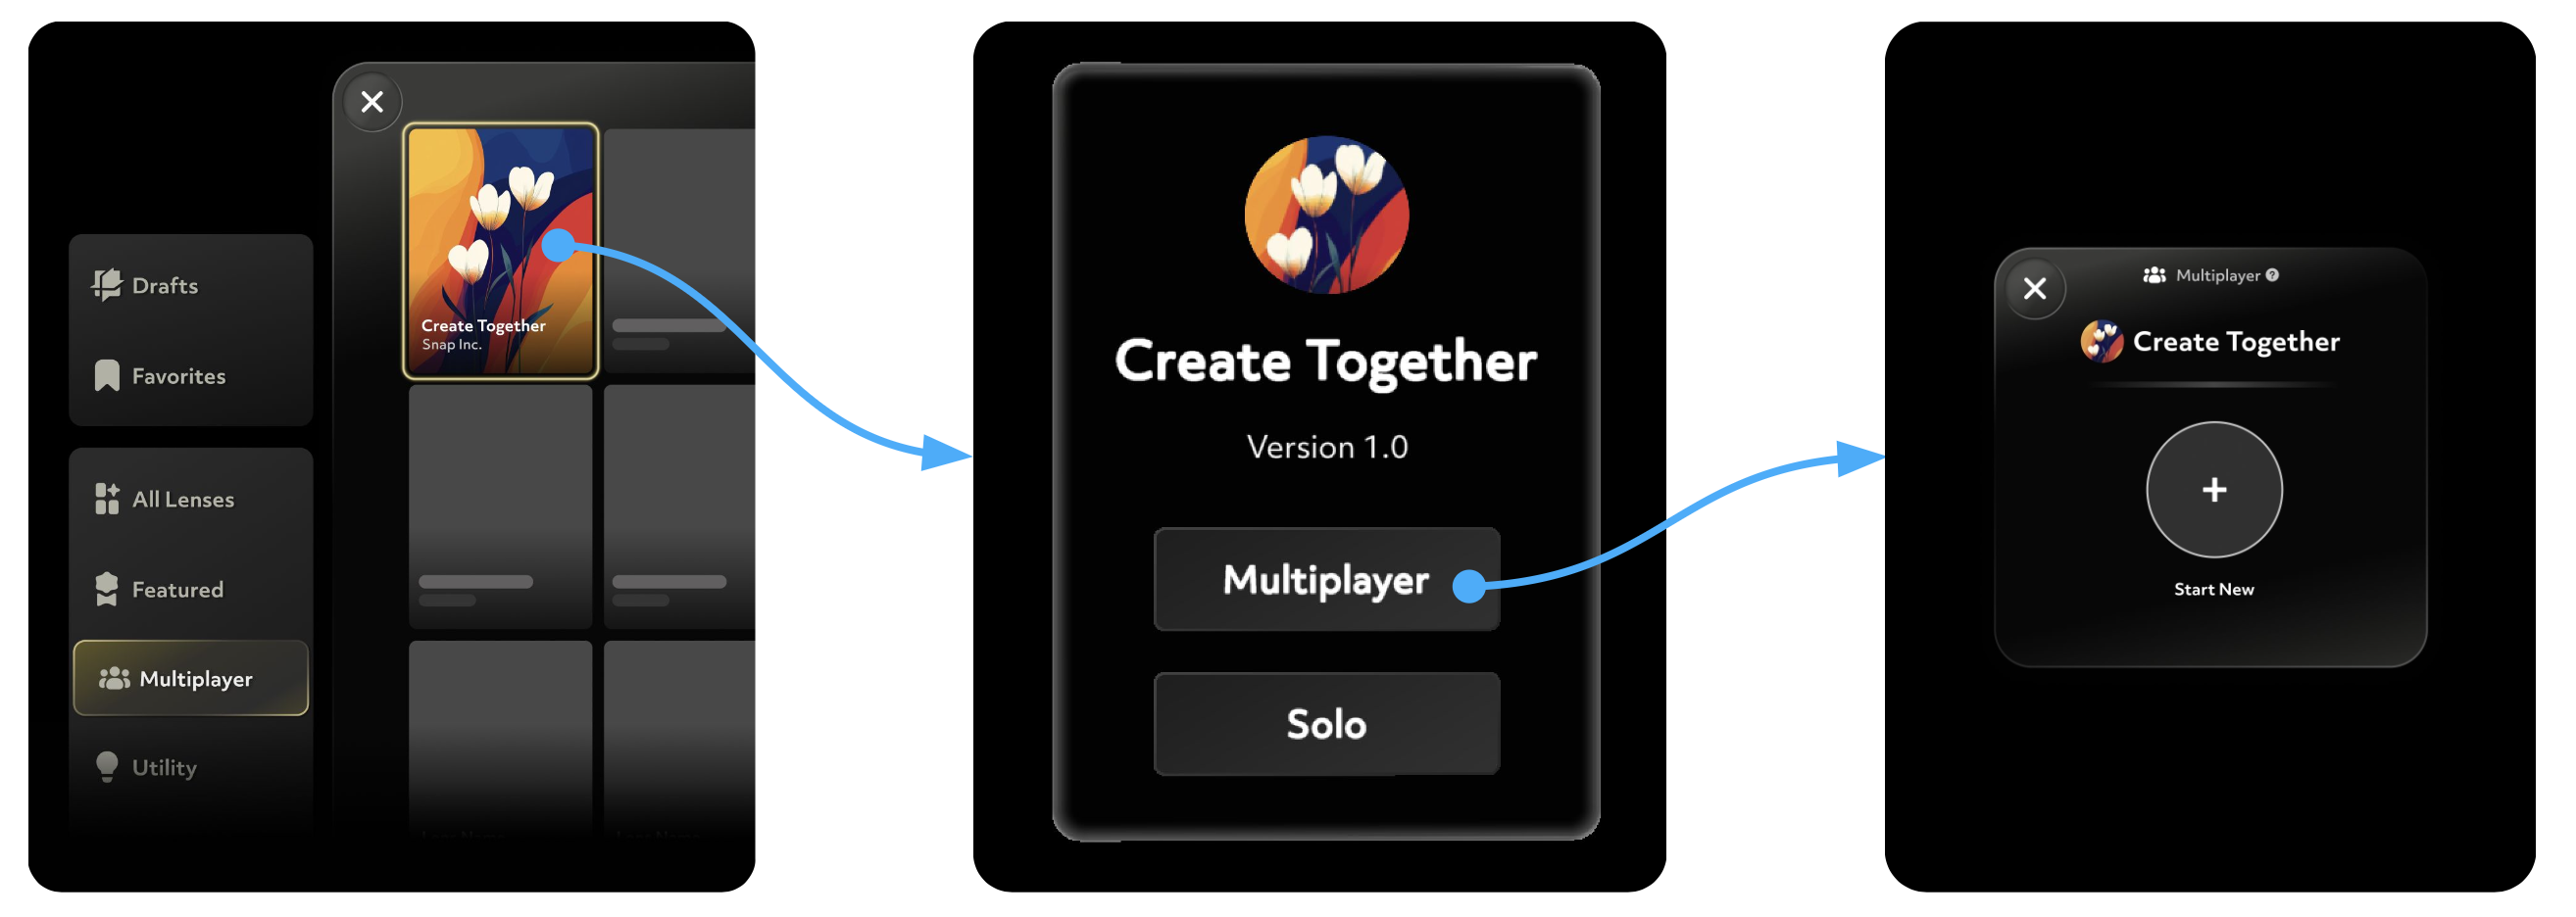
Connected Lenses are available under the Multiplayer section of Lens Explorer. To start a Connected Lens session, follow these steps:
- Select the Multiplayer category in Lens Explorer.
- Launch your chosen Lens.
- Choose Multiplayer in the Lens UI to open the system dialog for selecting a session.
- Select Start New to create a new session.

Joining an Existing Session
There are two ways to join an active Connected Lens session from Lens Explorer:
- Multiplayer category
- Active Nearby category
Multiplayer Category
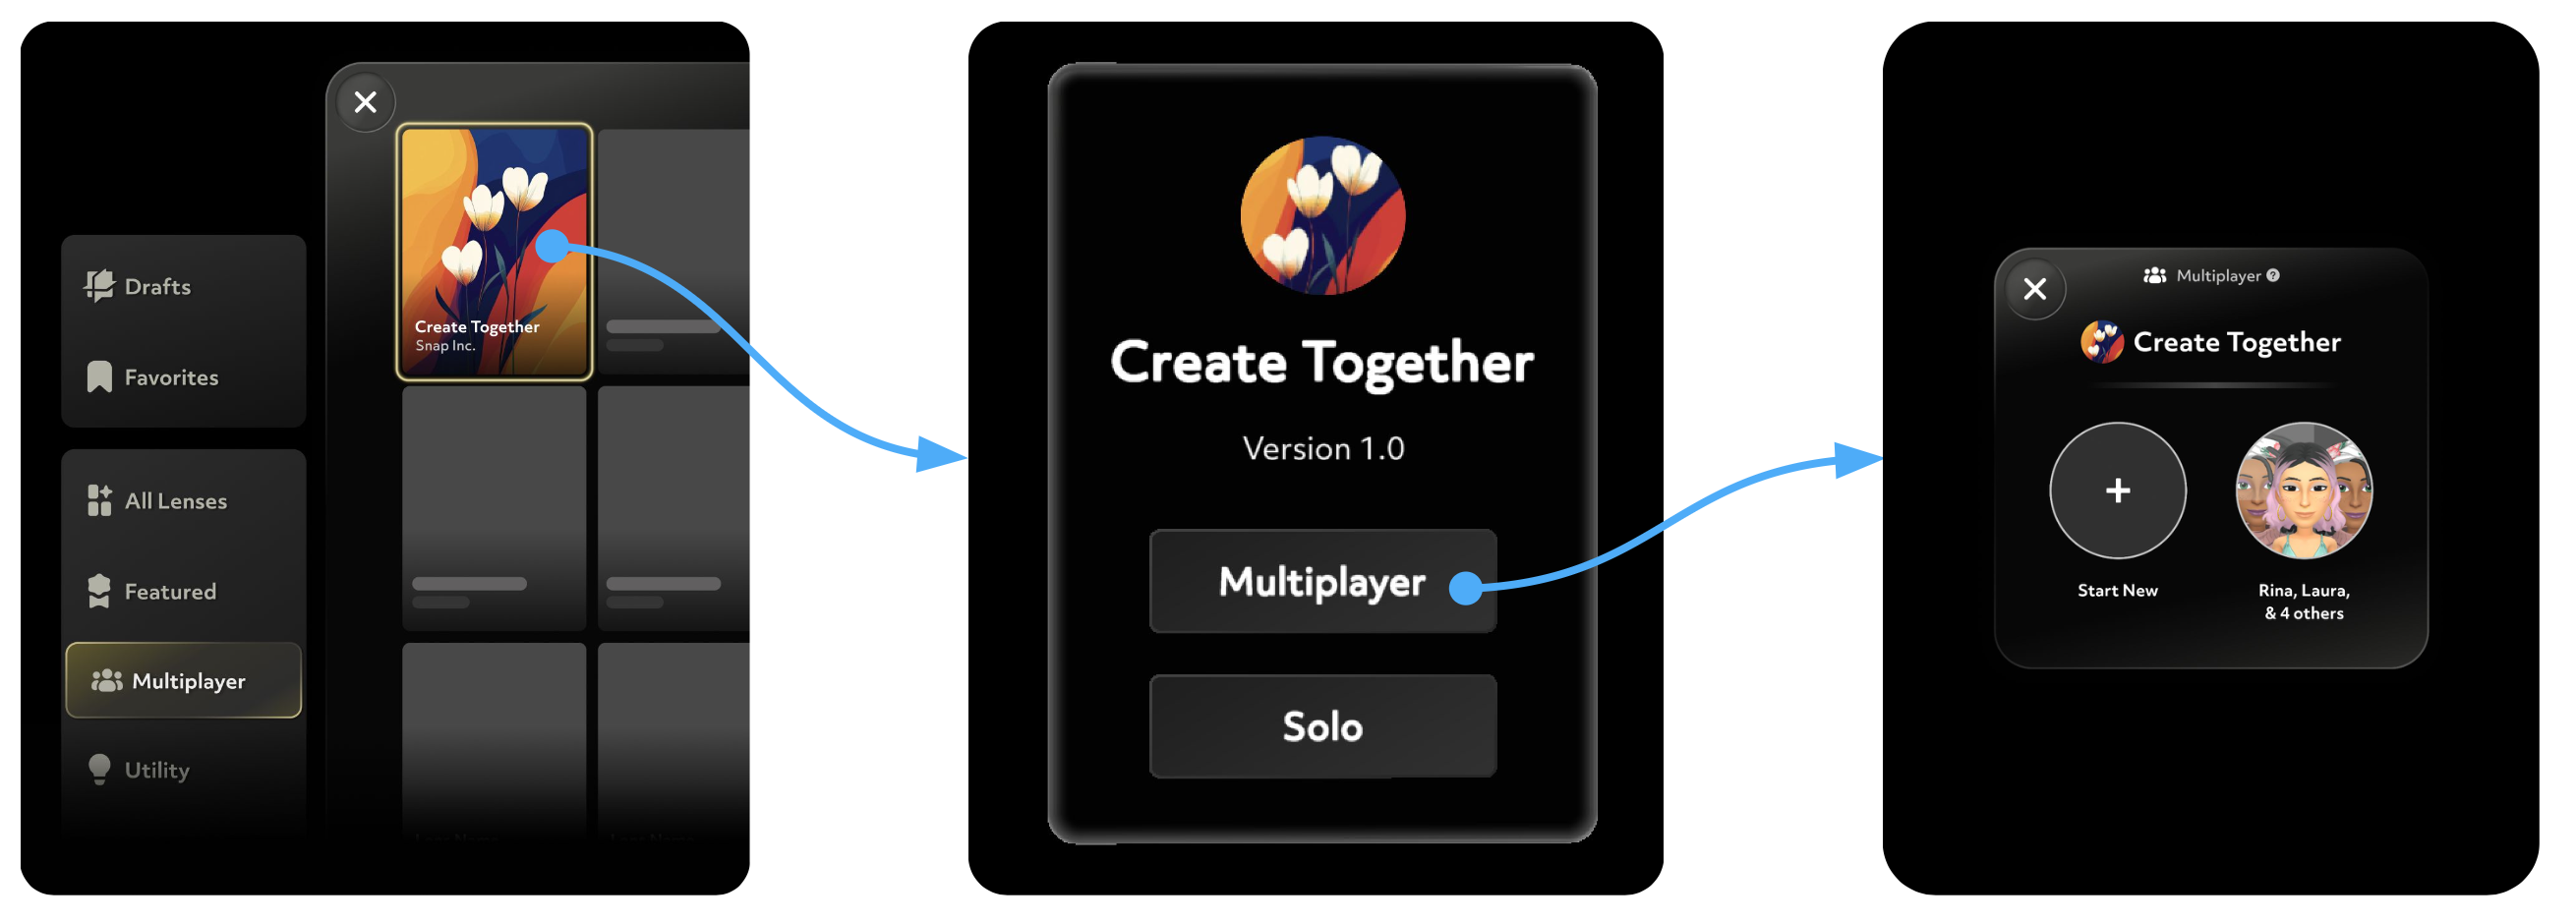
- Select the Multiplayer category in Lens Explorer.
- Launch the same Lens as the person you want to join.
- Choose Multiplayer in the Lens UI to open the system dialog for selecting a session.
- Select the session that has the name(s) and Bitmoji(s) of those you would like to join.

Active Nearby Category
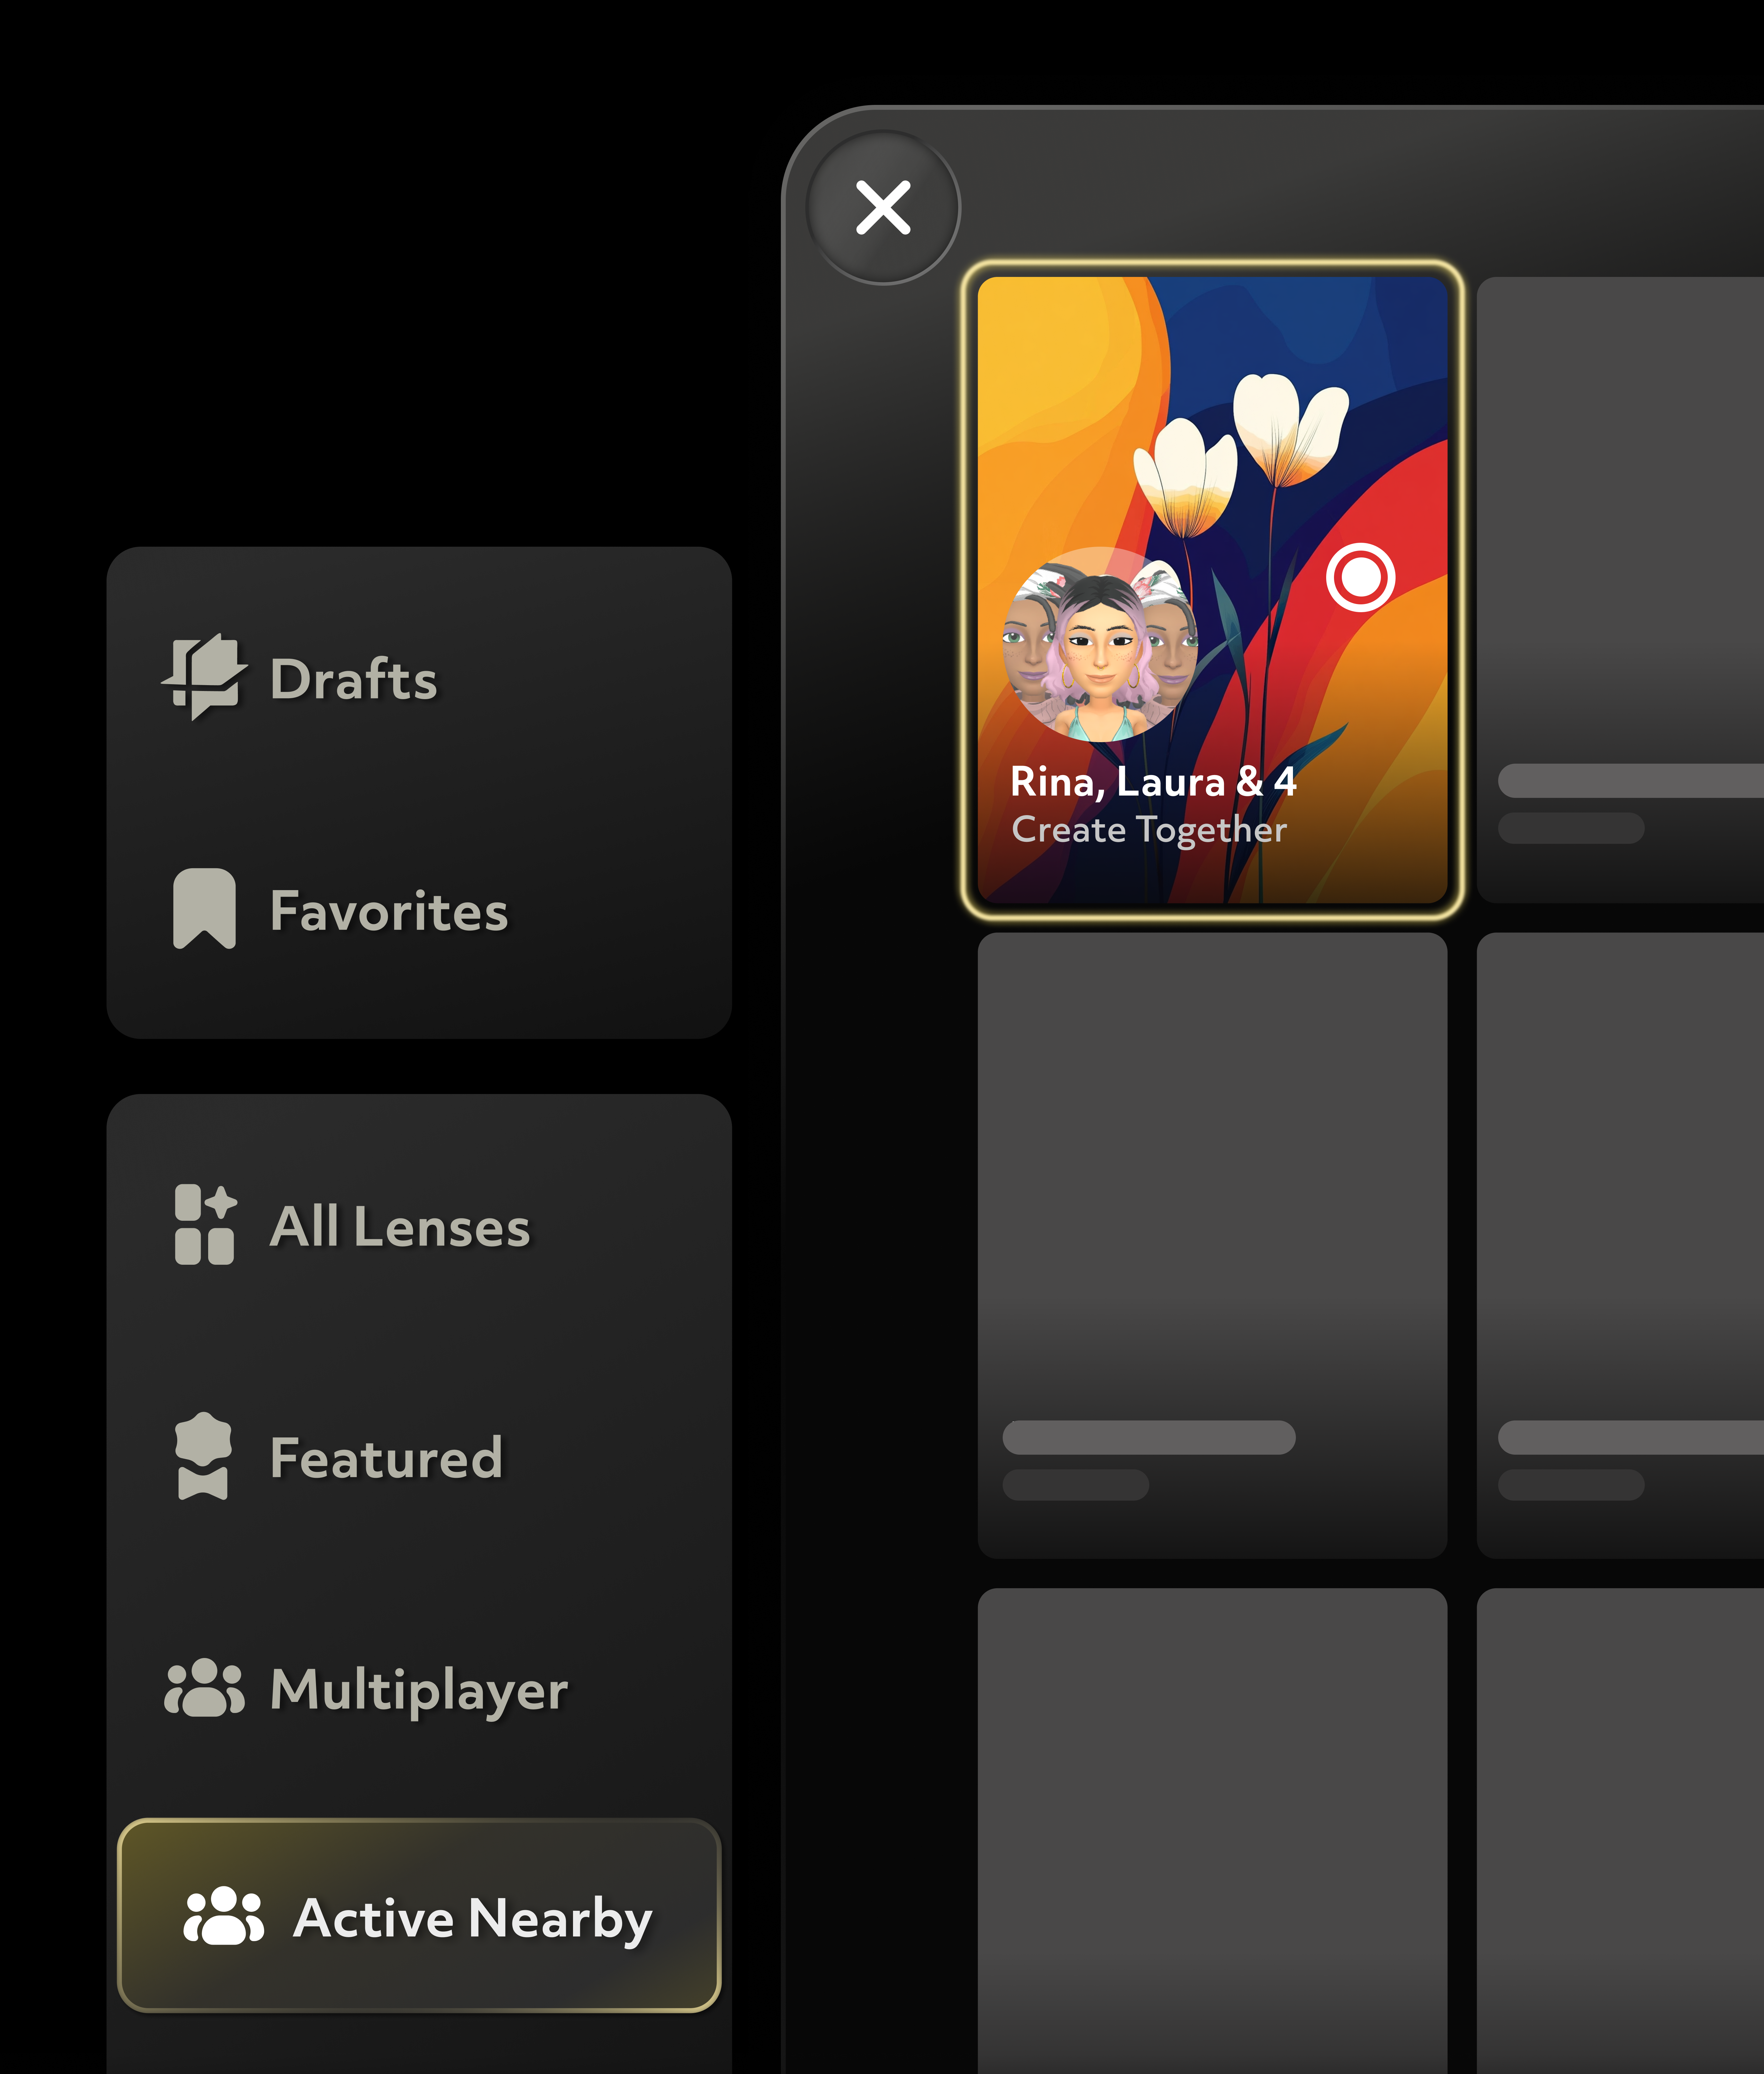
- Select the Active Nearby category in Lens Explorer. Lens Explorer will show tiles of Connected Lenses sessions that are active around you.
- Select the tile for a Connected Lens session you would like to join.

Establishing a Shared Coordinate Space
Connected Lenses on Spectacles are colocated. The first user to join the Lens establishes the shared coordinate space automatically. Subsequent players are guided to look at a friend who has already colocated to align their space with theirs.
Ensure successful colocation by:
- Facing your friend and looking at them head-on
- Standing within 2 meters of the friend you are looking at
- Using adequate lighting to make features of your space detectable
Once you colocate successfully, Connected Lenses session setup is complete!

Was this page helpful?