Quiz
Quiz Lenses combine the interactivity of quizzes with personalized AR effects, creating a unique and engaging experience for users. Quiz Template allows you to design your own quizzes with specific questions, options, and AR Effects, all while incorporating interactive elements like tap and head tilt interaction.
This template allows you to create following variations of experience out the box:
- Quiz with yes-no options picked by tilting head
- Quiz with 2 or 4 buttons with text answers
- Quiz with 2 or 4 buttons with image answers
These quizzes may also be split in two broad categories:
- With correct answers, to let users compete in knowledge of some topic, or help them learn something. While implementing such quiz you may want to show only part of questions for each round, likely in random order, to keep them engaging on following playthroughs. Also, it's nice to have some feedback on whether the answer was correct.
- Without correct answers, for example: personality or preferences quizzes, or helping to decide something. These usually ask all of their questions and don't benefit from shuffling.
If you are familiar with scripting, you may also try to implement quizzes where questions are generated at the start of the Lens, instead of being predefined; quizzes with correct answers that only allow a number of mistakes; or quizzes which change which questions are shown depending on previous answers.
Also, there are triggers on most of the meaningful events, all of them can call Behavior scripts or custom script methods, but some of them also carry additional information (e.g. index of shown questions, index of the answer picked by the user, and whether it was correct, if applicable, which result was shown and how many answers were given and how many of them were correct), which is more useful with custom scripts, as behaviors can't receive parameters.
Project overview
Visual layers
There are multiple cameras with different layers, so we can position our objects one before other easier and control which effects apply to which objects.
Face effects
This is the place to put your retouches, makeups, etc, anything that alters the face, but shouldn't draw over background or other decorations.
VFX BG (segmented BG)
Elements here will be behind user segmentation, so it's a good place for background VFX, color corrections, etc.
3D camera
As the name implies, most of your 3D objects would go here. You may also put full screen effects here, or in the VFX FG camera.
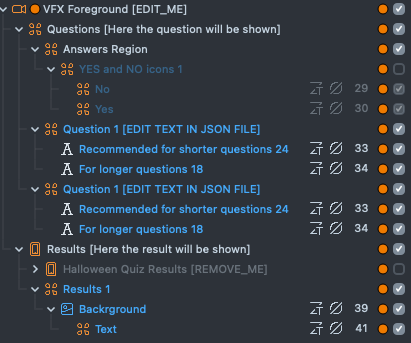
VFX FG
This is a place for things to be drawn over most of the visuals, for example quiz questions, answers and results are here by default.
UI
This layer is for UI elements that won't be recorded into Snap, like hints, or Reset button.
Quiz data
There is TypeScript definitions file Scripts/Declarations/Quiz.d.ts describing interfaces and types for
most of the scripts that intended to be changed or replaced, you can find QuizData specification there.
Specification of questions and rules to select results based on the answers to them is defined as a JavaScript object
provided by a script with API function getQuizData that returns a Promise<QuizData>, this allows
for quizzes to be generated at runtime. If your data is predefined — wrap it in Promise.resolve call,
check provided Quiz Data scripts for examples.
Quiz data objects consists of two properties — questions and results:
Questions
questions property is an array of question descriptors, which include:
questions— a string containing the question text;answers— an array of strings or textures representing possible answers;- optional
correctIdx— a number, index of correct answer for quizzes with correct answers;
If the first question descriptor contains correctIdx property, all other should do it too.
You may make a quiz that has images as questions, this will require changing QuestionView script to accept images.
Results
results property is an array of result descriptions, which include:
scene— a number identifying a "scene" to show for this result, this index will be used byResultsControllerin request toDecorations Controllerscript provided into its parameters, and also as the index of theResults prefabto instantiate.text— a string containing the text to be shown for this result. It may also include templates, see "Human body knowledge" example. This text will be passed to result prefab instantiated by theResultsController.- properties with names corresponding to question indices, and values being numbers or arrays of numbers describe questions and corresponding answers that add score to this result.
- optional
ceil— a number, for quizzes with correct answers all the results match the same questions, but the selection is based by the number of matching answers, this is property marks the maximum value of matching answers to consider this result to display. If the number of matching answers is greater than this value, this result will not be considered to display. Tip: use some unreasonably big number (like 1000) for the result matching the best score in case you change requirements later, so there won't be a situation when there is no result matching new amount of correct answers.
See example scripts and Quiz.d.ts to learn more.
Examples
Template provides three examples to get you started:
- Choose your meditation — simple quiz with Yes/No answers picked by tilting head.
- Halloween personality — more advanced personality quiz, where user picks answer by taping a button, it demonstrates how to change decorations for different results, and also how to implement reaction to user answer by custom script.
- Human body knowledge — example of a quiz with correct answers, which also features displaying only part of the questions at a time in random order, and formatting result text based on number of correct answers.
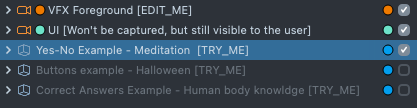
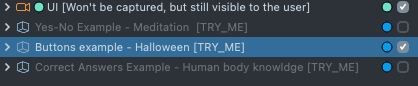
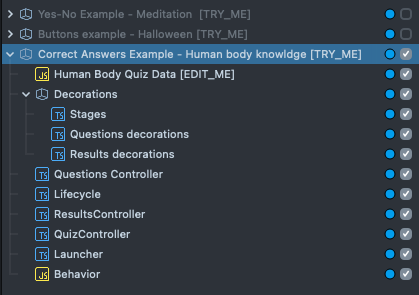
Try different examples by enabling corresponding Scene Objects.
Choose your meditation
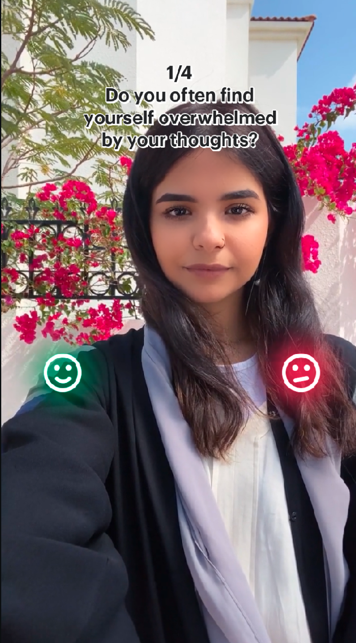

This variant is the one selected when you open the template for the first time, it's the simplest one and doesn't require any additional resources (but you may add some if you want), you can make the simplest quiz simply by changing the provided Quiz Data script.
Edit quiz data
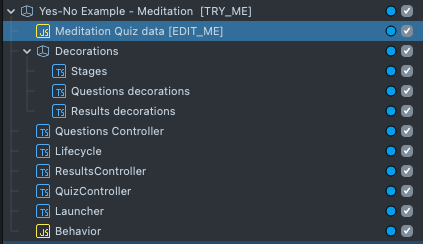
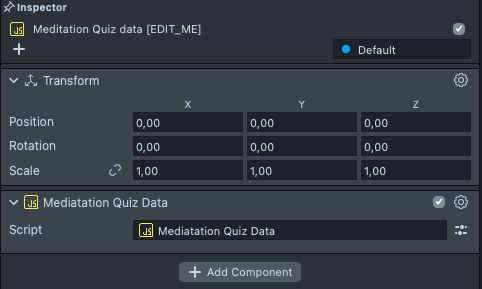
Edit the questions in the Examples->Meditation [REMOVE_ME]->Mediatation Quiz Data script.

You can also quickly navigate to it by clicking Meditation Quiz Data parameter of Script Component while holding Shift, or right-clicking it and picking Highlight.
There you can find question definitions, try changing texts, or rearrange question objects, each of them is wrapped in {curly brackets}:
'questions': [
{
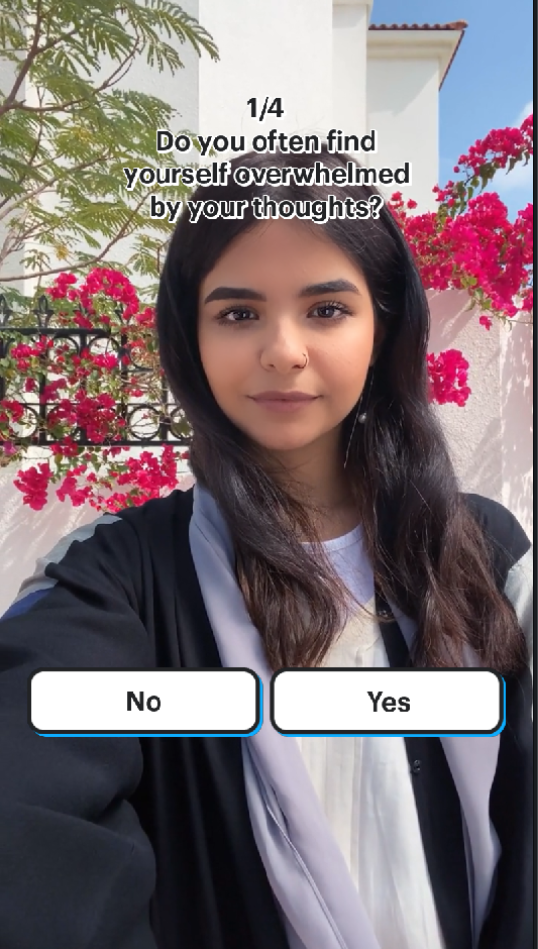
'question': 'Do you often find\n yourself overwhelmed\n by your thoughts?',
'answers': [
'No',
'Yes'
]
},
{
'question': 'Do you prefer focusing\n on a single task\n rather than multitasking?',
'answers': [
'No',
'Yes'
]
},
{
'question': 'Can you easily focus\n on your bodily sensations?',
'answers': [
'No',
'Yes'
],
},
{
'question': 'Do you find peace\n in observing\n your environment?',
'answers': [
'No',
'Yes'
],
}
]
Add newlines by using \n.
Here are result definitions:
    'results': [
    { 'text': 'Mindfulness meditation', 'scene': 0, '0': 0, '1': 0, '2': 0, '3': 0 },
    { 'text': 'Body scan meditation', 'scene': 1, '0': 0, '1': 0, '2': 0, '3': 1 },
    { 'text': 'Body scan meditation', 'scene': 1, '0': 0, '1': 0, '2': 1, '3': 0 },
    { 'text': 'Body scan meditation', 'scene': 1, '0': 0, '1': 0, '2': 1, '3': 1 },
    { 'text': 'Deep focus meditation', 'scene': 2, '0': 0, '1': 1, '2': 0, '3': 0 },
    { 'text': 'Deep focus meditation', 'scene': 2, '0': 0, '1': 1, '2': 0, '3': 1 },
    { 'text': 'Body scan meditation', 'scene': 1, '0': 0, '1': 1, '2': 1, '3': 0 },
    { 'text': 'Body scan meditation', 'scene': 1, '0': 0, '1': 1, '2': 1, '3': 1 },
    { 'text': 'Mindfulness meditation', 'scene': 0, '0': 1, '1': 0, '2': 0, '3': 0 },
    { 'text': 'Mindfulness meditation', 'scene': 0, '0': 1, '1': 0, '2': 0, '3': 1 },
    { 'text': 'Mindfulness meditation', 'scene': 0, '0': 1, '1': 0, '2': 1, '3': 0 },
    { 'text': 'Body scan meditation', 'scene': 1, '0': 1, '1': 0, '2': 1, '3': 1 },
    { 'text': 'Deep focus meditation', 'scene': 2, '0': 1, '1': 1, '2': 0, '3': 0 },
    { 'text': 'Deep focus meditation', 'scene': 2, '0': 1, '1': 1, '2': 0, '3': 1 },
    { 'text': 'Deep focus meditation', 'scene': 2, '0': 1, '1': 1, '2': 1, '3': 0 },
    { 'text': 'Body scan meditation', 'scene': 1, '0': 1, '1': 1, '2': 1, '3': 1 }
]
Try changing answer texts, it will be shown on the final screen in a bubble at the bottom of the screen.
If you rearranged questions earlier, notice, that results no longer match earlier answers,
since results map to questions by their index in questions array, the first question has index 0, second one — 1, and so forth.
For example, the first Mindfulness meditation result is defined by answering all questions No:
'0': 0 means "matches if user answered with the first answer to the first question",
'1': 0 — same for the second questions, and so forth.
Change Answer Picker prefab
As you may notice, the answers are provided in questions definitions, but are not displayed in current answer picker, it's always red and greens smileys, let's try answer picker prefab with buttons instead.
Go to the QuizController Script Component:
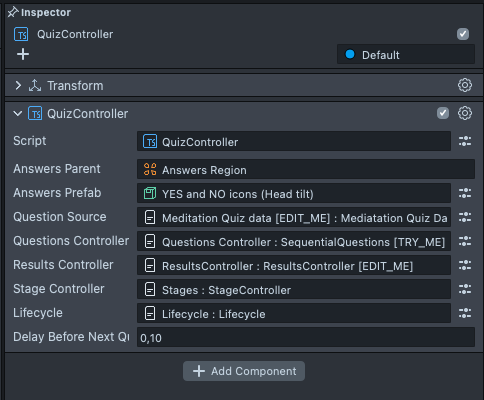
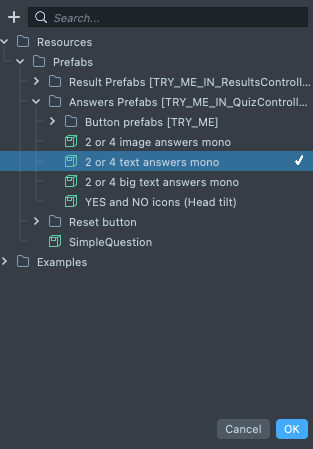
And replace Answers Prefab parameter with 2 or 4 text answers mono
Now we can see text answers:
You may edit this prefab, for example to make buttons of different colors.
For example, to make the first button red -- open prefab by double-clicking it in Asset Browser
and navigate to Button 1->Blue quarted button 1->Button 1 Image Component:
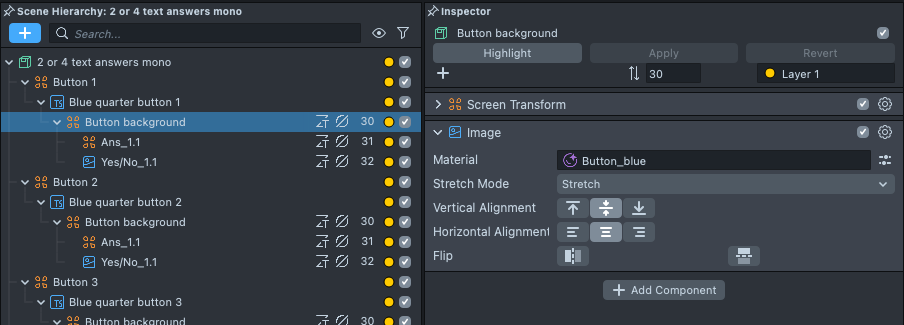
Then replace Button_blue material with Button_red and press Apply button at the top of the Inspector:

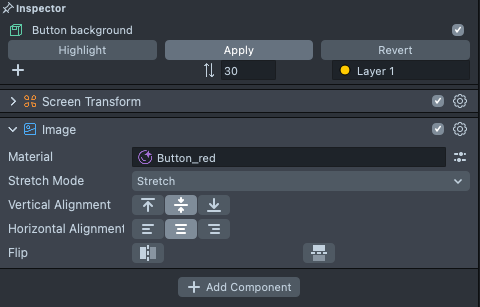
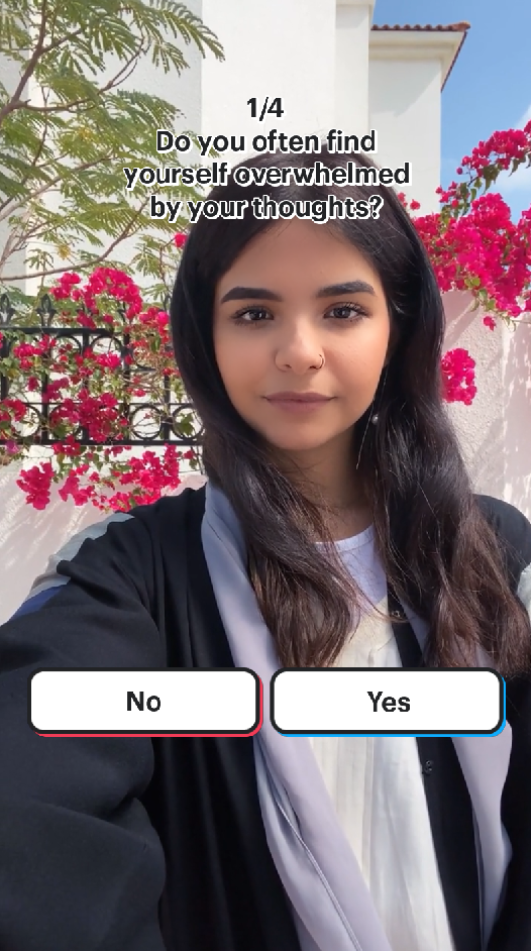
Congratulations, you've made your own style for buttons!
Change Result
So far, our results differed only in text, let's change their style too, so each result will have different color tint.
Let's return from the prefab view to Scene view, for that -- find Scene asset in Asset Browser, and double-click it as you did earlier with the
prefab:
Then navigate to ResultsController Script Component:
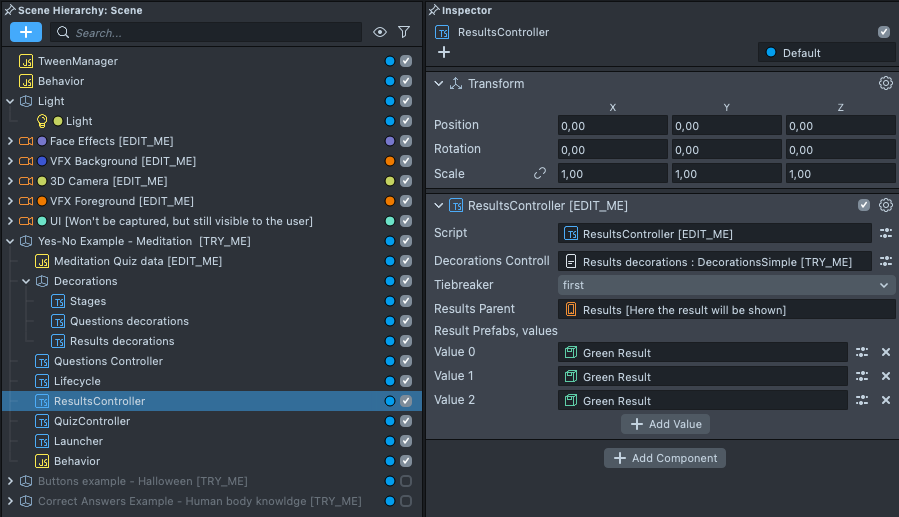
Here you can see three result prefabs, the same amount as the scenes we have in our results description, with corresponding indices: 0, 1 and 2.
You can add or remove them, just note, that if there is no prefab specified for the scene -- it won't be instantiated.
Try changing them the same way as with Answer Picker prefab, there are some predefined in the
Resources->Prefabs->Result Prefabs [TRY_ME_IN_ResultsController] folder:

Halloween personality
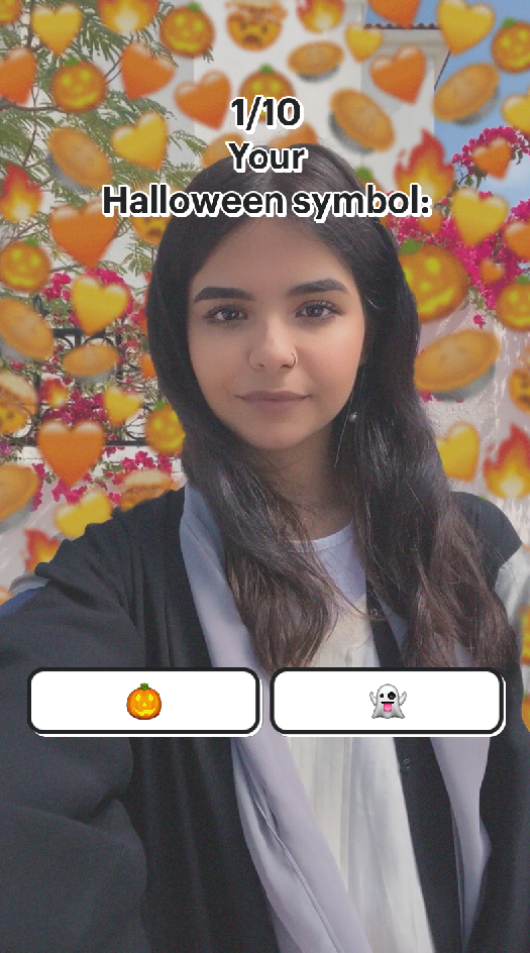

This example shows how to change decorations for different stages and results, and also how to react to user answers via a script.
Edit quiz data
In the previous example you've seen how to define results, so they correspond to a single answer in each question, but sometimes you may want to account for different answers the same way, you could duplicate results, of course, but this is not always necessary.
Open the Halloween Quiz Data script example, as you did in the previous example and go to result descriptions,
there you can find some duplicate results, that differ only in one answer, let's fix that:
{
    'text': 'Mummy',
    'scene': 4,
    '0': 1,
    '1': 1,
    '2': 0,
    '3': 0
},
{
    'text': 'Mummy',
    'scene': 4,
    '0': 1,
    '1': 1,
    '2': 1,
    '3': 0
},
{
    'text': 'Frankenstein',
    'scene': 5,
    '0': 1,
    '1': 0,
    '2': 0,
    '3': 1
},
{
    'text': 'Frankenstein',
    'scene': 5,
    '0': 1,
    '1': 0,
    '2': 1,
    '3': 1
}
become
{
    'text': 'Mummy',
    'scene': 4,
    '0': 1,
    '1': 1,
    '2': [0, 1],
    '3': 0
},
{
    'text': 'Frankenstein',
    'scene': 5,
    '0': 1,
    '1': 0,
    '2': [0, 1],
    '3': 1
}
These descriptions are identical, but the second one is easier to change.
You can also omit question from a result description, this would be the same, as specifying an empty array. Defining all answers is also different from defining none — in the first case any answer will give points to the result, in the second one — result won't get points independently of the answer. This may affect final result calculation.
Change decorations
This example contains post-effects for different states and results, let's see how it's configured:
Scene Objects to display at different stages (Intro, Questions and Results) are configured in
Decorations->Stages Script Component:
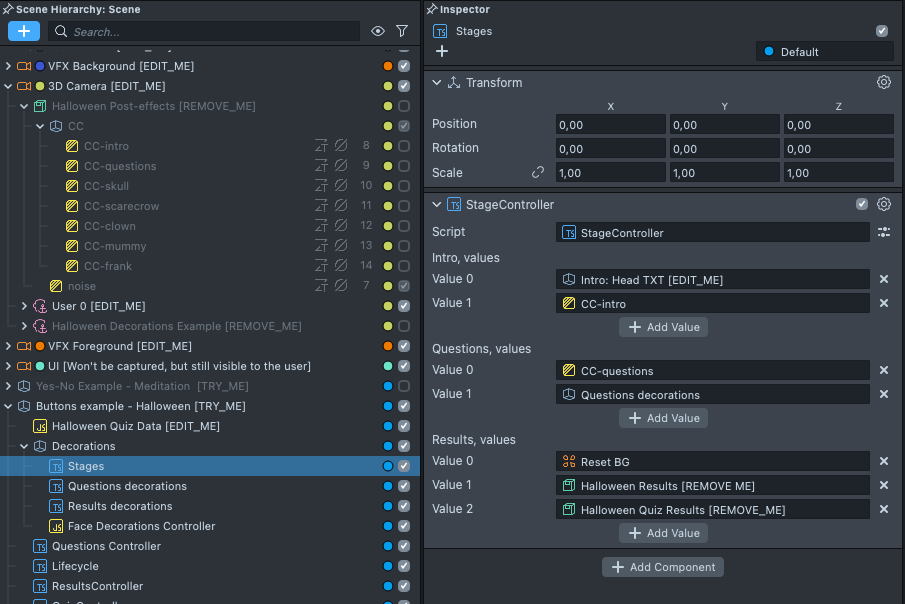
Here you can see that Intro and Questions have different Post-Effects located at
3D Camera [EDIT_ME]->Halloween Post-effects [REMOVE_ME]->CC, named CC-intro and CC-questions accordingly.
There are some other Post-Effects too, for different results.
These are configured in Decorations->Results decorations
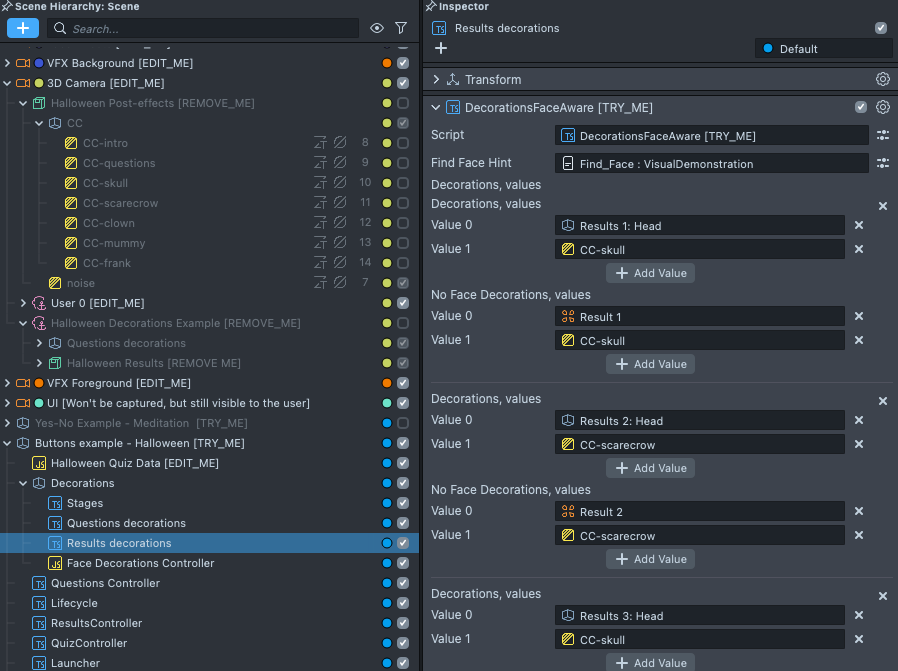
This decorations controller is aware of faces in camera, and has different decorations for situations
when there is face, and when there is none, there is also DecorationsSimple [TRY_ME], which doesn't
know about faces, and therefore easier to set up if there is no need for face decorations.
This decorations controller in turn is referenced in ResultsController:
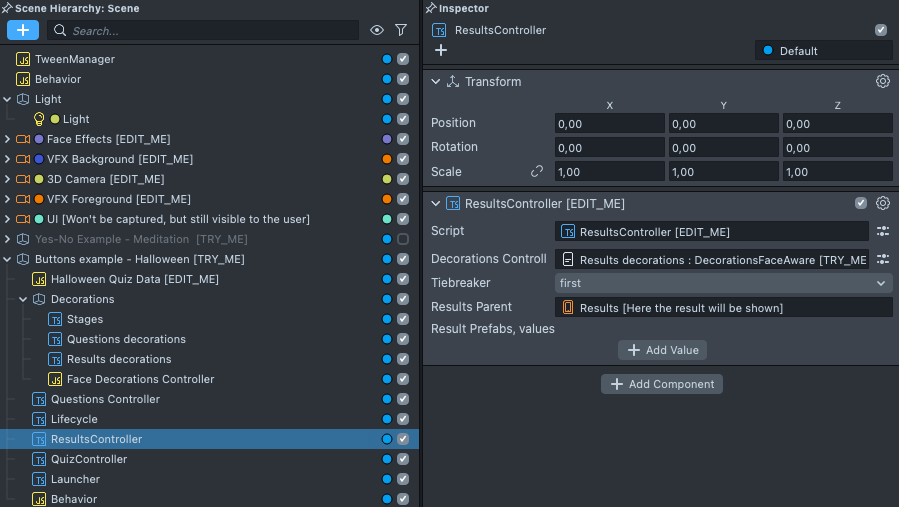
Note, there are no result prefabs in this example, every result has distinct scene with different decorations, and they correspond to sets of decorations in decorations controller.
Try adding backgrounds to different results in Results decorations script by pressing Add value button
and selecting background from VFX Background [EDIT_ME]->Halloween exampe [REMOVE_ME]->Questions BG Scene Object:
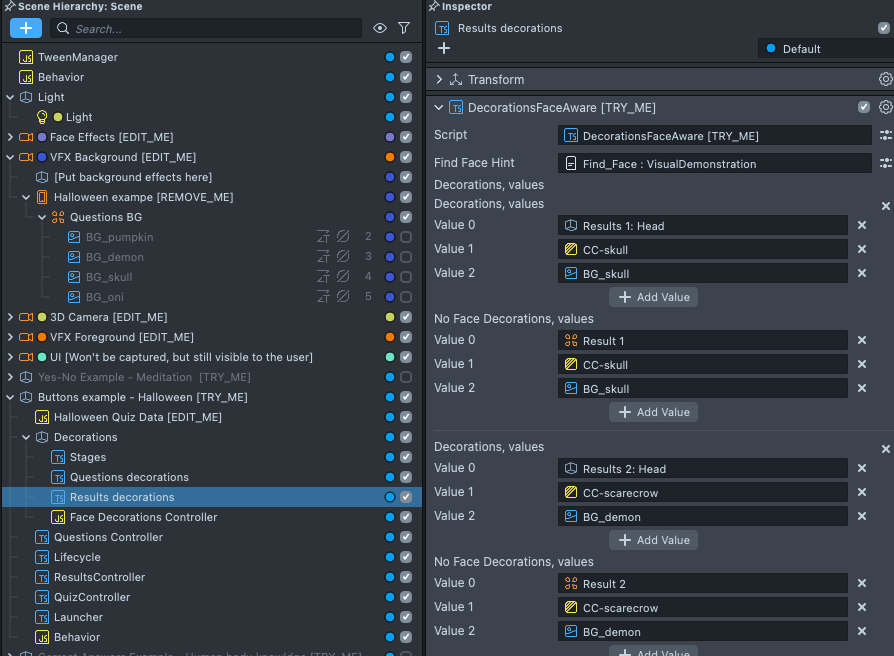
Now it looks complete:

Question decorations controller works the same way as the result decorations, but index of the scene is the index of the question from the beginning of the round, so you can show different decorations on each question as well.
Listening to events
As you may have noticed, there are emojis on the user face, that change depending on the last answer,
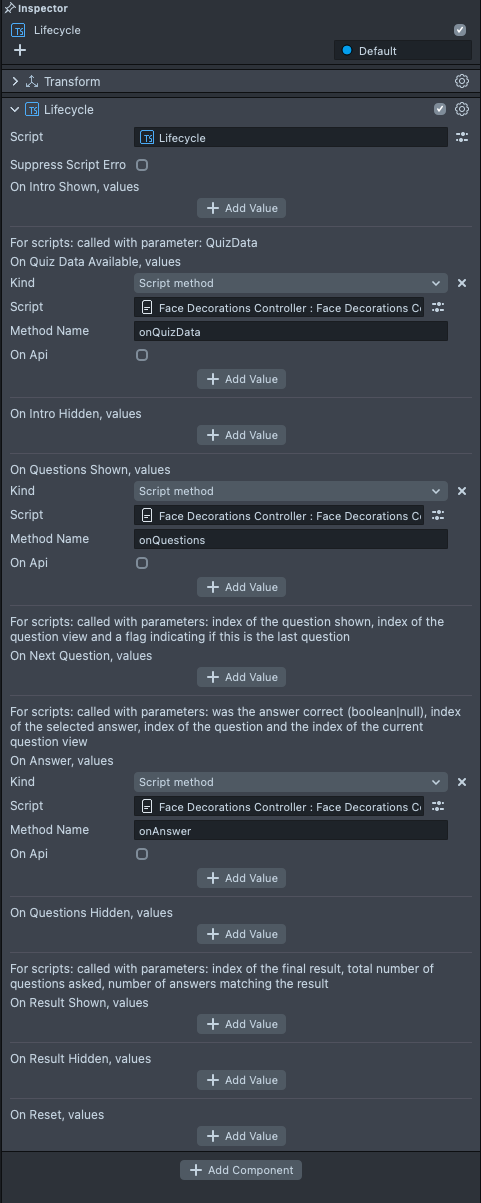
this is done by Face Decorations Controller script.
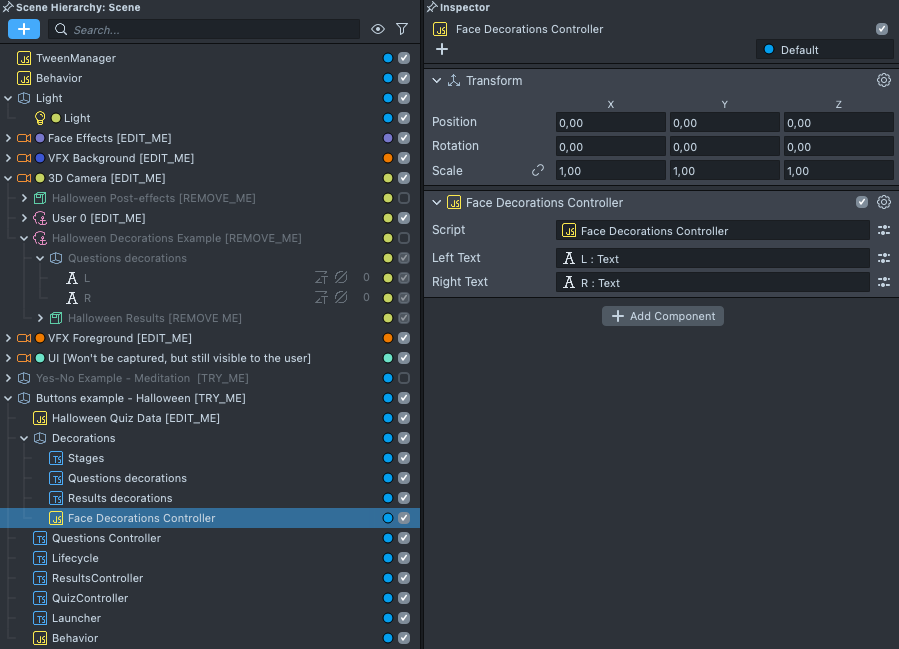
Which subscribes to On Quiz Data Avaliable, On Questions Shown and On Answer events in Lifecylce script:
The script itself is very simple:
//@input Component.Text leftText
//@input Component.Text rightText

let quizData = null;
script.onQuizData = (qd) => (quizData = qd);

script.onQuestions = () => setText('');

script.onAnswer = (isCorrect, a, q, qv) =>
  setText(quizData.questions[q].answers[a]);

function setText(value) {
  script.leftText.text = value;
  script.rightText.text = value;
}
- It references two Text components as inputs for left and right text.
- When the Quiz Data is available — it stores a copy locally.
- When questions are shown — it clears the text (no previous answer was given).
- When user answers a questions, it looks up answer text from Quiz Data by question and answer indices and sets it to Text components mentioned earlier.
You can edit this script, or write your own when more logic is needed on different events — expose
methods that you wish to be called on different events, and add them to the Lifecycle Script Component parameters.
Also, for cases when no parameters are needed to be processed, you can use Behavior script.
Human body knowledge
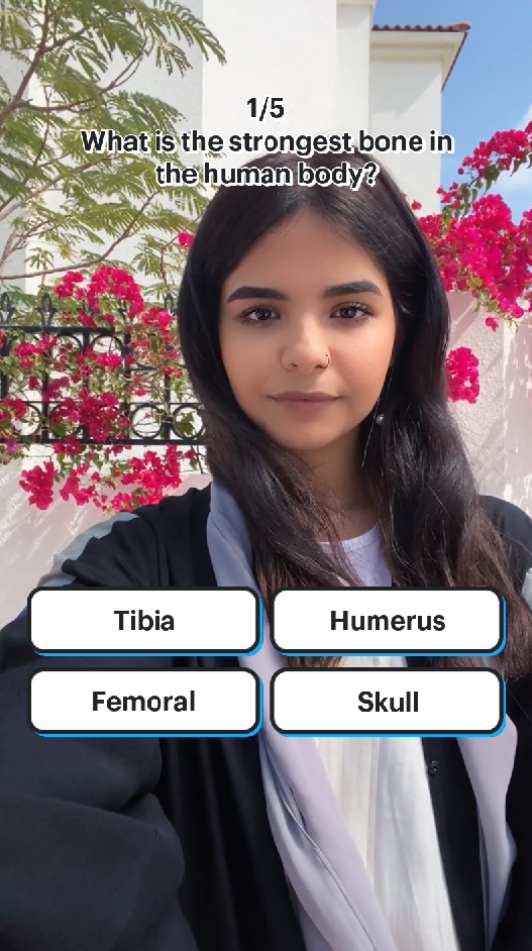
This example demonstrates how to implement a quiz with correct answers and different questions each time you try it.
Edit quiz data
Open HumanAnatomyQuizData script, first thing to notice is additional property correctIdx
indicating index of the correct answer:
{
    question: 'What is the largest organ inside the human body?',
    answers: [
        'Liver',
        'Stomach',
        'Kidney',
        'Lung',
    ],
    correctIdx: 0,
},
This index will be used to highlight buttons depending on whether the answer was correct.
Also, notice, that we have three results now, but there are no matching answers for any of them:
results: [
{
text: '{answersMatched}/{questionsAsked} -- Not everything works on the first try. Try again.',
scene: 0,
ceil: 2,
}, {
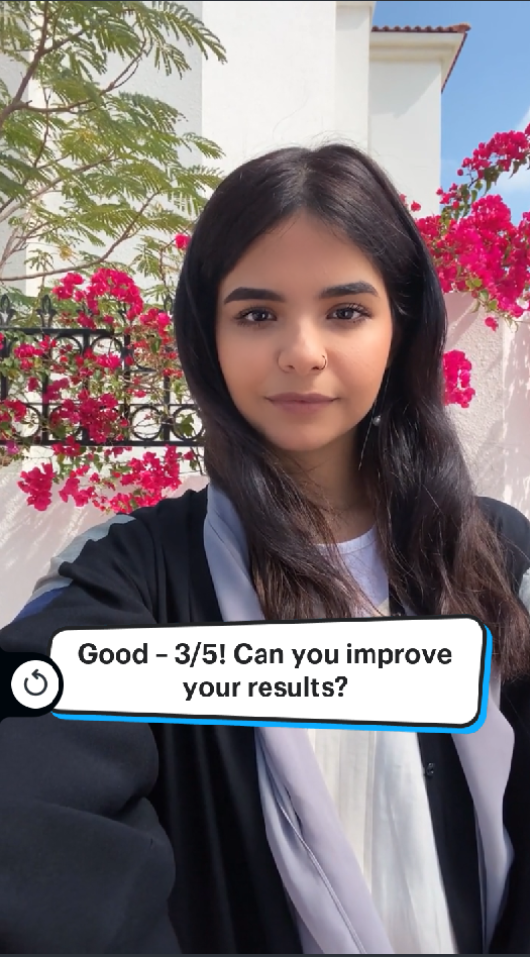
text: 'Good – {answersMatched}/{questionsAsked}! Can you improve your results?',
scene: 1,
ceil: 4,
}, {
text: 'Wow! Ready to nail a {answersMatched}/{questionsAsked} again?',
scene: 2,
ceil: 100,
},
],
This is because these results match the same answers — correct ones! And we can populate them by script:
// Fill matching answers for each result, as they are defined by the correctIdx and identical for each one
// the final result will be discriminated by the `ceil` value
const correctAnswers = quizData.questions.map((q) => q.correctIdx);
quizData.results.forEach((r) => {
  correctAnswers.forEach((a, q) => (r[q + ''] = a));
});
While the pattern is the same, they will all get scores for the correct answer, but to pick one, the ceil property is checked.
All results are sorted by the ascending ceil property, and the last one that has it higher than
the score (number of correct answers) is chosen.
{answersMatched} and {questionsAsked} are templates, and will be replaced by ResultsController script
when it's time to show the result.
Customize
This time, we have a lot of questions, but show only a part of them at a time.
This is done by RandomSliceQuestions Questions Controller:
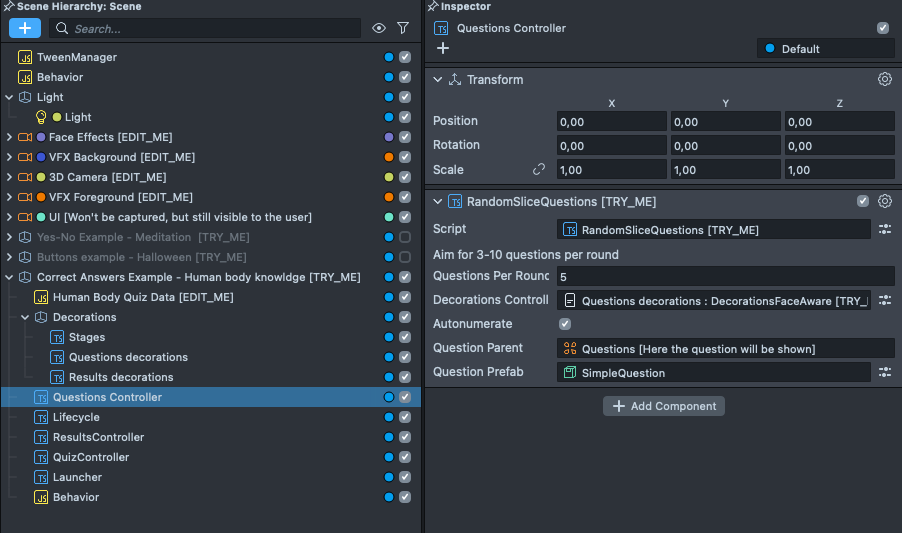
Here you can change the number of Questions Per Round, try setting it to 8 and update results definitions in Quiz Data, so the Good result is up to 6 correct answers.
Also try adding different visuals for different results, as in previous example.
If you wish tho add a script listening for questions and/or answers, there are two indices provided as parameters: question index and question view index. The first one corresponds to the index in Quiz Data, the second one corresponds to the index of the question from the start of the round (the first one being 0).
Now you are ready to make your own quizzes!

Extra bits
Lifecycle
Sometimes you want to perform actions at different events, like when the result is shown,
user picks an answer, or the quiz is reset, there is no need to edit existing scripts for that,
you may not even need to write scripts at all, as you may subscribe to these events in Lifecycle script
by Behavior trigger, Behavior script, or custom script, the latter also provides additional parameters
for some events, like an index of the question, index of picked answer, or was the answer correct.
General quiz lifecycle is shown on the following diagram:
All events in boxes on the diagram above can be subscribed to in Lifecycle script,
some of them also provide additional information to script methods, check Lifecycle.ts script
for more information about data available to event handlers.
Some other notes:
- Questions hidden and Result hidden also trigger before Intro shown, just in case there were some things that were enabled in project scene hierarchy for easier setup with scripts disabled.
- Quiz data ready may happen after Intro shown, if you make it asynchronous, for example, by generating it from API request, or from friends list
- If you make
Resetbutton available in the questions state, you will receive Questions hidden event if pressed in questions state, and Results hidden if pressed in results state.
Spare parts
There are a lot of swappable components, like Decorations controllers, Quiz Data providers, Question controllers, and prefabs, look around each example and note where to change them.
The first place to look is QuizController object, from there check ResultController, QuestionsController
and decorations scripts. Prefabs also contain logic, you can provide your own by following their APIs.
Prefabs
There are a number of predefined implementations of different parts of the quiz,
the first ones to check is different prefabs for answers in the Answers Prefabs folder,
you can drop them into QuizControllers Answers Prefab parameter.
In the same folder there is Button prefabs folder, with different buttons, answer prefabs are
using some of them, but you may create edit existing answers prefab by replacing buttons there with
ones from this folder, or create your own based on these prefabs.
Provided button prefabs indicate answer correctness by color and icon, this is done to make information easier to read from the screen in different lighting conditions and to accommodate people with color vision deficiency. Consider this in your own prefabs, this is not the only way to do so, you may also add different visual effects on face or screen depending on the answer, or play different sounds.
Quiz data
Each example uses simple JavaScript implementation of QuizDataProvider interface,
they all are for text answers, and fully described in the script.
To get started with image answers — try implementations from Scripts [EDIT_ME]/Data [TRY_ME_TO_PROVIDE_QUIZ_DATA] asset folder.
Writing your own parts
Sometimes, you may want to change logic slightly, for example, add different rules for calculating
results, or ordering questions, to do so, you have starting point — existing implementations in this template,
but consider the general API provided in Quiz.d.ts file, so it's easier to re-use implementations between
different quizzes in the future. If making many quiz lenses — consider storing reusable parts in the template project.
Consult with other d.ts files in Declarations folder to check APIs provided by other scripts,
like Behavior or Tween.
Debugging
Not everything always works as we expected, and extra help is required at times, so here are few tips to help you debug your quizzes:
1. Check logs
There are some logs for when the answer is given and when result is calculated.
There also may be some errors too.
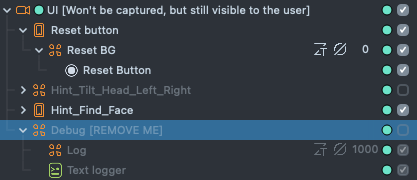
If you want to see logs on the device — enable Scene Object with text log:
2. Write logs
If you are writing your own scripts, or feel that available logging is insufficient — add logs!
In TypeScript files import log function that logs both to screen and Logger:
import { log } from 'Scripts/Modules/Utils';
log('Hello, world!');
In JavaScript use require:
const { log } = require('Scripts/Modules/Utils');
log('Hello world!');
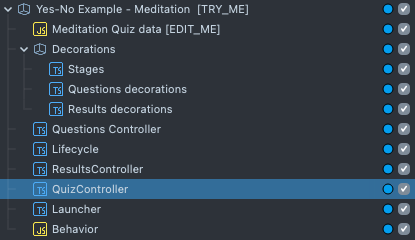
3. Check runtime scene hierarchy
Press "Eye" button at the top of the Preview panel to pause the Lens and observe hierarchy:

Objects in blue are the ones placed in hierarchy at runtime, checking them may help to investigate the problem, or learn more about implementation of this template: