Makeup
The Makeup Template allows you to create a Lens with different makeup styles. You can add lip tint and gloss, blush, eyeliner, eyeshadow, mascara, and eyebrow coloring. No external assets are necessary. You can also export the makeup to use in your existing Lens project.
Tutorial
Guide
The Makeup Controller
The template allows you to mix and match different effects to create your personalized makeup. These options are set in the Makeup Controller object found in the Objects panel. Most effects provide similar options such as: enable or disable, color, and intensity. Take a look at the sections below for additional information on each effect.
Customizing Lips
The template provides two different types of lip coloring that you can use separately or combine together to add makeup to the user's lips:
- Lips tint - matte coverage
- Lip gloss - shiny texture
You can enable or disable lip effects by clicking on the checkbox next to the effects’ name.

To change an effect’s color, click the colored box next to Color. Then, use the color picker to customize the color’s value. You can also change the strength of the effect with the Intensity slider. A value of 0 would make the effect invisible, and a value of 1 would make it fully visible.
You can additionally customize the blend mode that is used to apply the lips effect. To do this, select the corresponding face mask object in the Objects panel and find its Blend Mode property in Inspector. Good blend modes for lip coloring are Soft Light or Multiply.

You can do the same for the lip gloss effect. Good blend modes for a shiny effect and highlight texture are Screen or Add.
Customizing blush
Like the lips effect, you can enable or disable blush by clicking on the checkbox next to the effect's name. The blush effect also has the same color and intensity option as the lips effect.
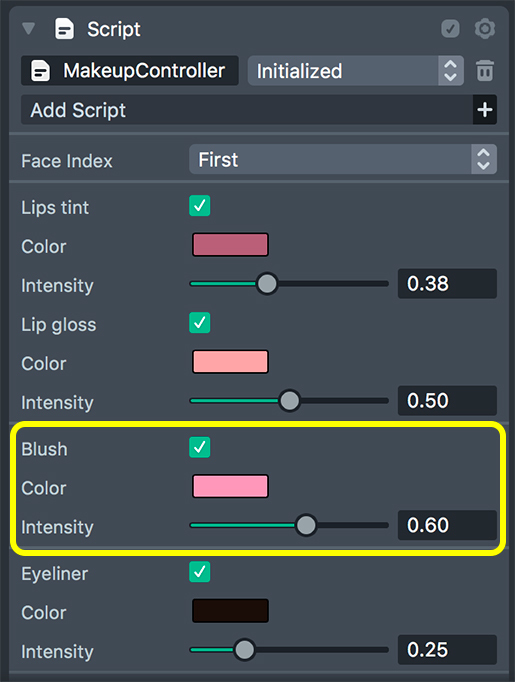
Similarly, you can change the blend mode used to apply the blush. First select the Blush face mask object in Objects panel. Then find its Blend Mode property in Inspector.

Customizing eyeliner
Try playing with the Eyeliner properties. You can adjust the eyeliner’s color and intensity in the same way as in the previous examples.

To change the effects blend mode, select the Eyeliner face mask object in Objects panel. Find its Blend Mode property in Inspector.
There are a number of blend modes that will help you to create various styles for eyeliner. Try Hard Light, Vivid Light looks great with bright colors. Multiply can be used for darker or less intense colors.

Customizing eyeshadows
In addition to the color and intensity properties, there are four types of eyeshadows to choose from.
- Single color - one color that covers the upper eyelid

- Two colors - a blend of two colors that covers the upper eyelid, plus highlights the inner part of the eyelid

- Single color heavy - one color that covers both the upper and lower eyelids

- Two colors heavy - a blend of two colors that covers the upper and lower eyelid, plus highlights the inner part of the eyelid

You can change the blend mode of these effects by looking for the Eyeshadows face masks in the Object panel. All three of them are used in different combinations to make a certain effect. You can experiment a lot with blend modes here. Try: Overlay, Multiply, Screen, Add, Soft Light, Hard Light, etc.

Customizing eyelashes
Like the previous effects, you can enable or disable the Mascara effect, as well as change its color and intensity.

To change the blend mode select Mascara face mask object in Objects panel. Find its Blend Mode property in the Inspector panel. As with the eyeliner effect, try experimenting with different ones!

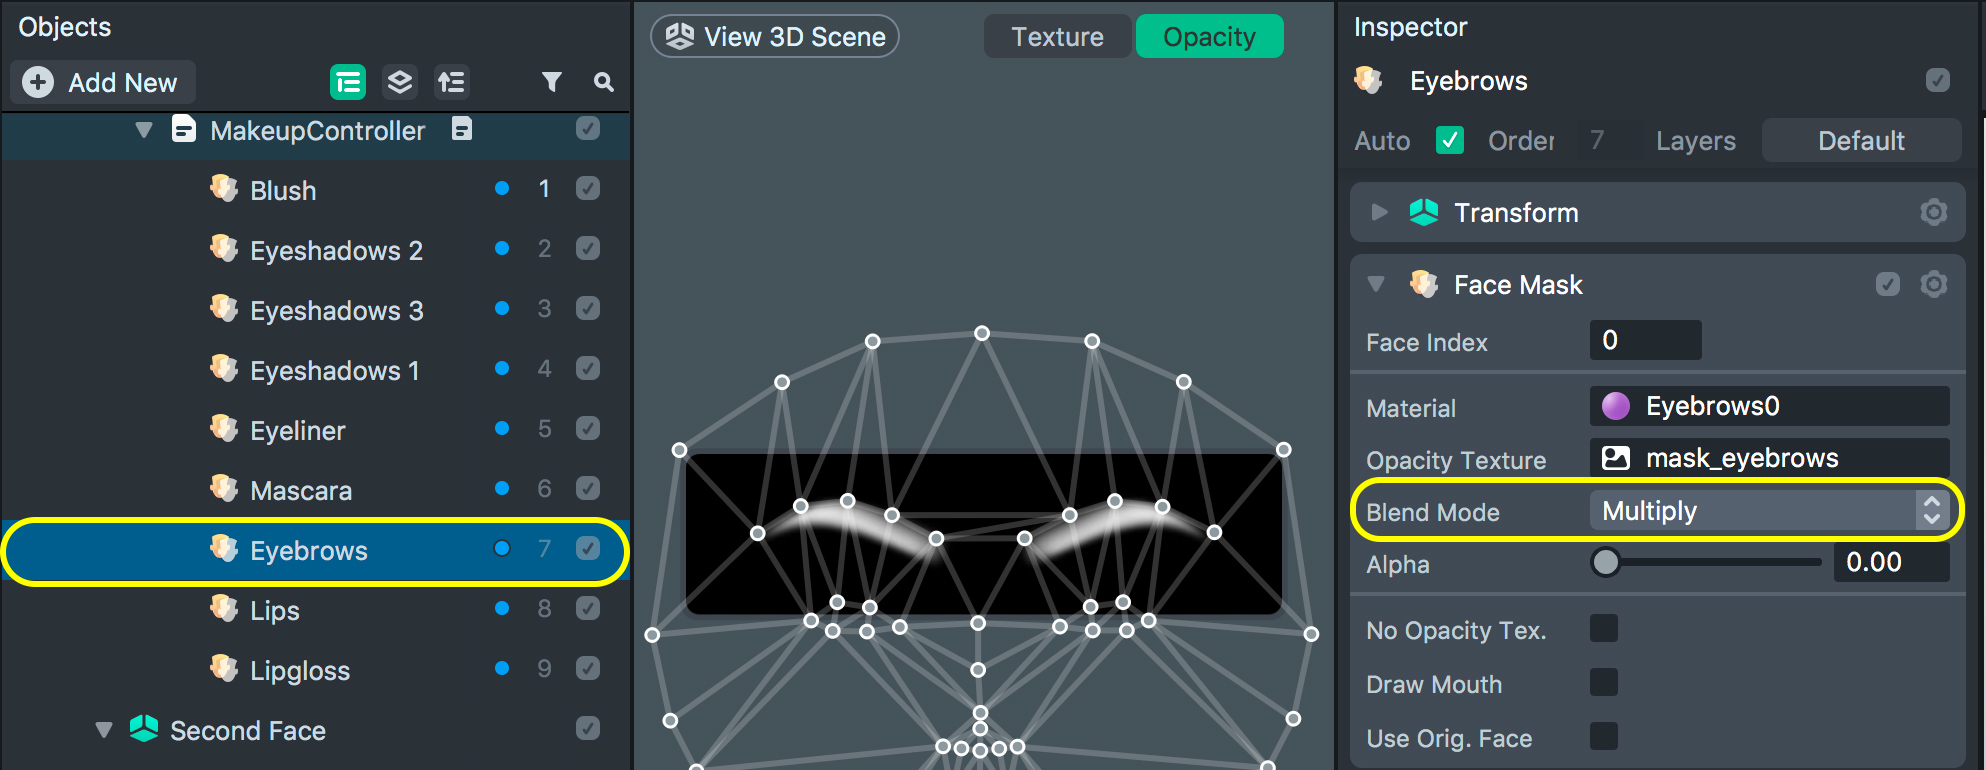
Customizing eyebrows
Similarly, try modifying the color and intensity of the Eyebrows as before.

To change the blend mode select Eyebrows face mask object in the Objects panel. Find its Blend Mode property in Inspector. Try Add or Overlay if you want to go for crazy fun colors.
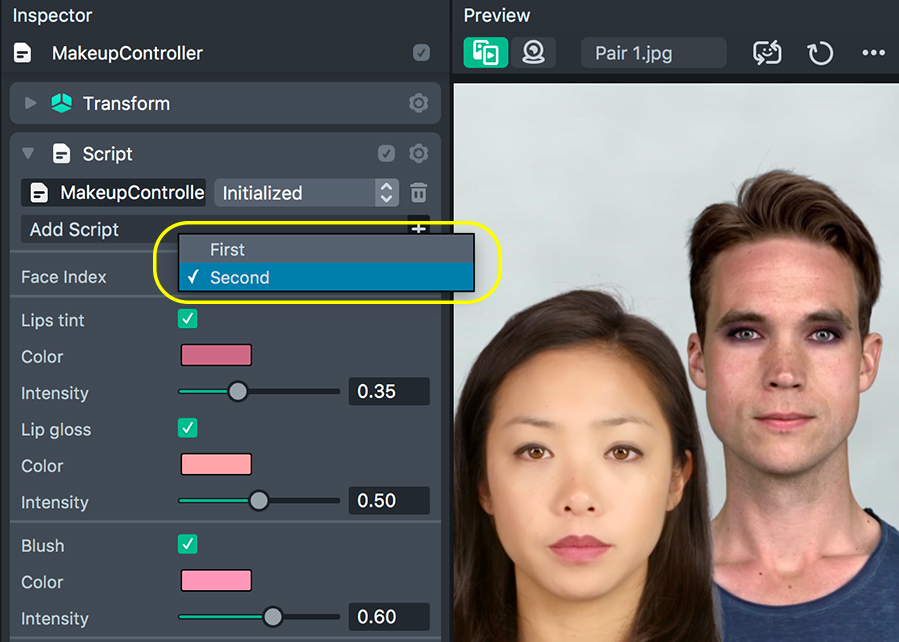
Working with Two Faces
By default, the template comes with two Makeup Controllers: one for each face. These two controllers are identical copies.
Changing face index
You can change the face for which the makeup is applied to by changing the face Index dropdown of either Makeup Controller.
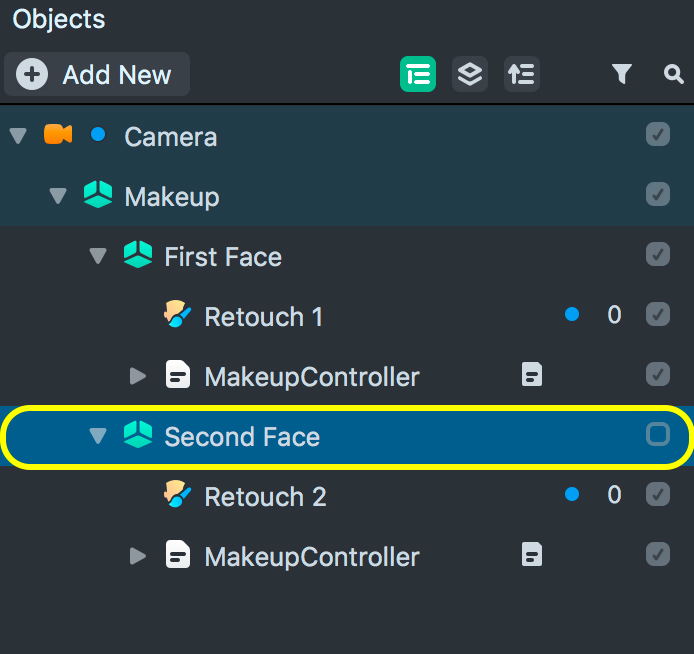
Enabling Makeup for Only One Face
You can enable makeup for only one face by disabling the Makeup Controller’s parent object (First Face, and Second Face).
: You want to disable the parent of the Makeup Controller since the template also includes a retouch for each face.
You can use the makeup that you've created in this template in your other Lens Projects. To do this, export First Face and import it in your other project. Take a look at the Importing guide for more information.
Previewing Your Lens
You’re now ready to preview your Lens. To preview your lens in Snapchat, follow the Pairing to Snapchat guide.
Related Guides
Please refer to the guides below for additional information: