Game Suite
Game Suite is a Lens Studio plugin that provides a visual level editor for building 3D game worlds directly inside Lens Studio. It gives you an interactive viewport, an asset library, and a set of editing tools so you can place, arrange, and configure game objects—then export the completed world into your Lens scene with a fully controllable, customizable Bitmoji game character ready to play.
Setup
Before using Game Suite, you need to add it to your project from the Asset Library:
- Open the Asset Library in Lens Studio.
- Search for Game Suite.
- Click Add to Project to install the plugin.
Once added, Game Suite runs as a plugin panel inside Lens Studio. To open it, navigate to Plugins in the top menu and select Game Suite.
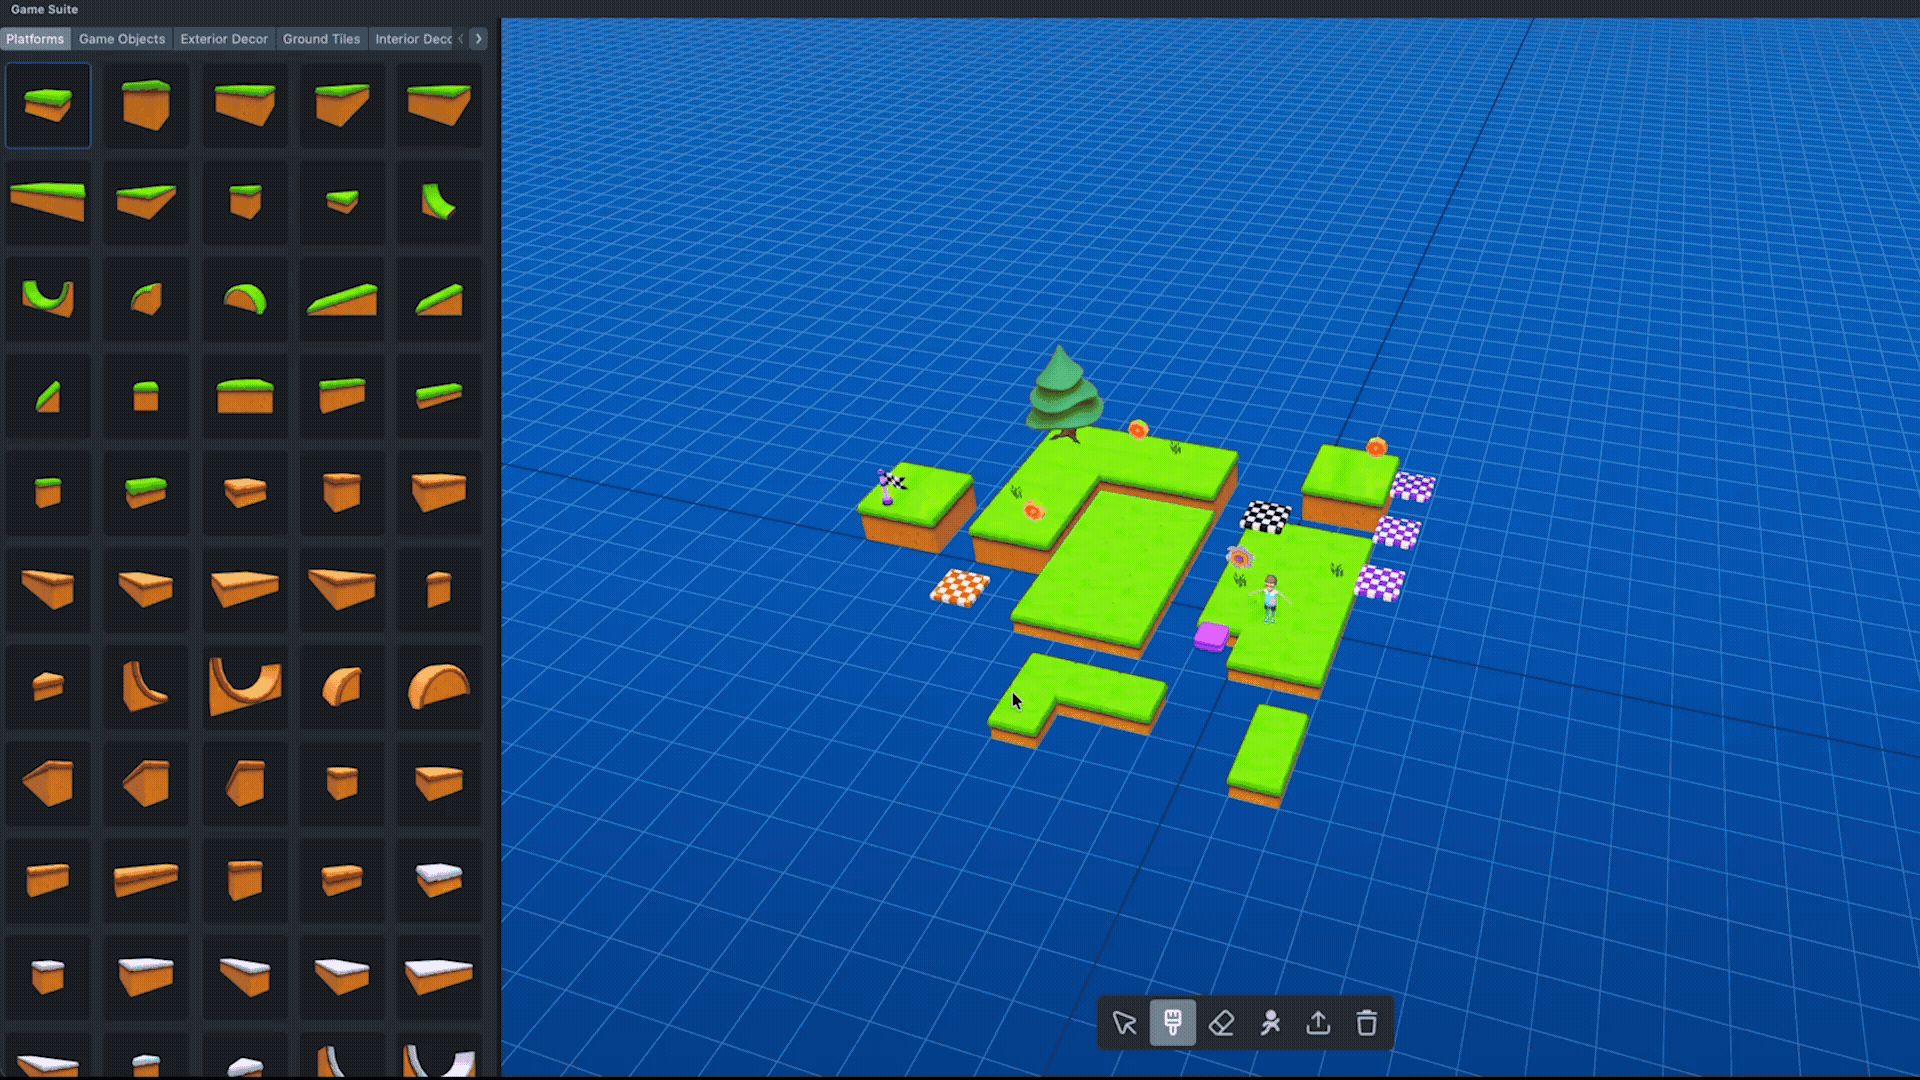
The editor workspace is divided into three areas:
- Side Panel—context-sensitive controls that change based on the active tool (for example, the asset library when Placement is active, or the spawn point controls when Players is active)
- Viewport—an interactive 3D canvas where you place and arrange game objects
- Toolbar—a floating bar at the bottom of the viewport containing the editing tools and action buttons
Toolbar Tools

The toolbar contains five selectable mode tools and two immediate action buttons.
Edit Tool
The Edit tool (cursor icon) is the default active tool when the editor opens. Use it to select and transform objects in the viewport.
Selecting and transforming objects:
- Click any placed object to select it. A 3D gizmo appears, letting you move, rotate, or scale the object.
- Objects snap to the grid when moved or rotated.
- Press Ctrl/Cmd+D to duplicate the selected object.
- Press Delete or Backspace to delete the selected object.
- Press R to rotate the selected object by 90 degrees.
Placement Tool
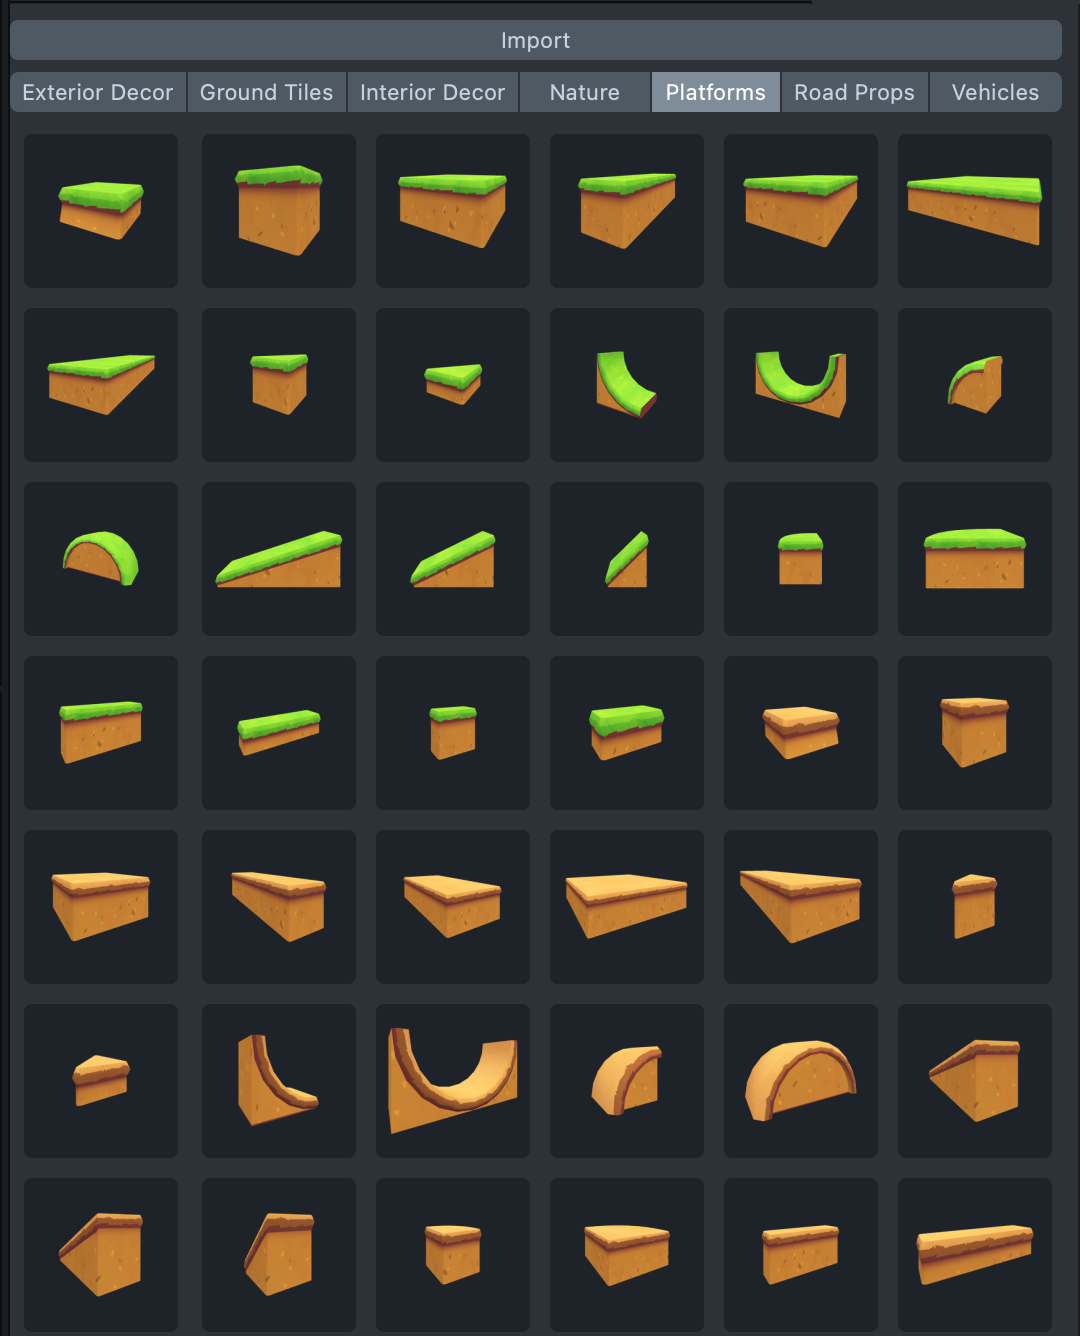
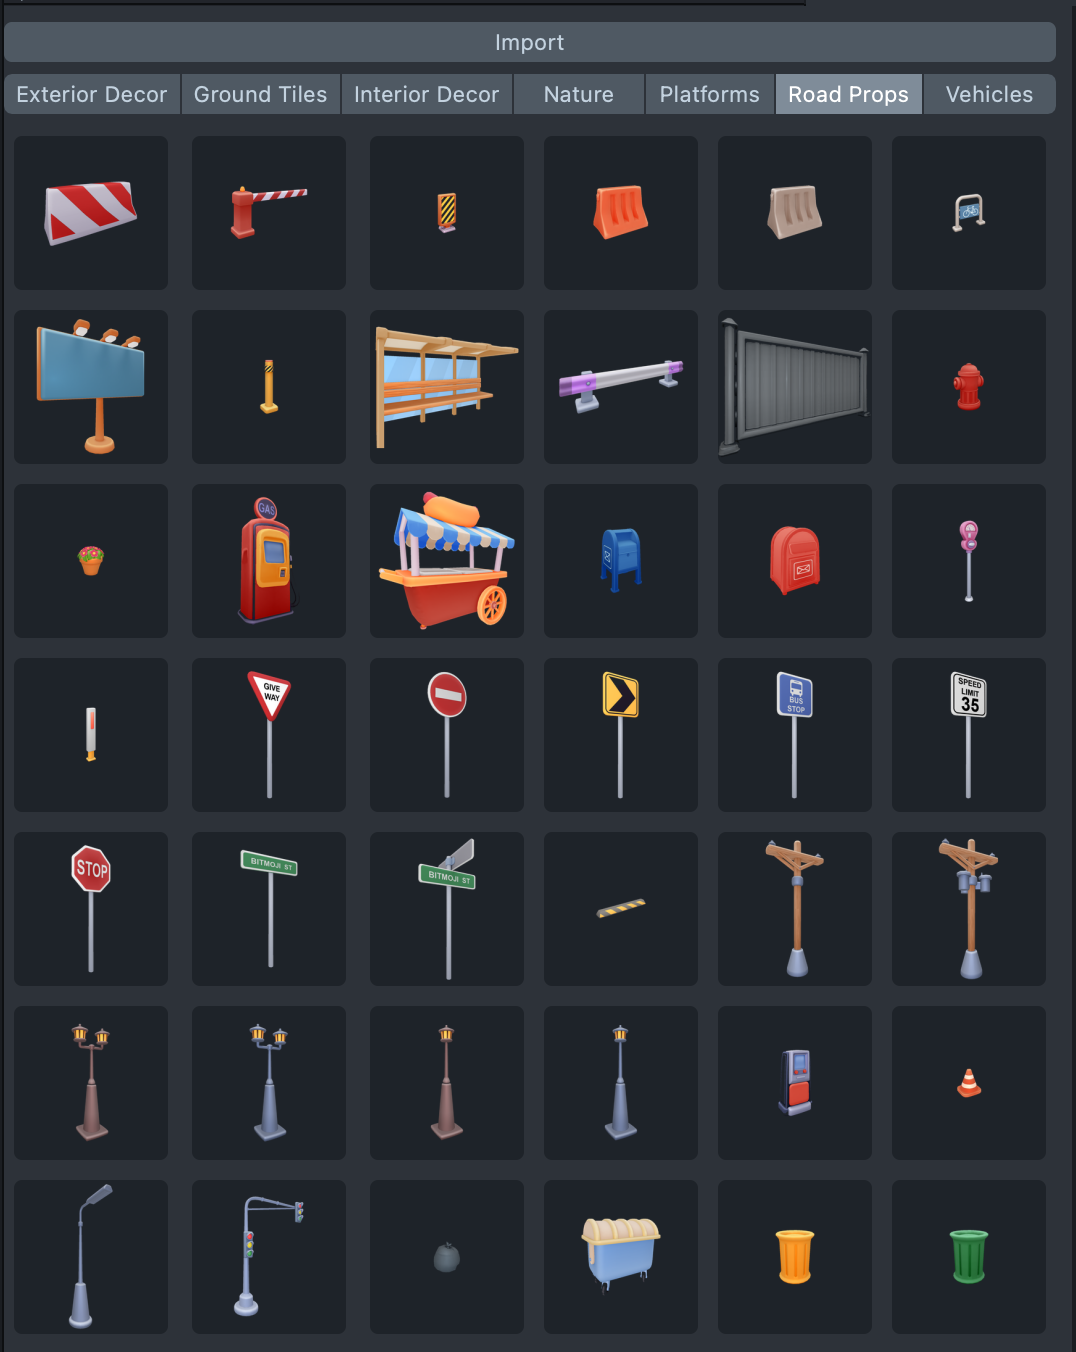
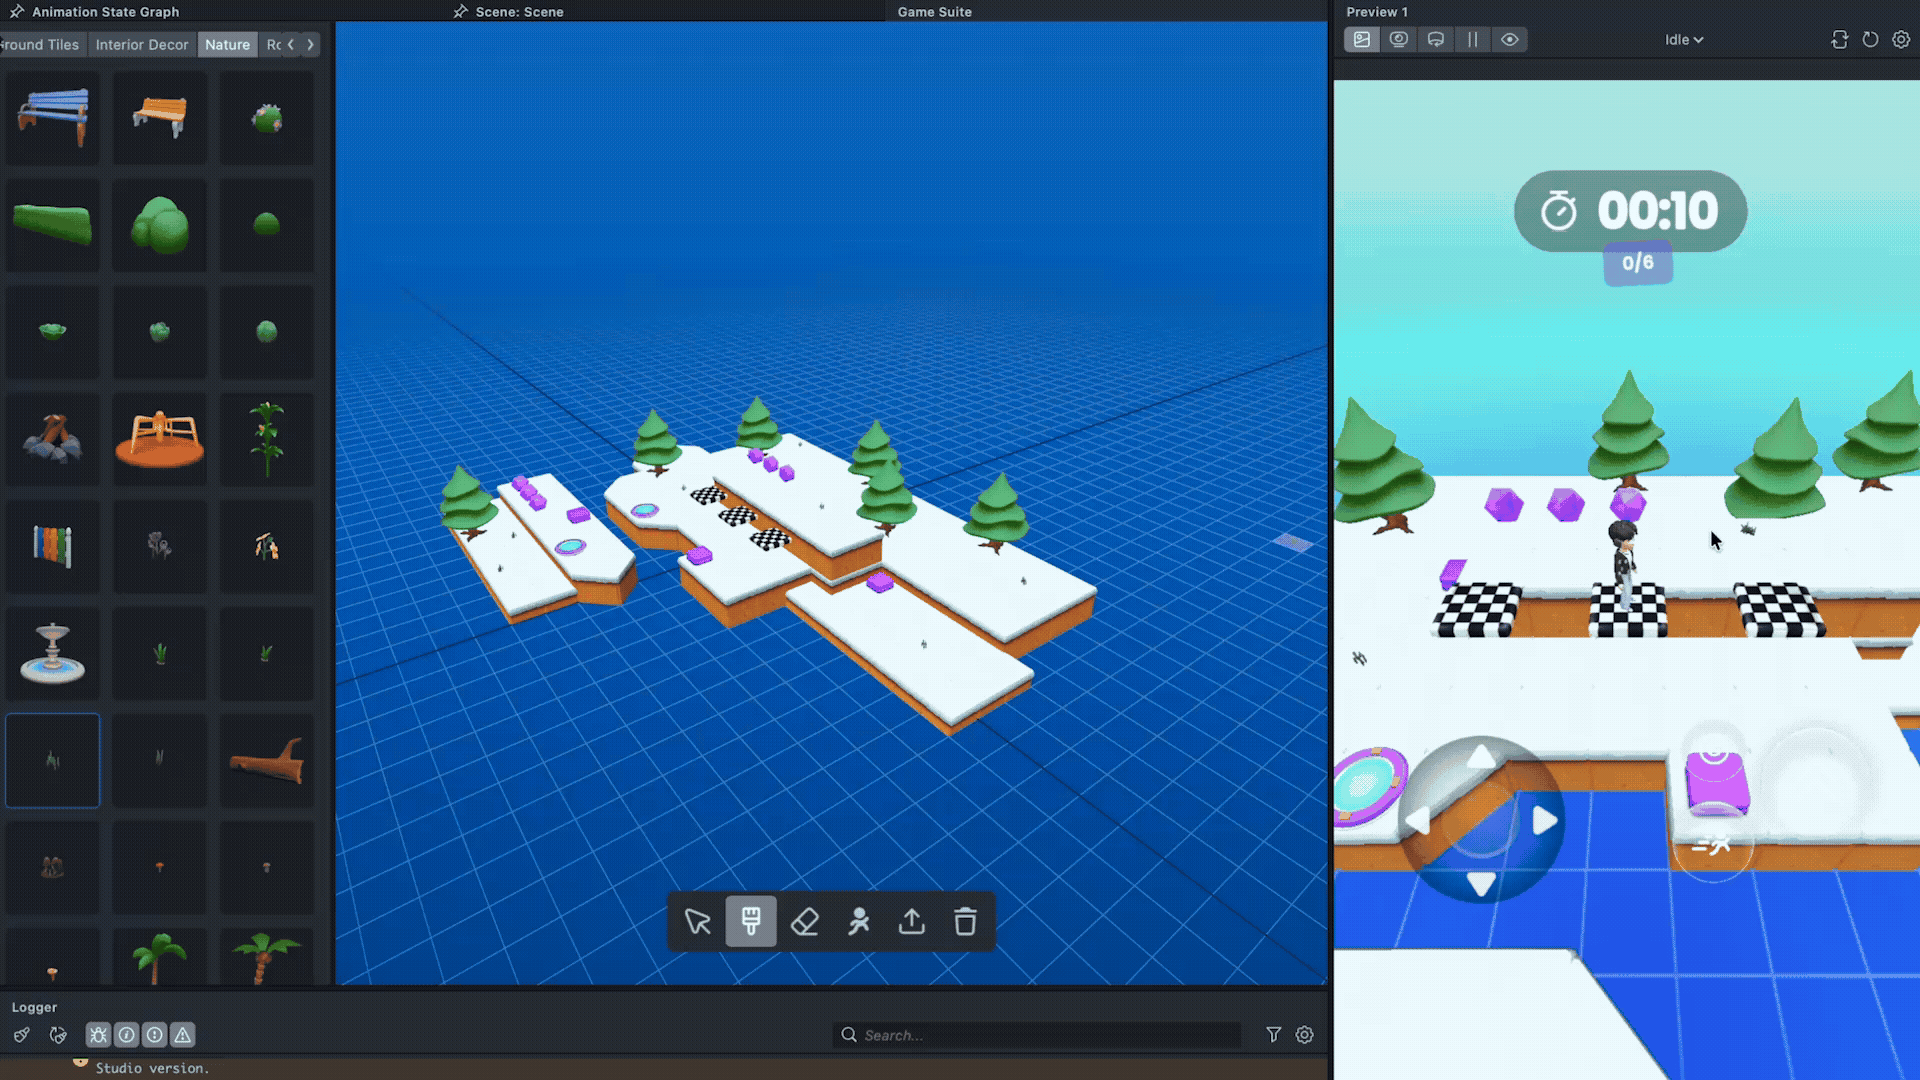
The Placement tool (paintbrush icon) gives you access to a large library of Bitmoji-themed assets organized into categories like Exterior, Interior, Nature, Road Props, Vehicles, Platforms, and more. Pick an asset from the library and place it into the viewport.
To place an asset:
- Select the Placement tool from the toolbar. The asset library opens in the Side Panel.
- Browse categories using the tabs at the top of the library.
- Click a tile to select an asset. A preview ghost appears in the viewport.
- Click or drag in the viewport to place copies of the asset onto the scene.
Placement behavior:
- Objects snap to the editor grid automatically.
- When you begin dragging after the initial touch, the Y-level of the first placed object is locked for the rest of the drag. This lets you paint a row of objects across a surface while keeping them at the same height.
- Press R to rotate the preview object by 90 degrees before placing.
- Hold Option to enter delete mode: clicking on a placed object removes it instead of placing a new one. Release Option to return to placement mode.
Eraser Tool
The Eraser tool (eraser icon) removes individual objects from the viewport. Click any placed object to delete it.
Players Tool
The Players tool (players icon) lets you position the spawn point for your game's player.
Working with the player:
- A player is automatically added to your scene—you don't need to add one manually, and additional players cannot be added.
- A Bitmoji placeholder appears in the viewport at the spawn position. Drag the placeholder to set where the player appears when the game starts.
- Player movement, jump, dash, and animation settings live in the Game Settings tool (see below), not in the Players tool.
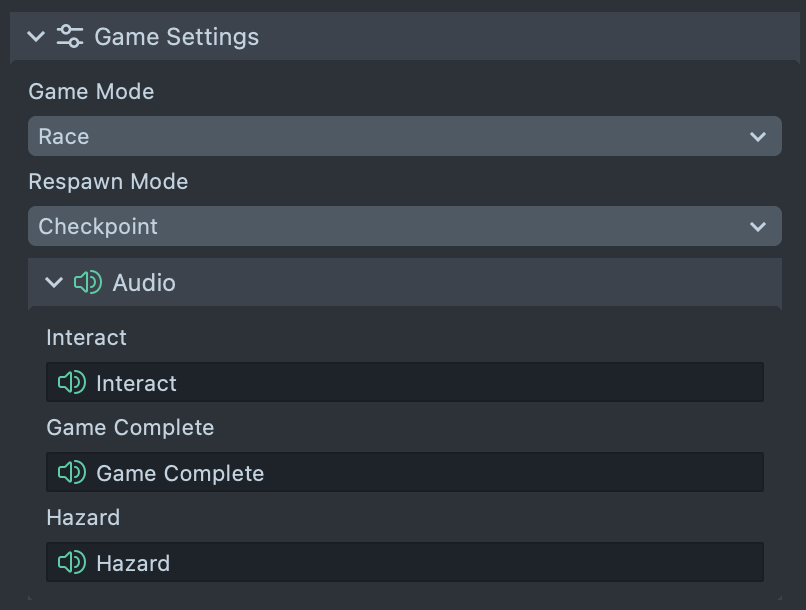
Game Settings Tool
The Game Settings tool opens the configuration panel in the Side Panel. It has two collapsible sections: Player Settings and Game Settings.
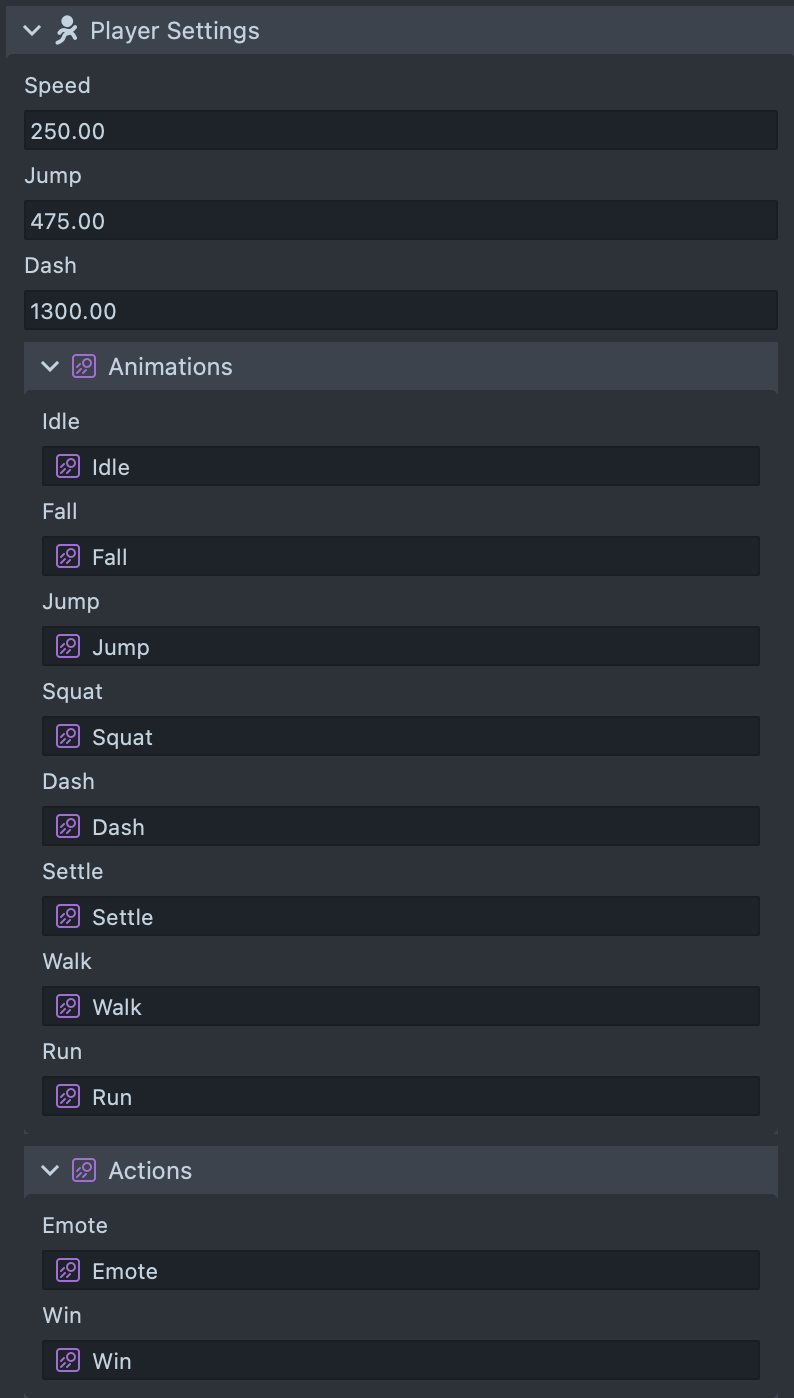
Player Settings controls how the Bitmoji character moves:
- Speed / Jump / Dash: tune the character's movement, jump height, and dash speed.
- Animations: assign custom animation clips for each character action: Idle, Walk, Run, Jump, Fall, Dash, Squat, Settle. Click the picker to choose an AnimationAsset from your project, or leave it as the default.
- Actions: assign clips for Emote and Win.
Game Settings controls the game mode and rules:
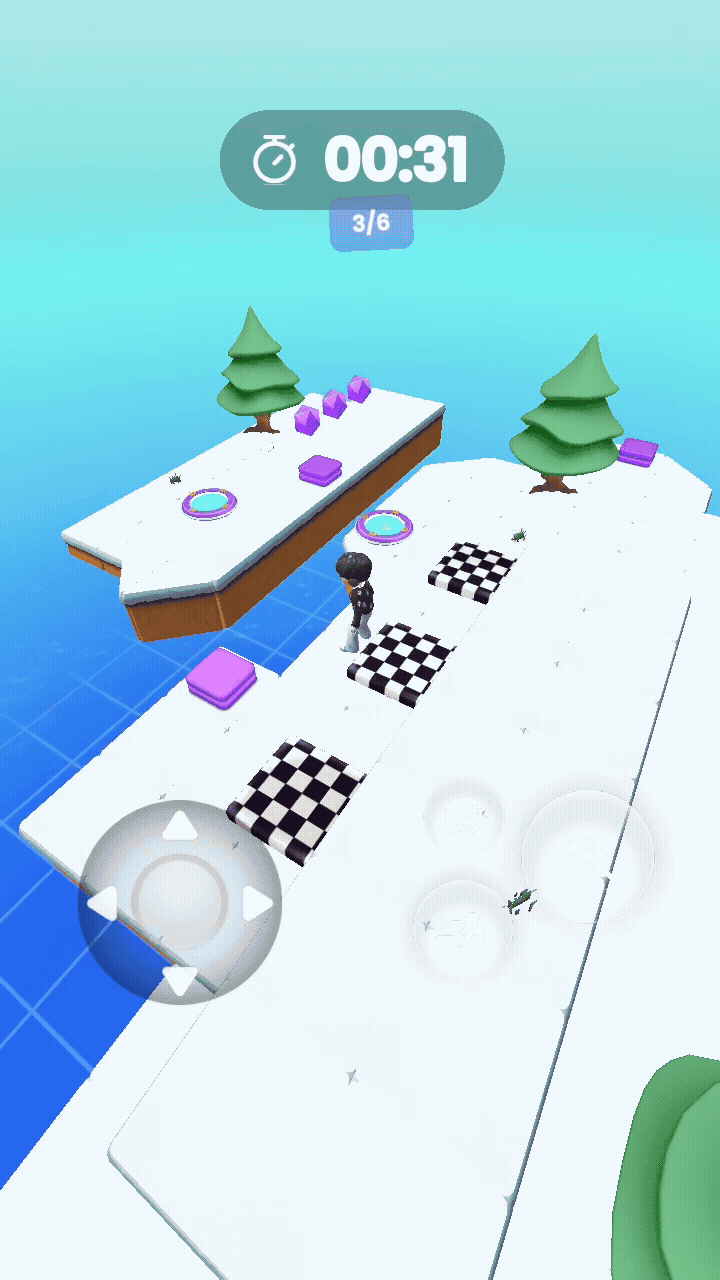
- Game Mode: choose None (open play, no win condition), Race (reach the finish), or Collection (gather required items).
- Player Restart Mode: set where the player returns after hitting a hazard: Checkpoint, Start, or Last Safe Position.
- Collection options: when Collection mode is selected, set a Target Collectibles count, or toggle Use Collectible Type Requirements to require specific counts of Orbs, Gems, Stars, and Coins.
- Audio: expand the Audio section to assign custom sounds for Interact (collecting items), Game Complete (win condition met), and Hazard (player hits a hazard).
All settings persist while the plugin is open. You can switch between tools and your configuration stays intact.
Game Objects
The asset library includes a Game Objects category containing interactive assets that handle their own game logic automatically when exported. These include:
- Collectibles: Coin, Gem Blue, Gem Violet, Orb Orange, Orb Violet, Orb Orange Violet, Star
- Hazards: Hazard Tile, Spikes, Rotating Blades, Rotating Arm, Swinging Pendulum
- Traversal: Bounce Pad, Spring Coil, Ladder, Platform BW, Platform Orange, Platform Violet
- Goals: Flag Orange Checkpoint, Flag Orange Finish, Flag Violet Checkpoint, Flag Violet Finish, Finish Gate
- Special: Portal Horizontal, Portal Vertical
Place these from the asset library like any other object. On export, each game object registers with the Game Manager and responds to player interactions automatically based on its type.
Clear (Action)
The Clear button (trash icon) immediately clears all placed objects from the viewport after showing a confirmation dialog. This action cannot be undone.
Export (Action)
The Export button (export icon) is the primary way to export the current world into your Lens scene. You can also use the Cmd+J keyboard shortcut.
Exporting to Your Lens Scene
When you are ready to bring your game world into Lens Studio, click the Export button in the toolbar. A confirmation dialog appears warning that exporting will overwrite the existing Game World object and any changes made in the Scene Editor. Click OK to proceed or Cancel to go back.
The export process:
- Any existing
GameWorldscene object is destroyed and replaced. - A Game Core prefab is instantiated, providing the Game Manager, 3D Camera, UI Camera, and Spawn Point.
- Each placed asset is instantiated as a prefab child of
GameWorld, with its position, rotation, and scale applied. - The player spawn position from the editor is applied to the Game Core's Spawn Point object.
- Game Settings (game mode, player restart, audio) and Player Settings (speed, jump, dash, animations) are written to the Game Manager and Character Controller scripts.
Once exported, your game is ready to test in the Lens Studio Preview window. Use WASD to move and Spacebar to jump to control the Bitmoji character.
You can also continue editing the exported objects directly in the Scene view. Re-exporting replaces the previous GameWorld entirely, so you can iterate in the Game Suite editor and re-export as many times as needed.
Workflow Summary
- Search for Game Suite in the Asset Library and click Add to Project.
- Open the plugin panel from Plugins > Game Suite.
- Use the Placement tool to populate the viewport with assets from the library, including Game Objects (collectibles, hazards, checkpoints, finish gates).
- Use the Players tool to place the spawn point for the main player.
- Use the Eraser tool or hold Option in Placement mode to remove unwanted objects.
- Select the Game Settings tool to configure game mode, player restart behavior, audio, player speed/jump/dash, and character animations.
- Click the Export button, confirm the export dialog, and the world exports to your Lens scene as the
GameWorldhierarchy. - Test in the Lens Studio Preview window, then continue building on top of the exported scene.
Keyboard Shortcuts
| Shortcut | Action |
|---|---|
| Cmd+J | Export world to Lens Studio |
| R | Rotate preview 90° (Placement Tool) or rotate selected object 90° (Edit Tool) |
| Option (hold) | Delete mode: click to remove objects (Placement Tool) |
| Ctrl/Cmd+D | Duplicate selected object (Edit Tool) |
| Delete / Backspace | Delete selected object (Edit Tool) |
| WASD | Move camera forward / left / backward / right |
| Q / E | Move camera down / up |
| Arrow keys | Rotate camera |