Part 3 - Endless Ground
Welcome to Part 3 of the Bitmoji Runner Game tutorial! In Part 2, we enhanced our game by making the Bitmoji move forward, jump, and slide while ensuring the camera followed it smoothly.
Now, in this part, we will build an endless ground system to maintain the illusion of an infinite track as the Bitmoji runs forward.
Instead of continuously adding new ground tiles, we will reposition existing ones dynamically, optimizing performance while keeping the game environment seamless.
By the end of this part, you’ll have a fully functional system that continuously recycles ground tiles, making your game feel more immersive and efficient.
Prerequisites
- Before we begin, make sure you have Lens Studio (version 5.2 or higher) installed on your computer.
- A basic understanding of programming, especially JavaScript, will be helpful.
- You will also need the project from Part 2 of this tutorial as a starting point.
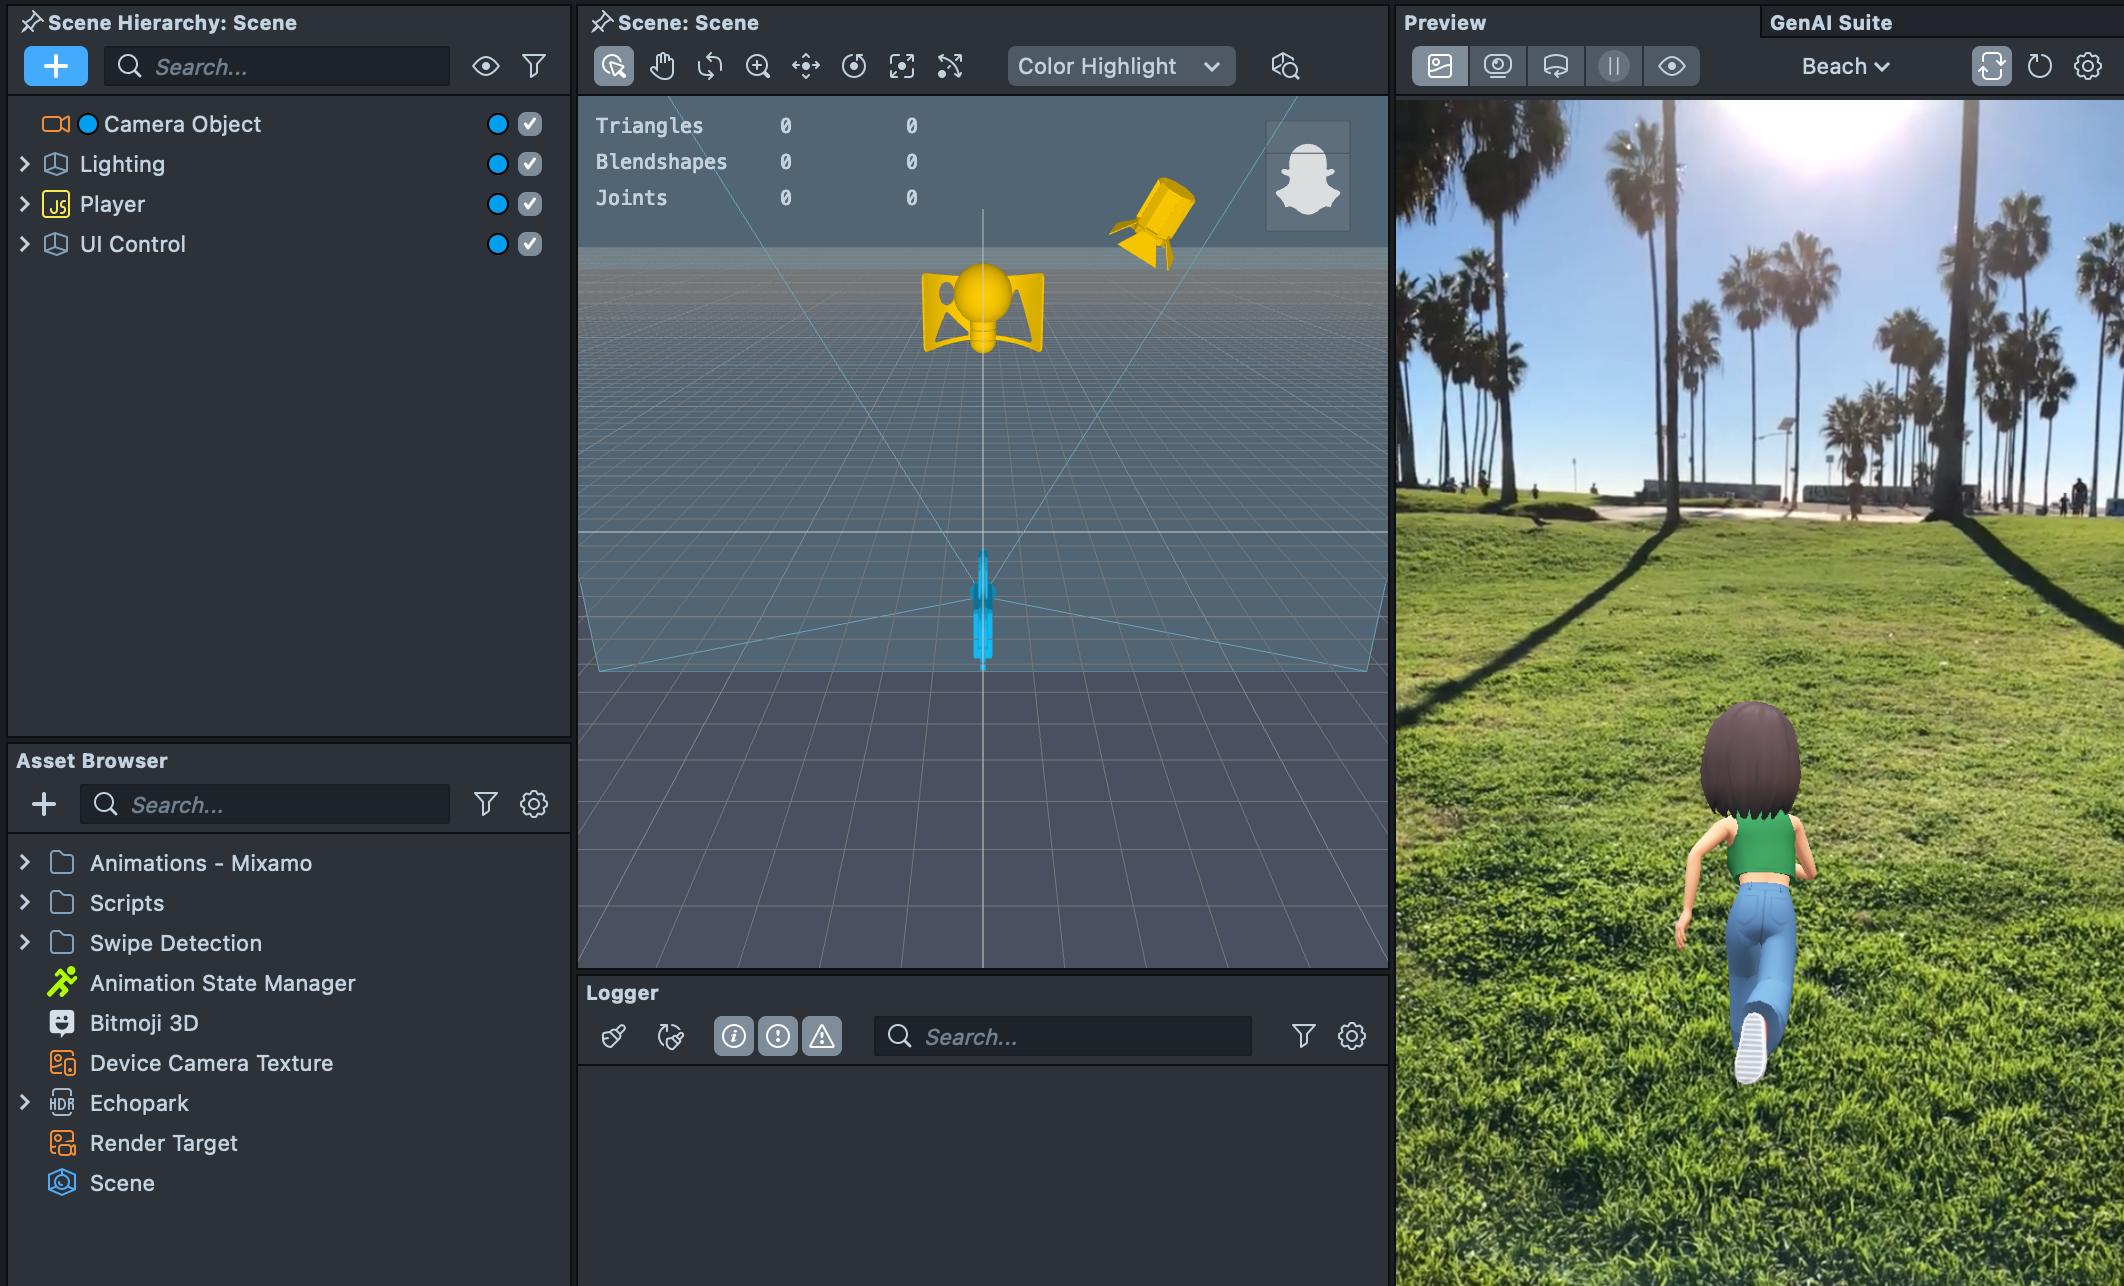
Before we dive into this part, let’s recap what we built in Part 2.
By the end of Part 2, we added forward movement, jumping, and sliding mechanics, allowing the Bitmoji to navigate dynamically through the game world. We also made the camera follow the player to keep it in view at all times.
Now, let’s take a look at what we’ll be building in this part.
By the end of Part 3, you’ll have a fully functional endless ground system that continuously recycles tiles to create the illusion of an infinite track.
Instead of spawning new tiles indefinitely, we’ll optimize performance by repositioning existing tiles as the Bitmoji moves forward. This approach keeps the game environment seamless and efficient, preventing unnecessary memory usage.
Creating Our First Ground Tile
To build an endless ground system, we first need to create a single tile that will serve as the foundation for our repeating ground. In this section, we’ll create a ground tile, adjust its scale and position, and apply a texture and material to make it visually appealing. Once configured, we’ll convert the tile into a prefab, allowing us to instantiate multiple copies dynamically using a script in the next steps.
Open the project you created in Part 2, as we’ll continue building on it to add new features in this part.
We will start by creating a new Scene Object called Environment.
To do this, right-click on an empty space in the Scene Hierarchy panel, then select Create Scene Object. Rename the newly created object to Environment.
Organizing scene objects into a dedicated Environment group will help keep the project structured and manageable as we add more elements.
With the Environment scene object selected, right-click on it and create a child Scene Object. Name this new object Tile Manager.
The Tile Manager will serve as the parent of our tiles. Later, we will attach a script to it that will handle the instantiation of tiles as its children, dynamically creating the endless ground.
Now, we will create our first tile. Since we will later instantiate multiple tiles as children of the Tile Manager scene object, we will first create the tile as a child object to ensure all transforms are correctly set before converting it into a prefab.
To do this, select the Tile Manager and click the + button in the Scene Hierarchy panel to create a new Plane object.
Next, adjust the plane's scale and position to match the desired dimensions for our ground tile.
To test the setup in the Preview Panel you can temporarily disable the CameraFollow script.
Next, we will import the texture we want to use for the tile. You can choose your own texture or download the one we are using from here.
To import the texture into your project, click the + button in the Asset Browser and select Import, or simply drag and drop the texture file into the Asset Browser panel.
Then, we will create a material for our tile.
In the Asset Browser, click the + button and select Uber PBR to create a new material.
Assign this material to the Plane we created earlier.
Then, click on the material in the Asset Browser to configure it and apply the texture we imported in the previous step.
To make our ground tile visually realistic and suitable for a racing track, we need to adjust several material properties. Here’s what we’ll do and why:
- Base Texture: We apply the imported texture here, setting
Texture UVtoTransformed UV2. This allows us to manipulate how the texture appears on the tile. - Normal Map: We assign the
MaterialParamstexture to this field and set itsTexture UVtoTransformed UV2. This enhances the surface details, making the tile look more three-dimensional. - Metallic & Roughness: These settings control how reflective and smooth the material appears. Adjusting them helps fine-tune the surface’s realism.
- Specular AO: Enabling this feature and setting both
IntensityandDarkeningto 1 increases the visual depth and contrast of the material. - Transformed UV2 Scaling: We adjust the UV scaling values to control how the texture repeats (e.g., 5.0, 9.0). This makes the texture tile seamlessly across the plane, ensuring that the ground looks continuous and aligned like a real racing track.
After testing the tile in the Preview Panel and making any necessary adjustments to its scale and appearance, rename the Plane scene object to Tile for clarity.
Once you’re satisfied with how it looks, drag the Tile from the Scene Hierarchy into the Asset Browser to create a Prefab.
This prefab will be used later in our script to dynamically instantiate multiple tiles, forming an endless ground.
Taking the time to adjust and preview the tile ensures that it fits well within the scene before creating the prefab. This step helps streamline the endless ground generation process.
To keep our project well-organized as we expand it, let’s properly structure our assets.
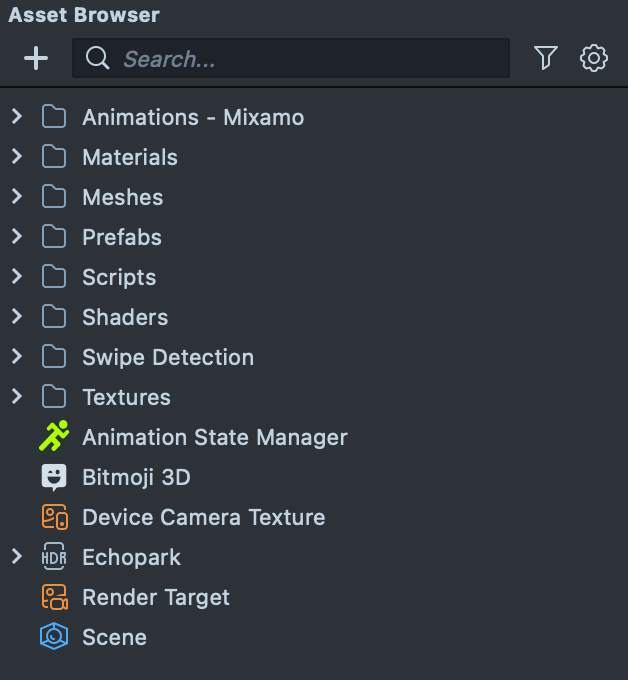
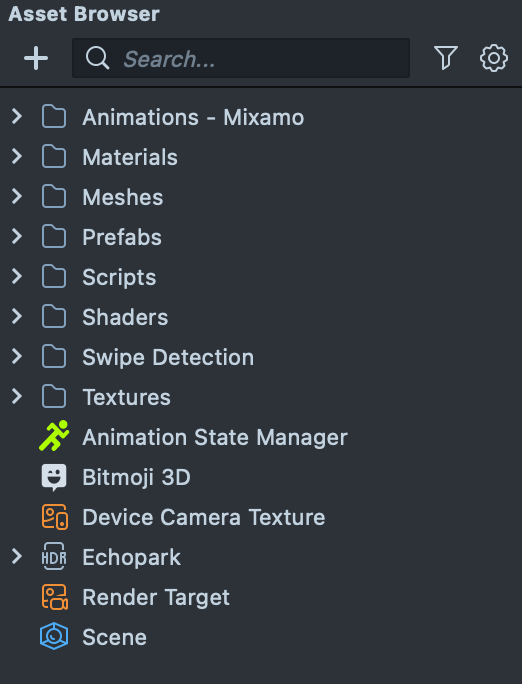
In the Asset Browser, create five new folders: Shaders, Materials, Textures, Meshes, and Prefabs.
Move all corresponding shaders, materials, and textures into their respective folders. Place the tile prefab in the Prefabs folder and the plane mesh into the Meshes folder to keep everything neatly arranged.
A well-organized project helps prevent clutter and makes it easier to find and manage assets as the game expands. Keeping prefabs in a dedicated folder ensures they are easily accessible for later use.


Spawning the Ground Tiles
Now that our ground tile prefab is ready, we will begin by spawning the initial set of tiles to form the track. We’ll write a script for the Tile Manager that instantiates a fixed number of tiles at the start of the game. These tiles will serve as the foundation of our endless ground system. In the next section, we’ll implement logic to reposition these tiles dynamically as the player moves forward, creating the illusion of an infinite track.
To begin, we will remove the existing Tile scene object from the scene, as we will be dynamically spawning tiles instead.
Next, select the Tile Manager scene object and add a JavaScript script component in the Inspector Panel.
This will automatically create a new script file in the Asset Browser. Rename this file to tileManager.js and double-click it to open the Script Editor, where we will start writing the logic for managing the endless ground system.
At the beginning of the script, we will define three inputs:
player: This will allow us to track the Bitmoji’s position and determine when to reset the ground tiles.tilePrefab: This is the prefab we created earlier, which we will instantiate multiple times to form the ground.parent SceneObject: This will serve as the parent for all instantiated tiles, keeping them organized in the scene.
After saving the script, select the Tile Manager Scene Object and assign the appropriate inputs in the Inspector Panel:
- Set the player input to the Bitmoji.
- Set the tilePrefab input to the tile prefab.
- Set the parent input to the Tile Manager scene object itself.
We will use two events in our script:
- Start Event: This will run at the beginning of the game to create the initial ground tiles.
- Update Event: This will continuously check the Bitmoji’s position and reset tile positions as the player moves forward, creating the illusion of an endless ground.
We will bind the Start Event to the onStart function and the Update Event to the onUpdate function, which we will implement later.
We need a totalTiles variable at the beginning of the script to define how many tiles we want in the scene.
In the onStart function, we will create tiles in a loop until we reach the specified number, ensuring that enough tiles are present at the start of the game to create the illusion of an endless ground.
We set totalTiles to 3 because having only 1 or 2 tiles would make the end of the ground visible, breaking the illusion of an infinite track.
Now, let's write the spawnTile function, which will create a new tile from our Tile prefab every time it is called.
This function will handle the instantiation and positioning of tiles to ensure a seamless ground generation.
We will use the instantiate method to create a new instance of the prefab and place it under the specified parent object. In this case, the new tile will be instantiated as a child of the Tile Manager scene object.
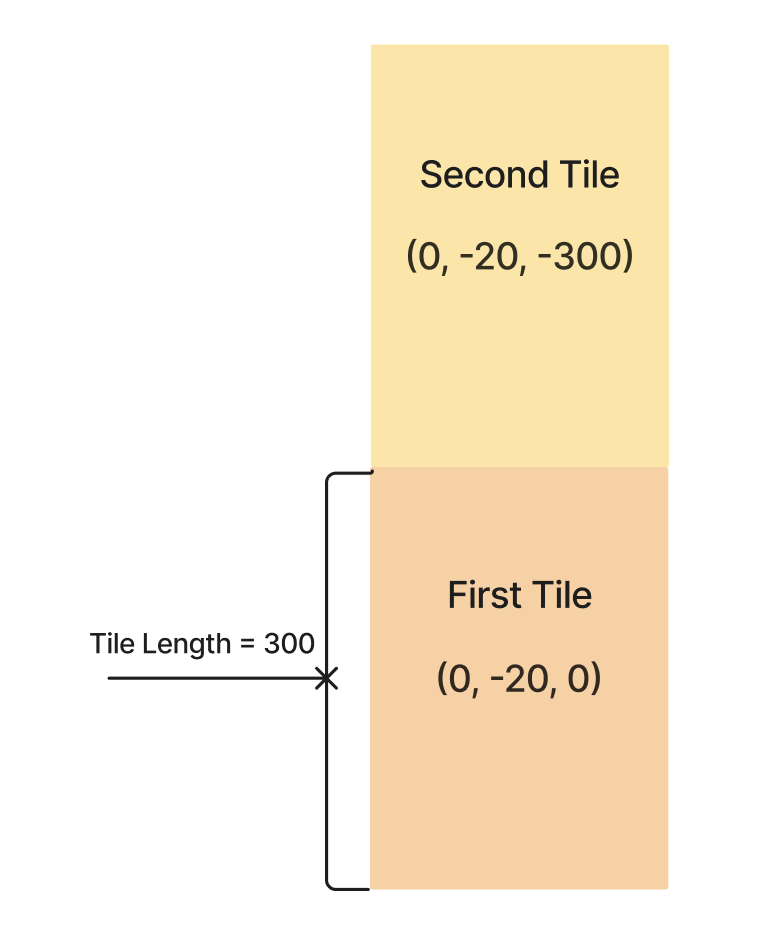
When we created our tile, we found that the best position for it was (0, -20, 0), with a scale of (125, 1, 300).
When instantiating the first tile, we will position it at this predefined location to ensure proper alignment in the scene.
However, if we keep instantiating new tiles at the same position, they will overlap. Instead, each new tile needs to be placed at the endpoint of the previous one.
Since we set the tile’s length (scale z) to 300, the second tile should be positioned at z = -300, the third at z = -600, and so on. This ensures the tiles align properly, creating a seamless and continuous ground.
Now, we will correctly position each newly spawned tile in the scene.
Inside the spawnTile function, we will create a vec3 variable to define the tile's position. The zSpawn value determines where along the z-axis the tile will be placed, ensuring that each tile is positioned at the endpoint of the previous one.
Next, we will set this position using the setLocalPosition method so that the tile appears in the correct location.
Finally, we will decrement zSpawn by tileLength, so the next tile spawns seamlessly at the end of the previous one, forming a continuous path.
Save the script and check the Preview Panel. You will see the tiles being instantiated as expected. However, as the Bitmoji continues running, it will eventually reach the end of the third tile.
Continuously creating new tiles would lead to an excessive number of objects in the scene, increasing the Lens size and affecting performance.
Instead, we will optimize the system by repositioning tiles once they move out of view, creating the illusion of an endless ground.

Repositioning Tiles for an Endless Ground
To maintain smooth performance, we will optimize our endless ground system by reusing tiles instead of continuously creating new ones. As the Bitmoji moves forward, we will track tiles and reposition them once they are out of view. This approach keeps the scene efficient while maintaining the illusion of an infinite running track.
At the beginning of the script, we will define an empty array called grounds. This array will store all the instantiated tiles, allowing us to track and manage them dynamically.
Then, inside the spawnTile function, after instantiating a new tile, we will push it into the grounds array. This ensures that each new tile is added to the list, making it accessible for repositioning later.
By storing tiles in an array, we can efficiently manage their positions and reset them when needed, preventing unnecessary memory usage and improving performance.
In the onUpdate function, we will retrieve the player's current position in world space using the getWorldPosition() method.
This will allow us to compare the player’s position with each tile’s position and determine when a tile moves far enough behind the player to be reset.
We use getWorldPosition() for the player to get its absolute position in the scene since it moves dynamically, while getLocalPosition() for the tiles ensures we track their position relative to the Tile Manager, which remains static.
This makes it easier to determine when a tile has moved far enough behind the player to be repositioned.
Next, we will loop through all the tiles stored in the grounds array and check their positions relative to the player.
If a tile’s z position is 200 units behind the player’s z position, we will call the resetTile function to move it to the end of the tile sequence and reuse it, maintaining the endless ground effect.
In the next step, we will write the resetTile function to handle this repositioning.
The value 200 was chosen after extensive testing to ensure a smooth transition.
If we reset the tile too soon, the player might see it disappear, breaking the illusion of an endless ground. If we reset it too late, the ground might appear to end before a new tile is placed, disrupting the gameplay flow.
You can experiment with different values to achieve the best result for your scene.
Now, we will define the resetTile function, which will reposition tiles once they move far enough behind the player.
Instead of creating new tiles, we will take the tile that is no longer visible and move it to the back of the tile sequence at the zSpawn position, ensuring the ground appears continuous.
Inside the resetTile function, we will:
- Define a new position for the tile at
vec3(0, -20, zSpawn), placing it at the end of the tile sequence. - Use setLocalPosition to move the tile to this position.
- Update
zSpawnby subtractingtileLengthso that the next tile reset continues the sequence correctly.
This approach keeps the ground seamless by continuously reusing tiles.
By updating zSpawn after repositioning each tile, we ensure that tiles always appear in the correct order, making the transition undetectable to the player.
Finally, save the script and check the Preview Panel to see our endless ground in action! As the Bitmoji moves forward, the tiles should seamlessly reposition, creating the illusion of an infinite track.
If you encounter any issues, debugging can help identify what’s going wrong. Use the print function in the part of the script you suspect isn’t working correctly.
For example:
- Add
print("instantiated")inside thespawnTilefunction to check how many times tiles are being instantiated. - Add
print("reset")right after callingresetTileto confirm whether tiles are being repositioned.
Another useful way to inspect our instantiated tiles is by checking the Runtime Scene Hierarchy.
Press the Eye button at the top of the Preview Panel to pause the Lens. This allows you to see all the instantiated tile prefabs in the Scene Hierarchy and verify their current positions.
Pausing the Lens using the Eye button is a great way to inspect how objects are dynamically instantiated in the scene and troubleshoot any unexpected behavior with tile spawning.
Final Touches and Optimization
Now that we've successfully implemented the endless ground system, let's take some final steps to keep our project well-structured and ensure the best possible gameplay experience. We'll organize our assets properly and experiment with different values to fine-tune the tile behavior for a seamless running experience.
To keep our project clean and easy to navigate, let’s ensure that all assets are stored in their respective folders, for example:
- Move all textures to the Textures folder.
- Move all materials to the Materials folder.
- Move all meshes to the Meshes folder.
- Ensure that the tile prefab is stored in the Prefabs folder.
Keeping assets well-organized will prevent clutter and allow you to quickly find and modify resources when needed.
Now that our endless ground system is functional, we should experiment with different values to optimize the experience. Some key values to test include:
tileLength: Try different tile lengths to adjust how frequently new tiles are repositioned.zSpawnOffset: Experiment with different values to ensure tiles are seamlessly placed.Reset Distance(200): Adjust this value to make sure tiles are completely out of view before repositioning. If it’s too small, tiles may visibly reset in the background. If it’s too large, the ground might appear to end before a new tile is repositioned.
Testing different values will help you find the optimal settings that make the endless ground feel smooth and natural while maintaining good performance.

Summary
In this part of the Bitmoji Runner Game tutorial, you’ve taken a major step in creating a seamless, infinite game environment by implementing the endless ground system. You learned how to dynamically spawn and reposition ground tiles as the player moves forward, creating the illusion of an infinite running track while keeping the project optimized.
By carefully managing tile placement and experimenting with key values like tile length and reset distance, you ensured smooth and natural transitions between tiles.
Tip: Continue testing and adjusting values to fine-tune the endless ground system for the best visual effect. Keep your project organized by structuring your assets properly—this will help as you move forward to the next step of the tutorial. In Part 4, we will introduce obstacles and physics to add challenge and excitement to the gameplay!