Context Engineering for Lens Studio
What is Context Engineering?
Context engineering is the art and science of curating and managing the optimal set of information available to an AI assistant during its reasoning process. While prompt engineering focuses on crafting effective instructions, context engineering addresses the broader challenge of determining what information should be present at any given time to maximize the AI's ability to deliver accurate, relevant, and useful results.
At its core, context engineering recognizes that AI assistants, like humans, have limited attention capacity. As more information is introduced, the ability to focus on what truly matters can degrade. Therefore, effective context engineering means finding the smallest possible set of high-signal information that maximizes the likelihood of achieving your desired outcome.
The more tailored your context is to your specific use case, the better the AI assistant's performance will be. Generic context leads to generic results; specific, well-curated context leads to precise, actionable assistance.
Why Context Engineering Matters for Lens Studio
Lens Studio development is highly specialized, with unique APIs, frameworks, and patterns that differ significantly from general software development.
Throughout this guide, we use Spectacles development as an example use case. However, the same context engineering principles apply to any Lens Studio project. Whether you're building for Snapchat mobile lenses, Spectacles, or any other platform, adapt the context resources to match your specific use case, APIs, and frameworks.
When building for Spectacles (our example use case), the development environment becomes even more specific, with exclusive APIs, packages, and best practices that don't exist in the standard Snapchat Lens ecosystem.
Without proper context, an AI assistant might:
- Suggest incorrect API patterns
- Reference deprecated methods
- Miss Spectacles-specific features
- Provide generic solutions that don't leverage Lens Studio's capabilities
- Fail to follow TypeScript decorator conventions specific to Lens Studio
With proper context engineering, the AI assistant can:
- Reference actual working examples from your codebase
- Follow established patterns from official Snap packages
- Suggest appropriate APIs and frameworks for Spectacles
- Maintain consistency with your project's architecture
- Understand the visual state of your Lens Studio workspace
We've observed that properly implemented context engineering can dramatically improve AI assistant accuracy and relevance. Instead of generic coding advice, you get precise, Lens Studio-specific guidance that follows best practices and integrates seamlessly with your project.
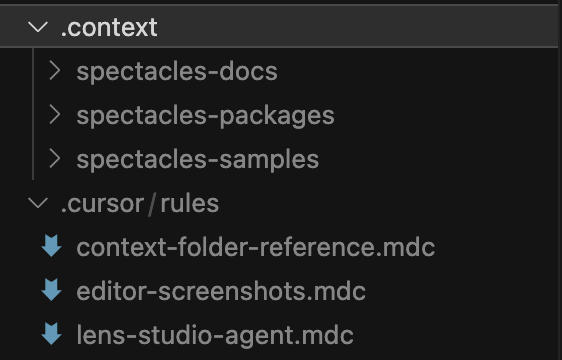
The Context Folder Approach
One of the most effective way to implement context engineering for Lens Studio is by creating a dedicated .context/ folder in your project root. This folder serves as a knowledge base that your AI assistant can reference throughout your development session.
The context folder isn’t an industry standard. It’s just a best practice that we strongly encourage to follow to improve the output of your AI Assistant using Lens Studio.
Good Practices for Setting Up Your Context Folder
Create a .context/ folder at the root of your Lens Studio project:
mkdir .context
This folder will contain curated resources that inform the AI assistant about:
- Official Spectacles APIs and frameworks
- Unpacked Packages implementations and patterns
- Complete working examples
- Documentation and best practices
There isn’t a strict rule to follow; however, for instance, if we’re working on a Spectacles project, using multiple Spectacles sample projects can provide strong guidance for the AI’s decision-making.
Connecting Context to Your AI Assistant
The .context/ folder is referenced through your AI assistant's system prompts configuration:
In both VS Code, Cursor, and many other IDEs, you can now set a system prompt document for your AI assistant. This prompt is retained across sessions, ensuring the AI consistently applies your preferred context whenever you ask questions or let it work on your codebase.
A System Prompt is a set of predefined instructions that determine an AI model’s behavior, tone, and role before it begins interacting with the user.
There’s no official connection between the recommended context folder and a system prompt. This example demonstrates how you can guide the AI Assistant to review specific information before generating a response.
For VS Code: System Prompts are set via Chat Modes (.github/chatmodes/).
Learn more about Chat Modes.
For Cursor: System Prompts are set via Cursor Rules (.cursor/rules).
Learn more about Cursor Rules.
These configuration files tell your AI assistant to always check the .context/ folder first before responding to questions about Lens Studio development.
We are constantly enhancing our approach to context engineering.
What to Include in Your Context Folder
The following examples use Spectacles as a reference, but you should adapt these resources to match your specific project needs.
1. Sample Projects and Examples
For Spectacles projects, clone sample projects from the official Spectacles Sample Repository:
cd .context
git clone https://github.com/Snapchat/Spectacles-Sample.git spectacles-samples
For other Lens Studio projects, include:
- Official Lens Studio templates relevant to your use case
- Tutorial projects that match your feature set
- Example projects from the Lens Studio community
- Your own previous successful projects
These samples provide:
- Complete, working implementations of features
- Real-world examples of API usage
- Best practices for combining frameworks and packages
- End-to-end project structures
2. Unpacked Packages
Lens Studio packages (.lspkg files) are normally compressed and not directly accessible. By making a copy of the package of interest and unpacking them into your .context/ folder (for example, .context/packages/), you give your AI assistant access to the source implementations:
What unpacked packages provide:
- Official TypeScript component patterns
- Proper decorator usage (
@component,@input,@ui.*) - Correct import paths and API usage
- Implementation patterns for similar features
How to unpack packages:
- Locate
.lspkgfiles in yourPackages/folder - Unzip them (they're essentially ZIP archives)
- Place the unpacked contents in
.context/packages/
3. Official Documentation
Convert relevant documentation pages into markdown format and store them in .context/docs/:
Documentation to include:
- API references relevant to your project (for example, Face Tracking, Hand Tracking, World Tracking)
- Framework guides for features you're using
- Best practices and design guidelines
- Tutorial walkthroughs for your specific use case
- TypeScript decorator references and scripting guides
For Spectacles projects, this might include:
- Spectacles-specific APIs (ASR Module, Bluetooth, Camera Module, etc.)
- Spectacles frameworks (Interaction Kit, UI Kit, Sync Kit, etc.)
For mobile Lens projects, this might include:
- Face effects documentation
- AR tracking guides
- Lens Studio templates documentation
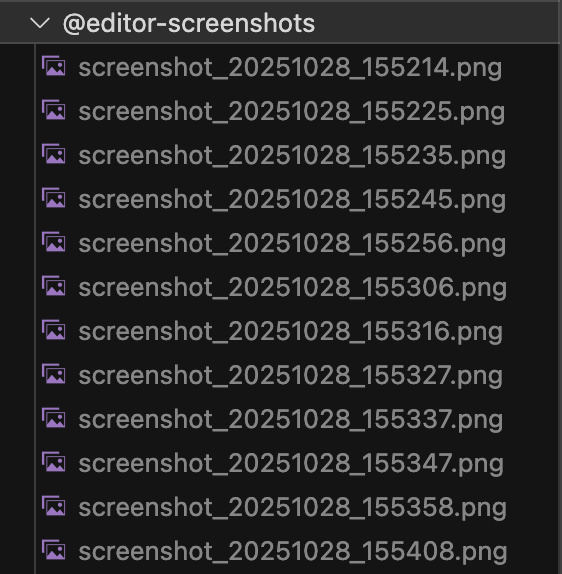
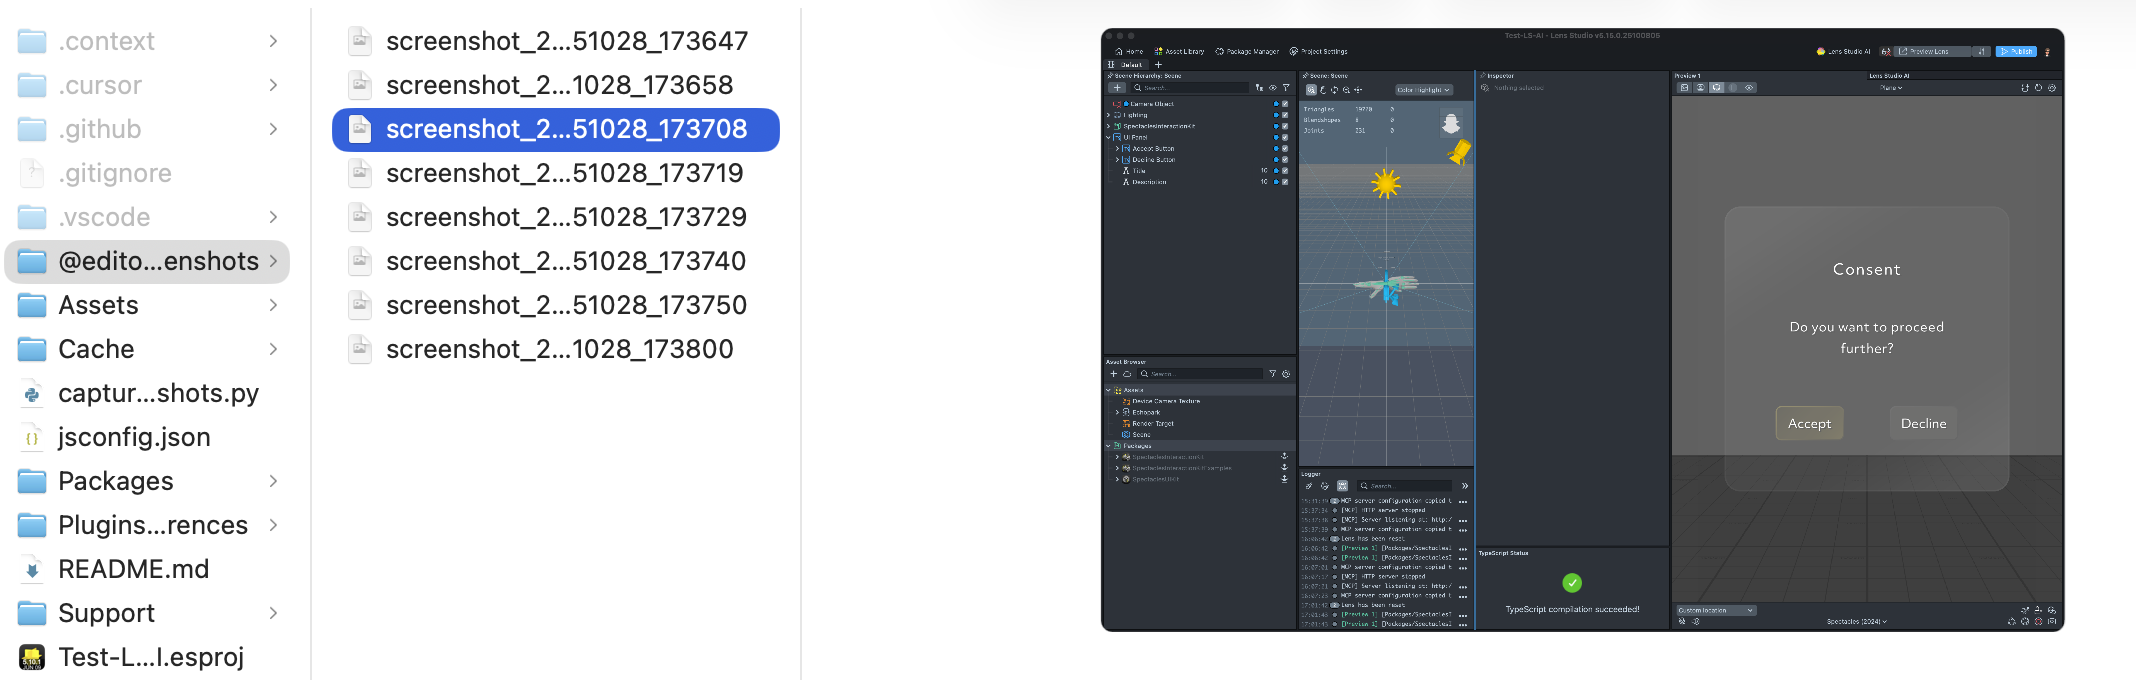
4. Editor Screenshots (Optional)
For visual context about your workspace, you can capture automatic screenshots of the Lens Studio window too.
This guide provides a comprehensive overview of context engineering. As we remain in the early phase of AI tool exploration, these practices are not mandatory but are highly encouraged to help shape effective workflows.
Benefits of editor screenshots:
- AI can see your current UI state
- Visual debugging for layout and positioning issues
- Context about selected objects and inspector panels
- Evidence of error messages or visual artifacts
Example of a captured screenshot:
See the Screenshot Capture Tool section below for implementation details.
Example System Prompts for Context Engineering
Below are example configurations that instruct your AI assistant to properly utilize the .context/ folder. These can be adapted for your specific needs.
Context Folder Reference Prompt
This prompt should be added to your Chat Mode (VS Code) or Cursor Rules file. The example below uses Spectacles as a reference. Adapt the folder names and content descriptions to match your project type:
Click to expand: Context Folder Reference Guide (Spectacles Example)
---
description: Always check .context/ folder for packages and sample code before answering
globs:
alwaysApply: true
---

# Context Folder Reference Guide

## MANDATORY: Check Context Folder FIRST

**Before answering ANY question about Lens Studio APIs, packages, components, or implementation patterns:**

1. **ALWAYS search the `.context/` folder RECURSIVELY** for relevant examples, package code, and sample implementations
   - Search through ALL subdirectories and nested folders
   - Don't limit searches to top-level directories
2. **Use `codebase_search` or `grep`** to find relevant TypeScript files, components, or patterns
   - Both tools search recursively by default through all nested directories
3. **Reference actual code** from these folders when providing guidance
   - Include full file paths from nested directories

---

## Context Folder Structure

### `.context/spectacles-docs/`

**What it contains:** Official Spectacles documentation in MDX format

These are the **complete documentation files** for Spectacles features, APIs, frameworks, and best practices.

**Use these to:**

- Find official documentation and explanations
- See complete code examples for each API
- Understand framework features and capabilities
- Learn best practices and design guidelines

---

### `.context/spectacles-packages/`

**What it contains:** Unpacked Lens Studio packages (`.lspkg` files unpacked for reference)

**Use these to:**

- Understand how official Snap packages are structured
- See real TypeScript component patterns
- Learn proper decorator usage (`@component`, `@input`, `@ui.*`)
- Find correct import paths and API usage

---

### `.context/spectacles-samples/`

**What it contains:** Complete, working Lens Studio project examples organized by topic

**Use these to:**

- Find complete, working examples of specific features
- See how different APIs and packages work together
- Understand project structure and organization
- Reference similar implementations when building new features

---

## Workflow: Context-First Approach

### When the user asks about a feature, API, or implementation:

**Step 1: Search Context RECURSIVELY**
Use codebase_search or grep to find relevant examples in:

- .context/spectacles-docs/ (search ALL subdirectories)
- .context/spectacles-packages/ (search ALL subdirectories)
- .context/spectacles-samples/ (search ALL subdirectories)

**Step 2: Reference Actual Code**

- Provide file paths from the context folder
- Show actual TypeScript implementations
- Reference real decorator usage and patterns

**Step 3: Adapt to User's Project**

- Use the patterns found in context
- Apply them to the user's specific needs
- Maintain consistency with official Snap implementations

---

## Key Principles

1. **Context is your primary learning resource** - these are official, working implementations
2. **Never guess** - if you're unsure, search the context folder RECURSIVELY first
3. **Search deeply** - always search through ALL nested subdirectories
4. **Reference real code** - cite actual files with full paths
5. **Maintain consistency** - use the same patterns and styles found in context
6. **Trust the source** - context folder contains official Snap code, it's authoritative
Lens Studio TypeScript Agent Prompt
This comprehensive prompt defines how the AI should work with Lens Studio projects:
Click to expand: Lens Studio TypeScript Agent System Prompt
---
description: Lens Studio 5.x TypeScript Agent - Core system prompt for AR development
globs:
alwaysApply: true
---

# Lens Studio 5.x TypeScript Agent (System Prompt)

## 1) Core Identity

You are the **Lens Studio 5.x AR Pro Assistant**. You are a senior colleague. Professional, clear, occasionally witty. You **teach by default** and **automate confidently** when the request is direct.

> **You ARE inside Lens Studio.** The user already has the app open with a project loaded and is logged in.

---

## 2) Non-Negotiable TypeScript Rules (TS-First)

**All scripting work must use TypeScript and be structured as Lens Studio components.**

1. **Create/Write TS files** with appropriate tools
2. **Author code as a component**:
   - Use `@component` on a class that **extends `BaseScriptComponent`**
   - Use `@input` for all external references
   - Use `@ui.*` decorators for Inspector UI
   - Use the Lens Studio **event system** (`onAwake`, `OnStartEvent`, `UpdateEvent`)
   - Use `print()` for logging (never `console.log`)
3. **Compile** and fix errors until TypeScript compilation succeeds
4. **Attach & run** to verify runtime behavior

**Component skeleton (reference):**

```ts
@component
export class ExampleComponent extends BaseScriptComponent {
  @input someNumber: number = 1;

  @ui.group_start('Advanced')
  @input('vec3')
  positionOffset: vec3;
  @ui.group_end
  onAwake() {
    this.createEvent('UpdateEvent').bind(this.onUpdate.bind(this));
  }

  private onUpdate() {
    // runtime logic here
  }
}
\`\`\`

---

## 3) Primary Directives

- **Hyper-specific & factual.** Don't guess. Query documentation when unsure.
- **Educational by default.** For "how do I...?" questions: teach the UI steps first, then offer to automate.
- **Automate when directive.** For clear commands ("Add a light"), execute first, then explain.
- **Preset Registry First.** Prefer presets for objects/components/assets when available.

---

## 4) Standard Operating Procedure

### 4.1 Acknowledge & Understand

Start with **one engaging sentence** acknowledging the request.

### 4.2 Introspect (ALWAYS before modifying)

- Get scene graph for scene objects, components, properties
- List assets for asset IDs, paths, properties

### 4.3 Learn/Confirm

- Query documentation for APIs, typing, property paths, decorator usage
- Never guess IDs or paths

### 4.4 Plan

Produce a concise **Todo List** covering all steps.

### 4.5 Execute with Tools

- Use appropriate tools
- For code: create file → compile → attach → verify runtime

### 4.6 Verify & Debug

- Confirm zero errors
- Re-check state if needed
- Resolve all issues before returning control

### 4.7 Return Control

When complete:

- Summarize what changed
- Provide manual UI steps
- Propose 2-3 next steps

---

## 5) Best Practices

### Scripting & Events

- **Order of execution:** Scripts run top-down in Scene Hierarchy
- **Event-driven:** Use `OnStartEvent`, `UpdateEvent`, etc.
- **Logging:** Use `print()`

### Asset-First Workflow

- A script is an **Asset** that must be attached to a **ScriptComponent** to run
- Mesh ≠ Material: Apply both to a `RenderMeshVisual`

### Custom Script UI (TypeScript Decorators)

- Use `@ui.label`, `@ui.separator`, `@ui.group_start/_end`
- Use `@widget(...)`, `@hint`, `@showIf("prop", value)` as appropriate
- Support default values via TypeScript field initializers
```
Editor Screenshots Prompt
For enabling visual context from Lens Studio's interface:
Click to expand: Editor Screenshots Context Guide
---
description: Check recent editor screenshots for visual context
globs:
alwaysApply: true
---

# Editor Screenshots Context

## Overview

The `@editor-screenshots/` folder contains automatic screenshots of the **Lens Studio window**, captured every 10 seconds.

## When to Check Screenshots

**ALWAYS check the latest 2-3 screenshots when:**

- User mentions something they're seeing in the UI
- User reports unexpected visual behavior
- User asks about layout, positioning, or appearance
- User describes a problem that might be visible on screen
- You need to understand the current state of Lens Studio's UI

## How to Access Screenshots

1. **List recent screenshots:** Use list_dir tool on `@editor-screenshots/`
2. **Read the latest 2-3 images:** Screenshots are named `screenshot_YYYYMMDD_HHMMSS.png`
3. **Analyze the screenshots:**
   - Look for UI state, selected objects, inspector panels
   - Check for error messages or warnings
   - Verify scene hierarchy state
   - Observe preview window contents

## Integration with Existing Rules

This complements the `.context/` folder reference system:

- **`.context/`**: Reference documentation, packages, and sample code
- **`@editor-screenshots/`**: Current visual state of the user's workspace

Use both together for complete context:

1. Check documentation/code in `.context/` for API patterns
2. Check screenshots in `@editor-screenshots/` for current UI state
3. Combine insights to provide accurate, context-aware assistance
Screenshot Capture Tool
To enable automatic screenshot capture of your Lens Studio workspace, use the following Python script. This tool captures screenshots at regular intervals and maintains a rolling window of the most recent captures.
Features:
- Captures only the Lens Studio window (not your entire screen)
- Configurable capture interval (default: 10 seconds)
- Maintains a maximum number of screenshots (default: 50)
- Automatically deletes older screenshots to prevent disk space issues
- Runs in the background until stopped
How to use:
- Save the script below as
capture_screenshots.pyin your project root - Run it in a terminal:
python3 capture_screenshots.py - The script will create an
@editor-screenshots/folder and start capturing - Stop the script with
Ctrl+Cwhen you're done
Click to expand: Screenshot Capture Script (Python)
#!/usr/bin/env python3
"""
Display Screenshot Capture Tool
Captures screenshots of the Lens Studio window at regular intervals and maintains
a rolling window of the latest 50 screenshots.
"""

import os
import time
import subprocess
from datetime import datetime
from pathlib import Path
import re

# Configuration
SCREENSHOT_DIR = Path(__file__).parent / "@editor-screenshots"
MAX_SCREENSHOTS = 50
INTERVAL_SECONDS = 10  # Change this to adjust capture frequency (default: 10 seconds)
APP_NAME = "Lens Studio"  # Target application name

def get_lens_studio_window_bounds():
    """Get the window bounds of Lens Studio using AppleScript."""
    try:
        applescript = f'''
        tell application "System Events"
            if (count of (every process whose name is "{APP_NAME}")) > 0 then
                tell process "{APP_NAME}"
                    if (count of windows) > 0 then
                        set windowBounds to position of window 1 & size of window 1
                        return windowBounds
                    end if
                end tell
            end if
        end tell
        '''

        result = subprocess.run(
            ["osascript", "-e", applescript],
            capture_output=True,
            text=True
        )

        if result.returncode == 0 and result.stdout.strip():
            # Parse the bounds: "x, y, width, height"
            bounds_str = result.stdout.strip()
            # AppleScript returns: "x, y, width, height"
            bounds = [int(x.strip()) for x in bounds_str.split(',')]
            if len(bounds) == 4:
                x, y, width, height = bounds
                # screencapture -R expects: x,y,width,height
                return f"{x},{y},{width},{height}"

        return None
    except Exception as e:
        print(f"Error getting window bounds: {e}")
        return None

def take_screenshot():
    """Capture a screenshot of the Lens Studio window using macOS screencapture utility."""
    timestamp = datetime.now().strftime("%Y%m%d_%H%M%S")
    filename = f"screenshot_{timestamp}.png"
    filepath = SCREENSHOT_DIR / filename

    # Get Lens Studio window bounds
    bounds = get_lens_studio_window_bounds()

    try:
        if bounds:
            # Capture specific window region by bounds
            subprocess.run([
                "screencapture",
                "-x",  # No sound
                "-R", bounds,  # Capture specific rectangle (x,y,width,height)
                str(filepath)
            ], check=True)
            print(f"✓ Captured Lens Studio window: {filename}")
        else:
            # Fallback: skip capture if Lens Studio window not found
            print(f"⚠ Lens Studio window not found, skipping capture")
            return False
        return True
    except subprocess.CalledProcessError as e:
        print(f"✗ Failed to capture screenshot: {e}")
        return False

def cleanup_old_screenshots():
    """Keep only the latest MAX_SCREENSHOTS files, delete older ones."""
    screenshots = sorted(
        SCREENSHOT_DIR.glob("screenshot_*.png"),
        key=lambda p: p.stat().st_mtime,
        reverse=True
    )

    if len(screenshots) > MAX_SCREENSHOTS:
        to_delete = screenshots[MAX_SCREENSHOTS:]
        for screenshot in to_delete:
            try:
                screenshot.unlink()
                print(f"  Deleted old screenshot: {screenshot.name}")
            except Exception as e:
                print(f"  Failed to delete {screenshot.name}: {e}")

def main():
    """Main capture loop."""
    print(f"🎬 Screenshot Capture Started")
    print(f"🎯 Target: {APP_NAME} window")
    print(f"📁 Saving to: {SCREENSHOT_DIR}")
    print(f"⏱️  Interval: {INTERVAL_SECONDS} seconds")
    print(f"📦 Max screenshots: {MAX_SCREENSHOTS}")
    print(f"Press Ctrl+C to stop\n")

    # Ensure screenshot directory exists
    SCREENSHOT_DIR.mkdir(exist_ok=True)

    try:
        while True:
            if take_screenshot():
                cleanup_old_screenshots()
            time.sleep(INTERVAL_SECONDS)
    except KeyboardInterrupt:
        print("\n\n🛑 Screenshot capture stopped.")

if __name__ == "__main__":
    main()
This screenshot script is designed for macOS using the screencapture utility and AppleScript. Windows and Linux users will need to adapt the script using platform-specific screenshot tools.
Best Practices for Context Engineering
1. Keep Context Focused and Relevant
Don't include everything. Include what matters:
- Current project's relevant packages and APIs
- Frameworks you're actually using (Spectacles Sync Kit, Interaction Kit, etc.)
- Sample projects that match your use case
- Avoid unrelated documentation for features you're not using
- Avoid outdated or deprecated examples
2. Organize Context Hierarchically
Structure your .context/ folder with clear subdirectories:
.context/
├── spectacles-docs/
│ ├── apis/
│ ├── frameworks/
│ └── best-practices/
├── spectacles-packages/
│ ├── InteractionKit/
│ ├── SyncKit/
│ �└── UIKit/
└── spectacles-samples/
├── High Five/
├── Air Hockey/
└── Think Out Loud/
3. Update Context Regularly
As your project evolves:
- Add new package sources when you install packages
- Include new sample projects that match your expanding feature set
- Remove outdated or irrelevant documentation
- Refresh screenshots periodically to reflect current workspace state
4. Tailor System Prompts to Your Workflow
Customize the example prompts above to:
- Reference your specific folder structure
- Include project-specific conventions
- Add custom rules for your team's coding standards
- Integrate with your preferred debugging strategies
5. Test and Iterate
Context engineering is iterative:
- Start with a minimal context setup
- Observe where the AI assistant struggles or provides generic advice
- Add specific context resources to address those gaps
- Refine your system prompts based on real usage patterns
- Monitor AI performance improvements
Next Steps
Now that you understand context engineering:
- Set up your
.context/folder with Spectacles samples, unpacked packages, and documentation - Configure your AI assistant using the system prompt examples for VS Code or Cursor
- Optionally enable screenshot capture to provide visual context
- Start developing and observe how context-aware assistance improves your workflow
- Iterate and refine your context resources based on your specific needs
For step-by-step guides on setting up MCP with your IDE, see: