Animating Scene Objects
Lens Studio supports keyframe animation on scene objects—no external 3D software needed. You can animate position, rotation, and scale, control playback with transport controls, and record keyframes live in the viewport.
Quick Start: The Animate Action
Use the Animate context menu action to start animating a scene object.
- In the Scene Hierarchy, right-click a scene object.
- Choose Animate.
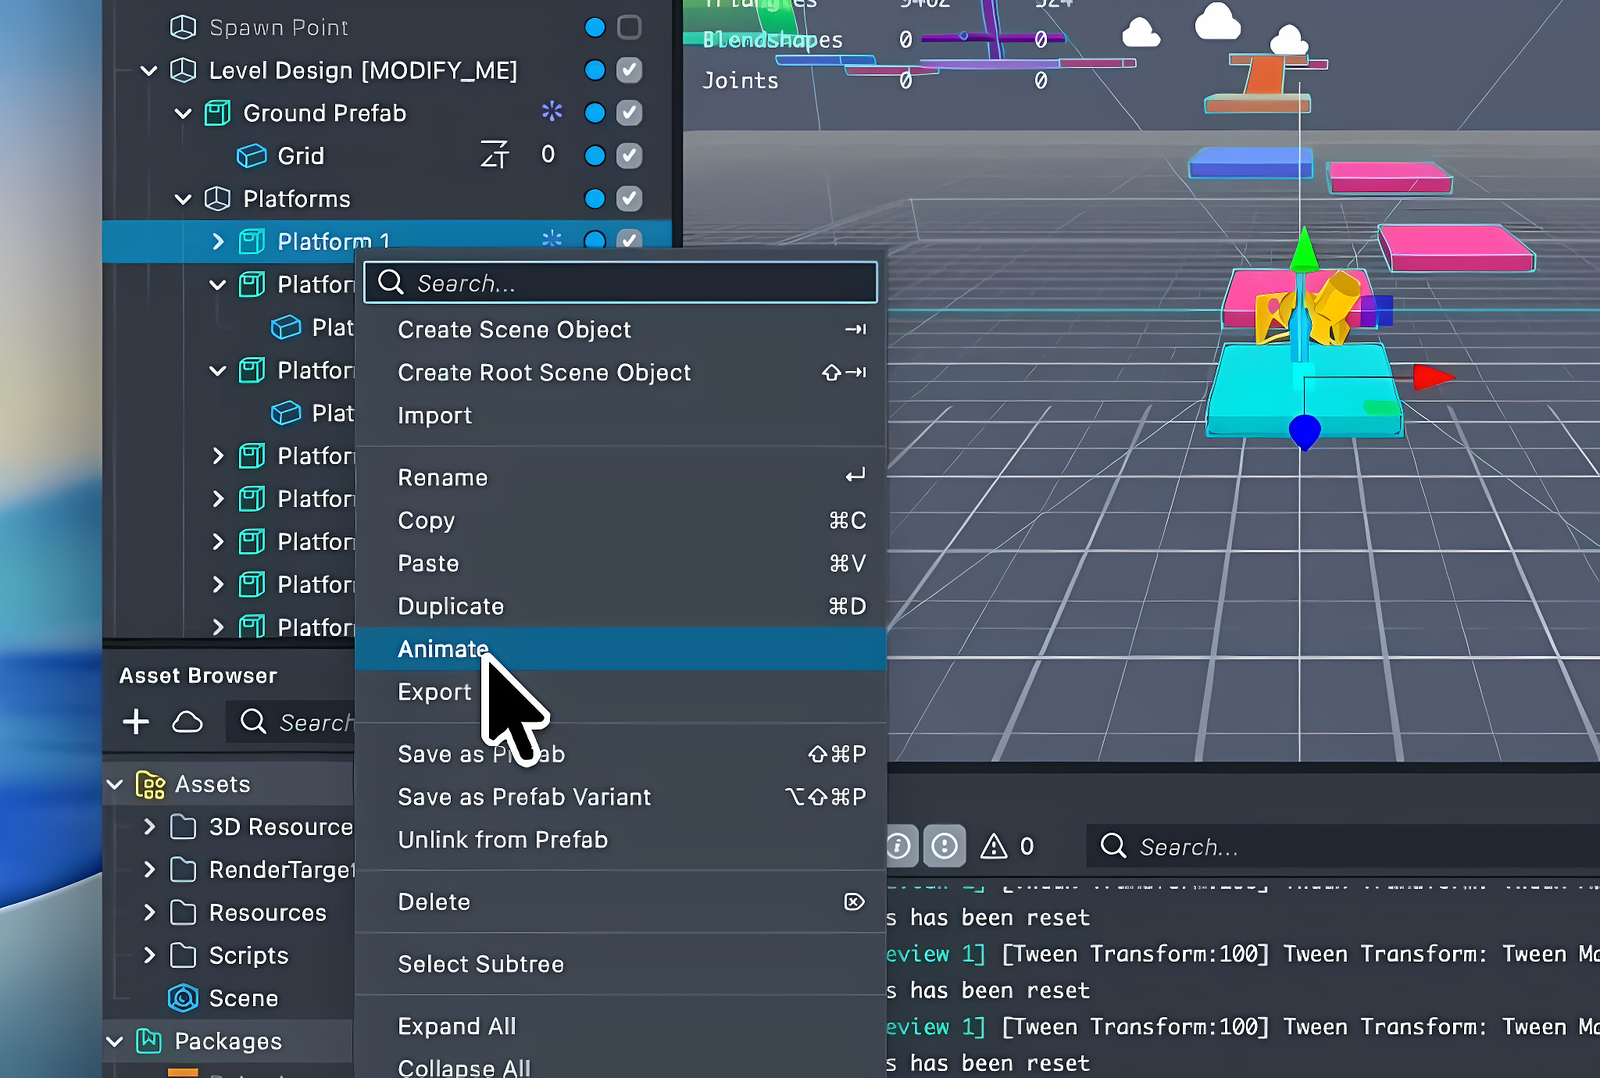
Lens Studio then:
- Creates an
AnimationAssetwith default keyframes for the object's current position, rotation, and scale. - Adds an
AnimationPlayercomponent wired to the new asset via anAnimationClip. - Opens the Animation Curve Editor and loads the new curves.
- Restores selection to the scene object.
If the object already has an AnimationPlayer, Lens Studio uses the existing player and its clips instead.
After running Animate, scrub through time, edit curve shapes, or record new keyframes—no manual wiring needed.
What Gets Created
| Created | Details |
|---|---|
AnimationAsset | Contains layers for position, rotation, and scale. Each starts with one keyframe at time 0. |
AnimationPlayer component | Added to the scene object with Autoplay on. |
AnimationClip | Created inside the AnimationPlayer, linked to the new AnimationAsset. |
See the Animation Player reference for details on each entity.
Recording Keyframes
With an AnimationPlayer on the scene object, record new keyframes by moving the object in the viewport.
Enable Recording
Click the red circle Record button in the Animation Curve Editor toolbar to toggle recording on.
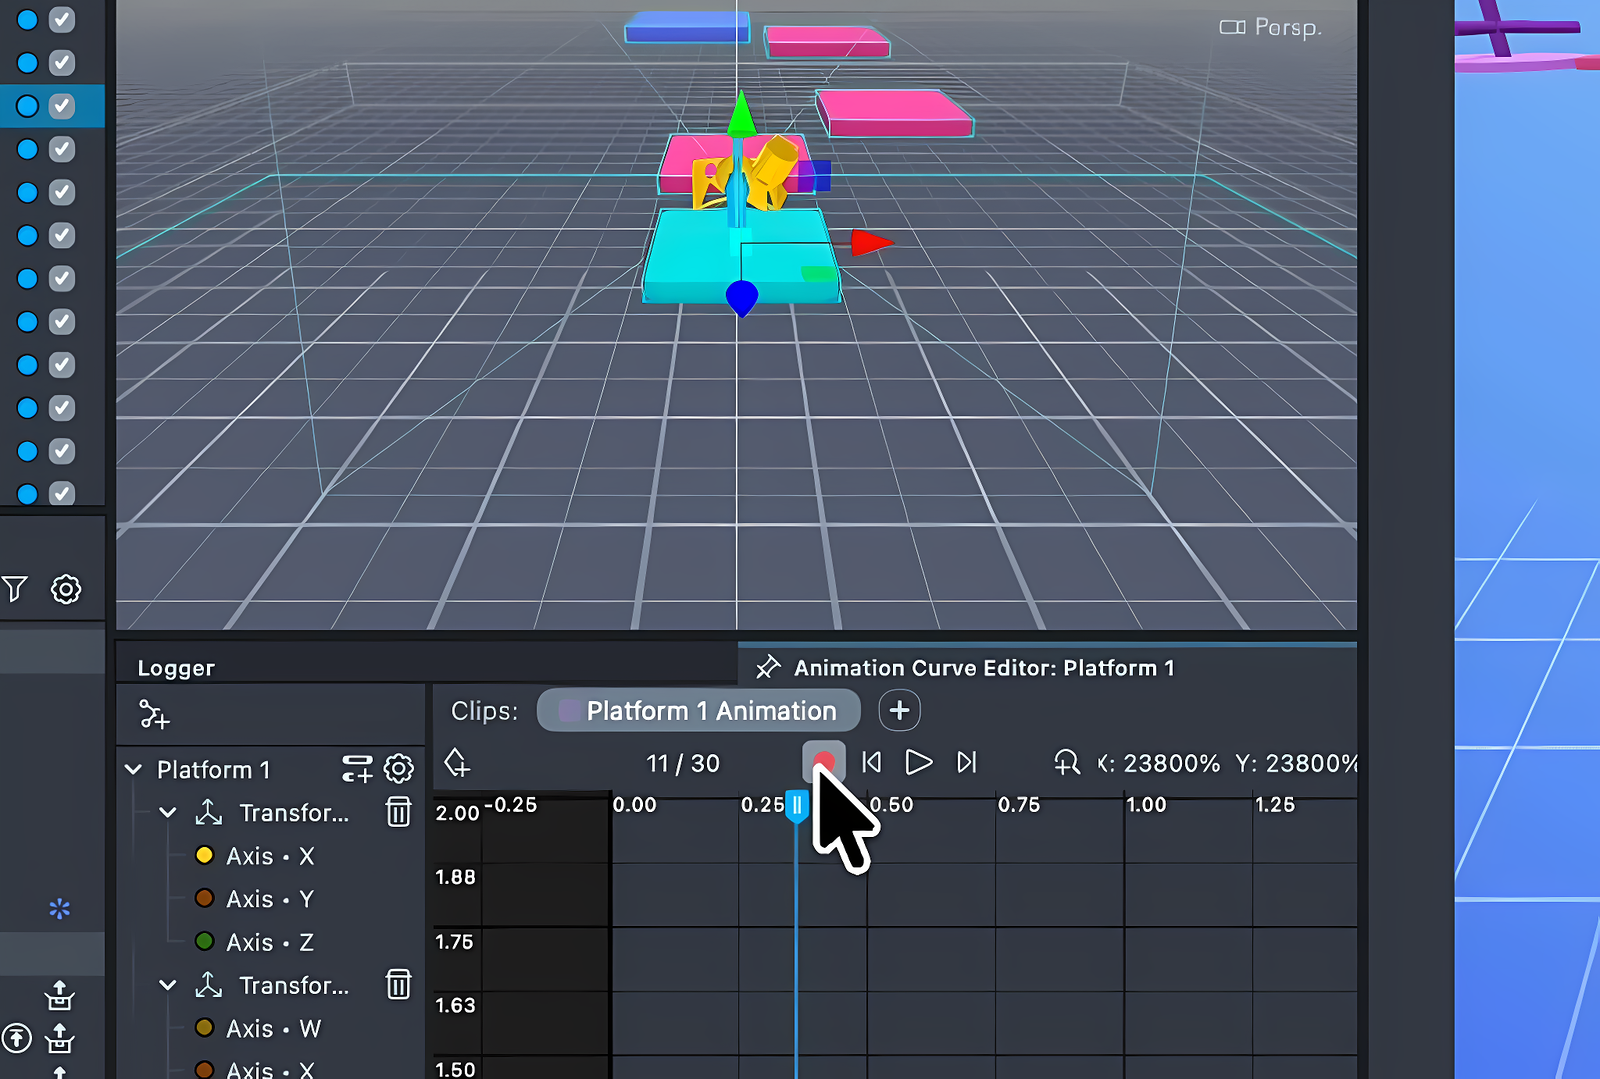
With the record button on:
- Position the scrubber—the playhead—at the desired time.
- Move, rotate, or scale the scene object in the Scene Editor viewport.
- On release, the editor writes position, rotation, and scale keyframes at the scrubber time.
Recording uses debouncing—one keyframe per drag. This keeps the undo history clean: each drag produces one undo step.
Overwriting Existing Keyframes
If a keyframe exists at the current scrubber time, the editor overwrites it. Use this to refine a captured pose.
Stopping Recording
Click Record again to turn it off. With recording off, viewport moves don't affect the curves.
Previewing the Animation
Use the transport controls to preview without leaving the editor:
| Control | Action |
|---|---|
| Play / Stop | Toggles AnimationPlayer autoplay. |
| Step Forward | Advances one frame. |
| Step Back | Steps back one frame. |
| Scrub ruler | Click and drag the time ruler to seek to any frame. |
For details on transport controls and the clips bar, see Animation Curve Editor—Transport Controls.
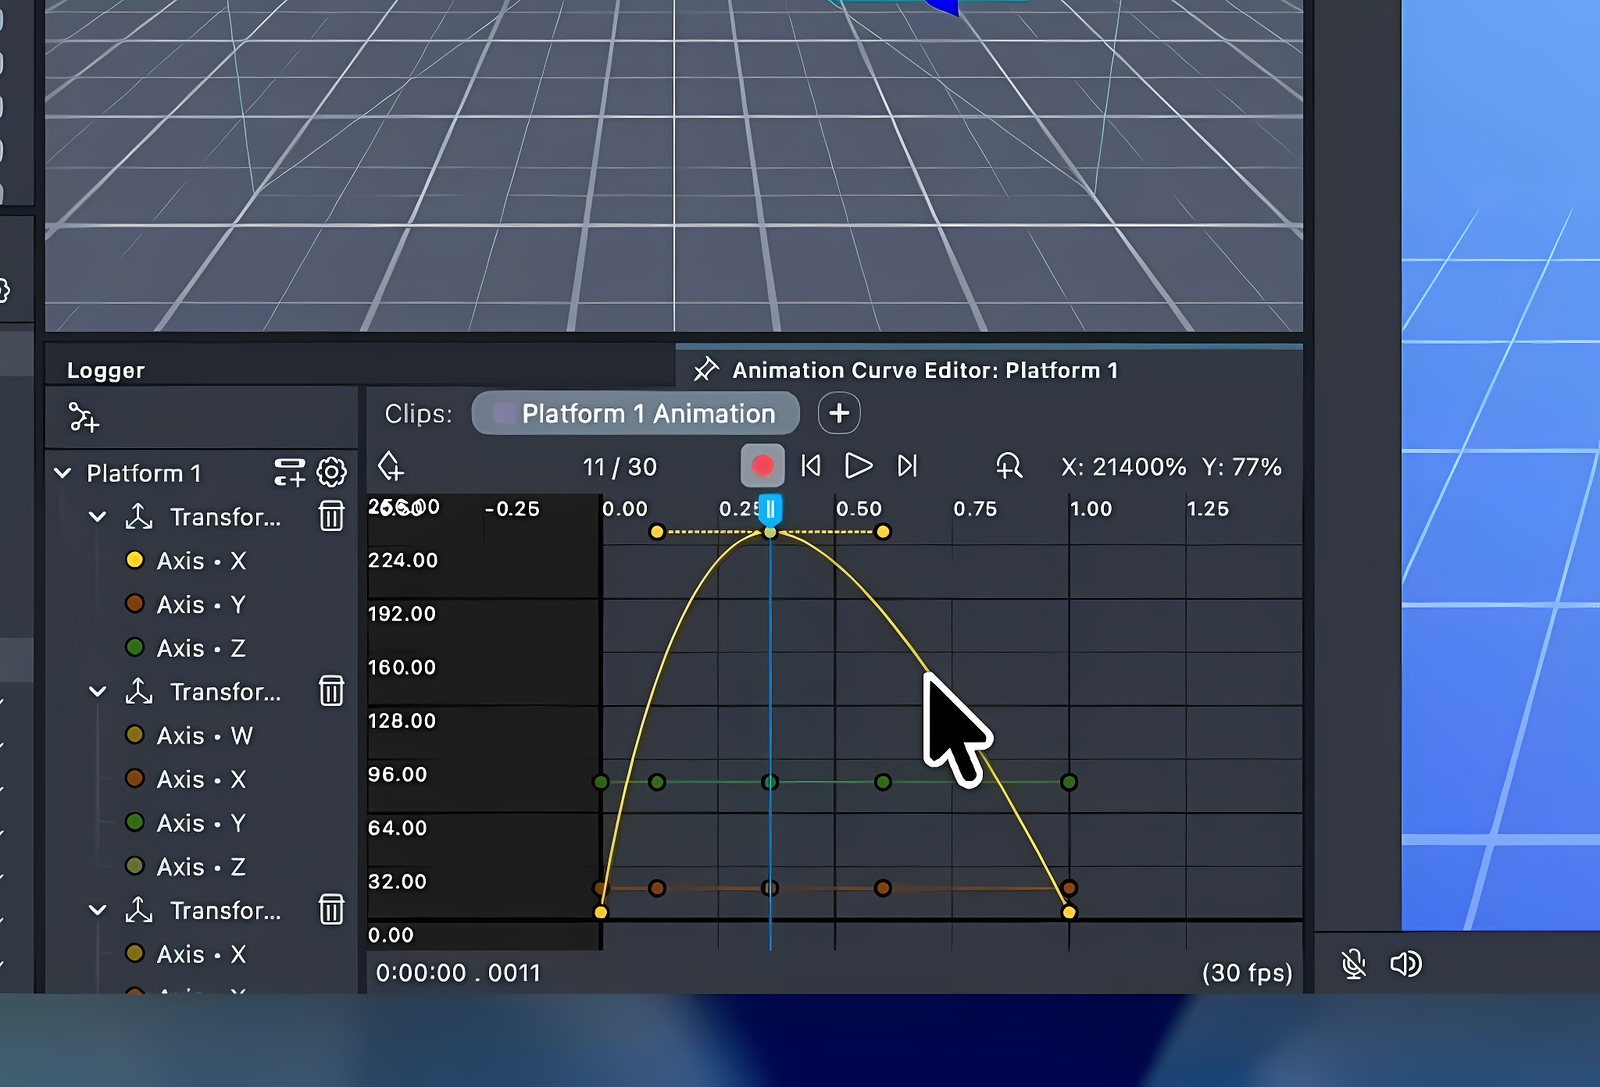
Editing Curves
After recording or using Animate, open the Animation Curve Editor to refine:
- Switch from Linear to Free Bezier tangents for smooth ease-in/ease-out motion.
- Mix tangent types per segment—for example, snap to a key then ease out.
- Drag tangent handles to adjust speed through each keyframe.
The editor curve matches runtime exactly - Lens Studio resamples non-linear Bezier curves during playback.
Related Links
- Animation Curve Editor—full reference for the curve editor UI, transport controls, and tangent handles
- Animation Player—AnimationPlayer, AnimationClip, and AnimationAsset reference
- Animation Events—trigger script callbacks at specific points in an animation timeline
- Playing Animations Programmatically—control playback from script
- Animation Player API
- Animation Asset API