Animation State Graph Editor
The Animation State Graph Editor is a Lens Studio plugin that provides a visual, node-based interface for building animation state machines. Instead of configuring states and transitions through inspector fields, you work on an interactive canvas—adding states as nodes, drawing transitions as arrows, and setting conditions inline.
It works with the Animation State Graph Player component, which replaces the legacy Animation State Manager component. The visual editor and the component together give you full control over complex animation logic without writing code.
Setup
- Open the Asset Library in Lens Studio.
- Search for Animation State Graph Editor and click Install.
Two ways to get started:
Option A: Start from the plugin
- Open the editor from Plugins > Animation State Graph Editor.
- Click the Add Animation State Graph Player button in the editor and select the SceneObject you want to create a graph for.
Option B: Start from the Asset Library
- Search for Animation State Graph Player in the Asset Library and add it to your project.
- In the Inspector, add the Animation State Graph Player component to the SceneObject you want to animate.
- Double-click the SceneObject in the Scene Hierarchy to open the plugin and start building the graph.
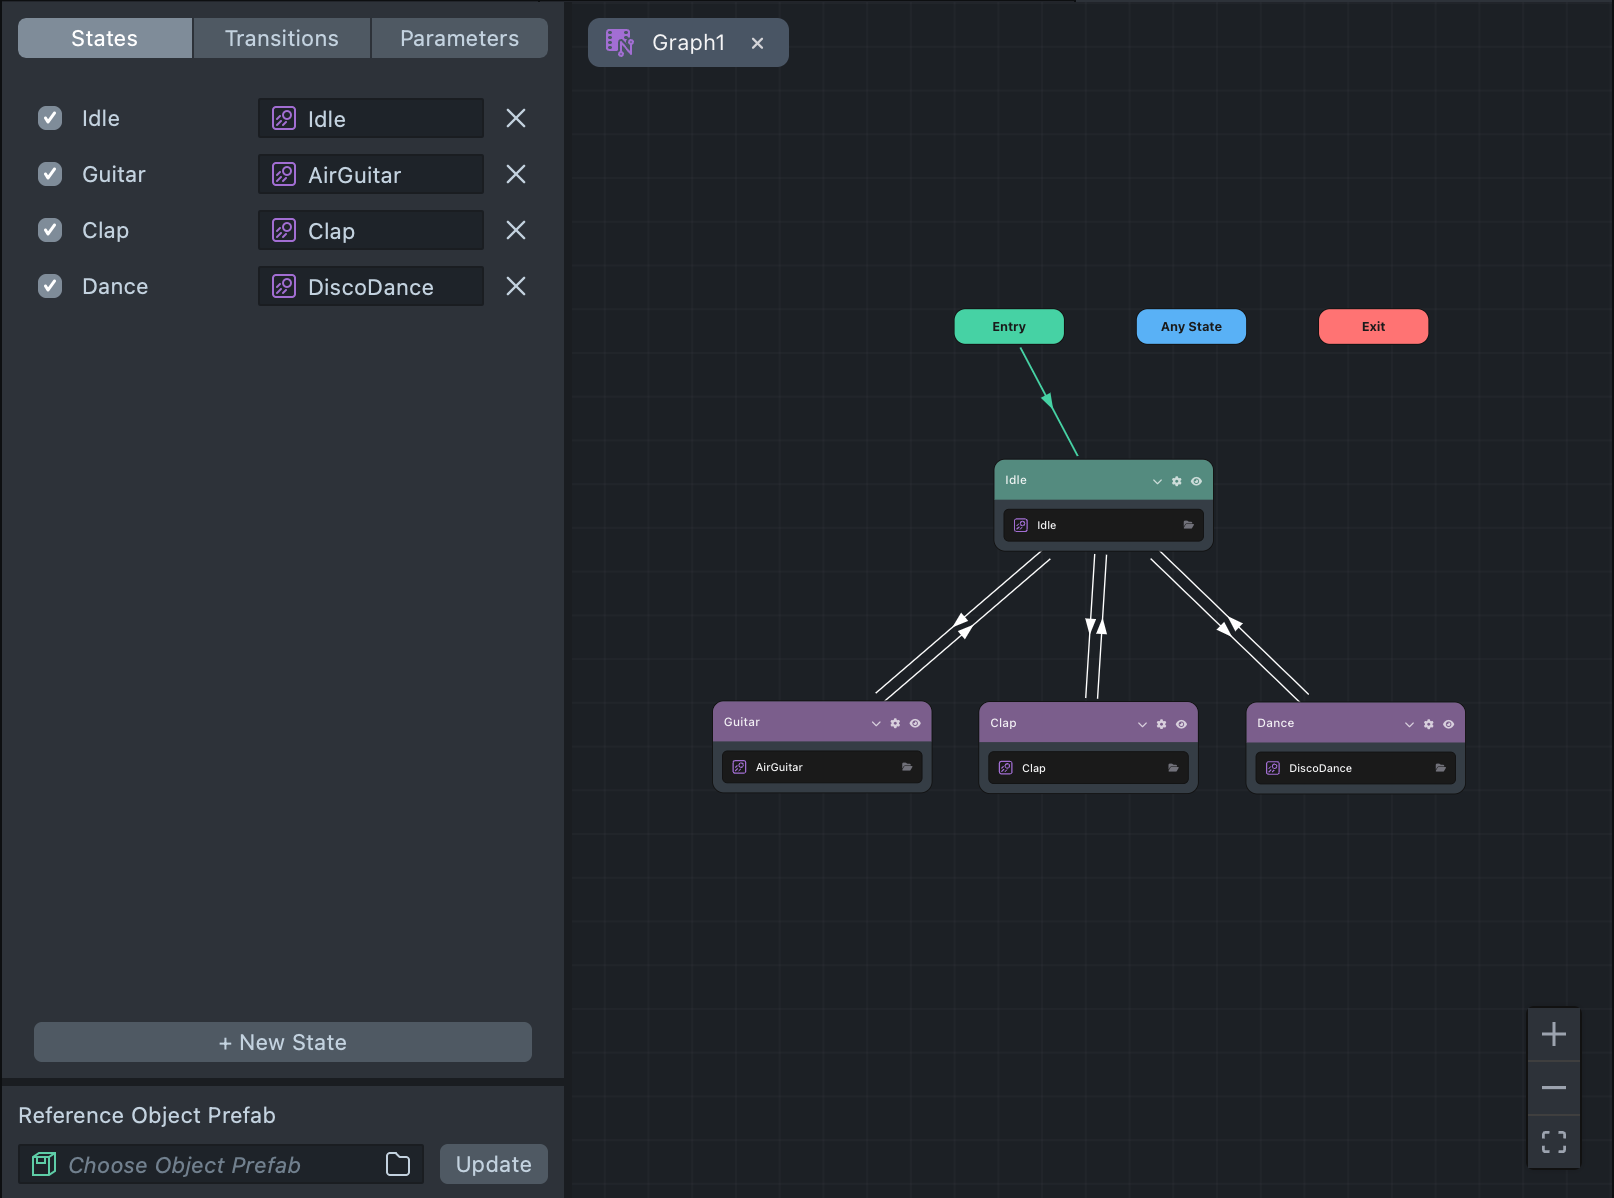
The editor loads the animation state graph stored on the selected component. If no graph exists yet, the canvas starts with default Entry, Any State, and Exit nodes.
![]()
Each Animation State Graph Player component stores its own graph. If your scene has several animated objects, each one has its own independent state machine.
Editor Layout
The editor has three main areas:
- Graph Canvas—the central workspace where state nodes and transition arrows live. Pan by dragging the background, zoom with the scroll wheel.
- Sidebar—a tabbed panel on the left with three tabs: States for managing animation states, Transitions for viewing and selecting all transitions in the graph, and Parameters for defining variables used in transition conditions.
- Toolbar—anchored in the bottom-right corner with Zoom In, Zoom Out, and Fit View buttons.
States
States represent the different animations your object can play. Each state appears as a node on the canvas that you can drag to reposition.
State Types
The editor supports four state types:
| Type | Purpose |
|---|---|
| Entry | The starting point of the state machine. The first transition out of Entry determines the initial animation. |
| Exit | A terminal state. Transitioning here stops all animation playback. |
| Any State | A global source state. Transitions from Any State can fire regardless of which state is currently active. |
| Normal | A user-defined animation state with an assigned clip and playback settings. |
The editor creates Entry, Exit, and Any State automatically. You add Normal states yourself.
Adding States
To add a new state, either:
- Click New State in the States panel on the sidebar, or
- Right-click anywhere on the graph canvas and select Create State from the context menu.
Once added, name the state (for example, "Idle," "Run," "Jump") and assign an animation clip by clicking the asset picker button on the state node, which opens the Lens Studio asset browser.
State Node Configuration
Click a state node on the canvas to expand it and reveal its full clip configuration:
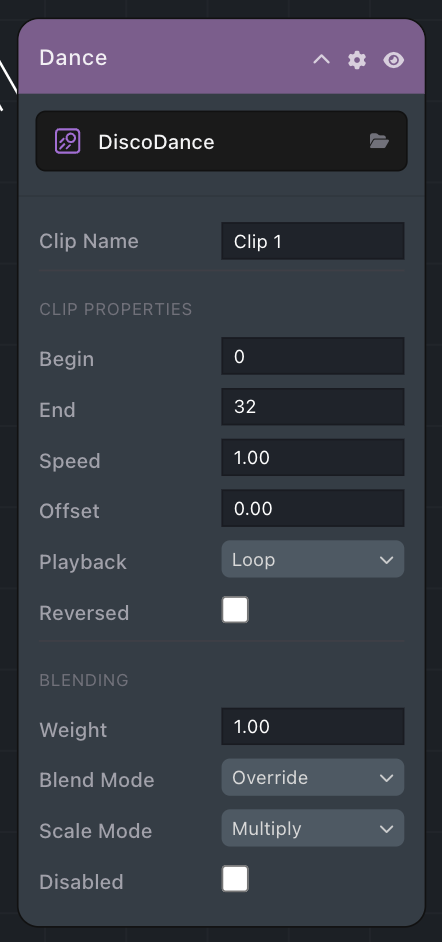
- Animation Asset: The animation clip assigned to this state, selected via the asset picker.
- Begin / End: Frame range defining which part of the clip to play.
- Speed: Playback speed multiplier.
- Offset: Starting offset within the clip.
- Playback Mode:
Loop,Single, orPingPong. - Reversed: Play the clip in reverse.
- Weight: Blend weight of this clip (0.0 to 1.0).
- Blend Mode:
Overridereplaces other animations,Additivelayers on top. - Scale Mode:
MultiplyorAdditive, controls how animation values apply to joints. - Disabled: Temporarily turn off this state without deleting it.
All editing happens directly on the node—there is no separate inspector or dialog.
State Context Menu
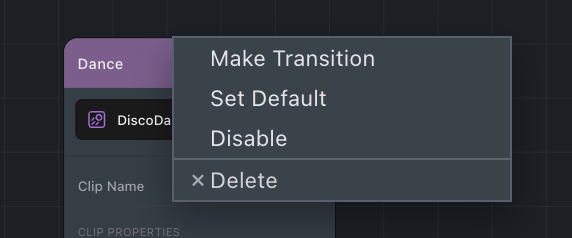
Right-click a state node to access additional options:
- Make Transition—start drawing a transition from this state.
- Set Default—set this state as the default state that Entry transitions to.
- Disable—temporarily disable the state without removing it. Disabled states appear dimmed on the canvas.
- Delete—permanently remove the state and all its connected transitions.
Reference Object Prefab
As an optional workflow, you can use a Reference Object Prefab to automatically generate states from an existing 3D object that already has animations baked in.
The Reference Object Prefab picker is located at the bottom of the sidebar. To use it:
- Click Choose Object Pref… and select an ObjectPrefab from your project that contains an Animation Player with animation clips.
- Click Update.
The editor scans the prefab for all Animation Player components, extracts every animation clip, and automatically creates a matching state for each clip in the graph. Clip settings (frame range, speed, blend mode, etc.) are carried over to the new states.
If you update the prefab's animations later, click Update again to re-sync. New clips are added as new states, existing states are updated with the latest clip data, and states whose clips no longer exist in the prefab are automatically disabled.
Transitions
Transitions define how and when the state machine moves from one state to another. They appear as directional arrows on the canvas.
Drawing Transitions
To create a transition, either:
- Click and drag from the border of a state node to another node, or
- Right-click a state node and select Make Transition, then click the destination node.
The arrow indicates the direction of the transition (from → to).
Transition Settings
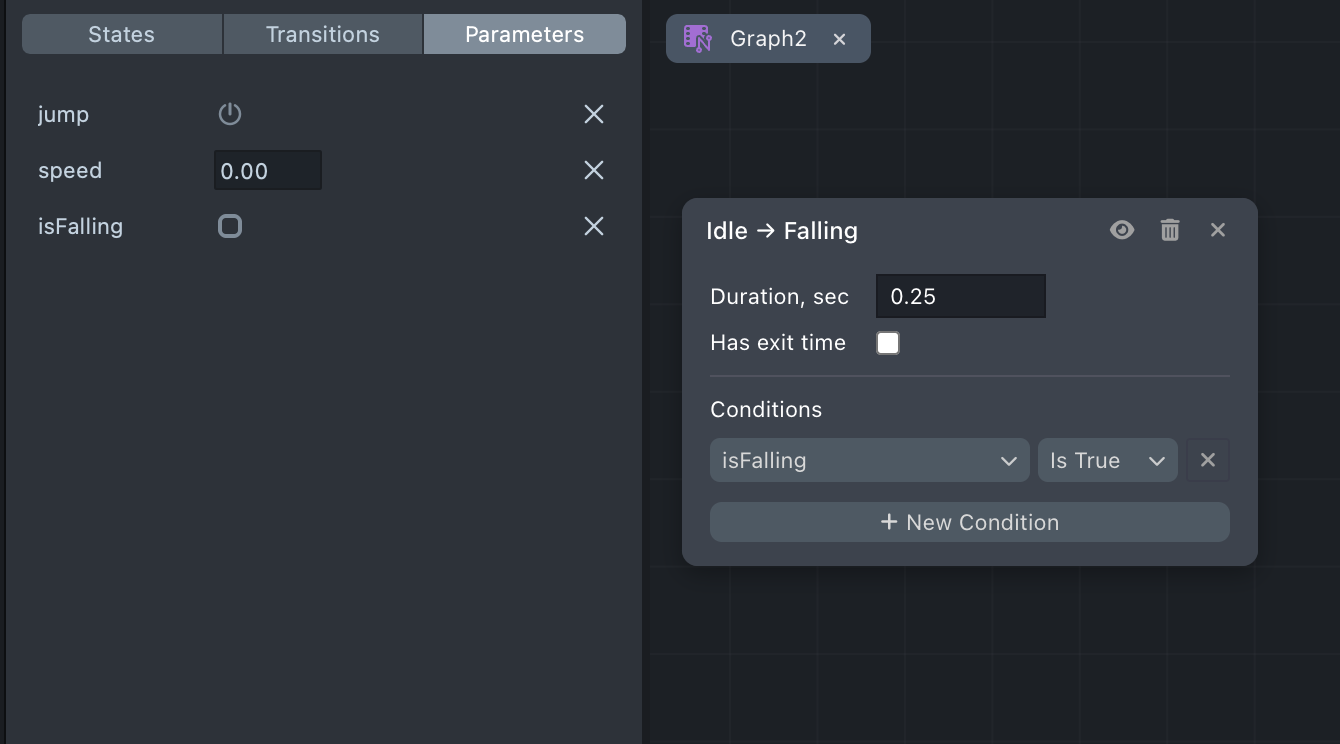
Click a transition arrow to open the inline transition editor:
![]()
- Duration, sec—how long the blend between the two states takes, in seconds.
- Has exit time—when checked, the transition waits until a normalized time (0 to 1) in the source animation before it can begin. For example, 0.9 means the transition starts near the end of the current clip.
Conditions
Each transition can have one or more conditions that must all be true for the transition to fire. Conditions reference parameters (defined in the Parameters tab) and use comparison operators.
For example:
Speed > 0.5—a Float comparisonIsGrounded == true—a Bool checkJump—a Trigger (fires once when set, then auto-resets)
If a transition has no conditions, it fires as soon as the exit time is reached (or immediately if no exit time is set).
Disabling Transitions
Like states, transitions can be disabled temporarily. Click the eye icon in the transition editor popup to toggle a transition on or off.
Parameters
Parameters are variables that drive transition conditions. Define them in the Parameters tab of the sidebar.
Parameter Types
| Type | Description | Example Use |
|---|---|---|
| Float | A decimal number | Movement speed, blend weight |
| Int | A whole number | Weapon index, animation variant |
| Bool | True or false | IsGrounded, IsRunning |
| Trigger | A one-shot signal that auto-resets after firing | Jump, Attack, Emote |
Managing Parameters
- Click Add Parameter and choose a type.
- Name the parameter descriptively (for example, "Speed," "IsJumping").
- Set a default value.
Parameters defined here sync with the Animation State Graph Player component. They appear on the component in the Inspector, and you control them via script at runtime.
Scripting
At runtime, you control the Animation State Graph Player through script by setting parameter values. The state machine evaluates transitions automatically based on the conditions you configured in the editor.
Setting Parameters
// @input Component.ScriptComponent animPlayer

// Set a float parameter
script.animPlayer.setParameter('Speed', 1.5);

// Set a boolean parameter
script.animPlayer.setParameter('IsGrounded', true);

// Fire a trigger
script.animPlayer.setTrigger('Jump');

// Reset a trigger manually (triggers auto-reset, but you can force it)
script.animPlayer.resetTrigger('Jump');
Querying State
You can read the current state and listen for state changes:
// Get the current state name
var currentState = script.animPlayer.getCurrentStateName();

// Get a state object and add callbacks
var runState = script.animPlayer.getState('Run');
runState.onEnter.add(function () {
  print('Entered Run state');
});
runState.onExit.add(function () {
  print('Exited Run state');
});
Forcing State Changes
You can bypass transition logic and force an immediate state change:
// Immediately switch to Idle
script.animPlayer.setState('Idle', 0);

// Transition to Run over 0.5 seconds
script.animPlayer.setState('Run', 0.5);
Using with Behavior Script
If you prefer not to write code, the Animation State Graph Player API is accessible from the Behavior script:
- Select Call Object API as the response type.
- Set Call Type to Call Function.
- Set Function Name to
setParameterorsetTrigger. - Set Argument 1 type to
stringand value to your parameter name. - Set Argument 2 to the parameter value, or leave it as value type None for triggers.
Graph Utilities
Undo / Redo
All graph operations support undo and redo via standard keyboard shortcuts (⌘Z / ⌘⇧Z).
Auto Arrange
Right-click the canvas and select Auto Arrange to automatically organize the graph layout. This is useful when your graph becomes complex and nodes overlap.
Fit View
Click the Fit View button in the bottom-right toolbar to zoom the canvas so all nodes are visible. You can also use the Zoom In and Zoom Out buttons to adjust manually.
Multi-Select
Hold ⌘ and click to select several nodes at once. Drag any selected node to move them all together.
Copy and Paste
Select one or more state nodes and use ⌘C / ⌘V to duplicate them.
Animation State Graph Editor vs Animation State Manager
The Animation State Graph Editor is the visual authoring tool for the Animation State Graph Player component. It replaces the legacy Animation State Manager component for new projects.
| Animation State Graph Editor | Animation State Manager | |
|---|---|---|
| Authoring | Visual node-based canvas | Inspector field lists |
| Component | Animation State Graph Player | Animation State Manager |
| State configuration | Inline on each node | Inspector fields |
| Transition authoring | Draw arrows between nodes | Add entries to a transition list |
| Blend trees | Not yet supported | Supported |
| Runtime API | setParameter, setTrigger, setState | setParameter, setTrigger, setState |
The legacy Animation State Manager component continues to work for existing projects. For new projects, we recommend using the Animation State Graph Editor and Animation State Graph Player.