Comic Maker Beta
The Comic Maker Beta plugin allows Lens Creators to easily build comic-style stories by combining background images, speech bubbles, and Bitmoji characters into fun, expressive scenes. The result is a Lens made up of static frames that users can flip through by tapping on the screen.
Create a Comic
The plugin makes it easy to create a series of static comic "pages". Let’s go through the creation flow step by step.
Known Issue: After saving the project, the plugin loses all progress made within it. The project itself is saved, but it requires manual adjustments through the Scene Hierarchy and Inspector. Avoid saving the project if you plan to continue editing within the plugin.
Known Issue: Outfit override is currently not compatible with the Comic Maker Beta plugin.
-
Open the Comic Maker Beta tab in the
Window->Bitmoji Suite.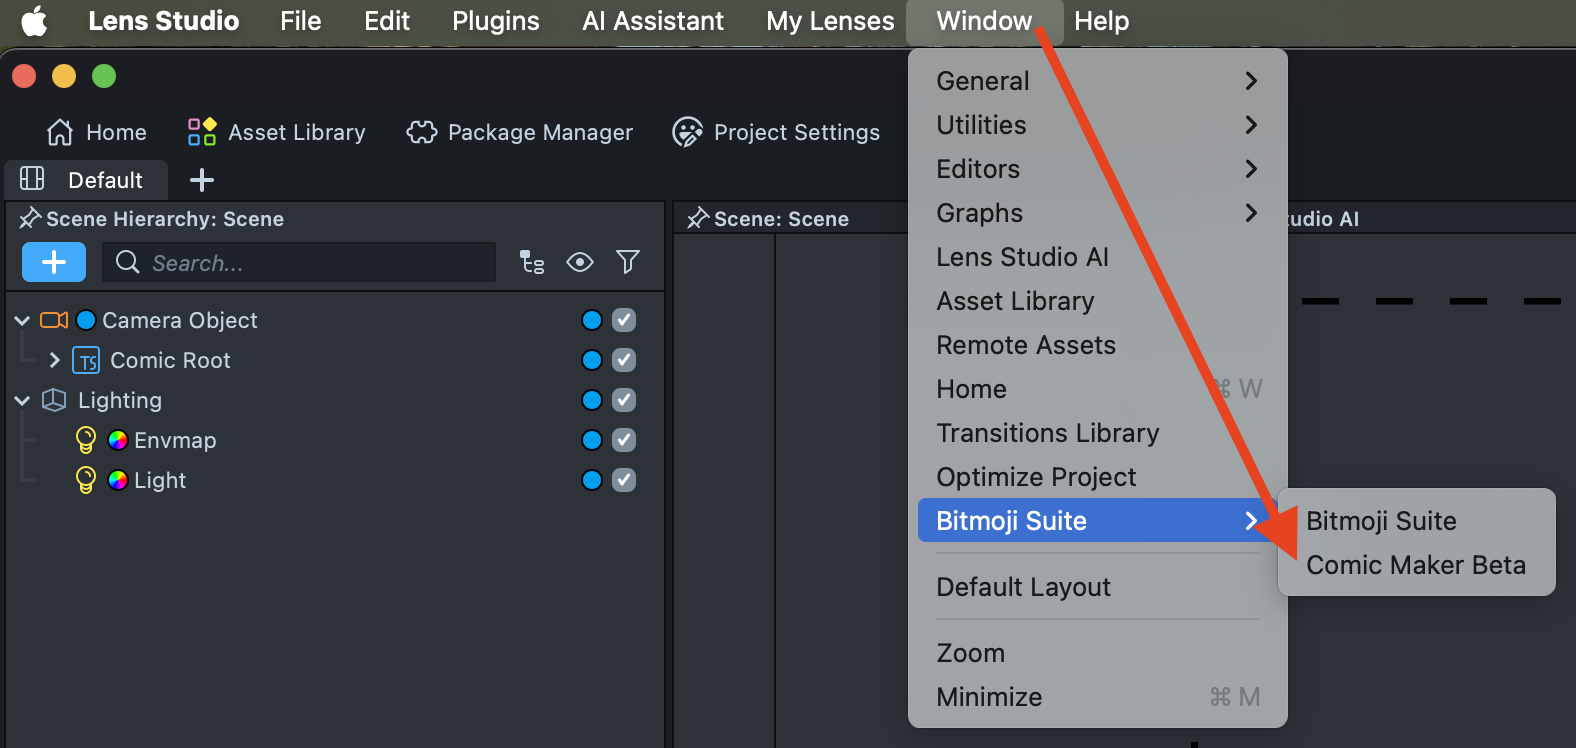
-
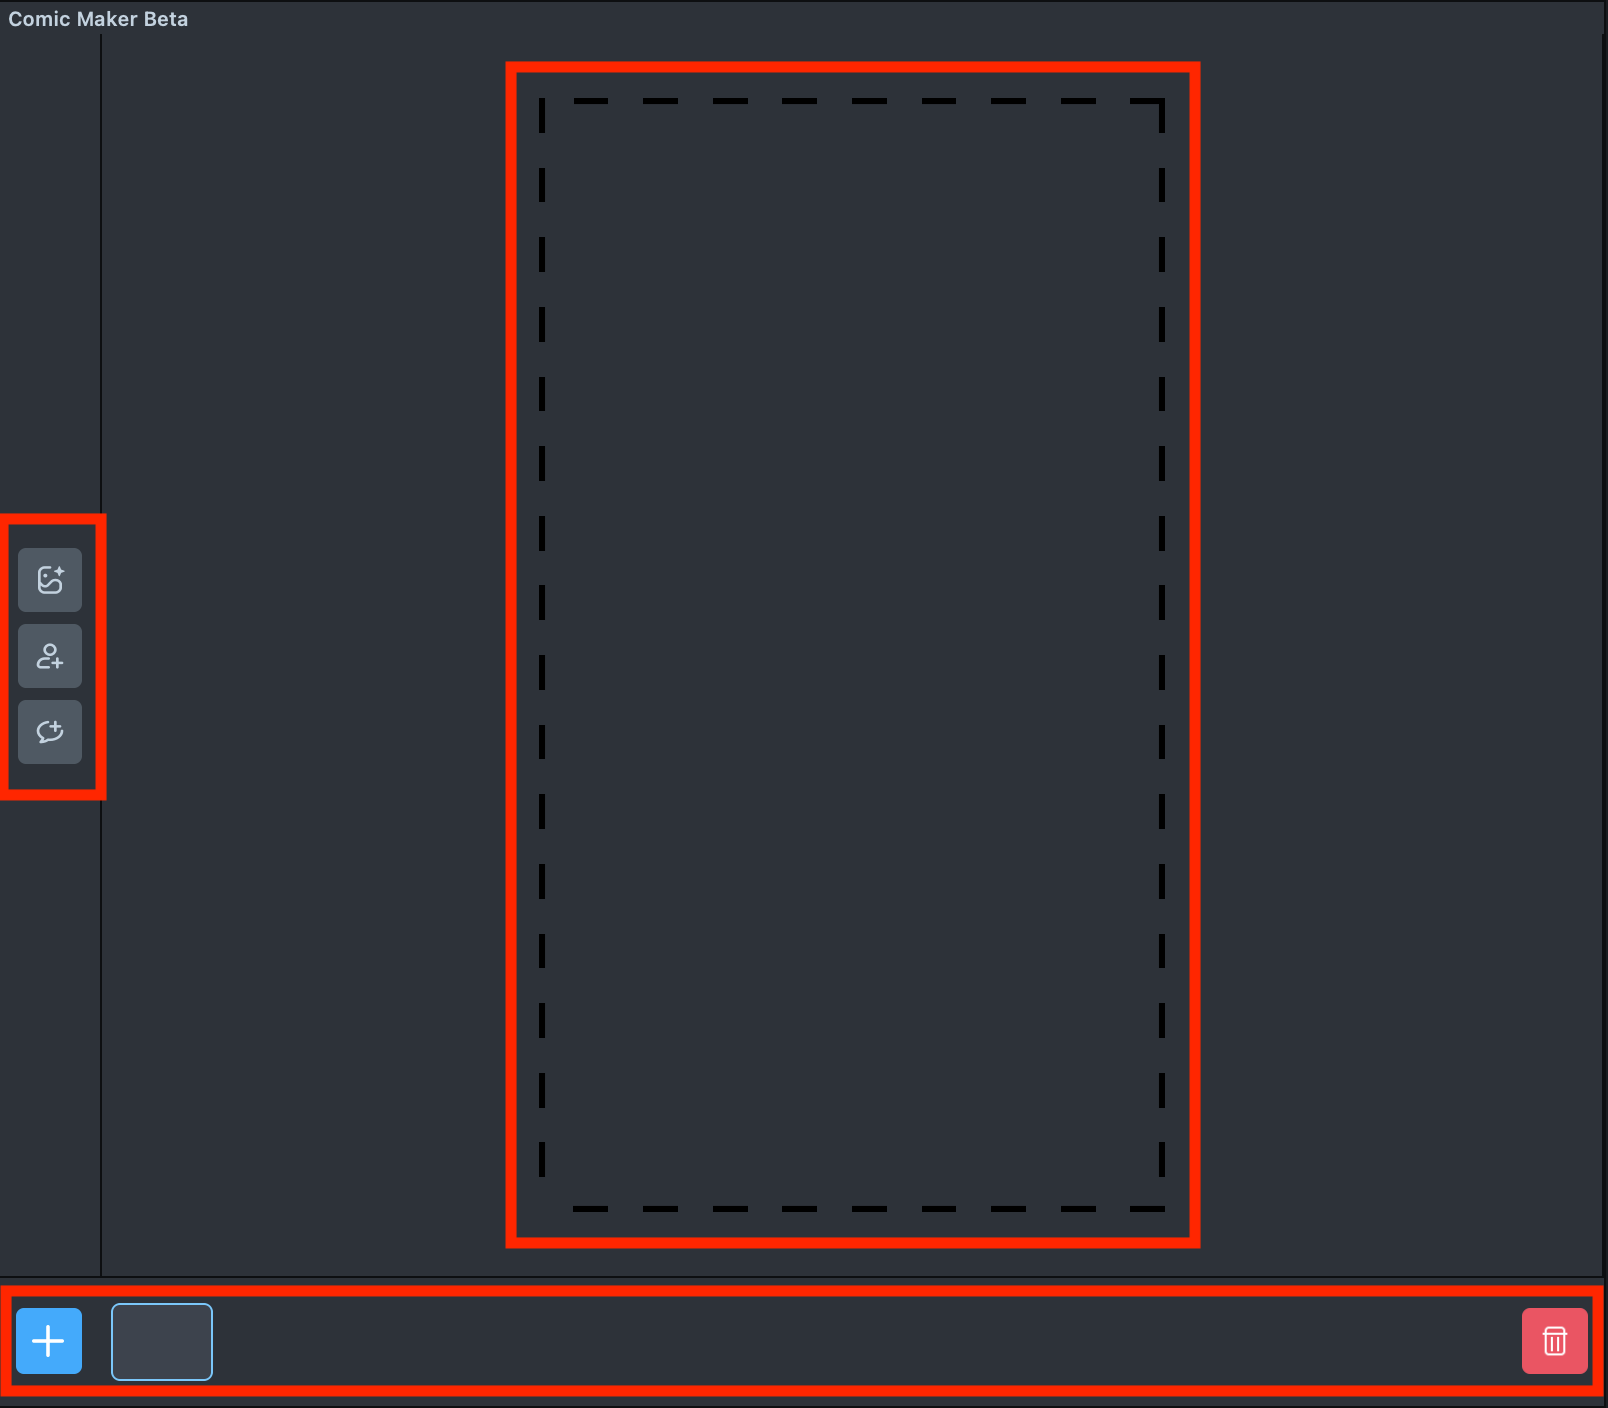
In the left toolbar, you’ll find buttons to add a background, Bitmoji characters, and speech bubbles. The bottom toolbar displays all the comic pages you’ve created, allowing you to switch between them or delete pages. The black dashed line in the center marks the visible area of a mobile device screen — this is how your comic will appear to Lens users.
-
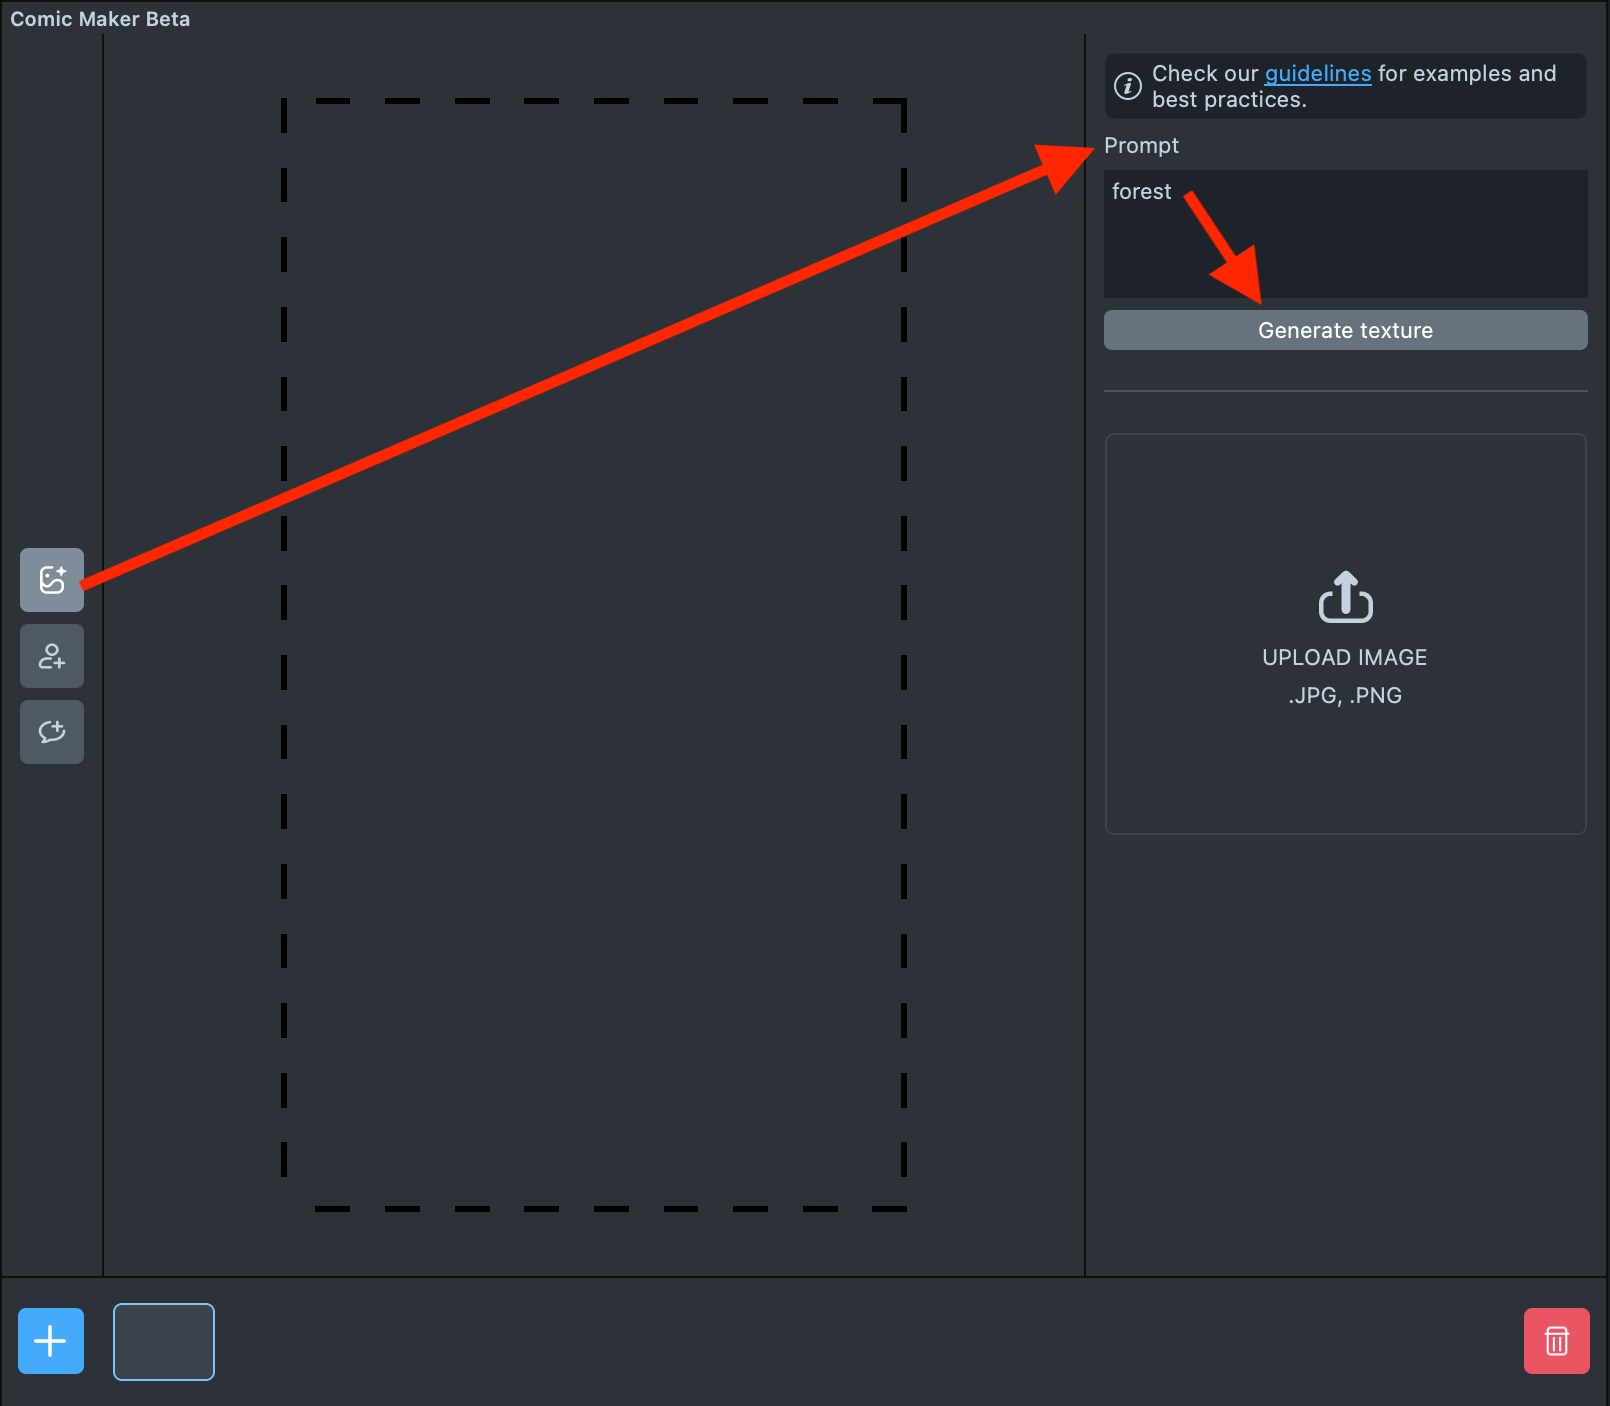
To add a background, click the background button in the left toolbar. In the right-side menu, you can either generate a new background texture or upload one from your file system.
-
Once the background is generated, click the сharacter button to place a Bitmoji in the scene.

-
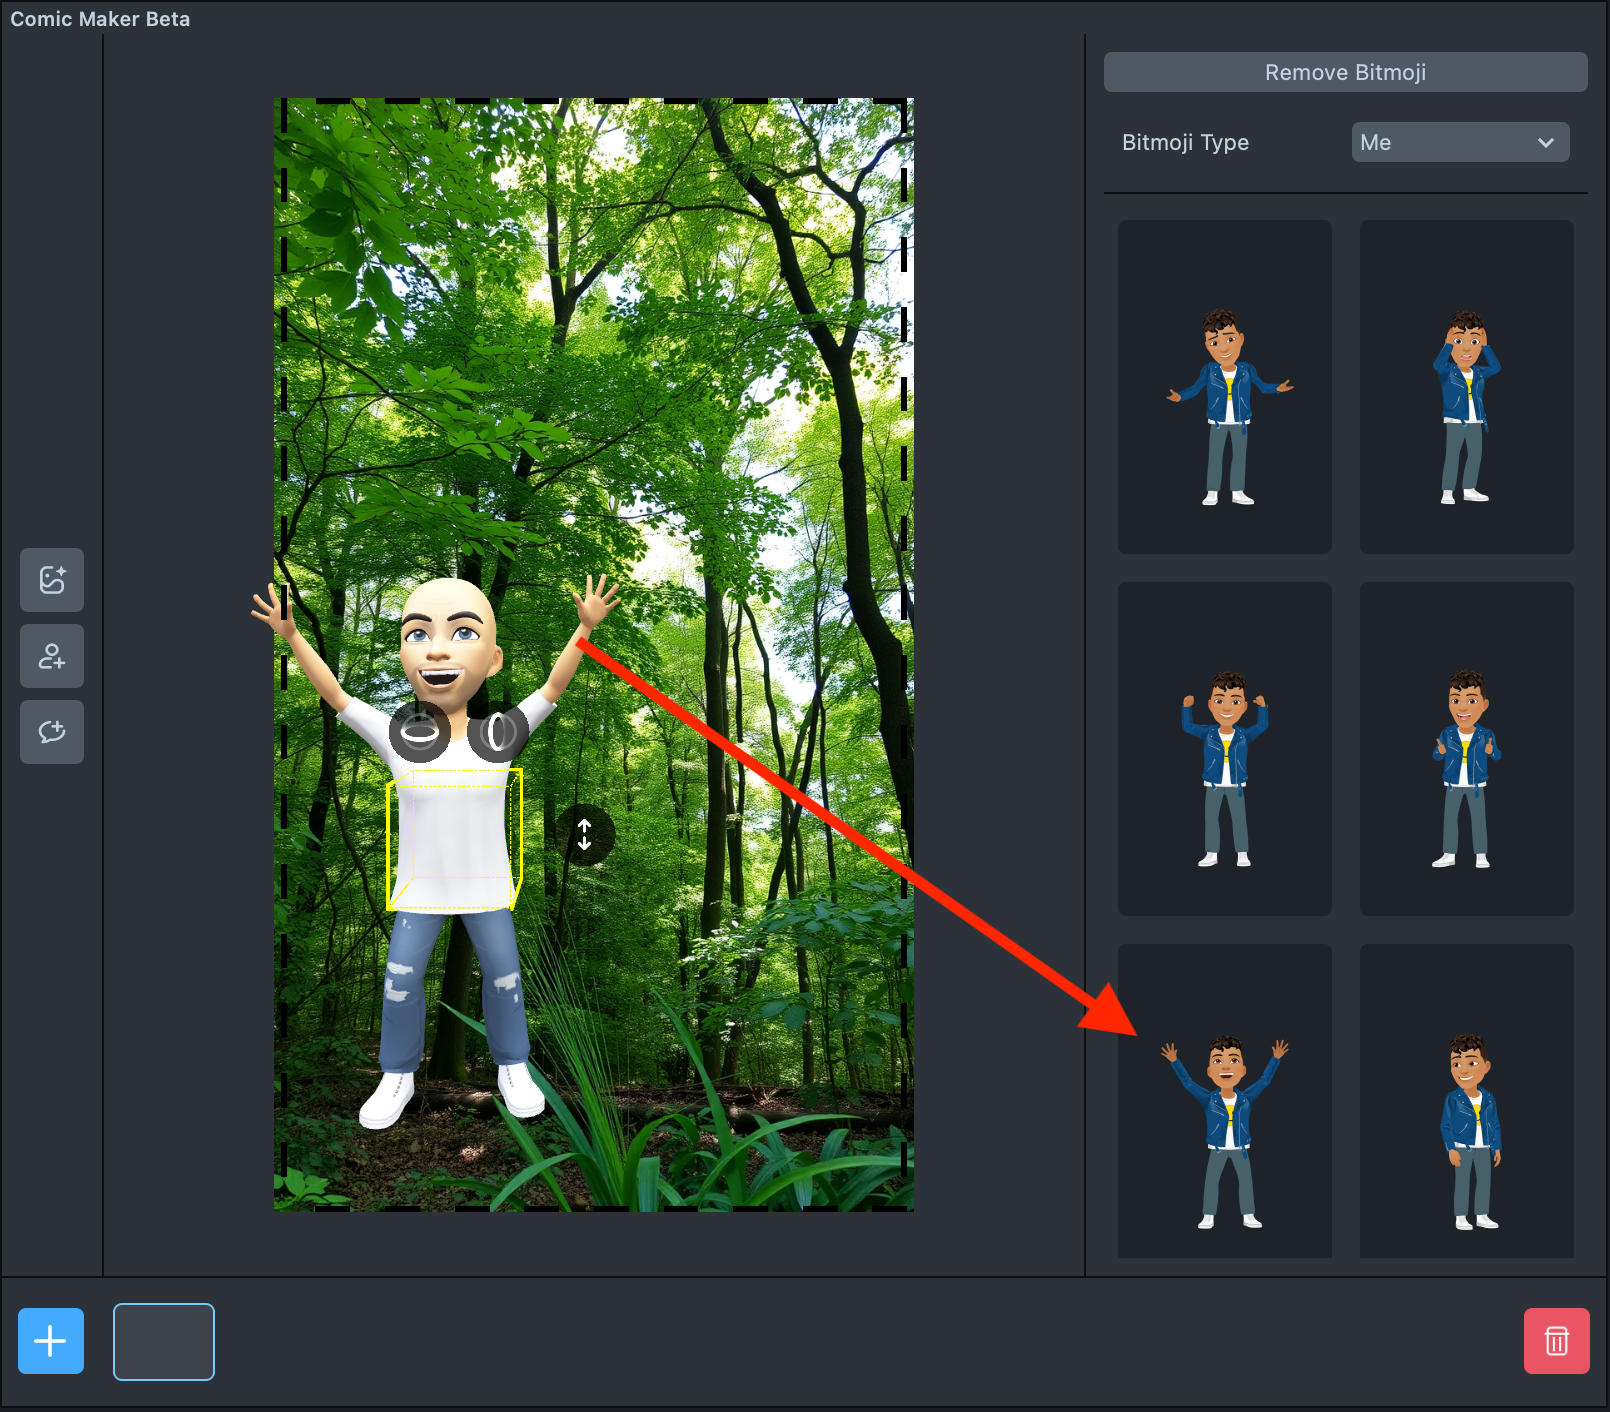
The Bitmoji will appear on the stage, and the Pose Gallery will be visible on the right. Select a pose that fits your scene to apply it to the Bitmoji.
-
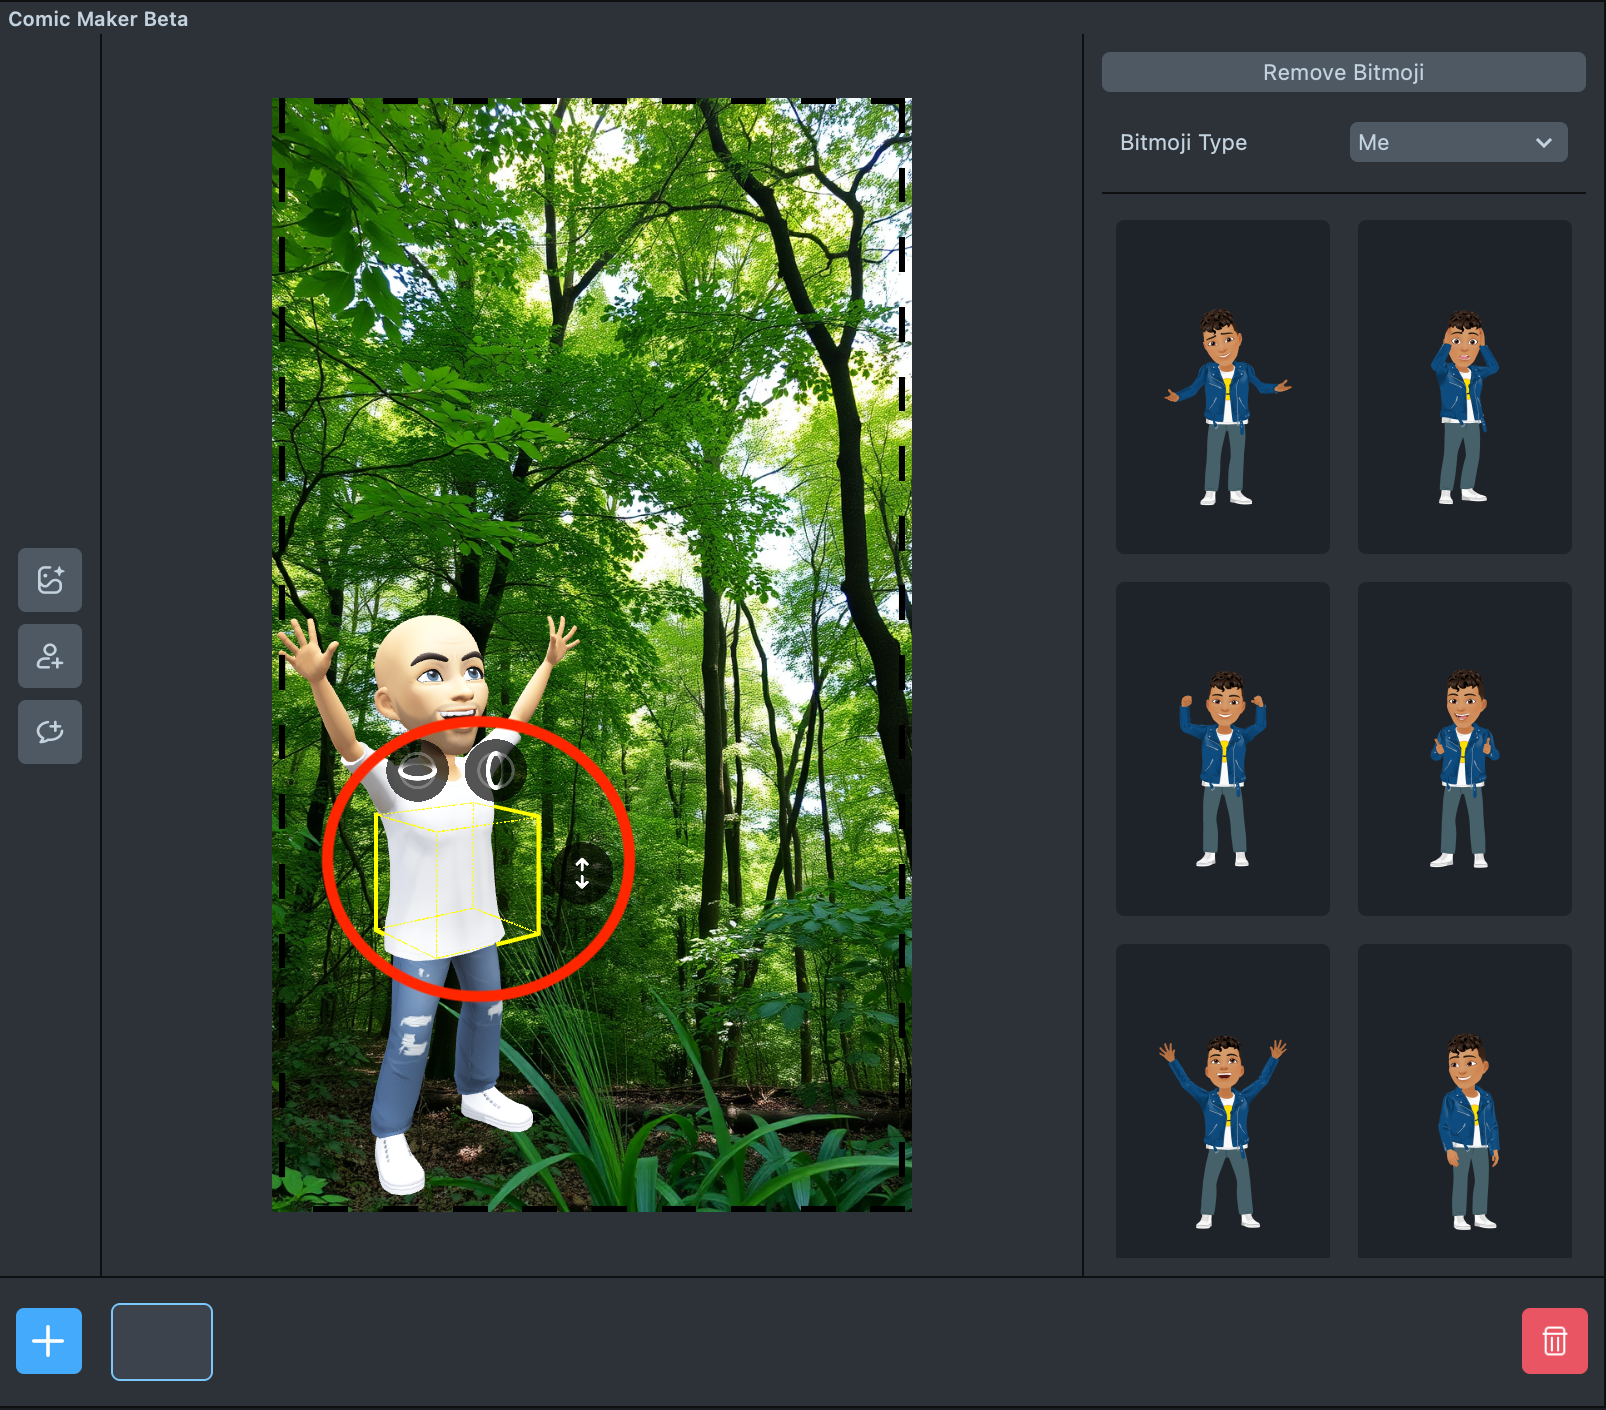
You can move and rotate Bitmoji characters in the scene using the on-screen controllers.
-
To add a speech bubble, click the corresponding button in the left toolbar.

-
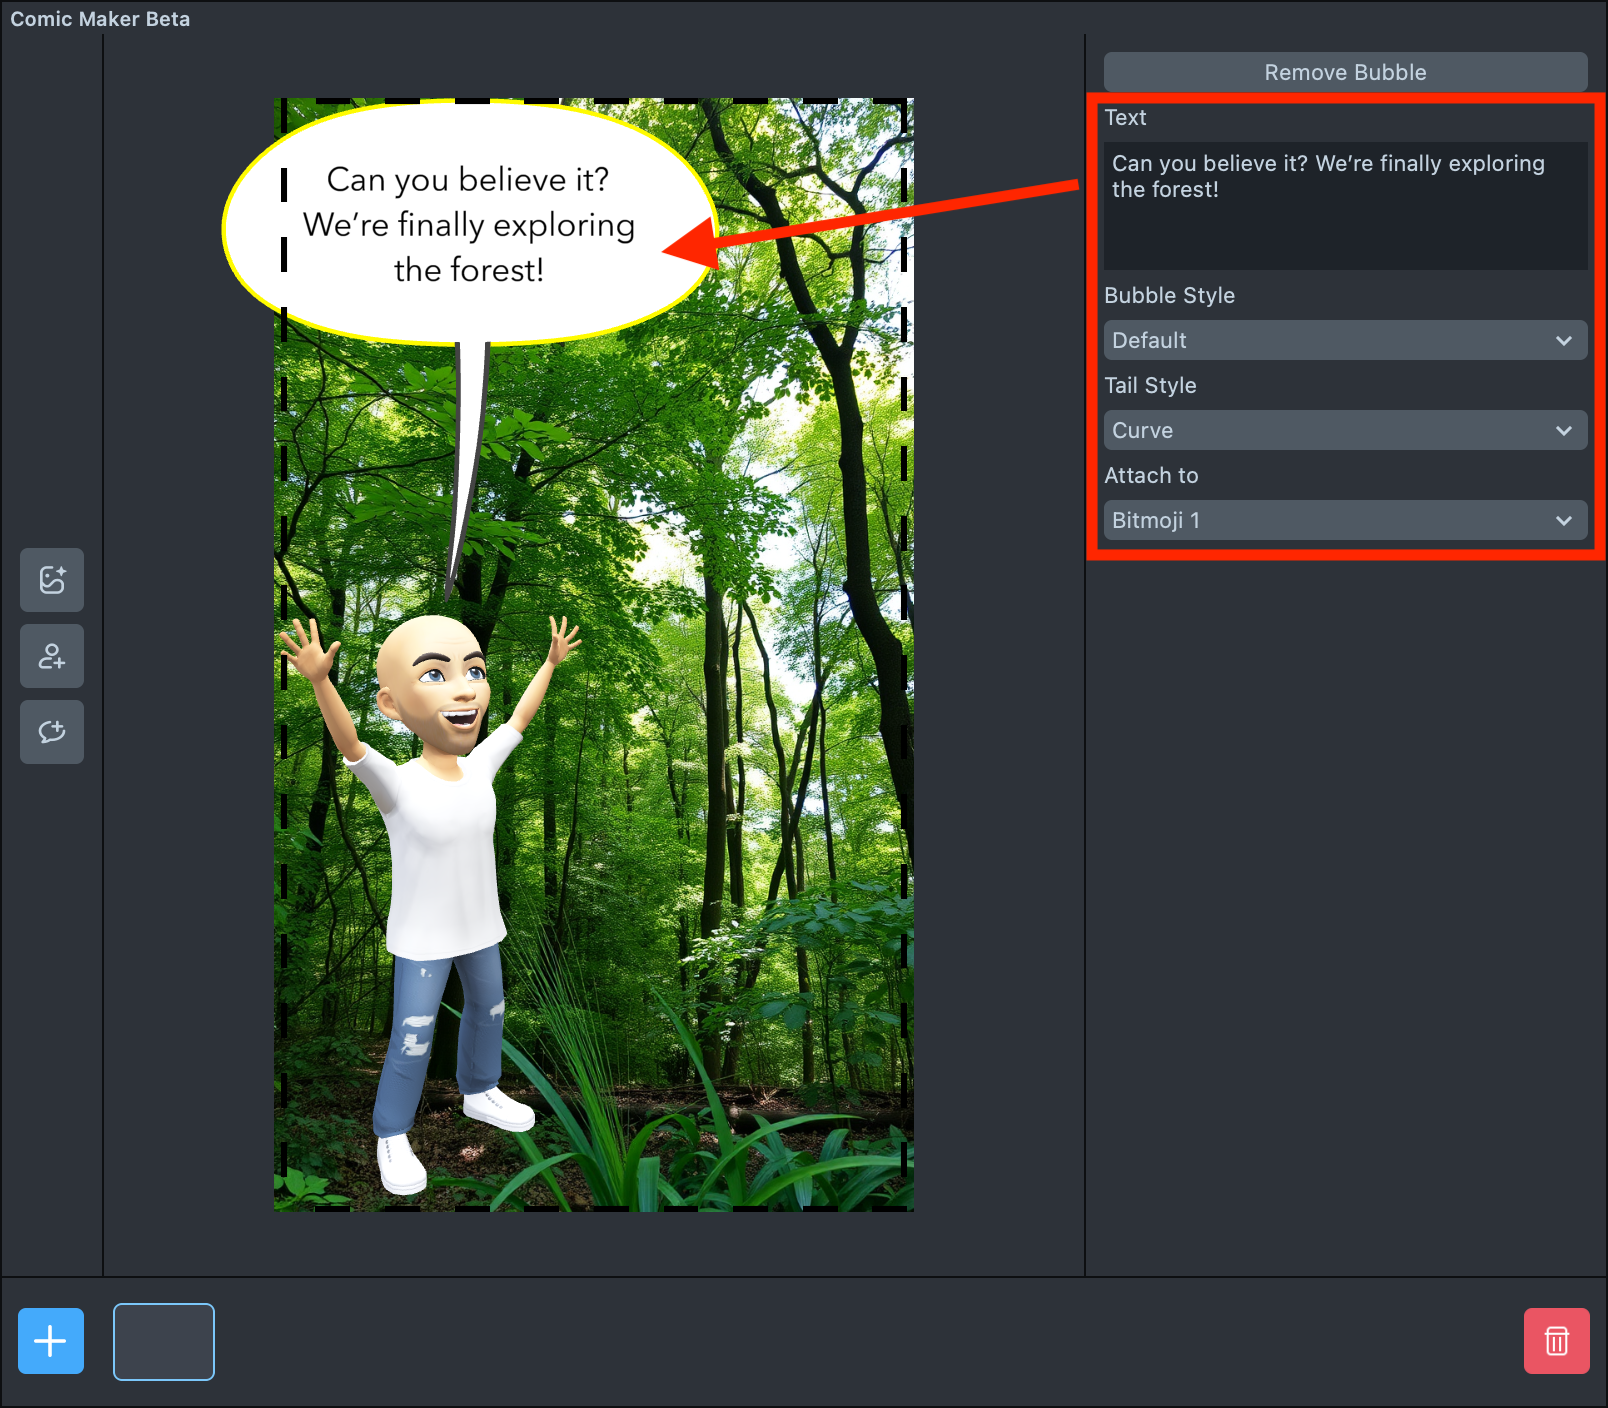
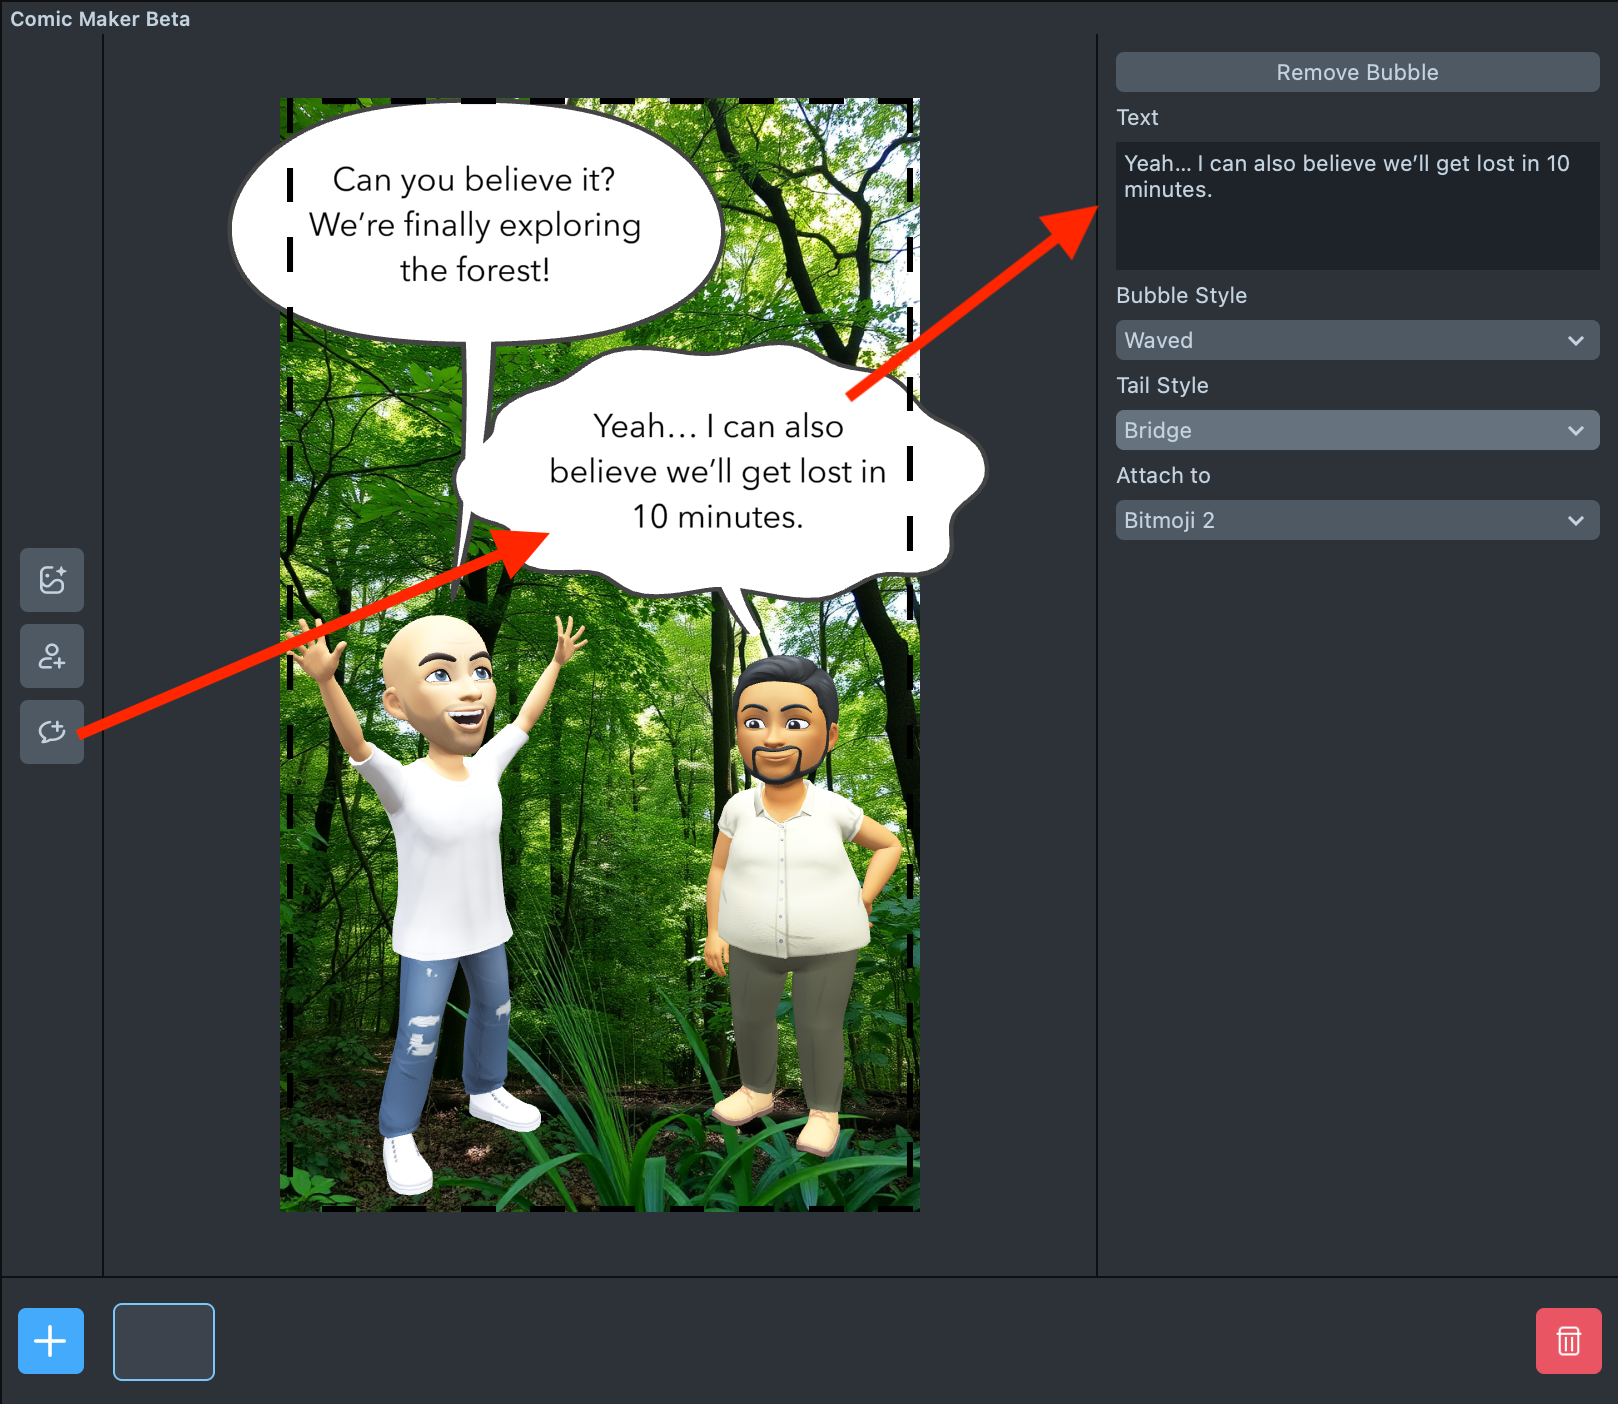
The speech bubble can be dragged anywhere on the screen. On the right panel, you can edit the text inside the bubble, choose a bubble style and tail style, and assign the bubble to a specific character.
-
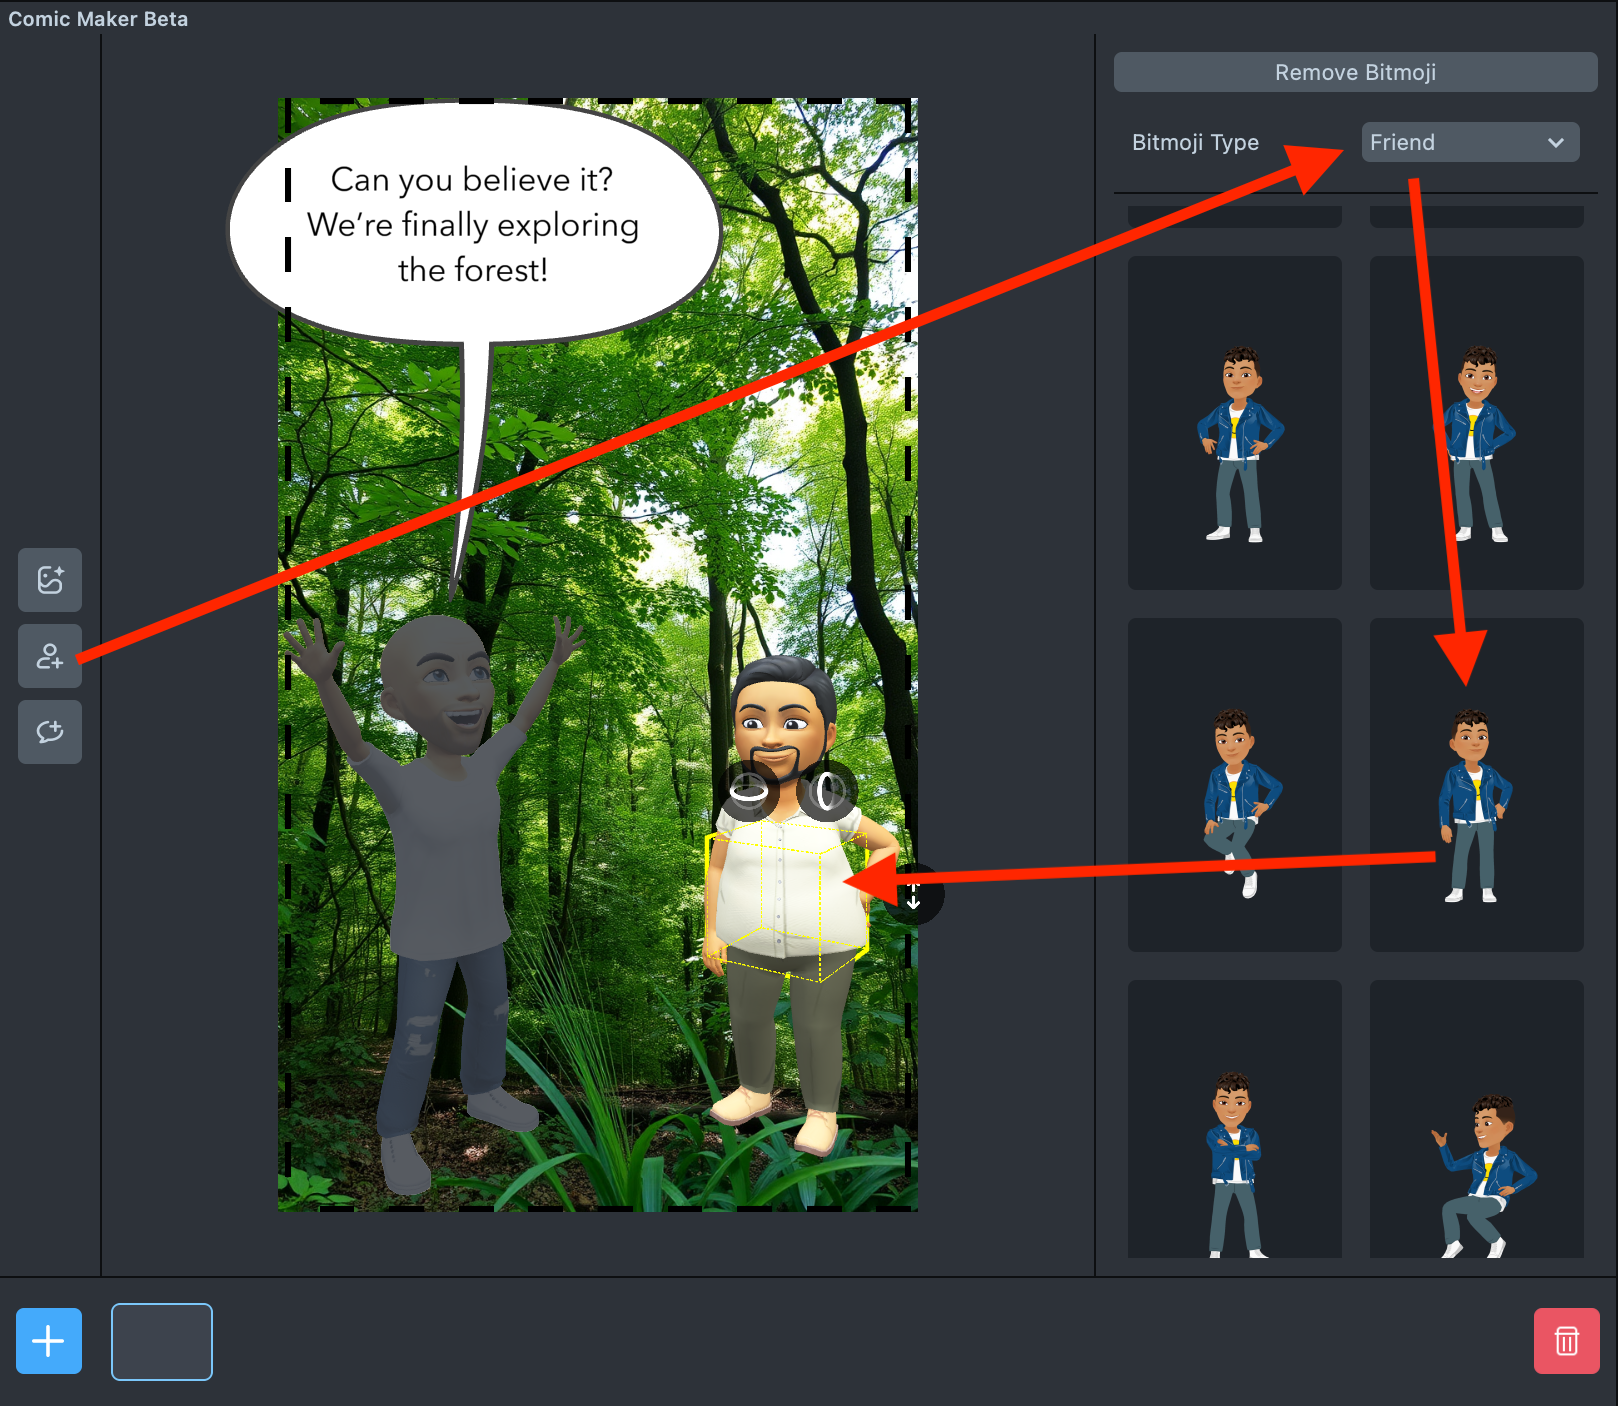
To add a friend to your comic, click the character button again and set the Bitmoji Type to Friend. Choose an appropriate pose for your friend.
In the Lens, your friend’s Bitmoji will automatically display as the most recent friend you’ve chatted with on Snapchat.
Currently, each page can include a maximum of two Bitmoji characters.
-
Add a speech bubble for your friend as well.
-
To add another page, click the plus
+icon in the lower-left corner, then click on the new page tile that appears. The background from the previous page will be copied automatically.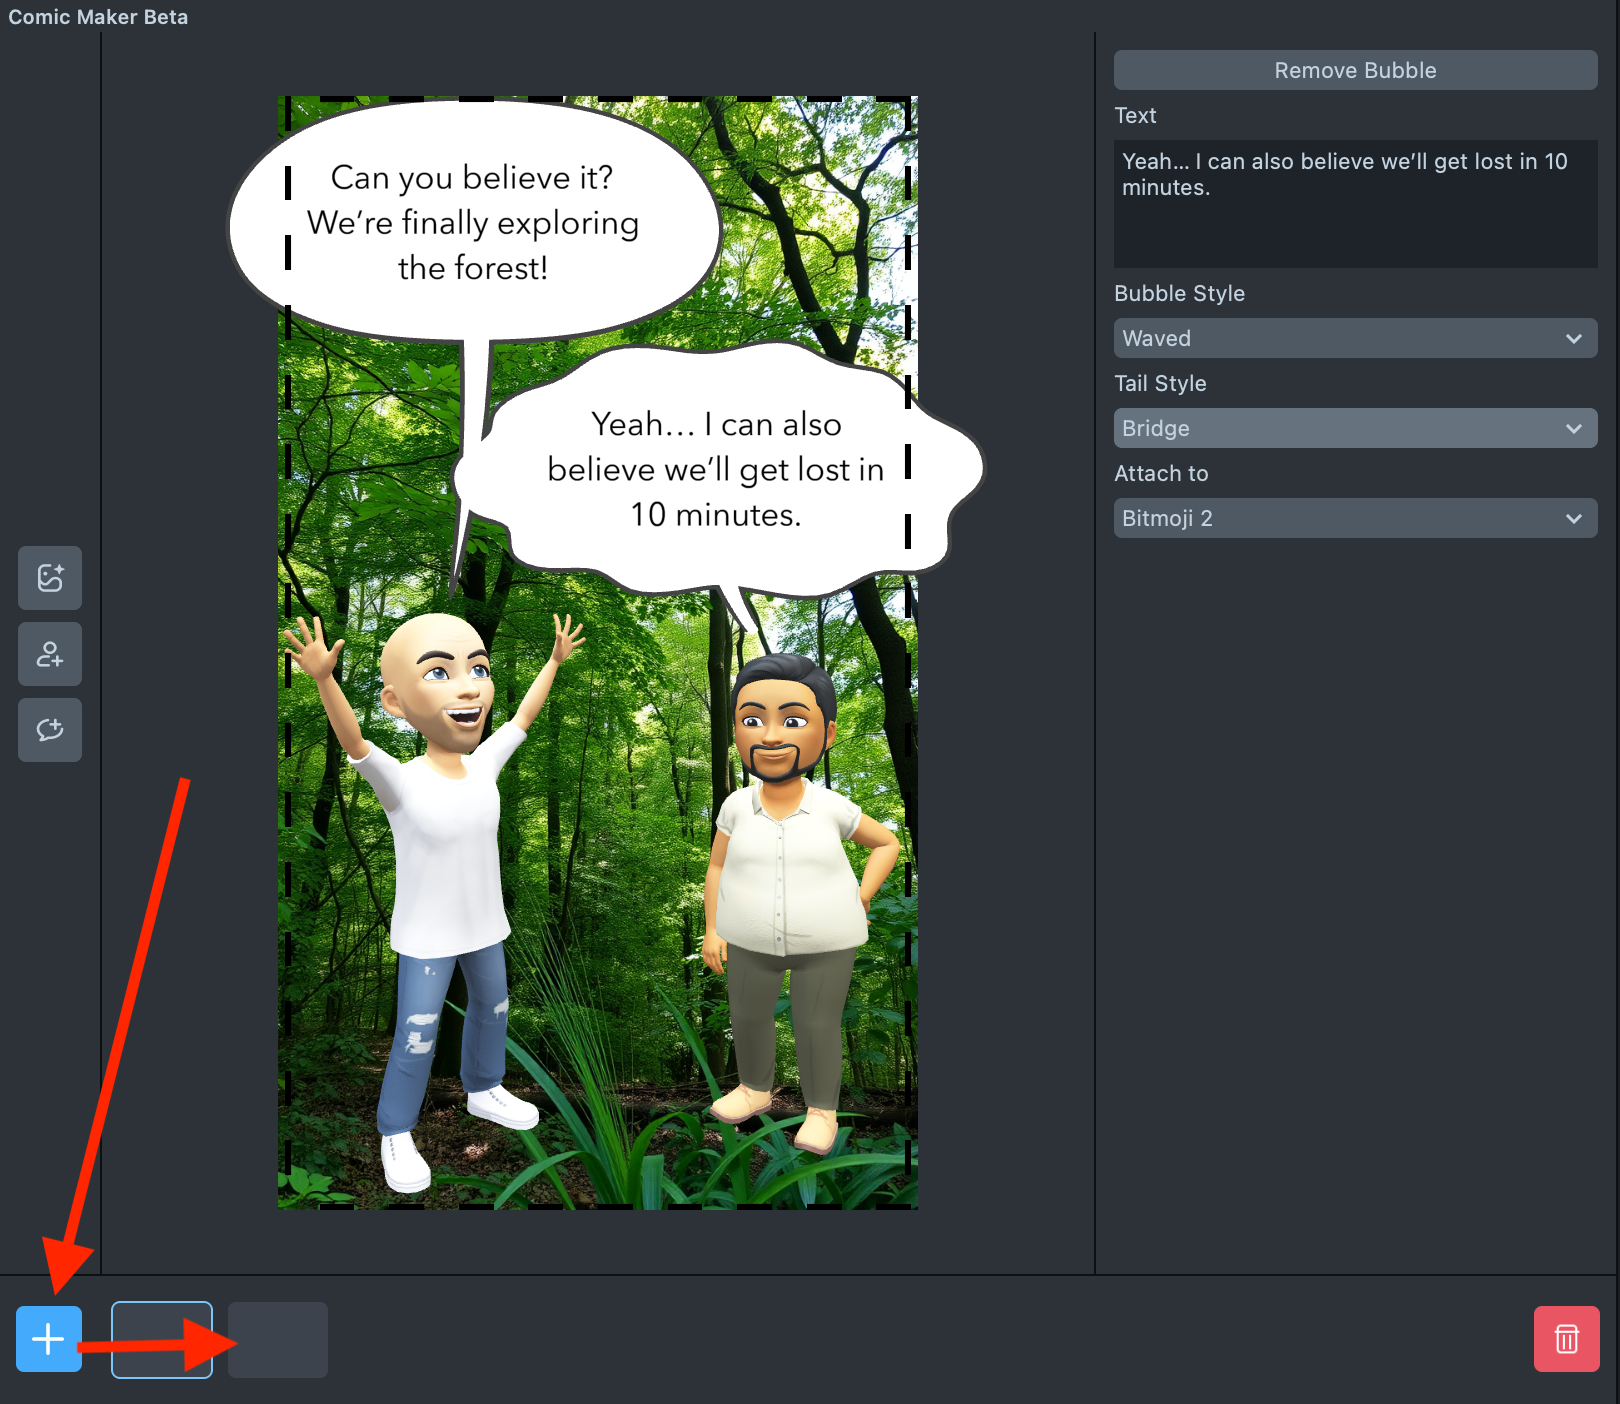
-
Repeat this process to build as many pages as you need for your story. When your comic is ready, click
Preview LensorPublish. On a device, Lens users can tap the screen to flip through the pages. -
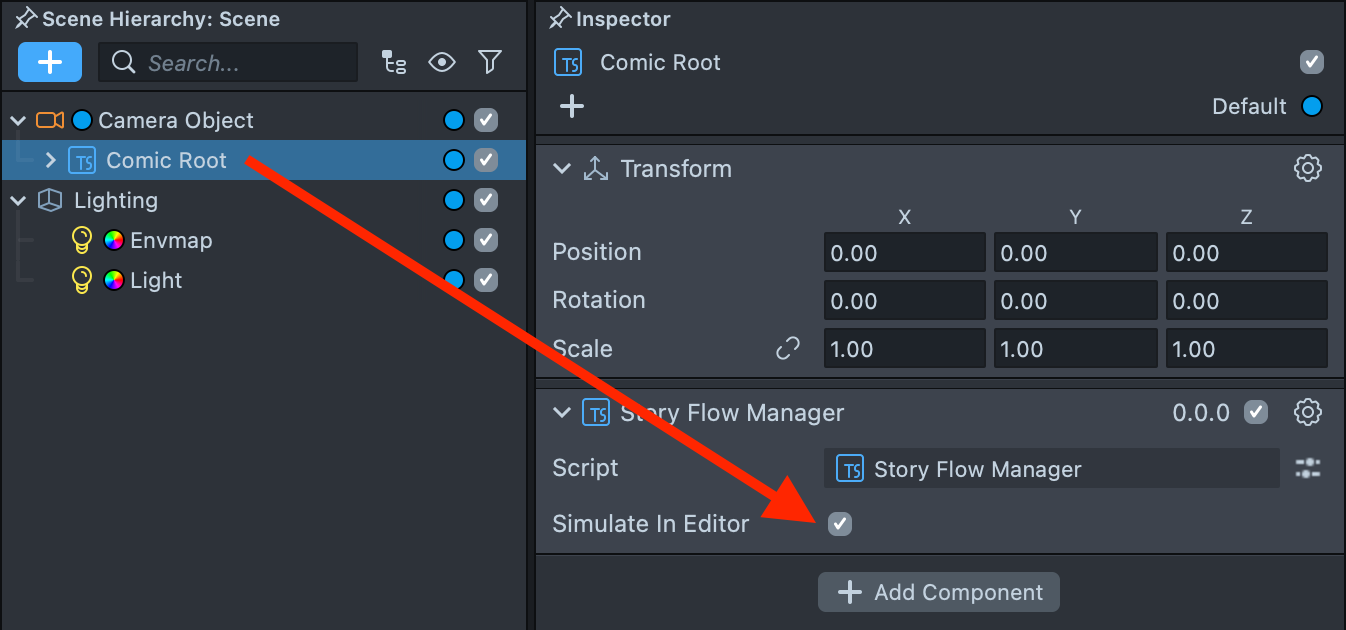
By default, page flipping by tapping isn’t available in the Lens Studio Preview. If you’d like to enable this option, select Comic Root in the Scene Hierarchy and check the
Simulate in Editorbox.