City-Scale AR Template
The City-Scale AR Template allows you to create unique Lens experience specific to select regions of certain cities around the world. The template provides a starter setup for City-Scale AR in addition to three examples City Scale AR Lenses.
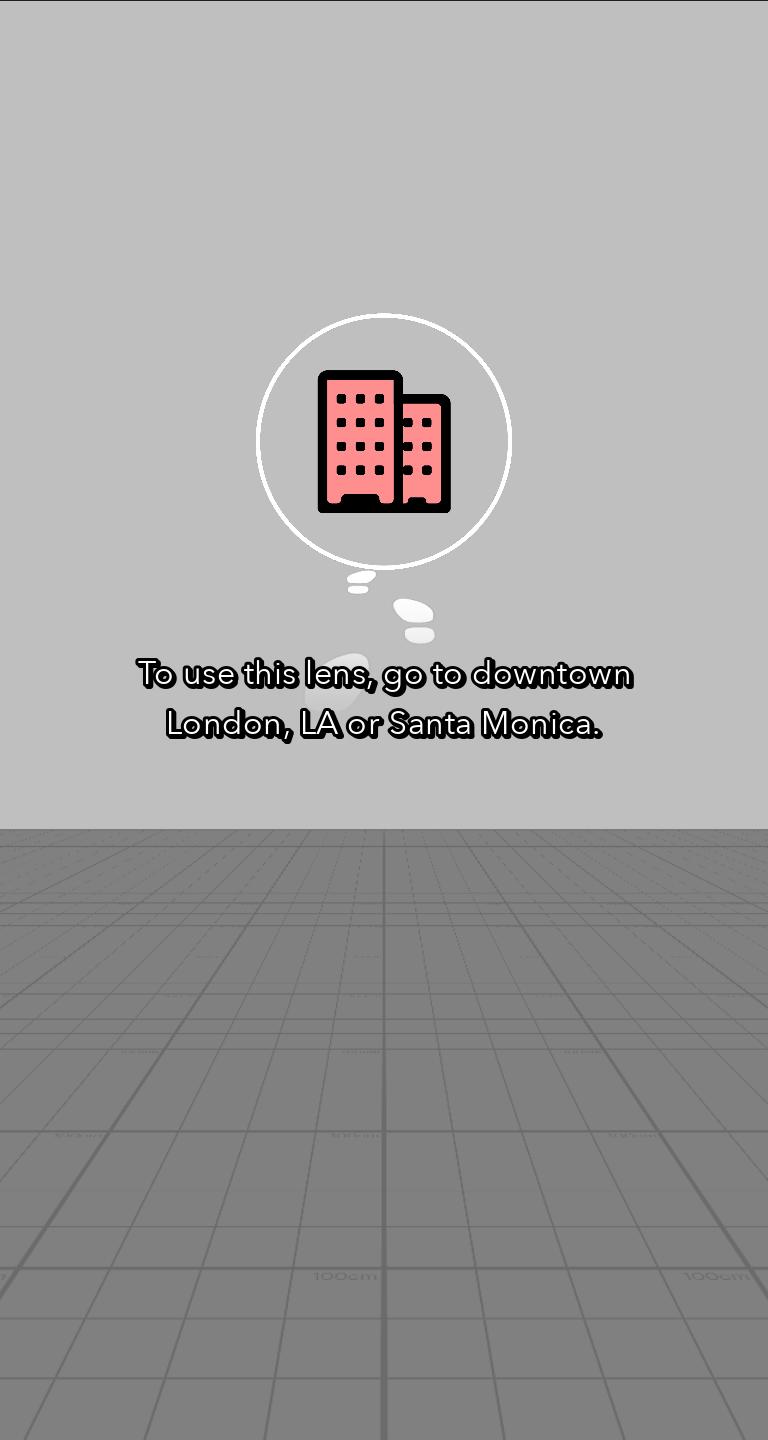
Currently, Snap supports London, Downtown Los Angeles and Santa Monica.
Setup
The City Scale AR workflow consists of choosing a part of the city and seeing that part of the city appear in the editor so you can create location based AR content.
Scene Hierarchy panel
The following portion of the Scene Hierarchy panel is responsible for City Scale AR tracking based on the user's location.
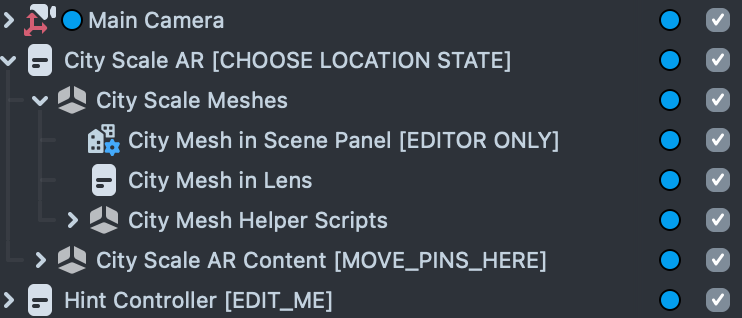
- Camera has
Device TrackingComponent set toWorldand aDevice Location TrackingComponent with theLocation Assetinput set toWorld. - City Scale AR is a script that forwards Device Location Tracking events as Behavior triggers.
- City Mesh in Scene Panel.lsc is a Custom Component responsible for making the city mesh that appears in the Scene Panel.
- City Mesh in Lens is a script that makes the city mesh that appears in the Preview Panel and on device.
- City Scale AR Content is a parent object for your AR content. Anything placed here will be hidden until users localised. Objects placed here will also be mirrored when the user flips the camera so that they appear correctly on front and rear camera modes.
Map Panel
The Map Panel lets you tell Lens Studio what part of the City you want to work on.
To open the Map panel, navigate to Windows > Panels > Map, select a City from the dropdown menu, and click on the part of the city you want to see.
The blue icon represents your simulated location within the city. Click on the map to move to a different part of the city.
The red pins indicate Located At components which are used to anchor AR content to a specific city location. Double clicking the map creates a new pin.
Click and drag to pan around. Scroll to zoom in and out.
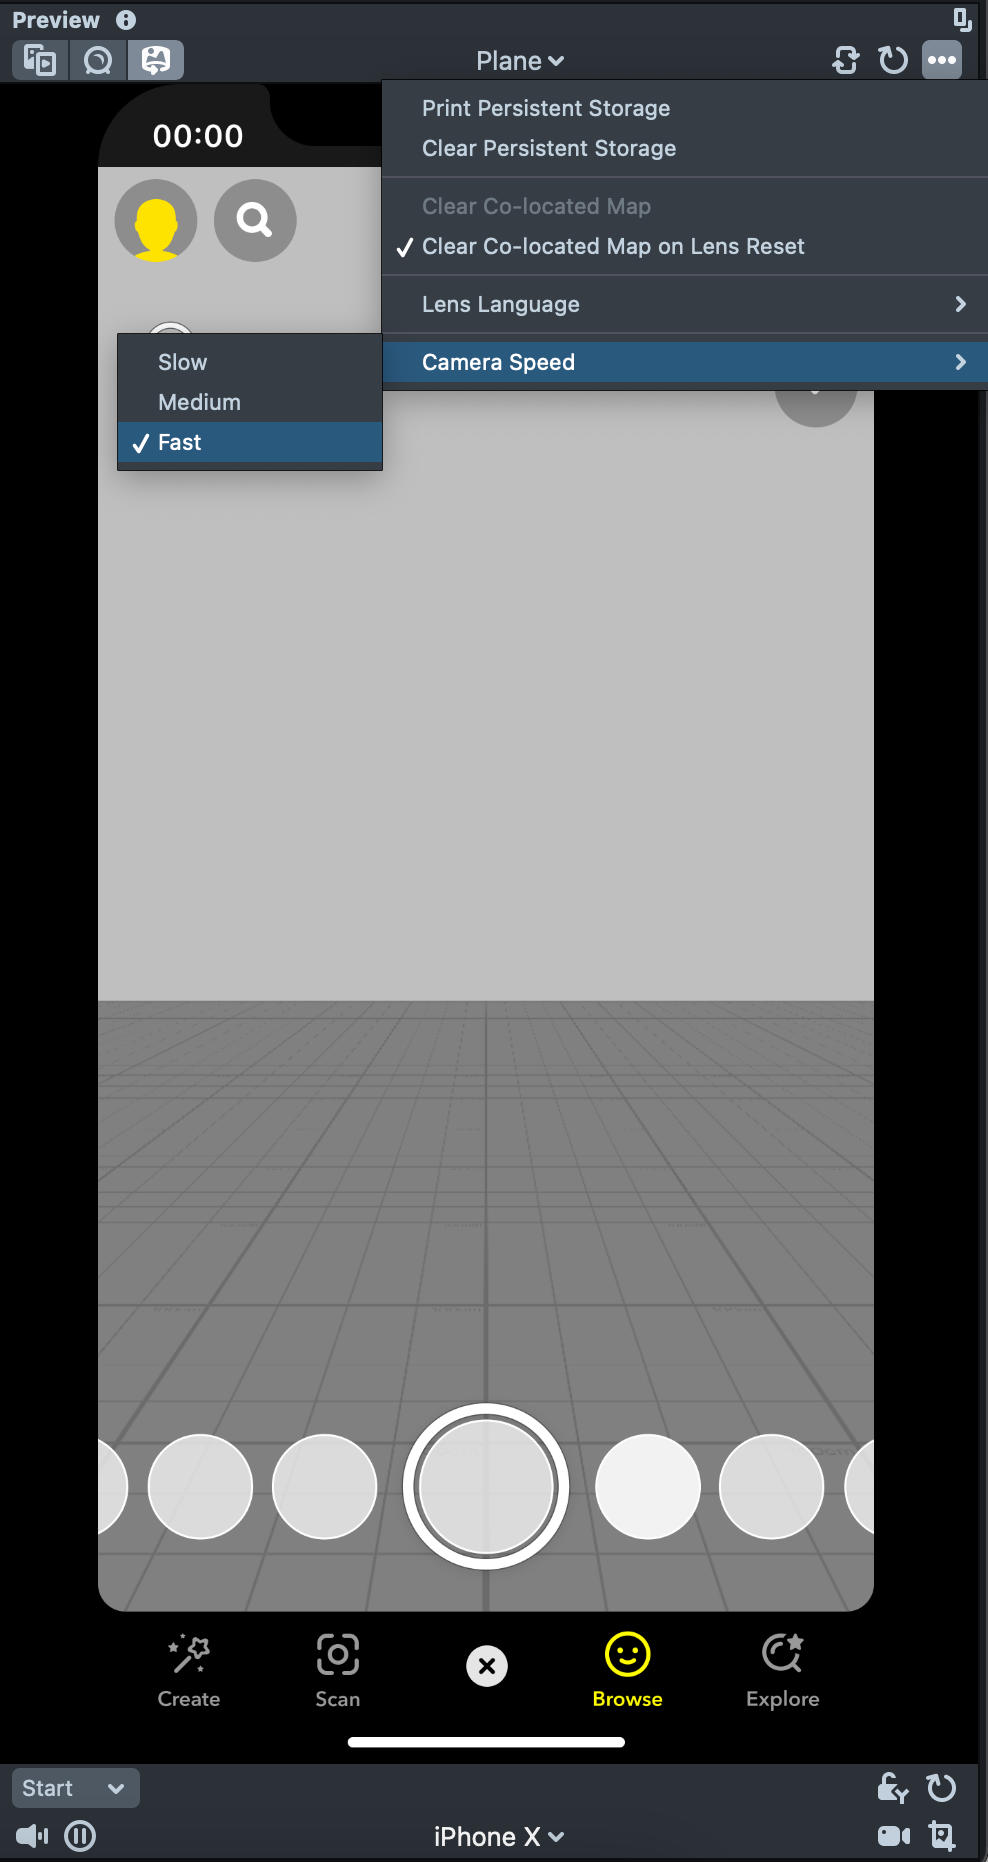
Preview Panel
It is recommended to set the Preview panel to Interactive preview
Can't see the City Meshes? The city mesh's origin is at sea level, so you will need to move the Interactive Preview Camera. (Right-click and drag to look up and you will see the city meshes.)
- Unlock Y on the bottom right of the preview.
- Increase Camera Speed under the menu in the top right.
- Adjust Camera Position until you are at desired street level.
Right Click & Dragto aimArrow Keysmove the Preview camera relative to your aimShiftraises the Preview camera
Ex 1 - Placing Anchored Content
This example shows AR content placed at specific intersections in London, LA, and Santa Monica. Each group of content lives inside of a LocatedAt Component. Each LocatedAt Component is represented as a Pin in the Map Panel.
Replace Content

In order to replace the content that is already anchored in the world, you can replace any of the objects that are underneath the Pin Objects. On a device, pins automatically move to their real world position after device tracking is found.
Add New Pins
To add content to a different location, double click on the map. This will create a new pin that you can drag to become a child of City Scale AR Content.
Ex 2 - Tapping the City Mesh
In this example, Snapchatters can spawn AR content by tapping on a building.
It's recommended to place AR content above a certain height to avoid rendering on top of people or cars at incorrect depths. To encourage this, the City Mesh material draws a boundary and the spawn script will only spawn assets when the user taps in the valid area.
This material option is set by the Material Params Override child object's useInteractionHeight input (Read the Default Material section for details).
Replace Content
To spawn your own content, replace the Spawnable Prefab input on the SpawnOnCityMesh.js script on the "Ex 2 - Tap to Spawn" Object.
Tap Event API
Whenever the user taps the City Mesh, an event will be fired that passes along the raycast hit result.
global.cityMesh.tap.addCallback(myFunction);

function myFunction(rayCastHit) {
  // the city mesh was tapped at rayCastHit.position;
}
Ex 3 - Colliding with the City Mesh
This example spits out objects that collide with the City Mesh. The objects have Physics Body Components on them so that they bounce off of buildings.
Replace Content
You can swap the asset the hose spit out with your own Prefab. Replace the "Dispense Prefab" Input in the "Dispenser" script.
Make sure that your object prefab has a Physics Body Component on it. Otherwise it will not collide with the City Mesh.
Collision Check API
If you want to run custom script when your object collides with the City Mesh, you can check the result of the collision with this function:
var body = script.getSceneObject().getComponent('Physics.BodyComponent');
body.onCollisionEnter(function (eventData) {
  if (global.cityMesh.getColliderMatch(eventData.collision.collider)) {
    // object collided with the city mesh.
  } else {
    // object collided with something else.
  }
});
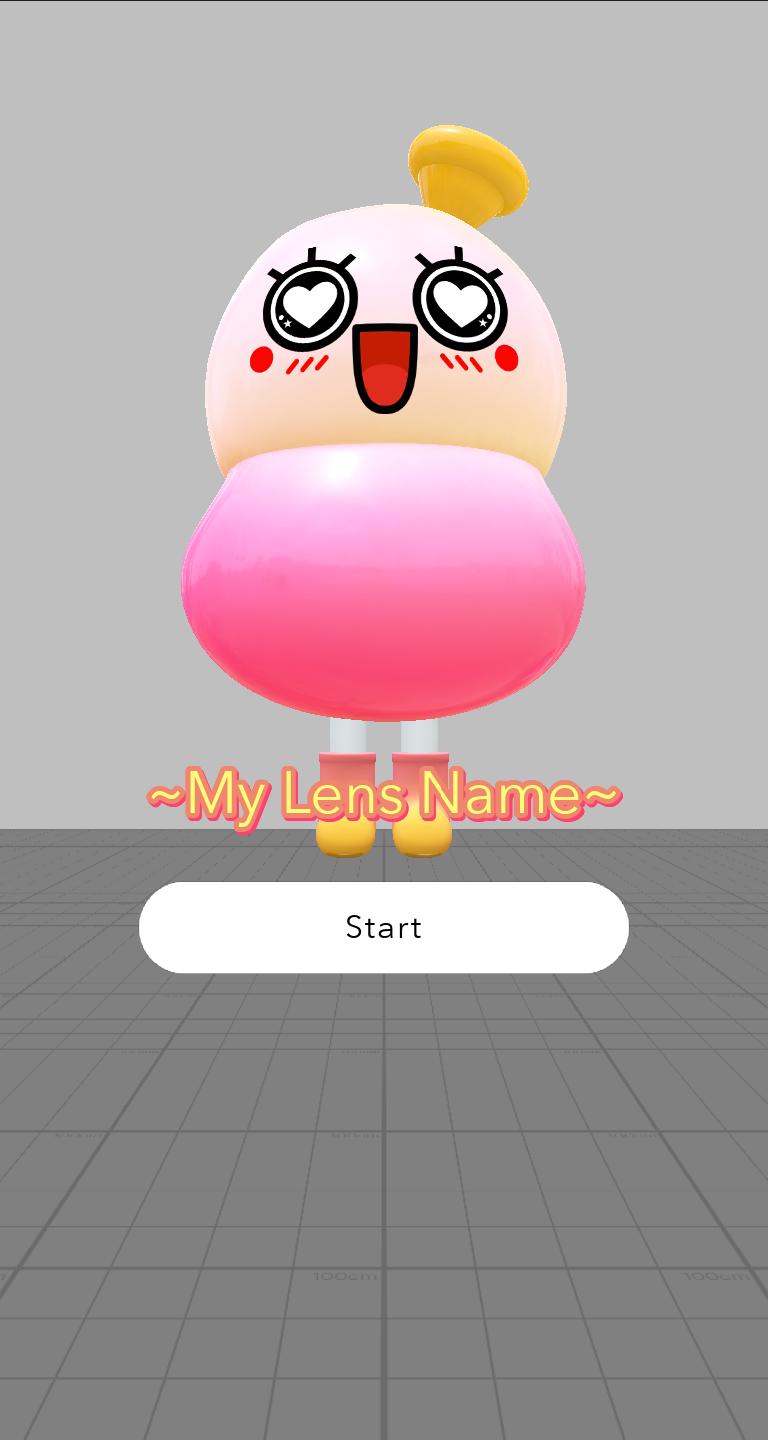
Title Screen
City Scale AR requires a Snapchatter to set up location tracking in order for location based AR content to appear. Starting your lens with a good title screen before showing any tracking setup can help spike Snapchatter engagement and prevent dropoff during the tracking setup. A good title screen includes AR content and sets the tone of your lens!
- Intro AR Content: Place your own non-location based AR here to grab Snapchatter's attention.
- Intro UI > Title Screen UI: Place your own UI lens title, logo, or description here.
- Start Button: If you replace the default start button with your own, remember to trigger TitleScreen.js script.tappedStartButton() when the button is tapped!
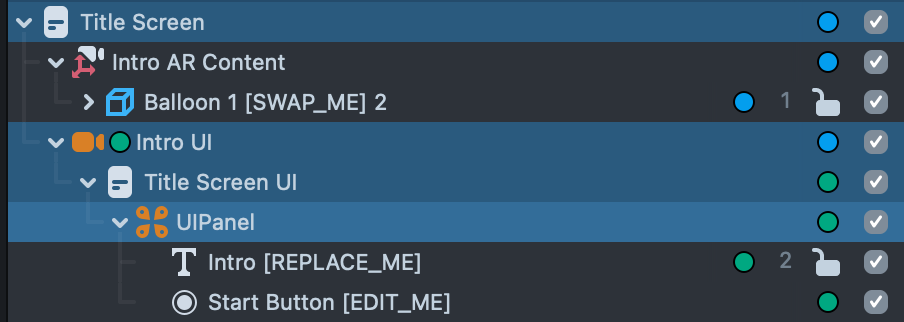
TitleScreen.js automatically disables the Hints and Location Content from triggering until the start button is pressed.
At that point, it hides any SceneObjects listed in the Title Screen's HideAfterTitleScreen input.
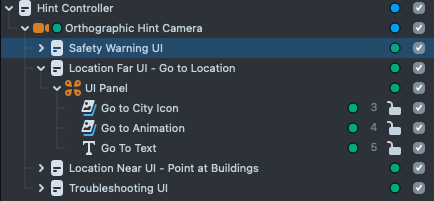
Hint UI
The Hint Controller automatically guides users through setting up City Scale AR tracking.
To preview individual hints in the Preview Panel, use the dropdown on City Scale AR SceneObject.
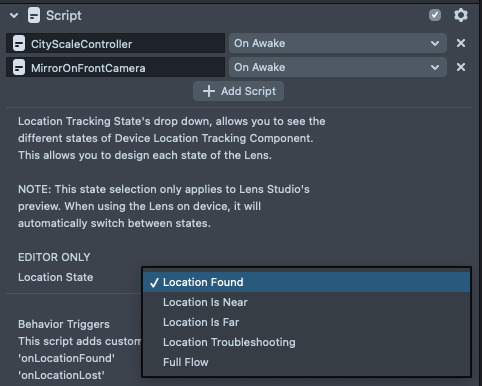
- Location Found: Hints are hidden and AR content is shown.
(When the Snapchatter's location is successfully tracked by City Scale AR.) - Location is Far: Specifies the supported City Scale areas where the lens can be experienced.
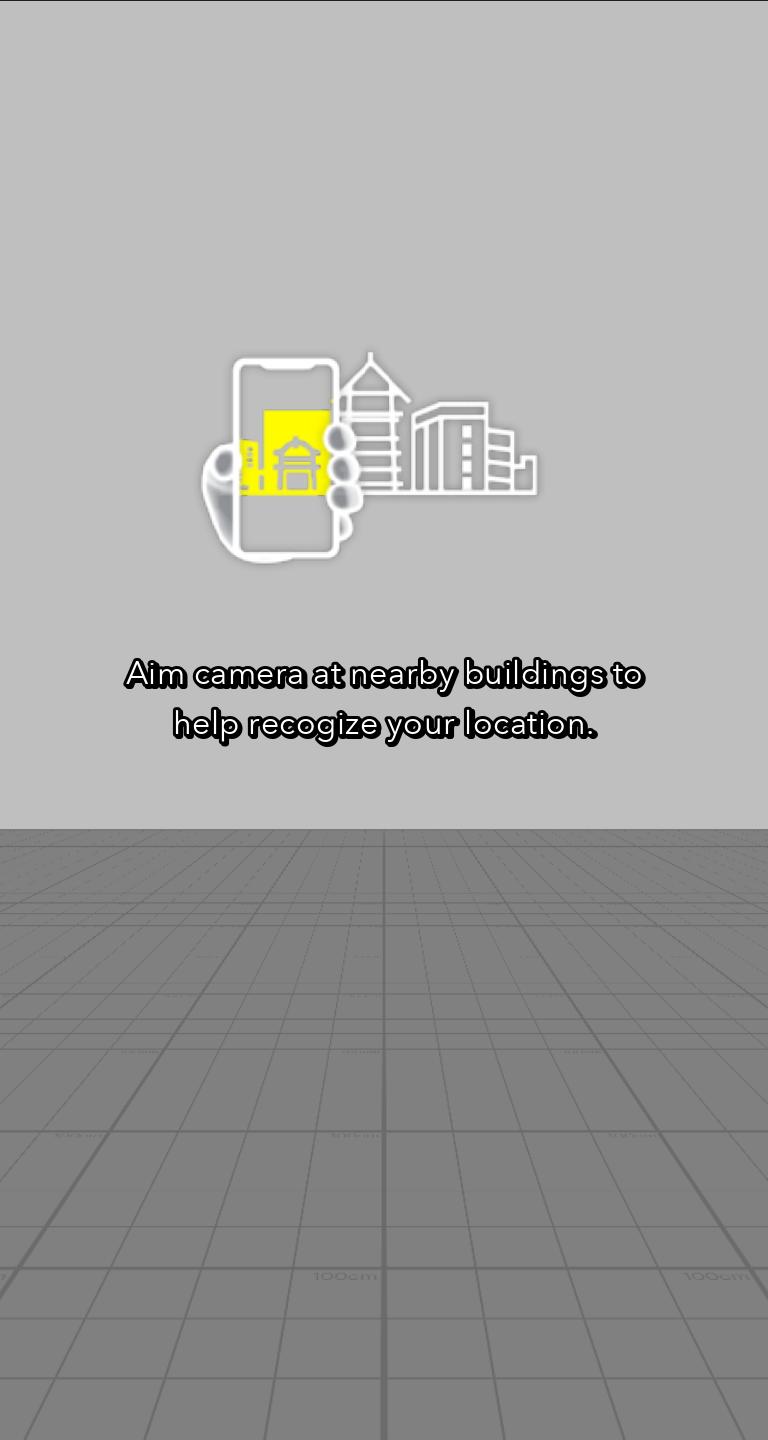
(When a Snapchatter is outside of the supported City Scale area.) - Location is Near: Instructs Snapchatters to look around buildings until their location is recognized.
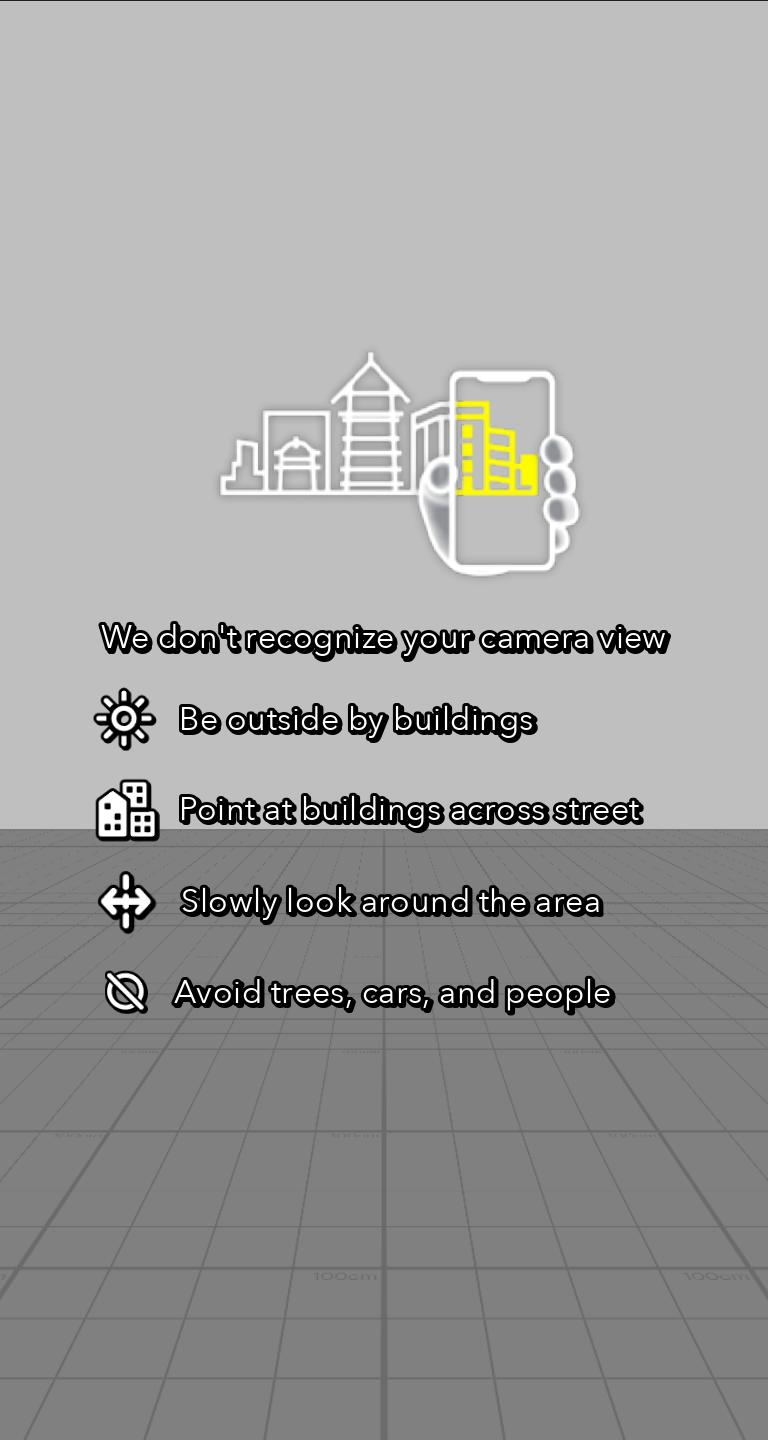
(When Snapchatter is within the supported City Scale area.) - Location Troubleshooting: Lists tips to help City Scale AR recognize and track location.
(When Snapchatter has been unsuccessful in theLocation is Nearstate for over 10 seconds.) - Full Flow: The Preview panel will not force a specific UI hint state.
(Similar to what will be shown on device.)
The UI for each state can be found in the UI Panel objects under in the Orthographic Camera.
Behind the Scenes
Creating the Location Mesh
CityMesh.js renders a 3x3 grid of location meshes relative to a "World" Location Asset. Relative tiles each have a coordinate:
- North: (0, -1)
- South: (0, 1)
- East: (1, 0)
- West: (-1, 0)
CityMesh script allows to select a material which you may use to control the visualization. At runtime script will initialize all 9 meshes and set their material to a clone of the input material.
The script will trigger an event each time a tile finishes loading or fails to load. You can add your own callbacks to these events by calling addCallback(myfunction) on locationMeshDownloaded(TileInfo) and locationMeshDownloadFailed(TileInfo).
//@input Component.ScriptComponent cityMeshScript
var cityMeshScript = script.cityMeshScript;

cityMeshScript.locationMeshDownloaded.addCallback(function (tileInfo) {
  // a location mesh has downloaded
});
cityMeshScript.locationMeshDownloadFailed.addCallback(function (tileInfo) {
  // a location mesh has failed to download
});
In Lens Studio location meshes are scaled down by factor of 10 to make it easier to navigate using the interactive preview. On device they will automatically be scaled up. All children of LocatedAt Pin components will automatically be scaled in order to preserve their size relative to the City-Scale AR Location Meshes.
Default Material
The template includes City Mesh Scan Material which gives options for animating a sweep up the city buildings. Options can be set in the CityMaterialParameters.js script found beneath of the City Mesh In Lens parent object.
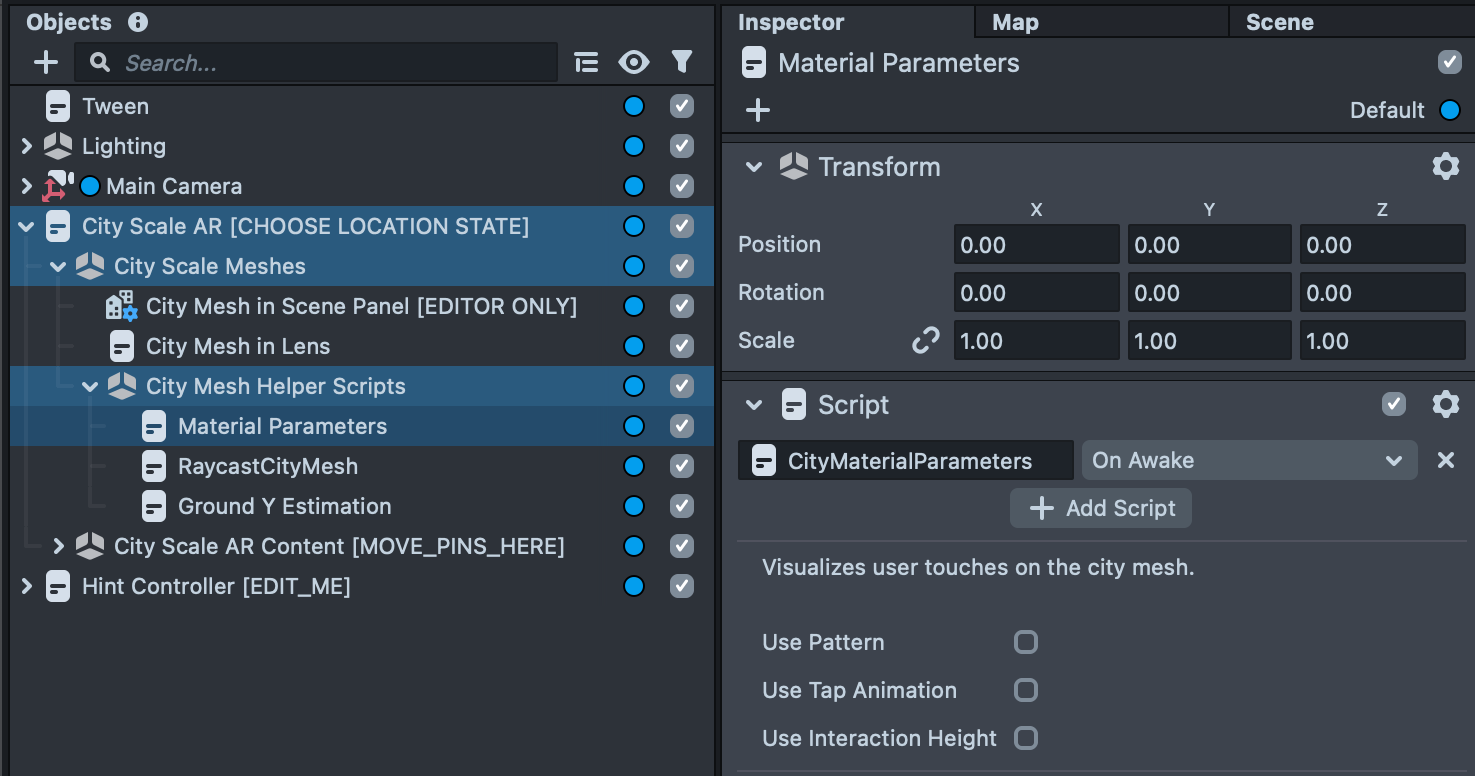
- Use Tap Animation: A ripple effect triggered when the user taps.
global.cityMesh.setUseTapAnimation(true) - Use Pattern: A grid texture wrapping around the buildings.
global.cityMesh.setUsePattern(true) - Use Interaction Height: A visual boundary below which Snapchatters are discouraged from placing objects in your Lens to avoid depth issues with crowds, cars, etc.
global.cityMesh.setUseInteractionHeight(true) - For advanced changes to colors and textures, select the material itself in the
Asset Browserpanel and make changes directly in the Inspector Panel.
Don't see your updates? Each of the City Scale AR Examples overrides the parameters with its own material configuration set by the MaterialParamForwarder.js script found inside of each example. You can edit or delete this object.
Custom Material
If you don't want to use the default material, swap the Material input in the CityMesh.js script on the "City Mesh in Lens" Object.
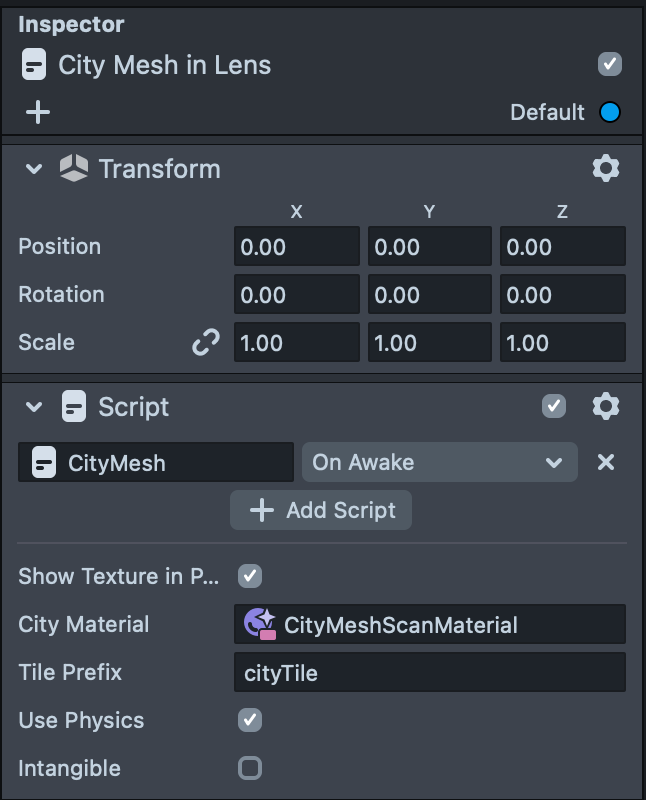
To change parameters on the material while the lens is running, add your key and value to the script.mainPass parameter of the CityMesh.js script and it will be applied to all 9 cloned materials. You can also directly access all 9 meshes by calling getRenderMeshVisuals() api of the CityMesh.js script.
//@input Component.ScriptComponent cityMeshScript
var cityMeshScript = script.cityMeshScript;

//@input Material newMaterial
var newMaterial = script.newMaterial;

//changes material on all 9 location mesh tiles
cityMeshScript.setMaterial(newMaterial);

//add key and value
cityMeshScript.mainPass['myKey'] = 0;
Behavior Triggers
The CityScaleController.js script on the City Scale AR object forwards custom behavior events to show/hide hints and AR content at the correct time.
- onLocationDataDownloaded
- onLocationDataDownloadFailed
- onLocationFound
- onLocationLost
- onCanShowLocationAR
- Triggers when location is found AND they are past the Title Screen and Hints.
- To add/trigger your own conditions use cityScaleController.addConditionToShowContent(function) and cityScaleController.checkToShowContent().
Directly setting DeviceLocationTrackingComponent properties overwrites important template code. Use the above custom behavior triggers instead.
Avoid playing Location AR content while the Title Screen or Hints are showing by referencing onCanShowLocationAR instead of onLocationFound.
Learn more about using Behavior Triggers at the Behavior Guide.
Previewing Your Lens
You’re now ready to preview your Lens experience. To preview your Lens in Snapchat, follow the Paring to Snapchat guide.
Publishing Your Lens
When publishing a City-Scale AR Lens make sure to include a preview video that shows your lens being used in the preview video of Lens Studio or on device with the real world. For more information you can read the preview video guide