Portrait Skin Segmentation
The Face Skin Segmentation and Body Skin Segmentation assets lets you easily segment skin in the camera view and replace it with an image, text, 3D models, post effects and more.
Since Skin Segmentation texture is a portrait effect, the effect works best when the user is close to the camera.
Guide
Find the Face Skin Segmentation or the Body Skin Segmentation asset in the Asset Library and import it into your project. Click here to learn more about how to use assets in the Asset Library.
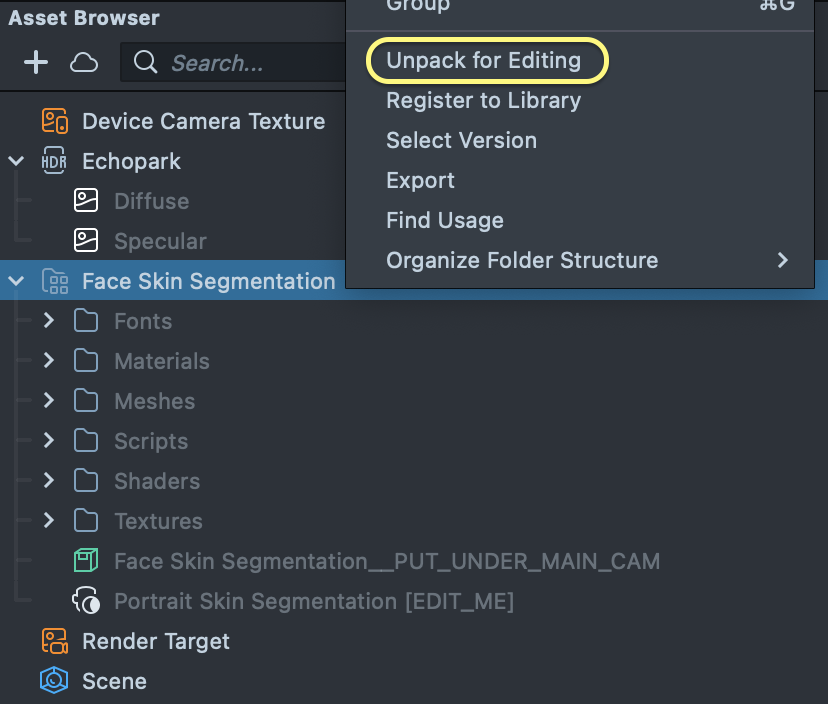
Once you import the asset from Asset Library, you can find the package in the Asset Browser. You can right-click and select Unpack for Editing from the drop-down menu to unpack all assets stored in the bundle. Click here to learn more about Asset Packages. Once you unpack the package, you can then edit its content.
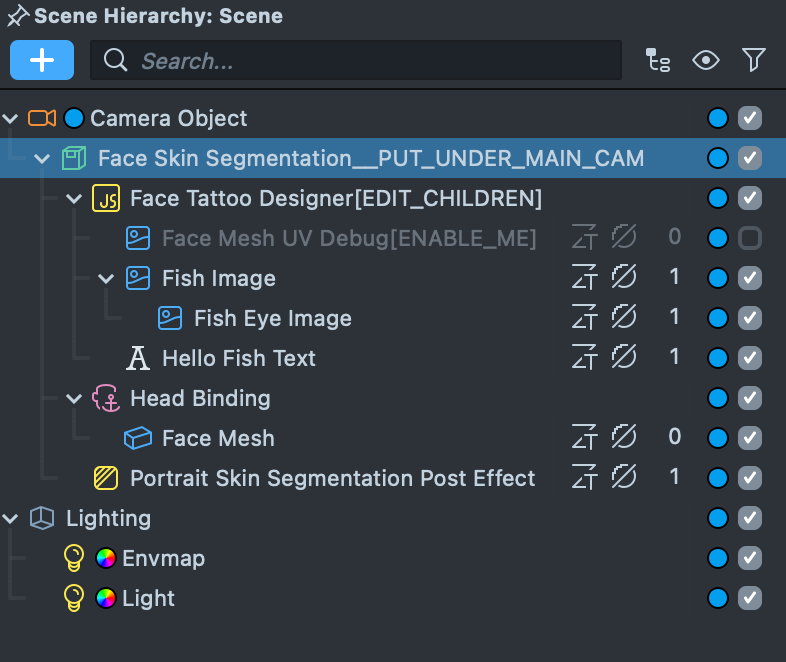
Follow the instructions and drag the prefab Face Skin Segmentation under the main Camera Object in the Scene Hierarchy to create a new Scene Object.
Attach Object To the Face Skin
The Face Skin Segmentation comes with a set of objects that lets you easily place design on the Face mesh within Lens Studio.
To make your objects appear on the face mesh, place any content as a child of the Face Tattoo Designer [EDIT_CHILDREN] and adjust the transform of the object on the face.

Under the Face Tattoo Designer [EDIT_CHILDREN] camera, you will find an object called Face Mesh UV Debug. This object is only visible in the 2D Scene Editor to help you place your design on the face.
Attaching Objects To the Body Skin
The Body Skin Segmentation asset comes with a body tracking that lets you easily attach images or any other object to the skin.

To edit the image on the body, select the child object of the tracked object and edit the values in the Inspector panel.
For example, to edit the image on the user’s left arm, select the child object of the Left Arm under 3D Body Tracking [EDIT_CHILDREN] and edit the Image component in the Inspector panel.
To learn more about the Image component please visit the Image guide page.
To add any object other than the image, add that object as a child of the tracked object. See the Right Fore Arm child to see how a 3D object is placed on the skin.
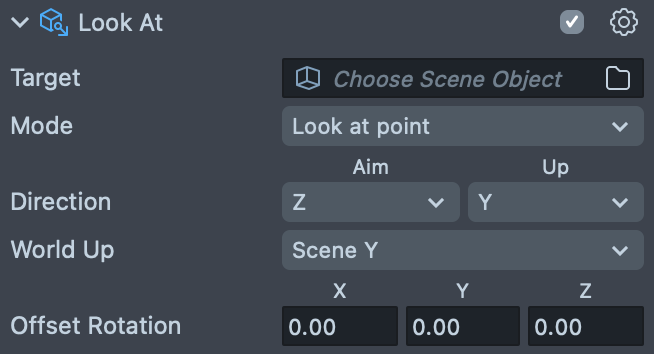
Tacked objects include a Look At component. This component makes sure all child objects always face the camera. This component is optional.
Preview Your Lens
You’re now ready to preview your Lens experience. To preview your Lens in Snapchat, follow the Pairing to Snapchat guide.