Character Animation
With the Character Animation plugin, creators can choose from existing animations in the Animation Library, generate entirely new ones using a Text Prompt, or upload a Video to capture animation from it - offering a flexible and powerful workflow for animation creation.
All animations can be applied to both: Bitmoji and Body Morph, making the plugin a versatile tool for different character types.
Getting Started
Launching Character Animation Plugin
-
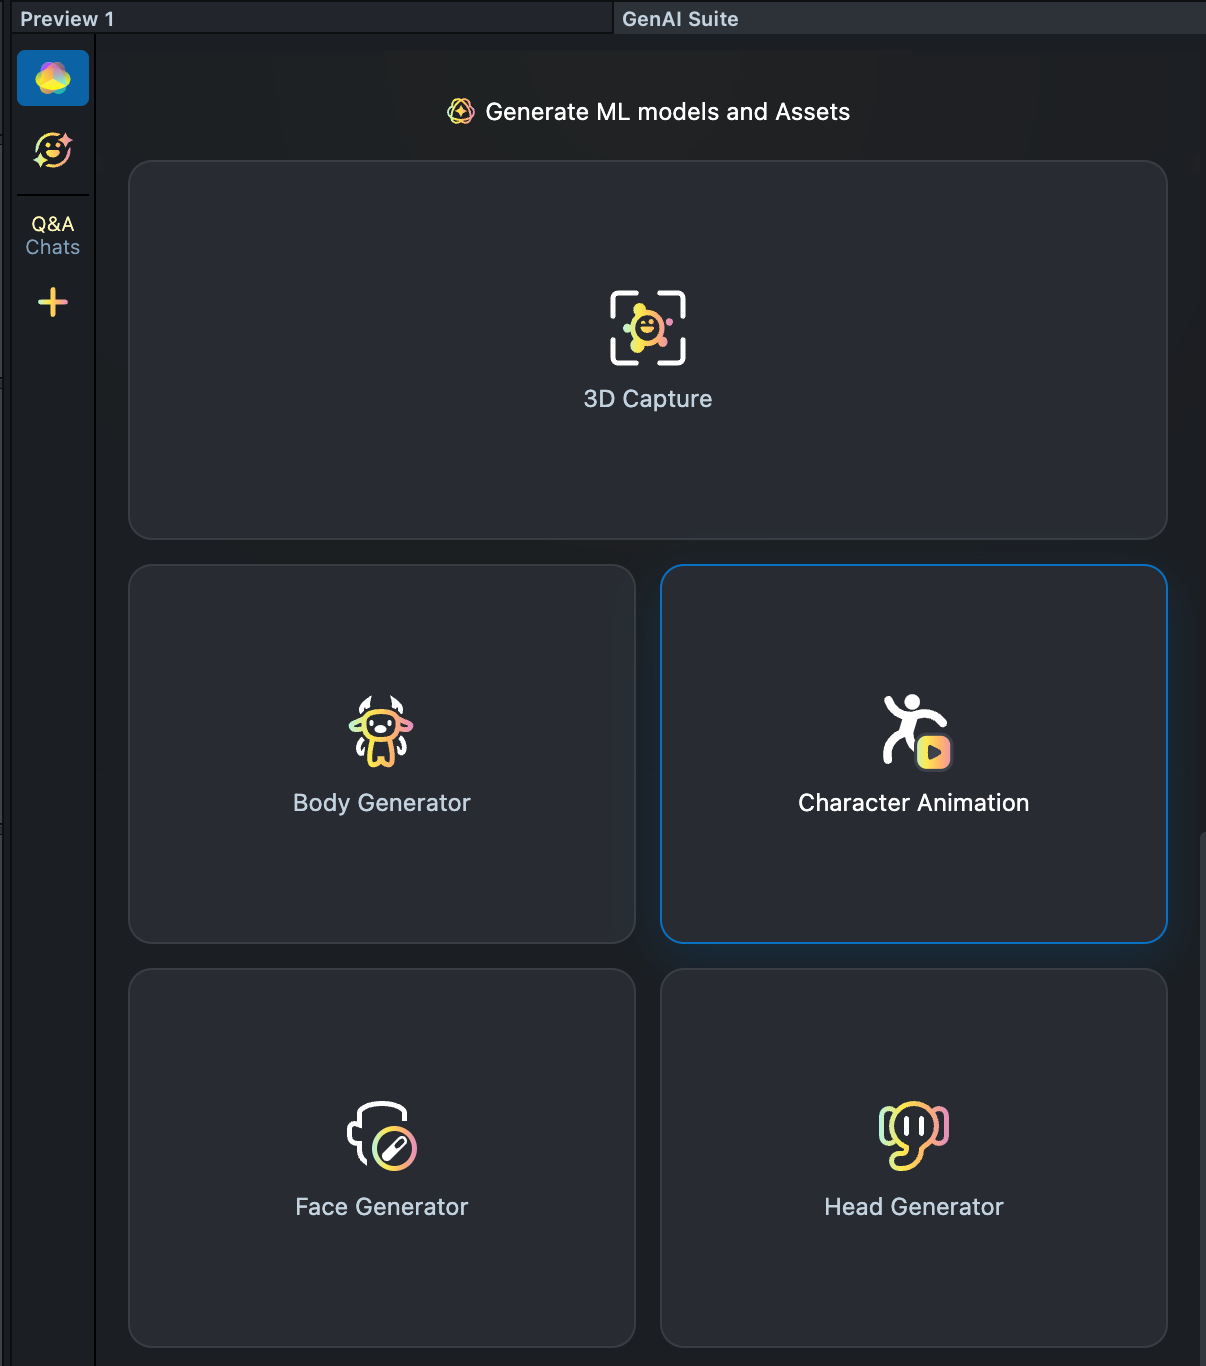
Navigate to the GenAI Suite using the option in the top right corner of the Lens Studio.
-
On the GenAI Home Page, you may need to scroll down to find the menu of GenAI tools. In the panel, select Character Animation.
User Interface Overview
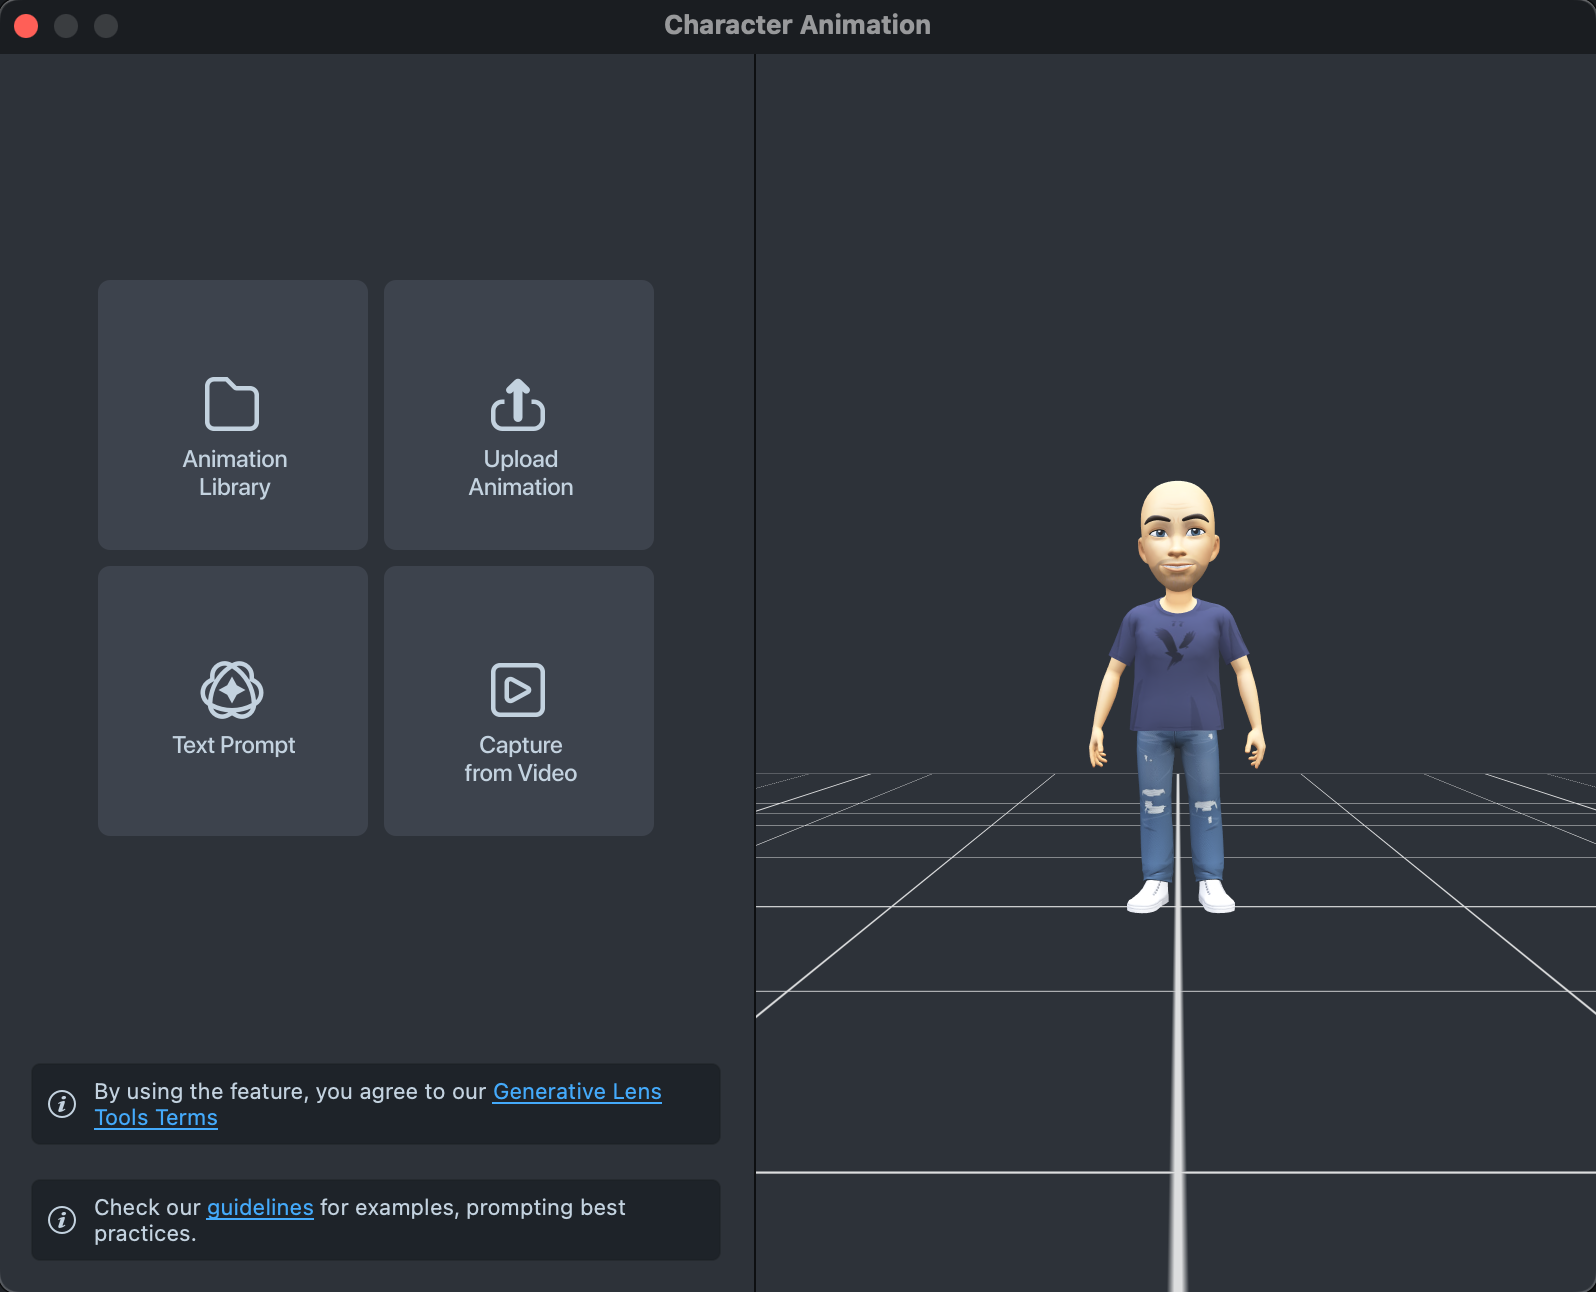
In the pop-up window, you’ll see four options:
- Animation Library - select and apply a pre-made animation from the library;
- Upload Animation - upload your animation;
- Text Prompt - generate a new animation by entering a text prompt;
- Capture from Video - upload a video and extract animation directly from it.
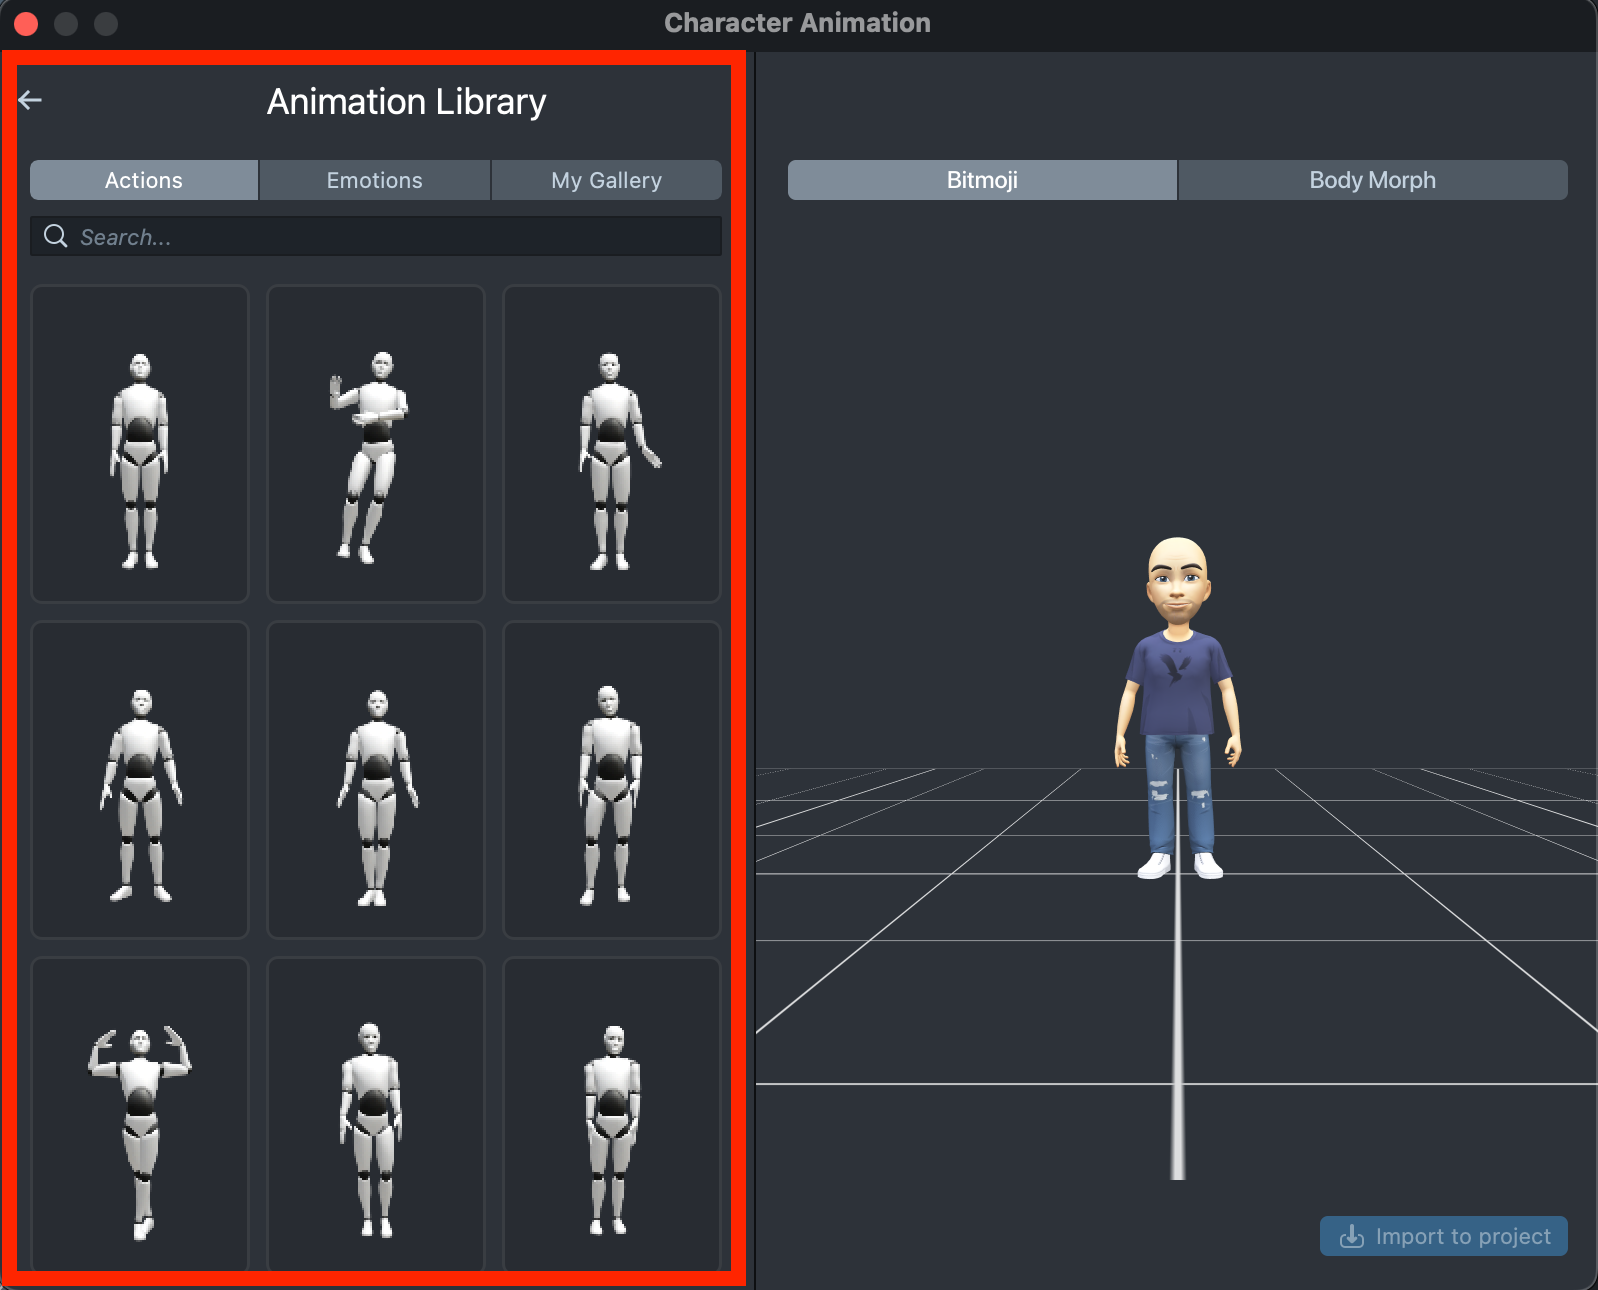
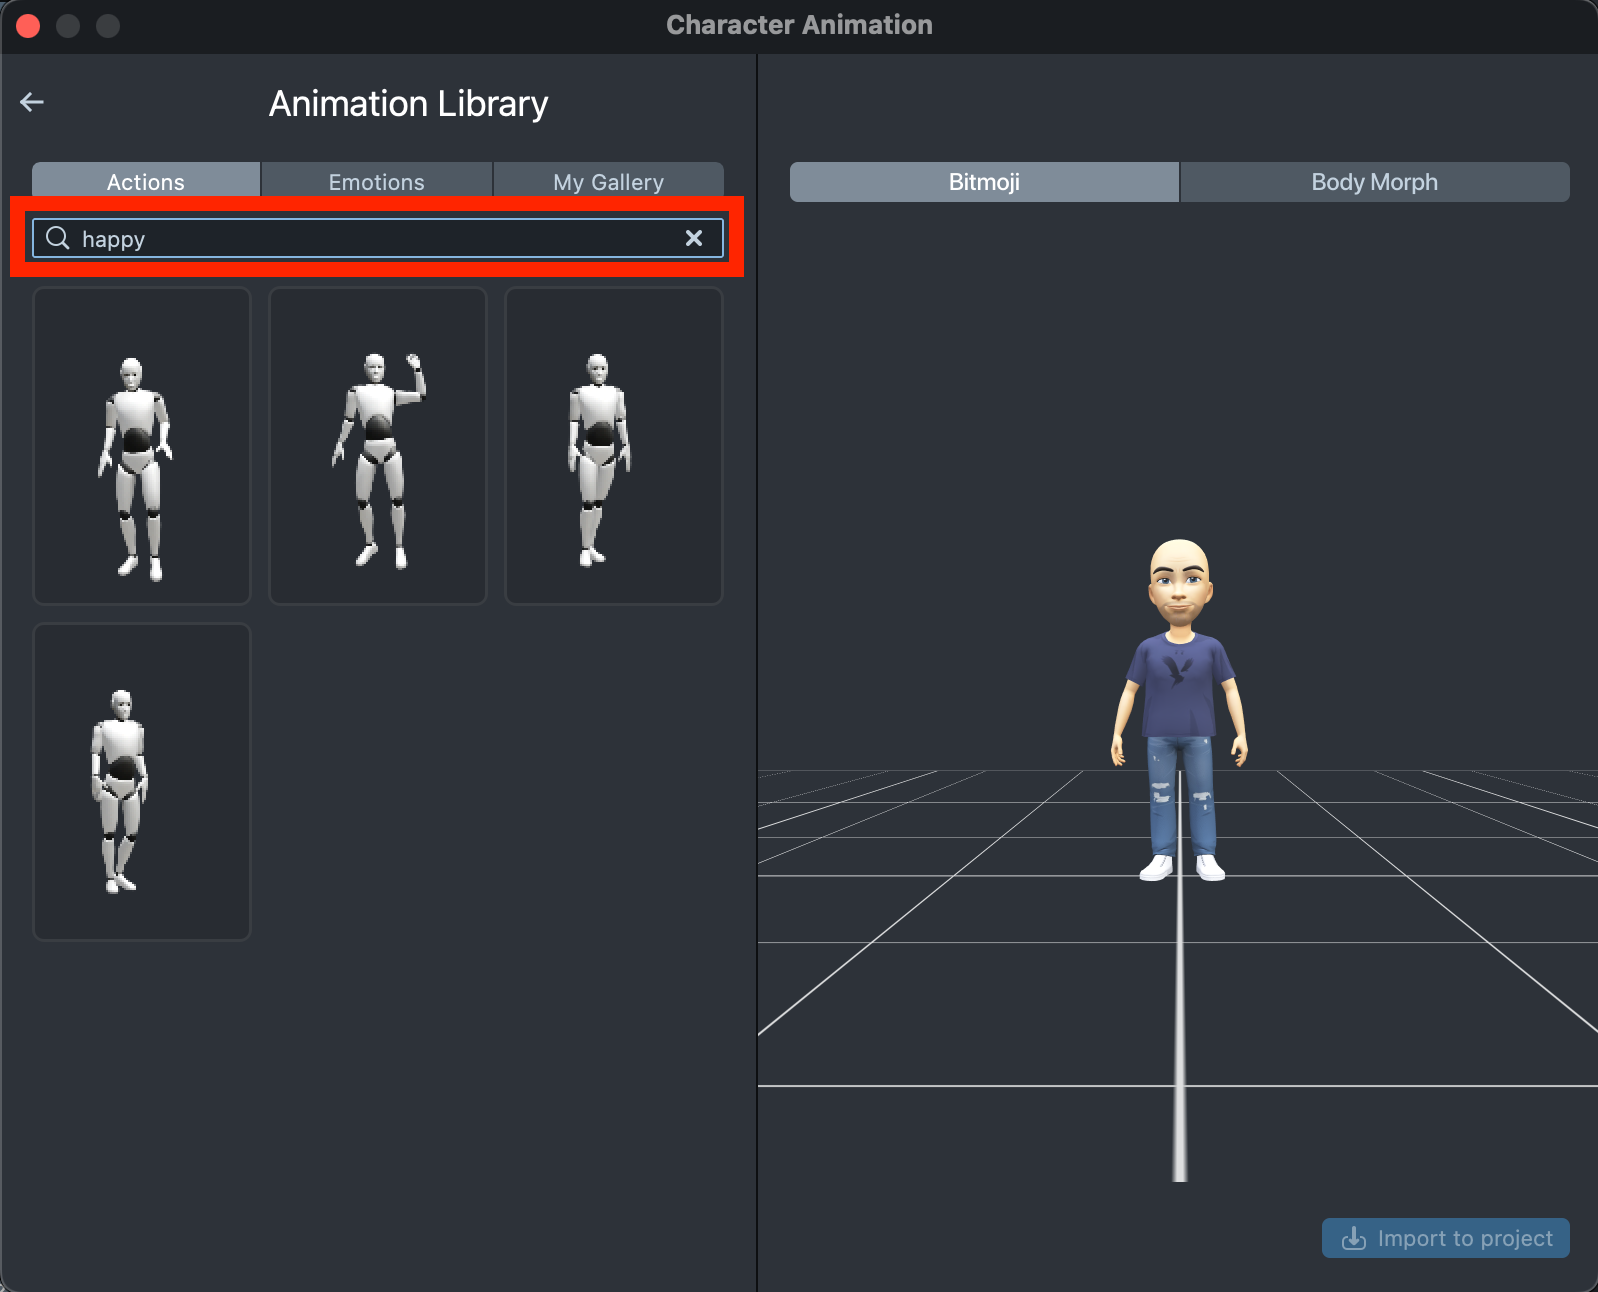
Animation Library
Choose an animation
On the left side, you’ll find all available animations, organized into three categories:
- Actions - full-body animations without facial expressions;
- Emotions – full-body animations with facial expressions included;
- My Gallery – this is where your custom animations will appear after being generated using a Text or Video Prompt. Here you can also track the status of the animation generation process.
For Bitmoji, you can optionally add facial animations using Bitmoji Face Animator.
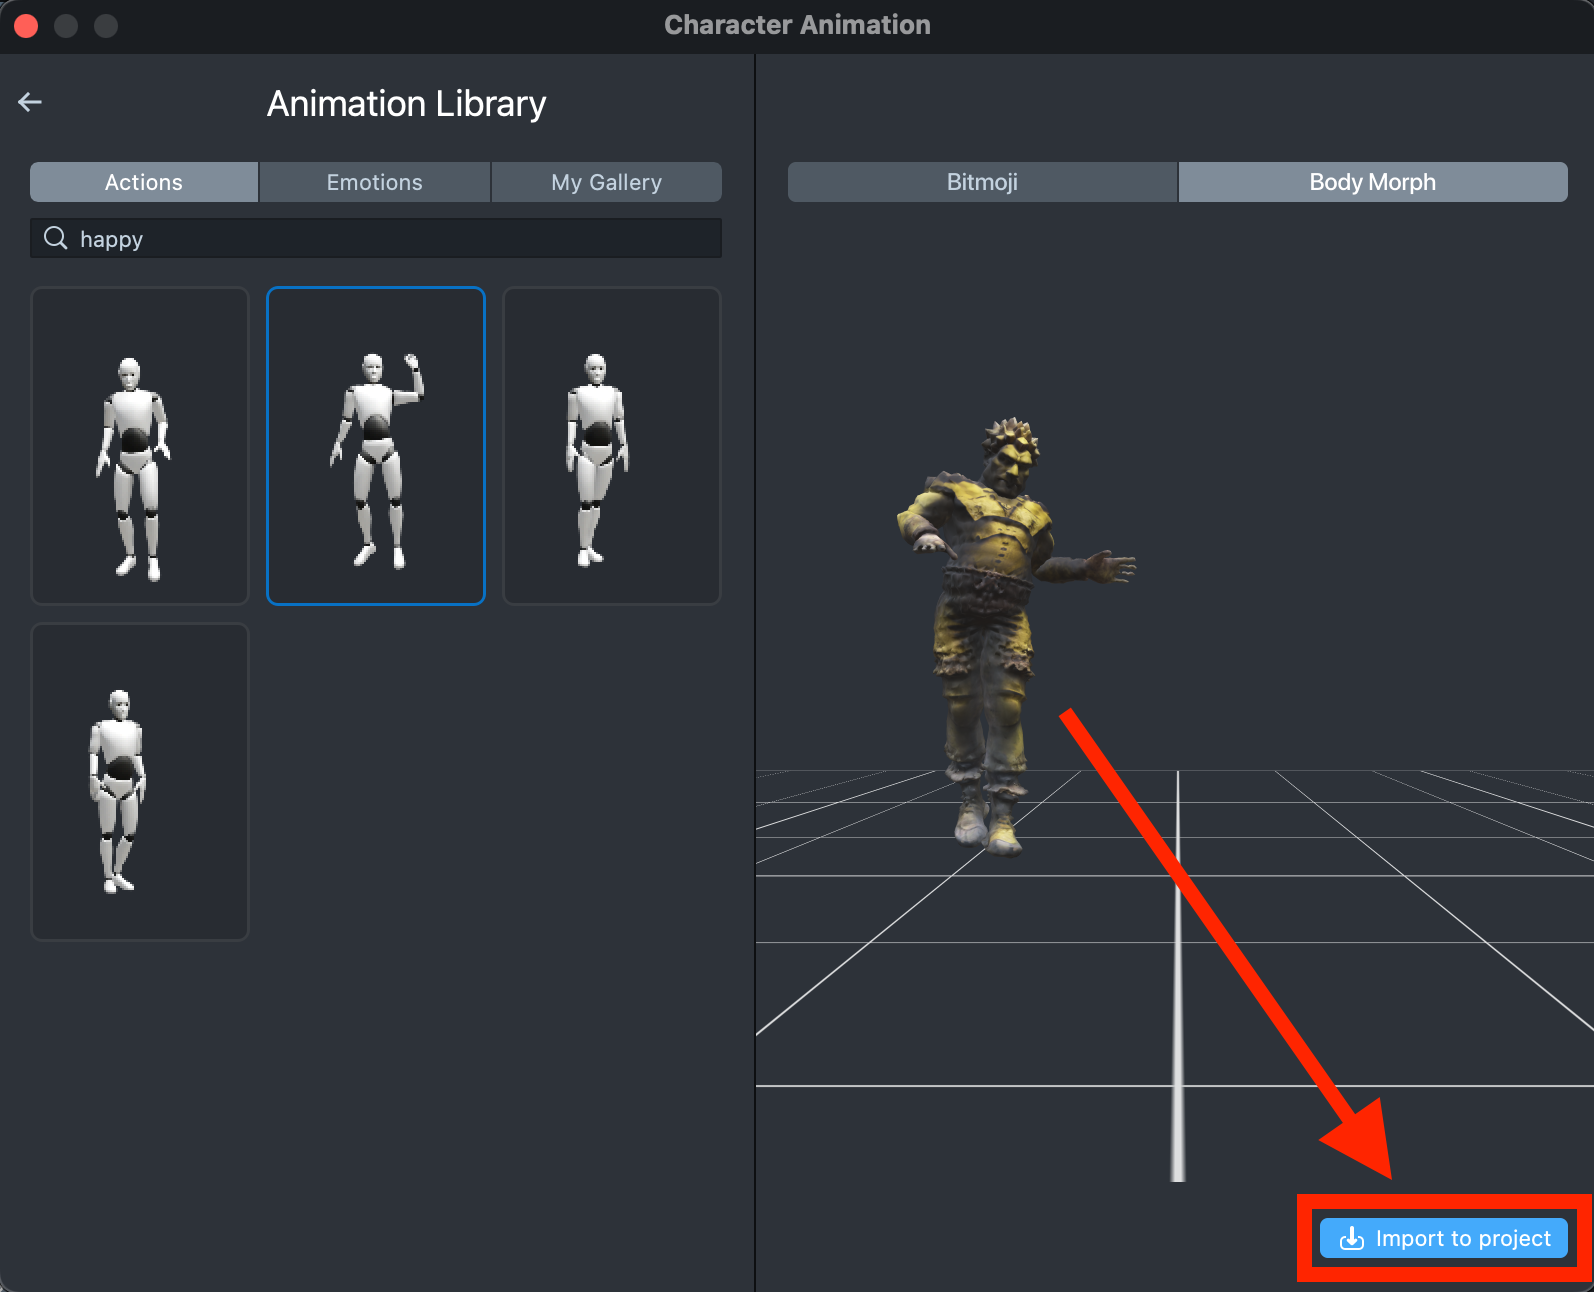
You can also use the search bar to quickly find the animation you need within each category.
Choose a character
Once you've selected an animation, the right-side panel allows you to choose which character to apply it to. You can switch between the tabs at the top to apply the animation to either Bitmoji or Body Morph.
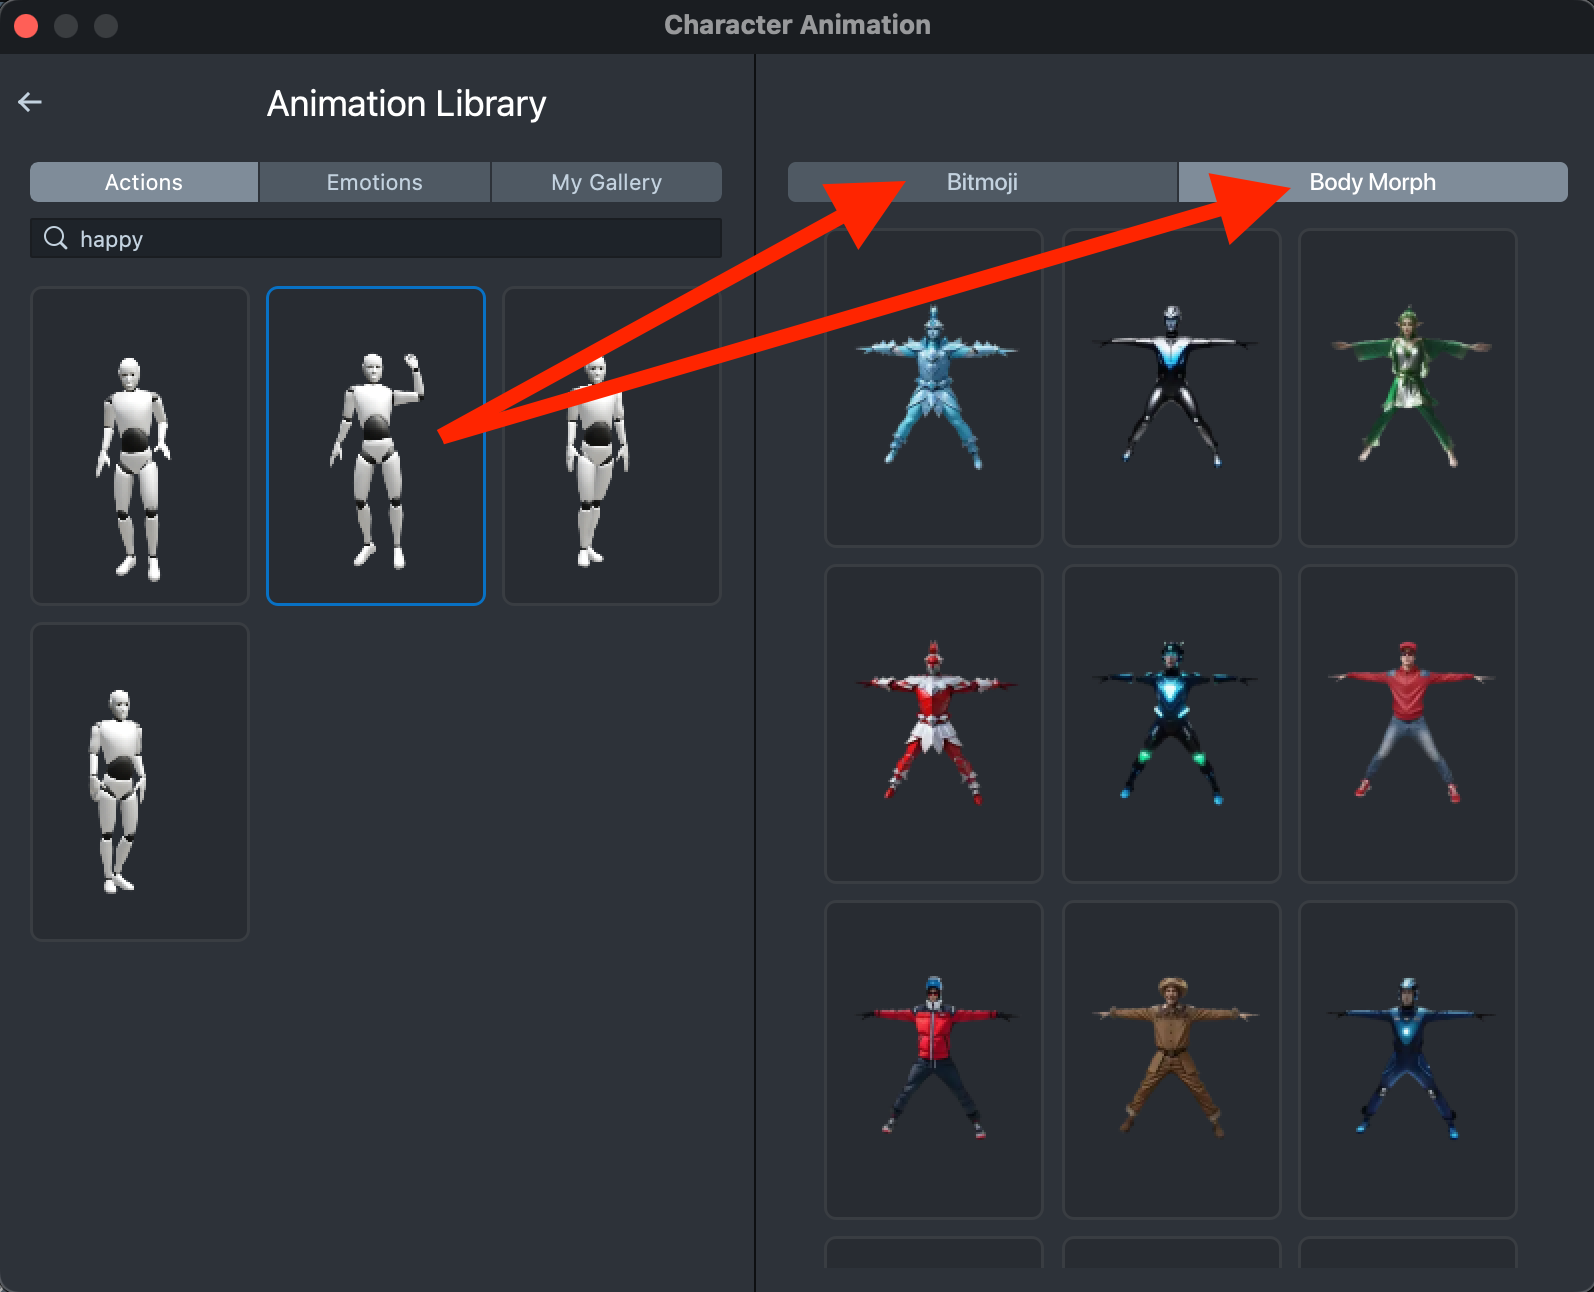
If your Body Morph tab is empty, it means you haven’t created any characters yet. To get started, open the Body Generator, create a character using its tools, and it will appear in the gallery, ready for you to apply animations to.
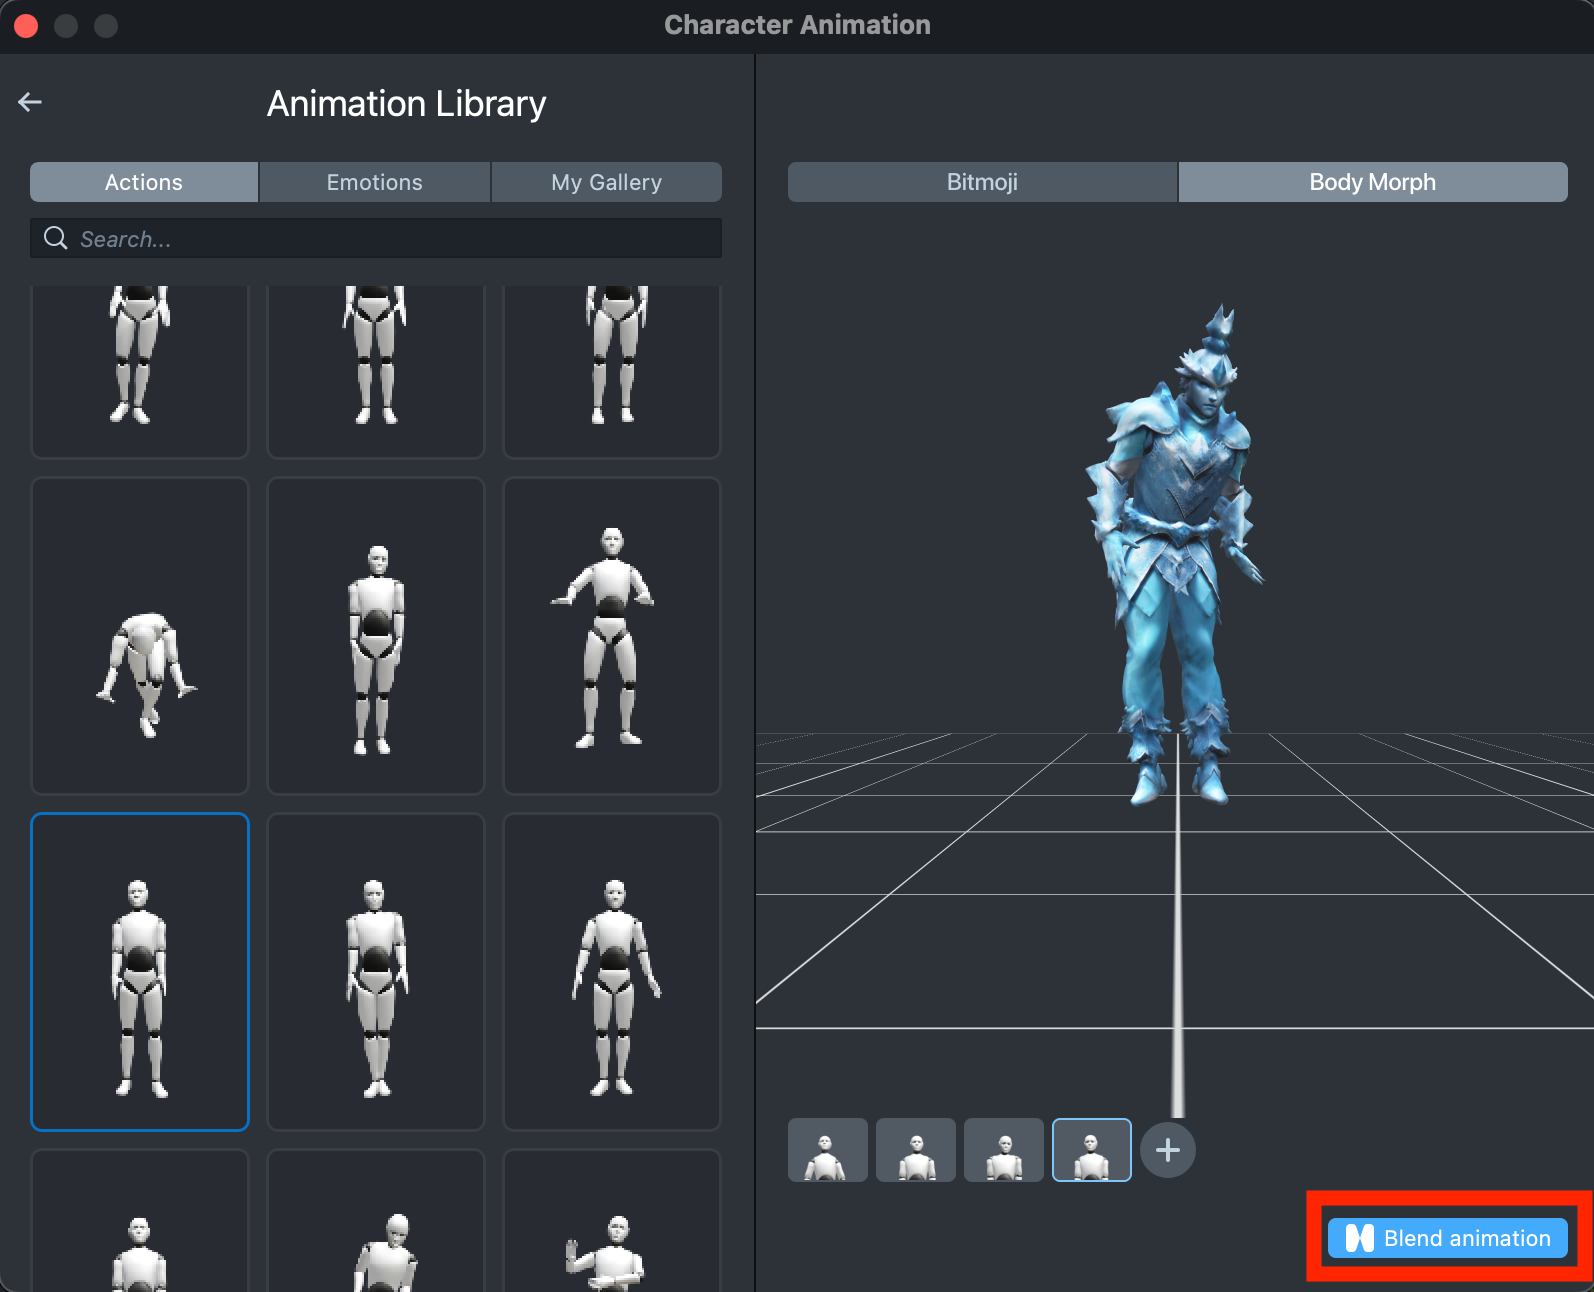
Stitch animations
This option lets you seamlessly stitch together any animations from the library, giving you full flexibility to bring your unique vision to life.
Select the first animation in the library that you’d like to stitch. A tiny preview of the animation will appear in the lower corner of the scene, along with a + button.
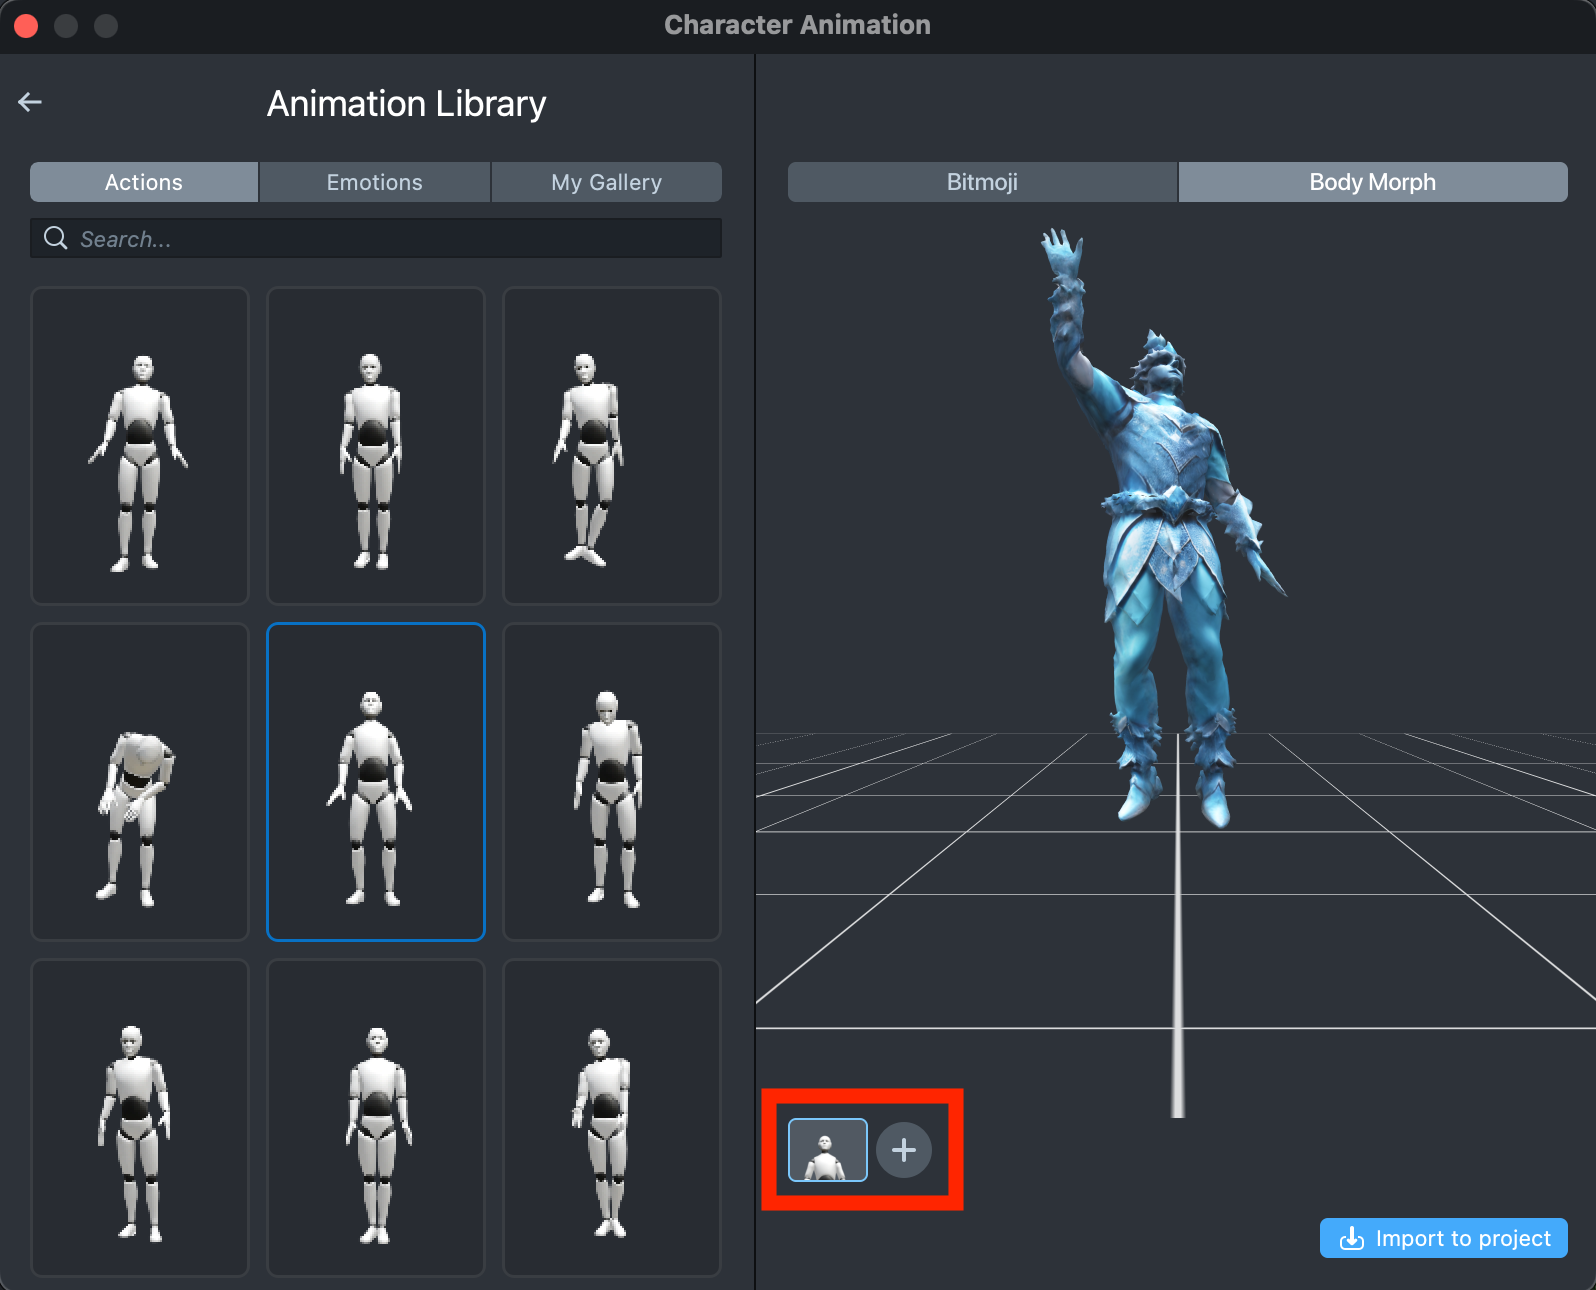
Click the + button to add a second animation. You can add up to five animations in total.
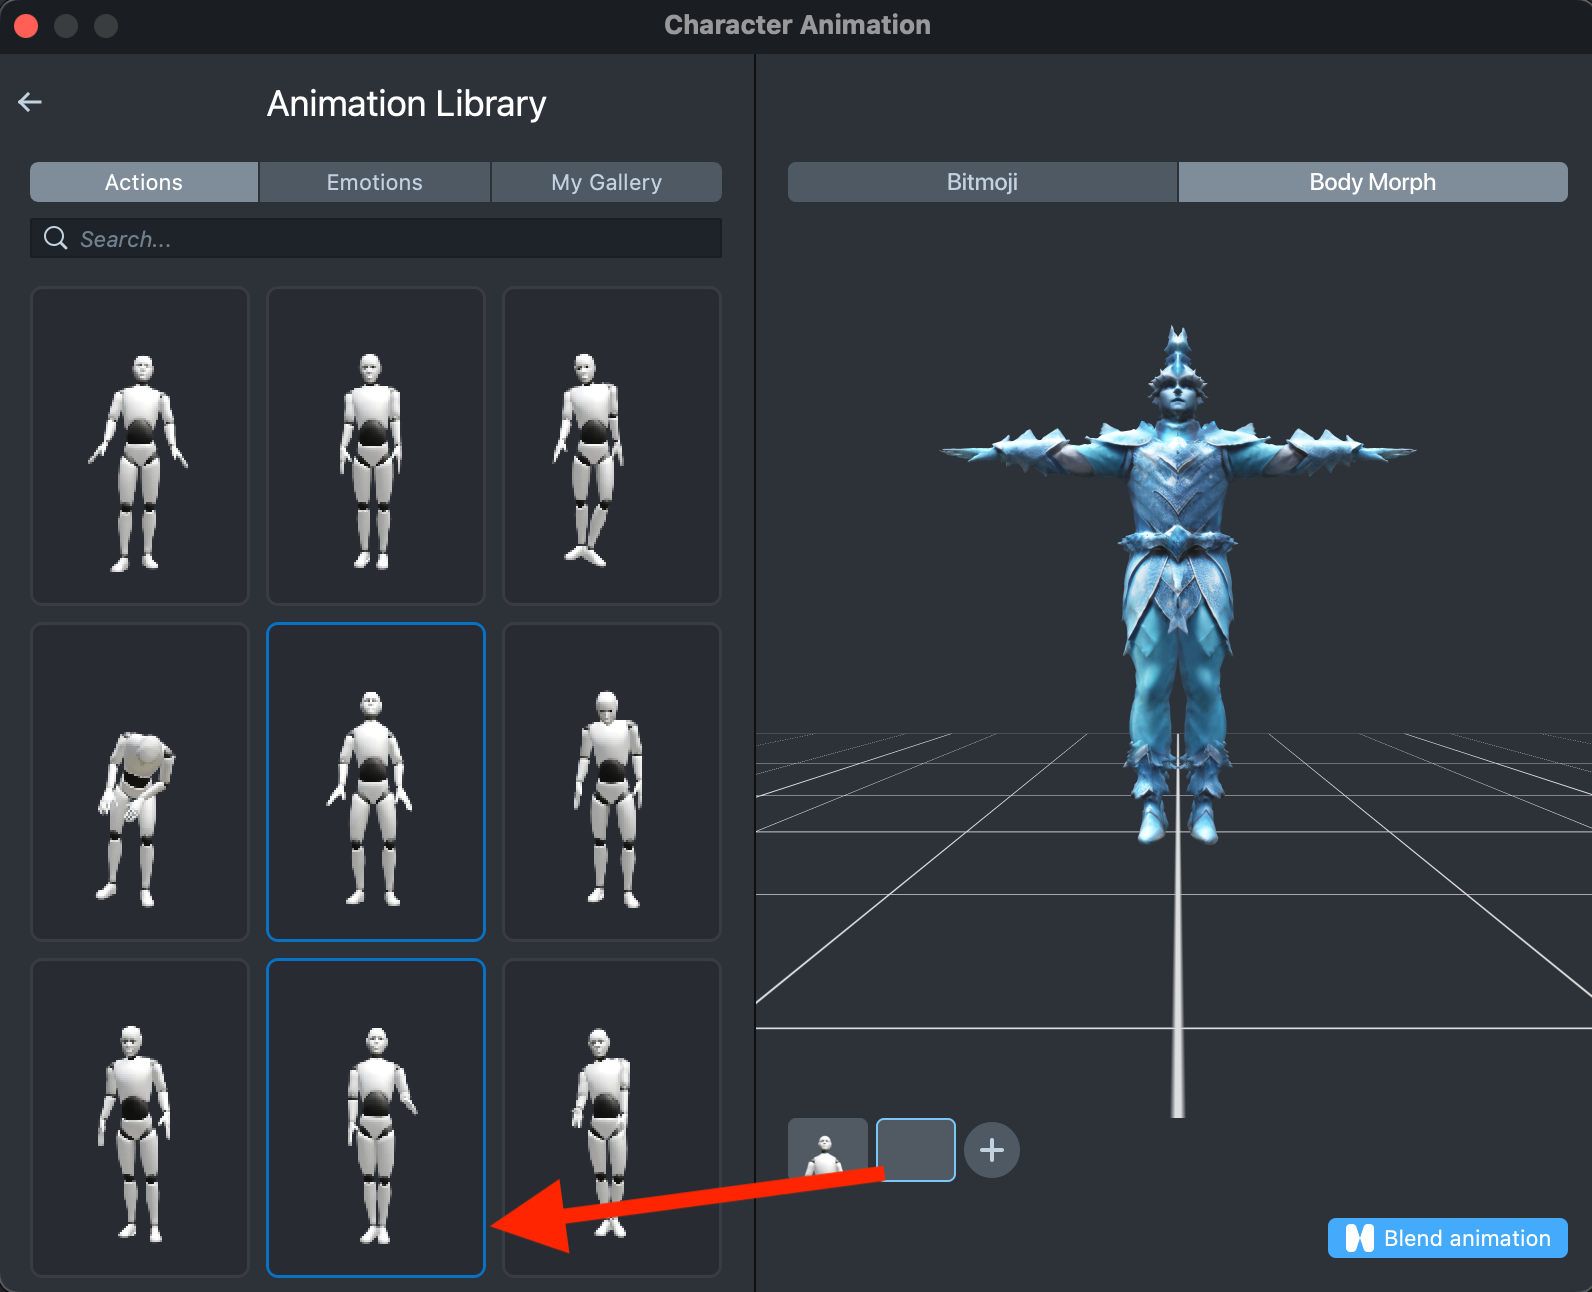
Once you’ve selected all the animations you want, click the Blend animation button, and you’ll see a new tile in the library, where you can track the progress of your animation stitching.
Import to Project
Once you’ve selected an animation and a character, click the Import to Project button to bring them into your project.
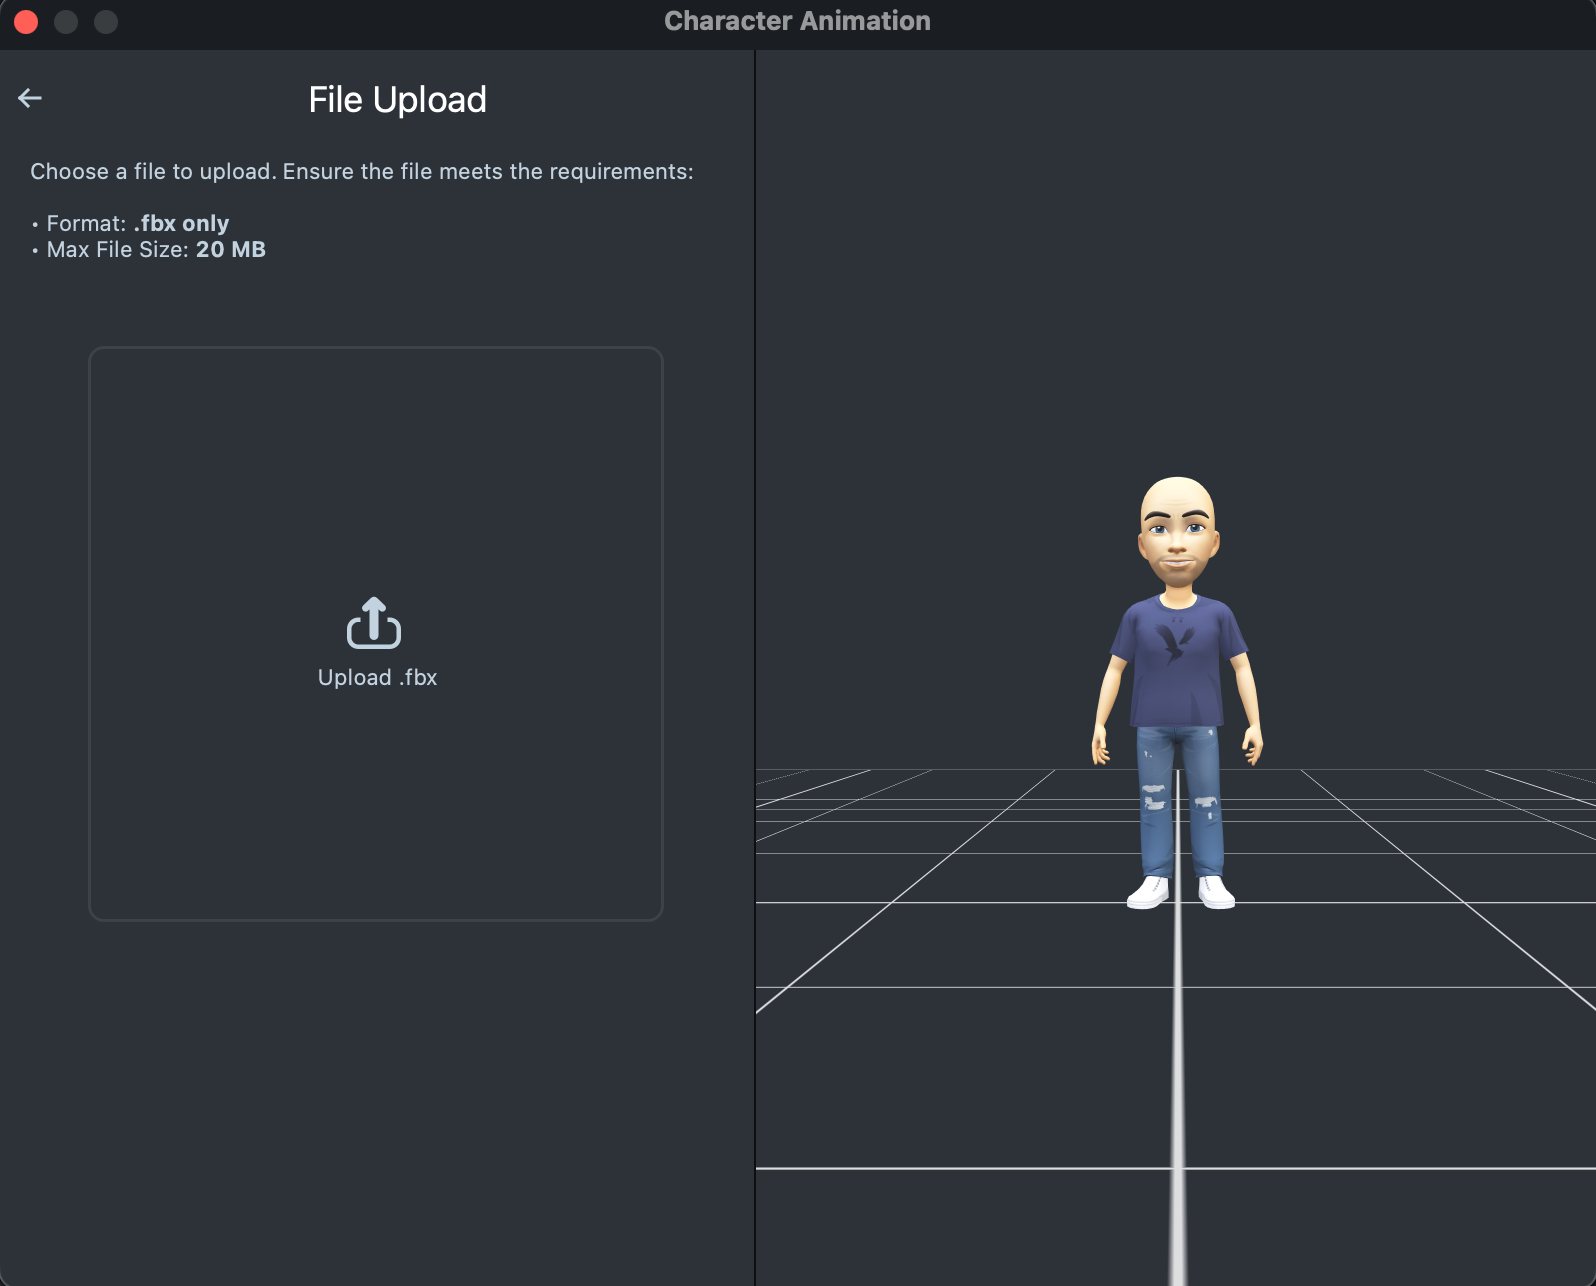
Upload Animation
This option lets you upload your animation file. Simply click the large placeholder labeled Upload .fbx and select your animation from your file system. You’ll then be redirected to the Animation Library, where you can track the progress of your animation uploading.
The animation file must be in .fbx format and under 20 MB.
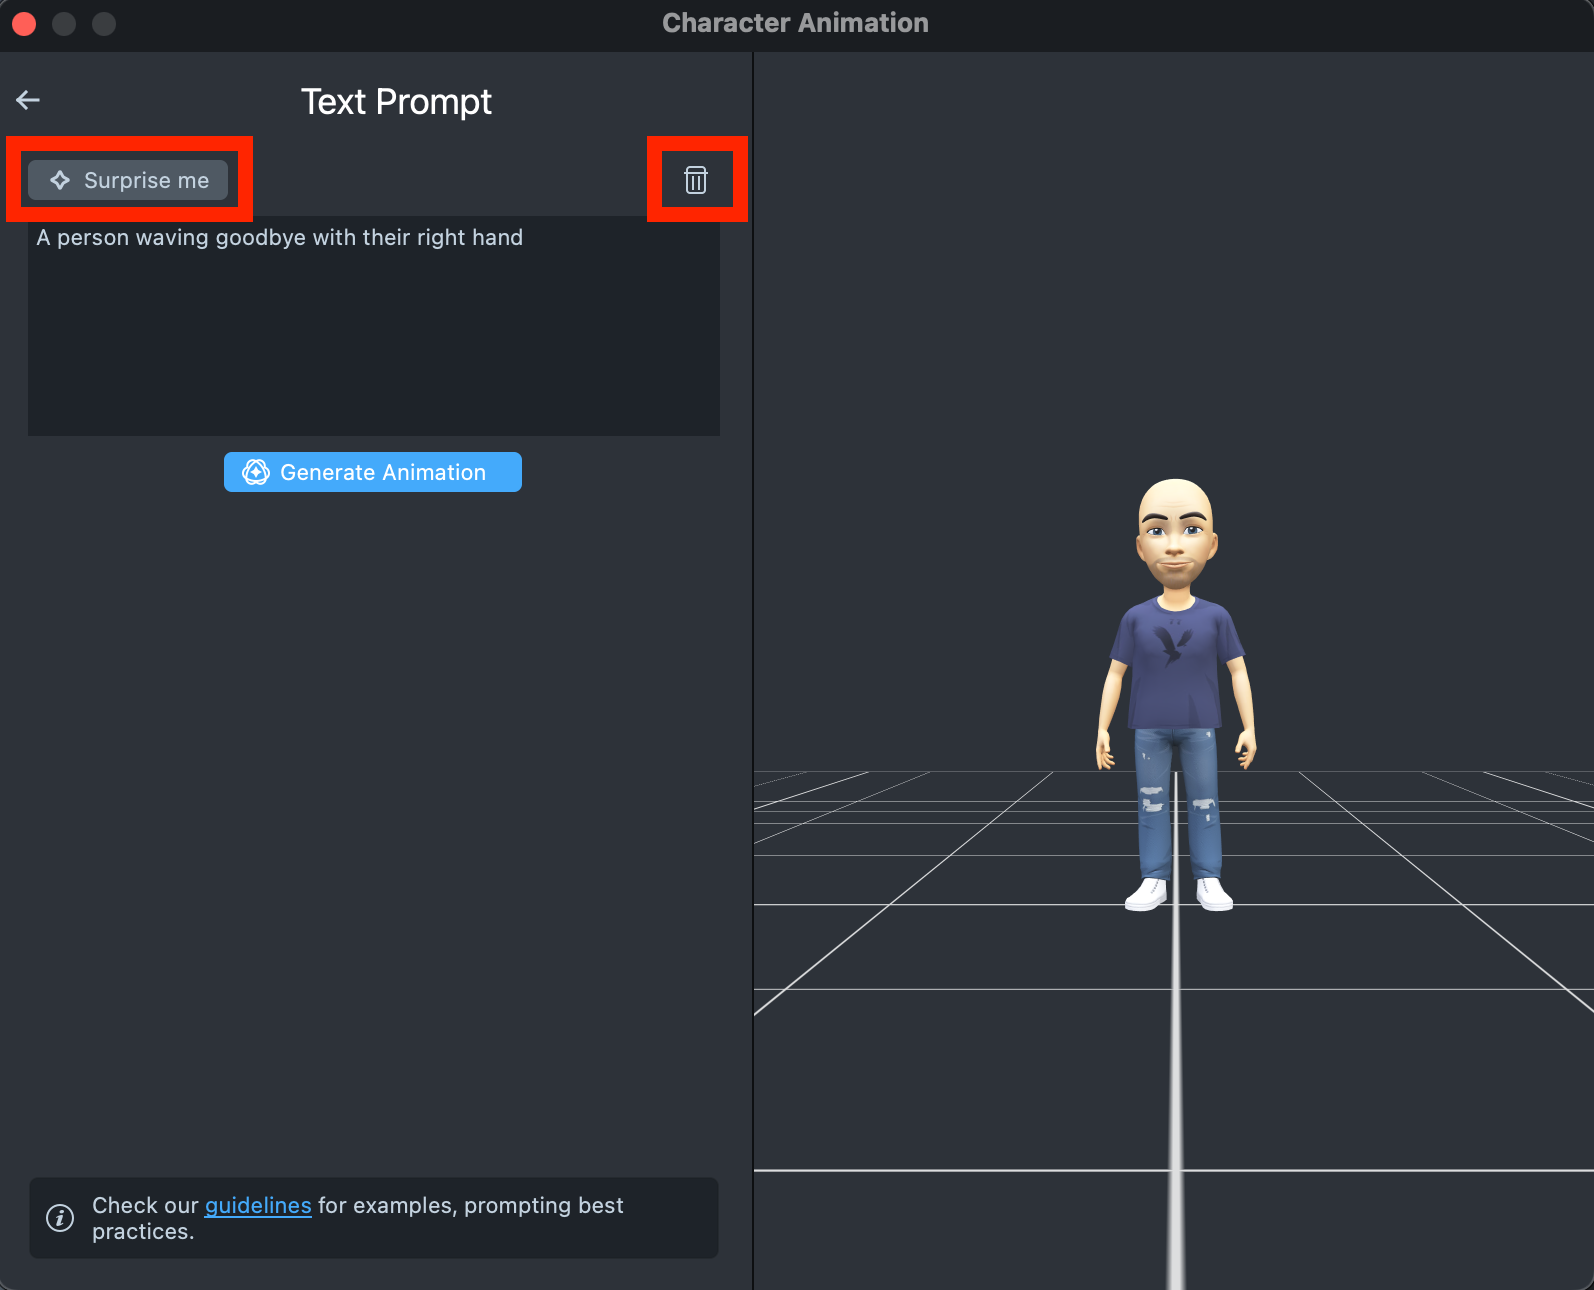
Text Prompt
Here, you can generate an animation by entering a text prompt in the input field.
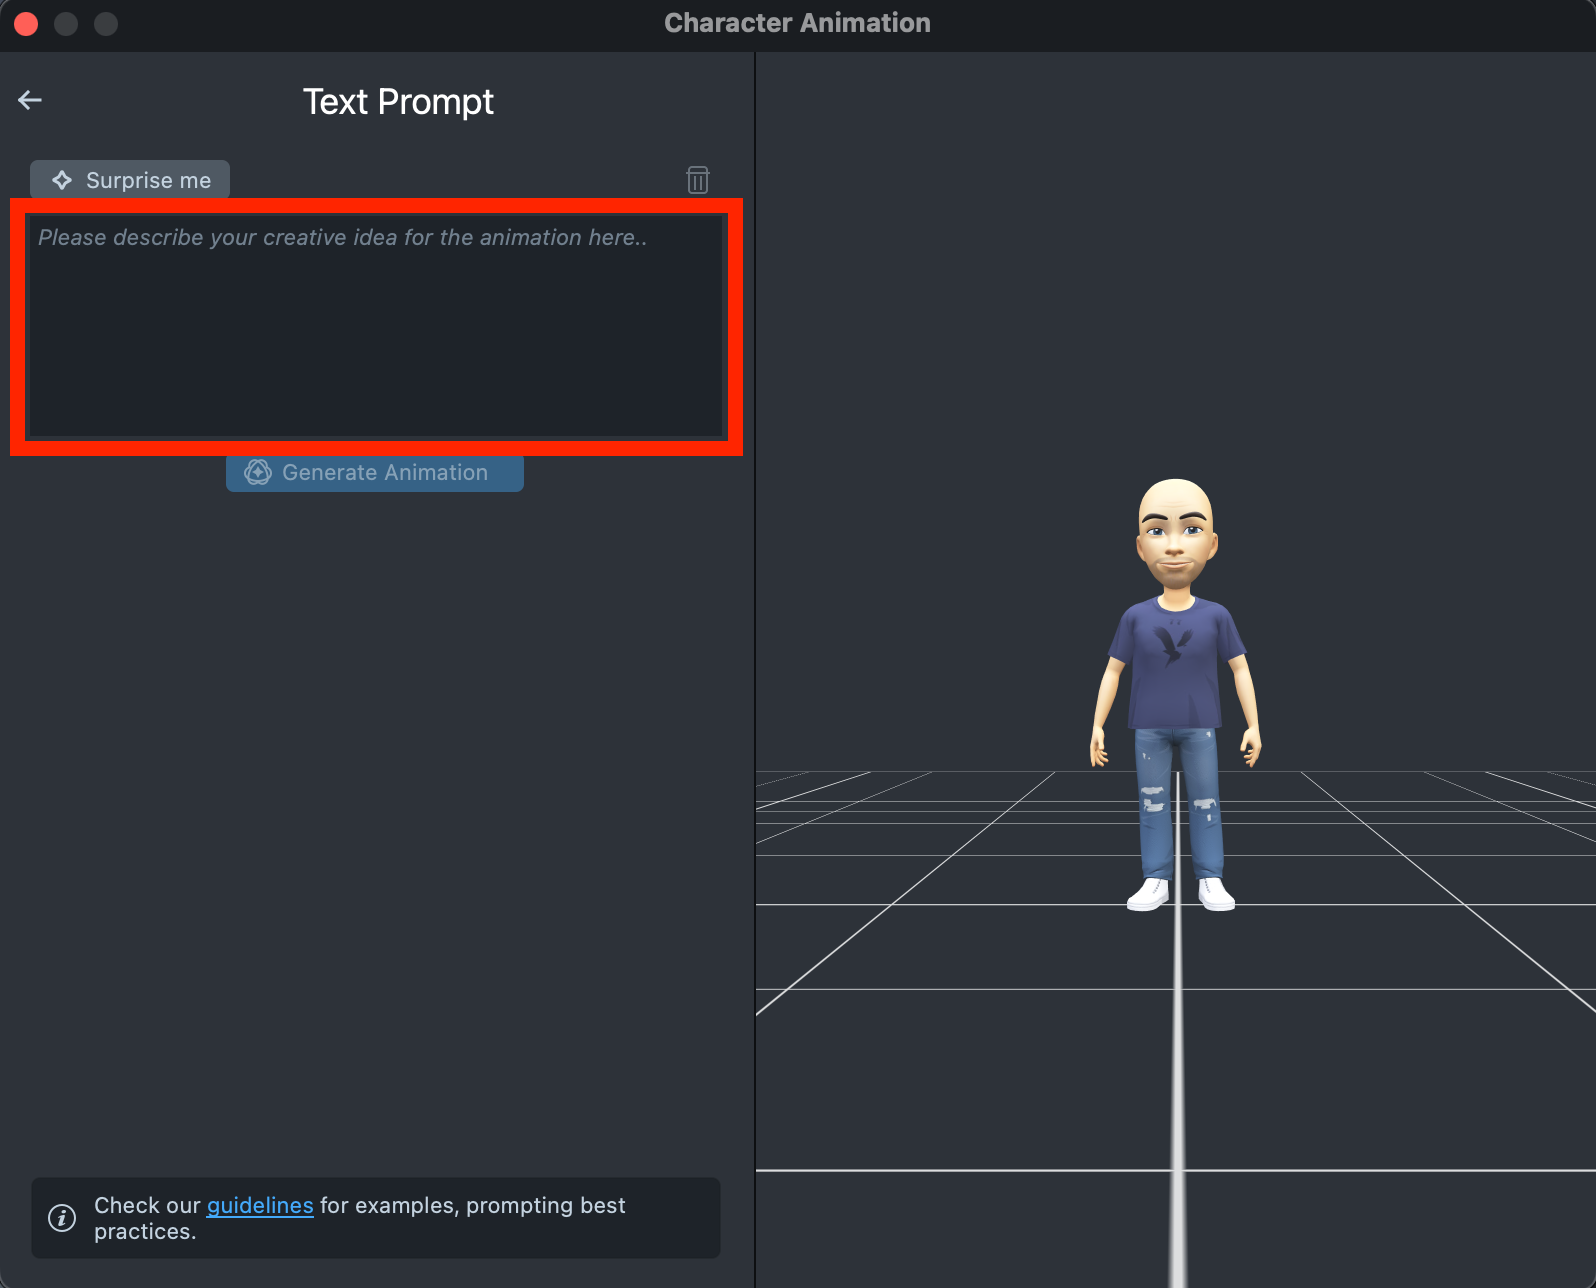
To explore how it works, click the Surprise me button to use one of the default prompts. You can also quickly clear the input using the trash icon in the top-right corner.
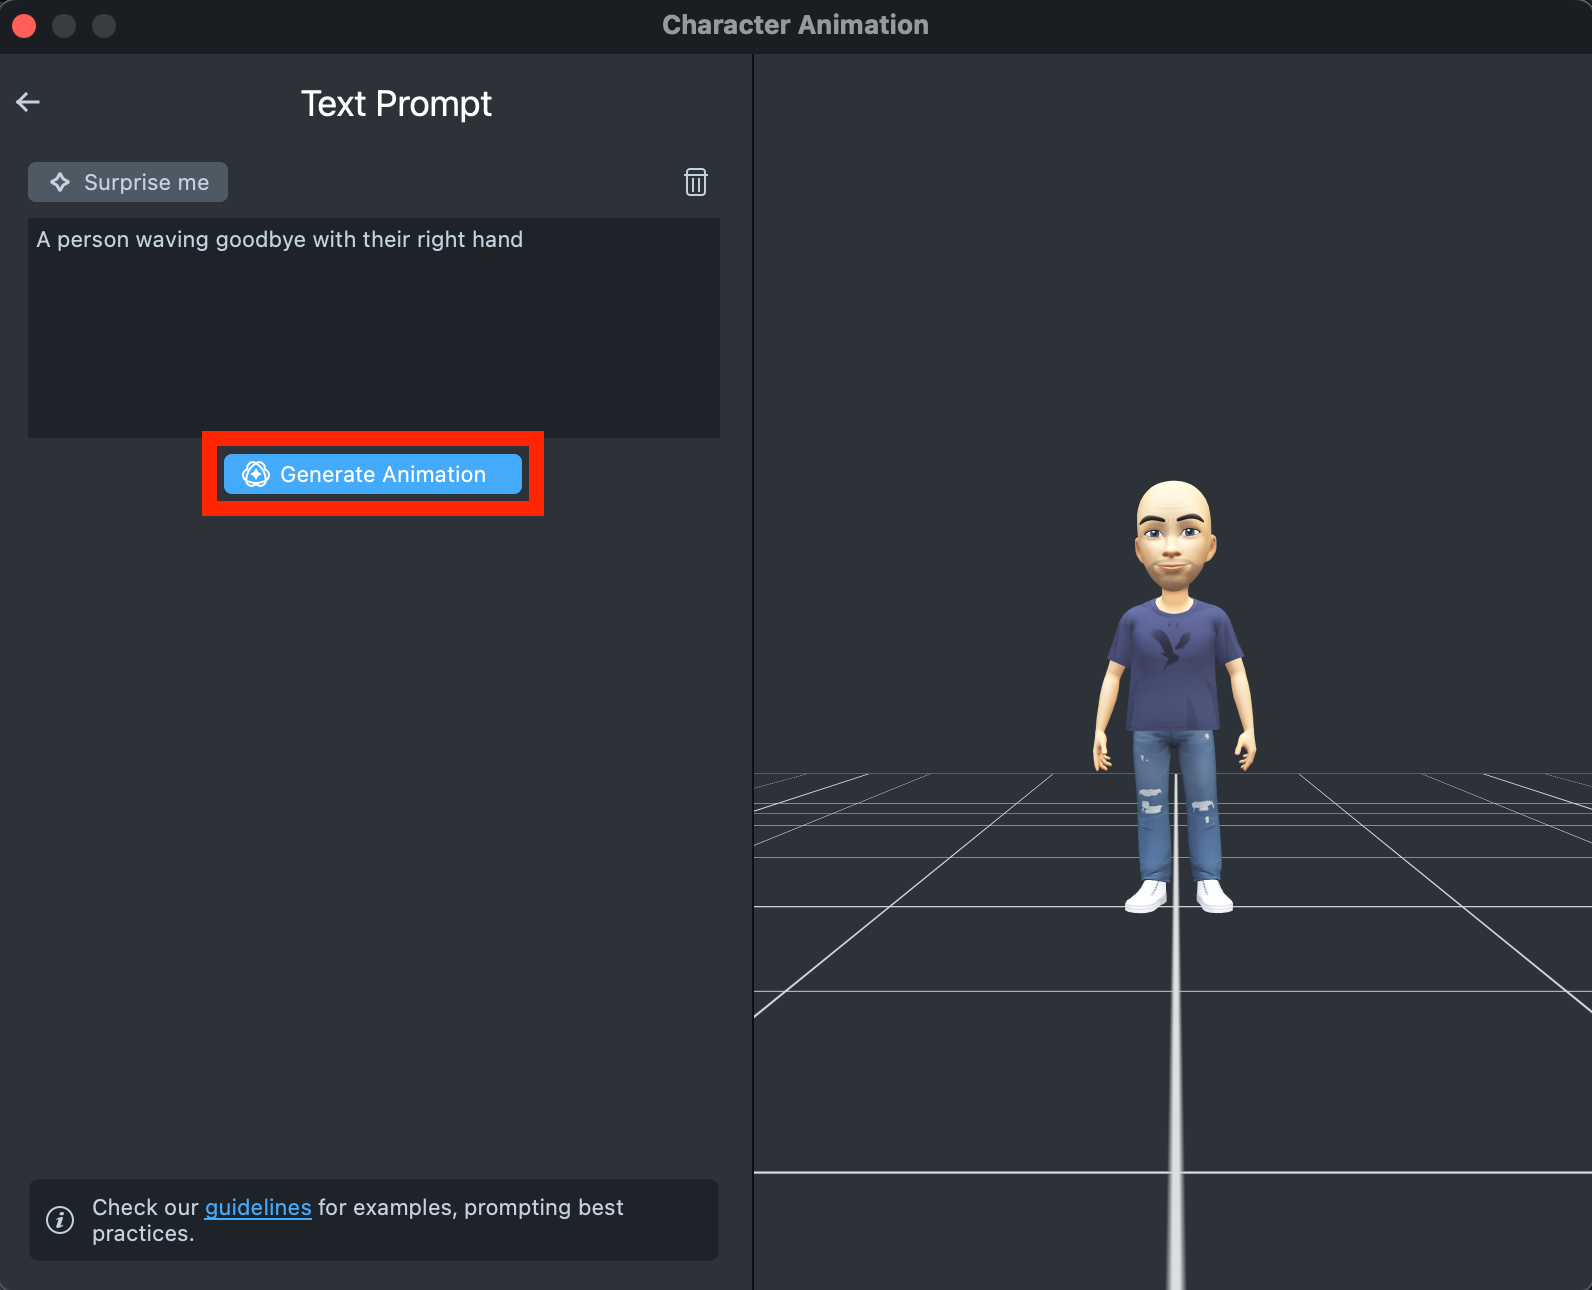
Once your text prompt is ready, click the Generate Animation button. You’ll then be redirected to the Animation Library, where you can track the progress of your animation generation.
Capture from Video
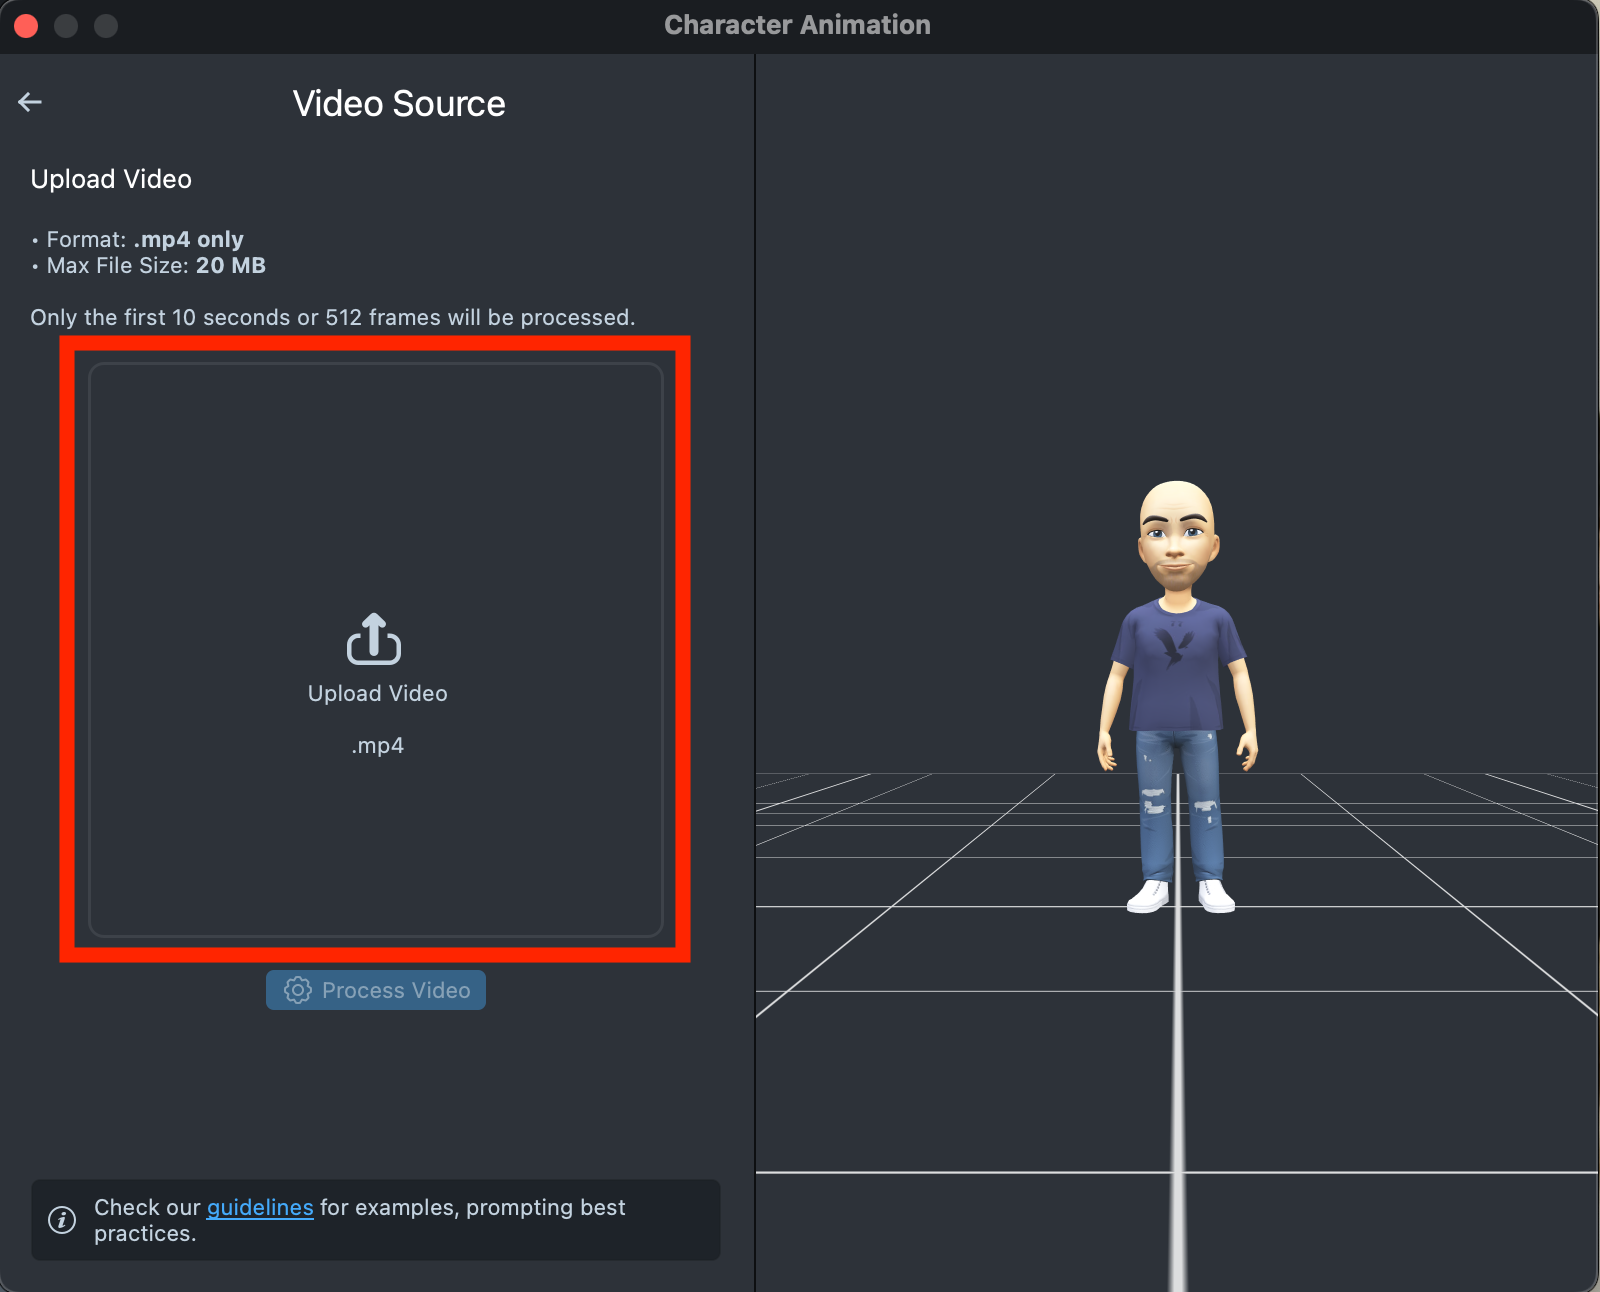
Use this option to generate an animation by uploading a video and extracting the persons’s movement from it.
Please, note that only the first 10 seconds or 512 frames will be processed. Video upload requirements:
- Format: .mp4 only
- Max File Size: 20 MB
Click the Upload Video area to select and upload your video file.
Then, click the Process Video button to allow the plugin to analyze the video and detect any persons present.
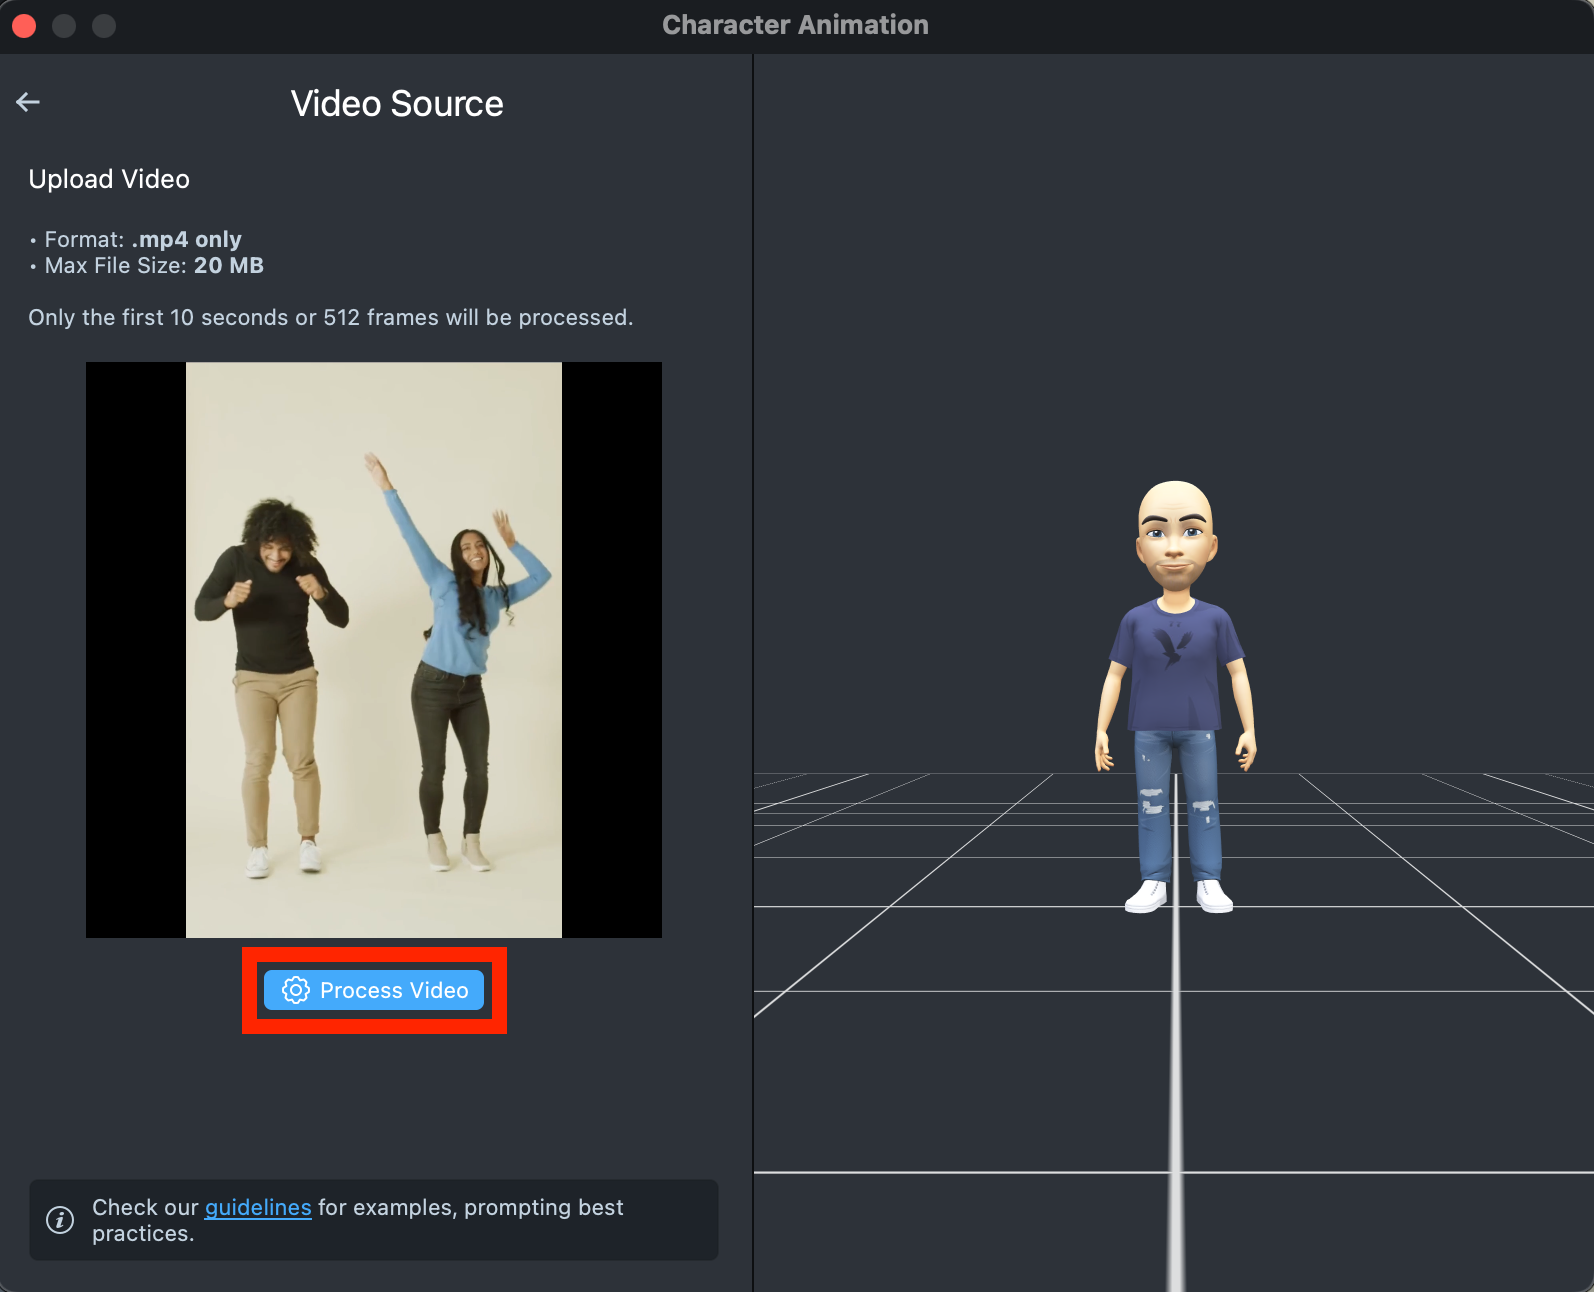
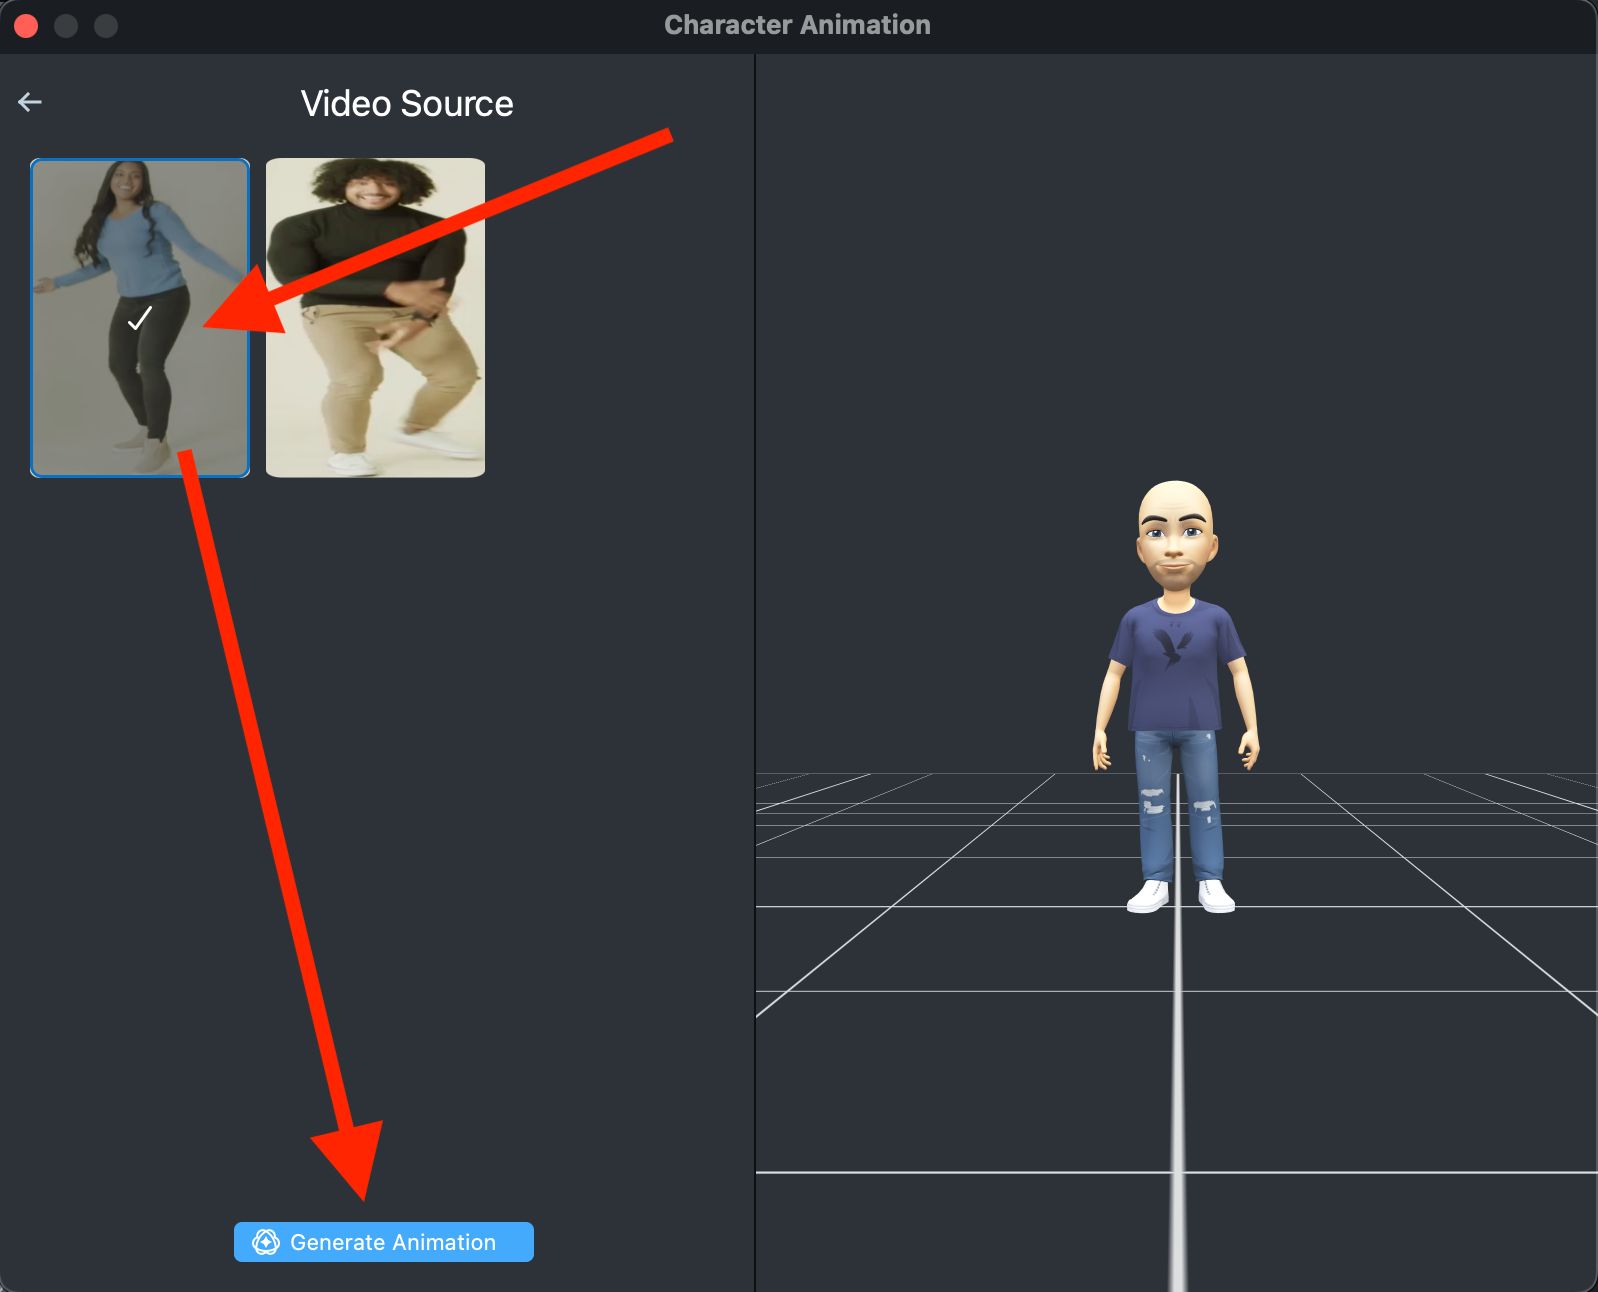
If the analysis is successful, you will see a breakdown of detected persons. Select the person whose motion you want to capture, and click Generate Animation to create the animation. You’ll then be redirected to the Animation Library, where you can track the progress of your animation generation.
Best Practices for Uploaded Video
Good ✅
- The video should be less than 10 seconds long;
- The video should contain at least one person;
- The full body of the selected person should be mostly visible.
| Example 1 | Example 2 | Example 3 |
|---|---|---|
Bad ❌
- Video containing no person;
- Video that is very blurry;
- Person in the video is too small;
- Person in the video is mostly occluded / not visible in the frame.
| Example 1 | Example 2 |
|---|---|
Visit Animating Bitmoji 3D to learn how to animate Bitmoji using other tools and how to apply them.