AI Video Transform

AI Video Transform plugin lets creators build Lenses that edit a user’s recorded camera video with AI. Each Lens transforms the recording with a unique embedded prompt. You can change style, outfit, props, the subject, or the background. The Lens keeps the original motion, timing, and camera movement.
Getting Started
Lenses created with the AI Video Transform plugin are available only to Lens+ subscribers. Using AI Video Transform doesn't automatically enroll you in Lens+ Payouts. To begin monetizing your Lenses, apply here.
Launching AI Video Transform
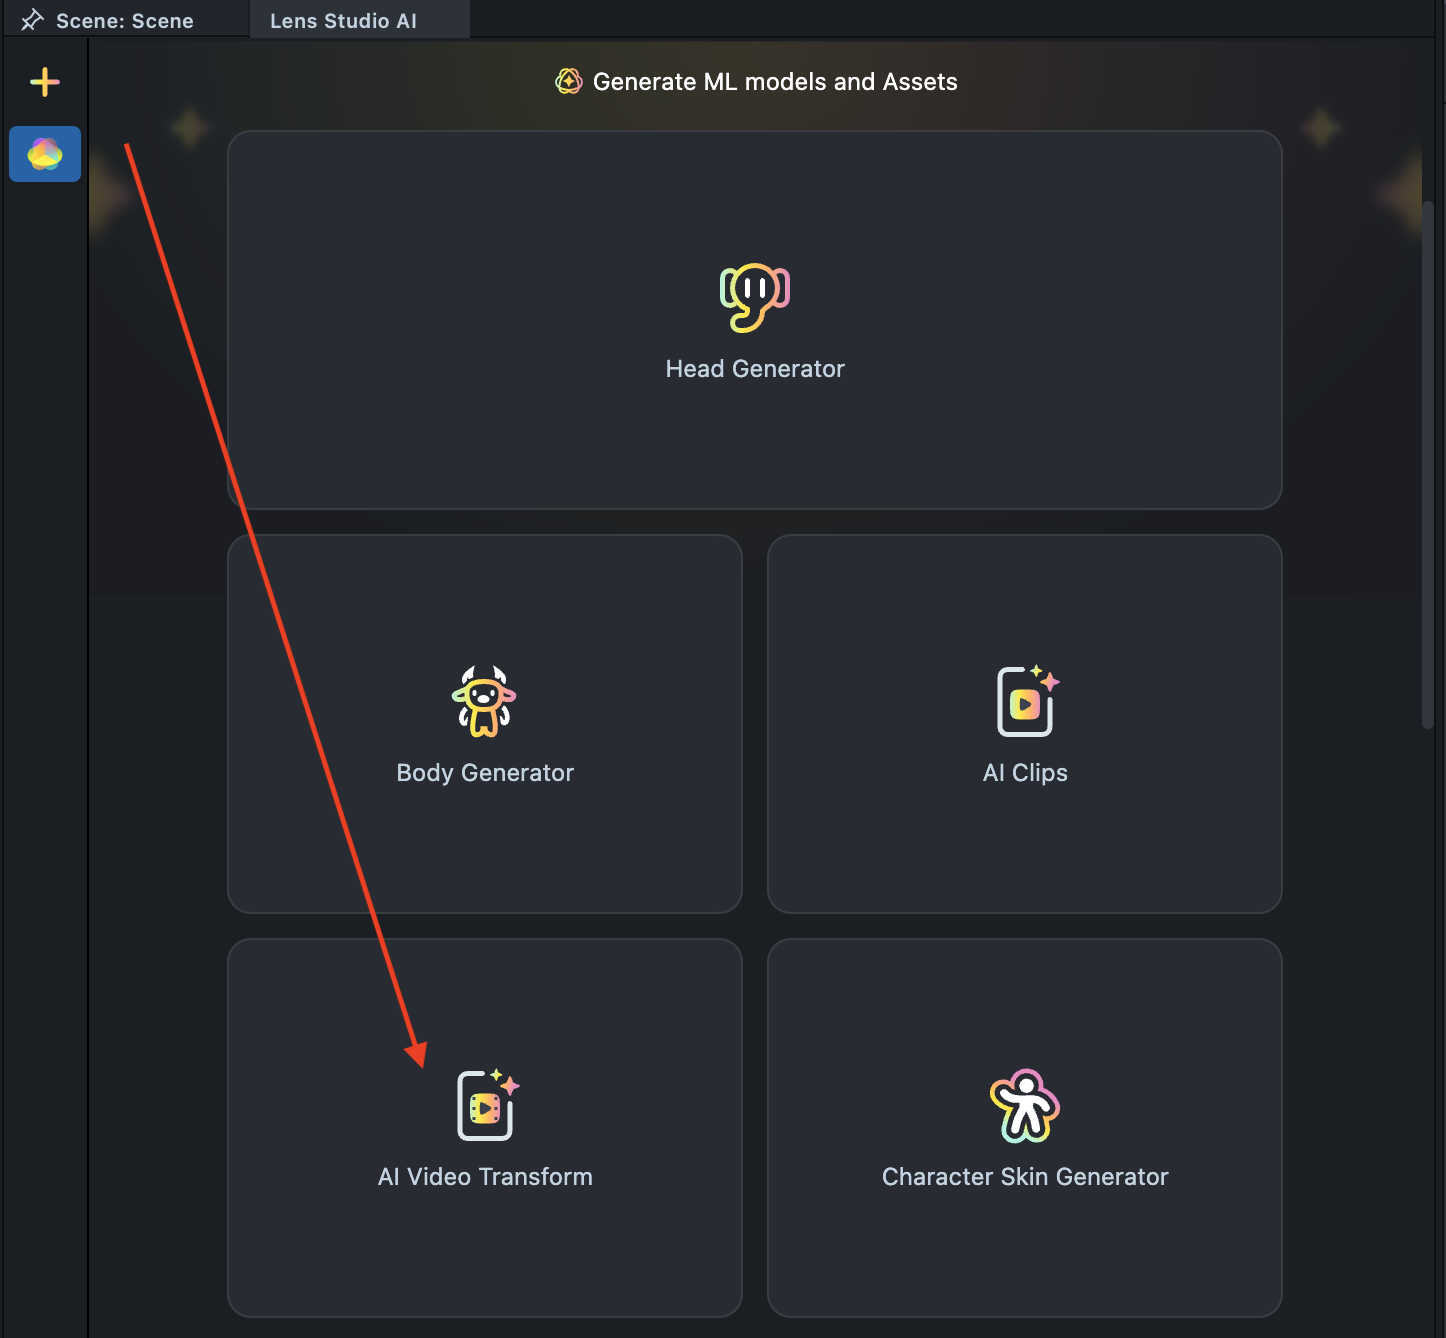
- Navigate to the
Lens Studio AIoption in the top right corner of the Lens Studio. Then, click in theGenAI Home Pagetab in the sidebar.

- On the
GenAI Home Pagetab, you may need to scroll down to find AI Video Transform.
User Interface Overview
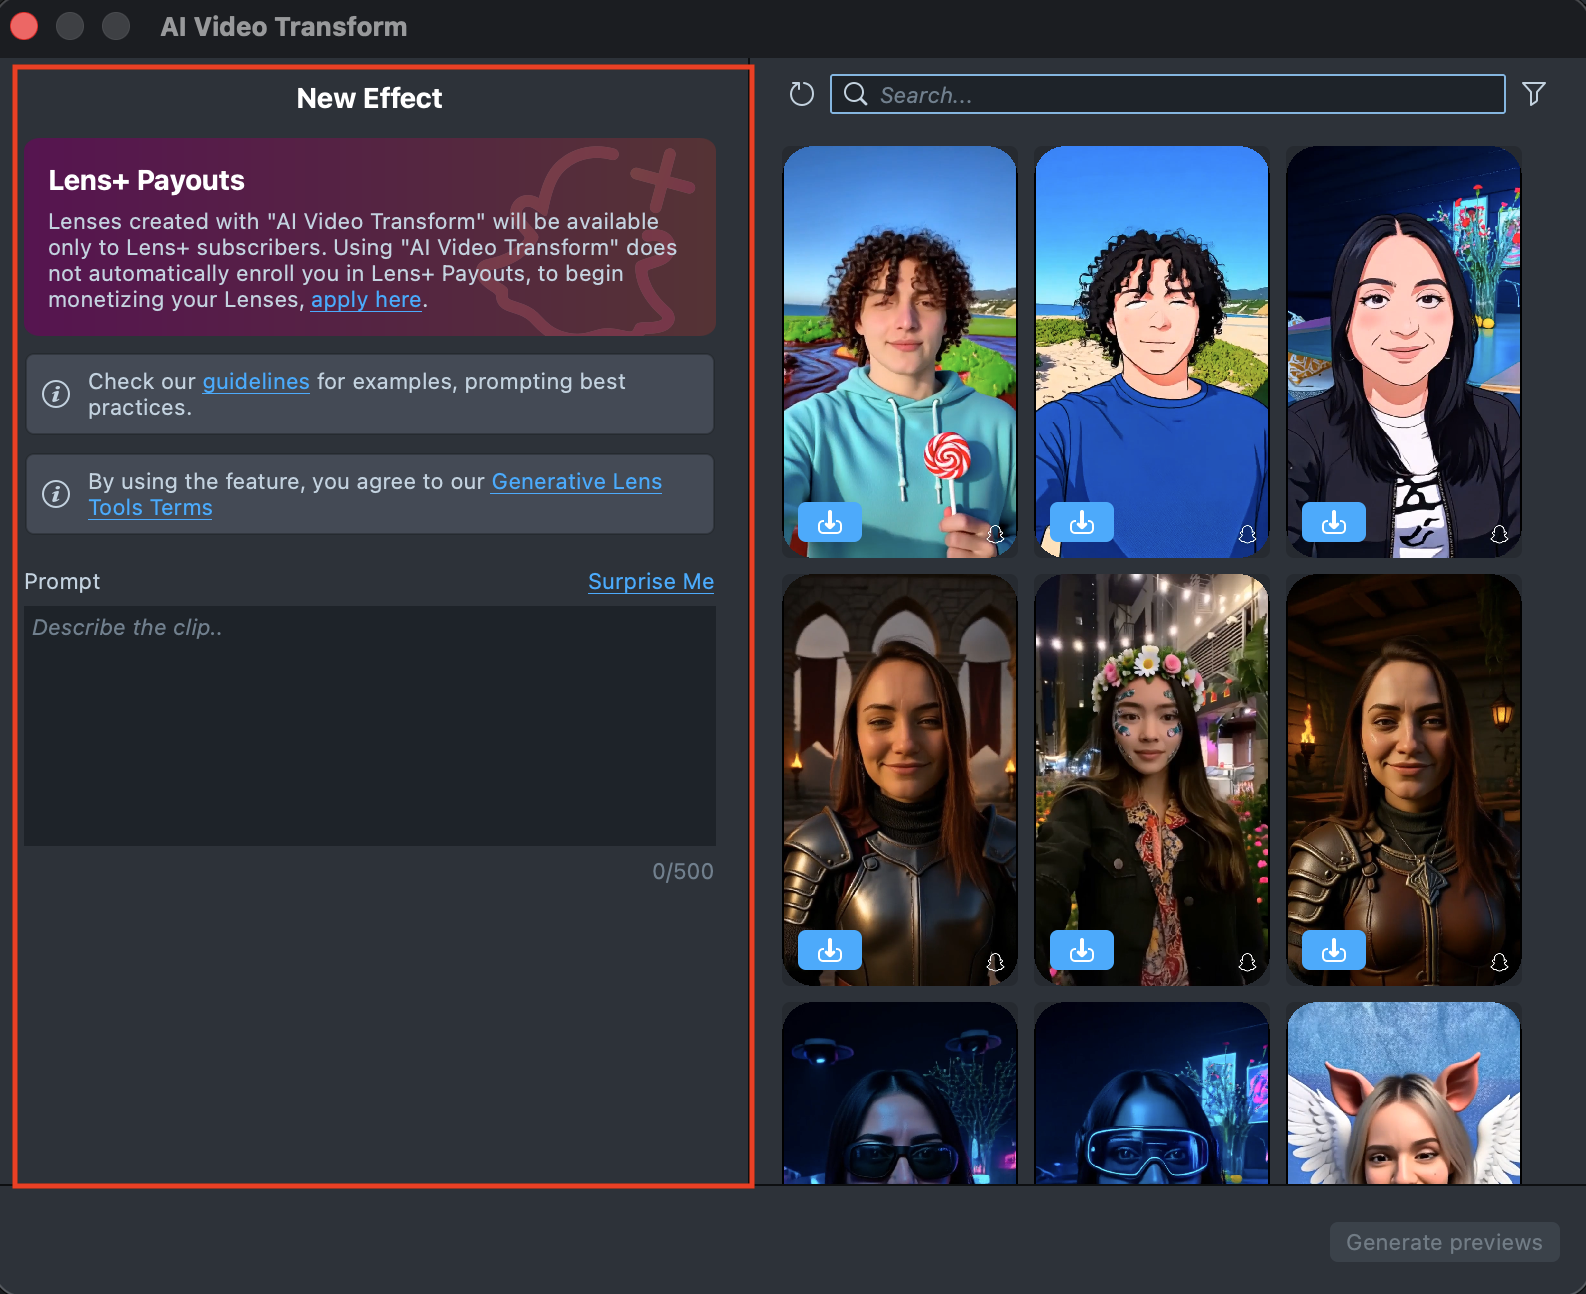
- Creation Panel: provides tools for creating and editing AI Video Transform effects.
- Gallery: shows all the effects you’ve created along with their statuses.
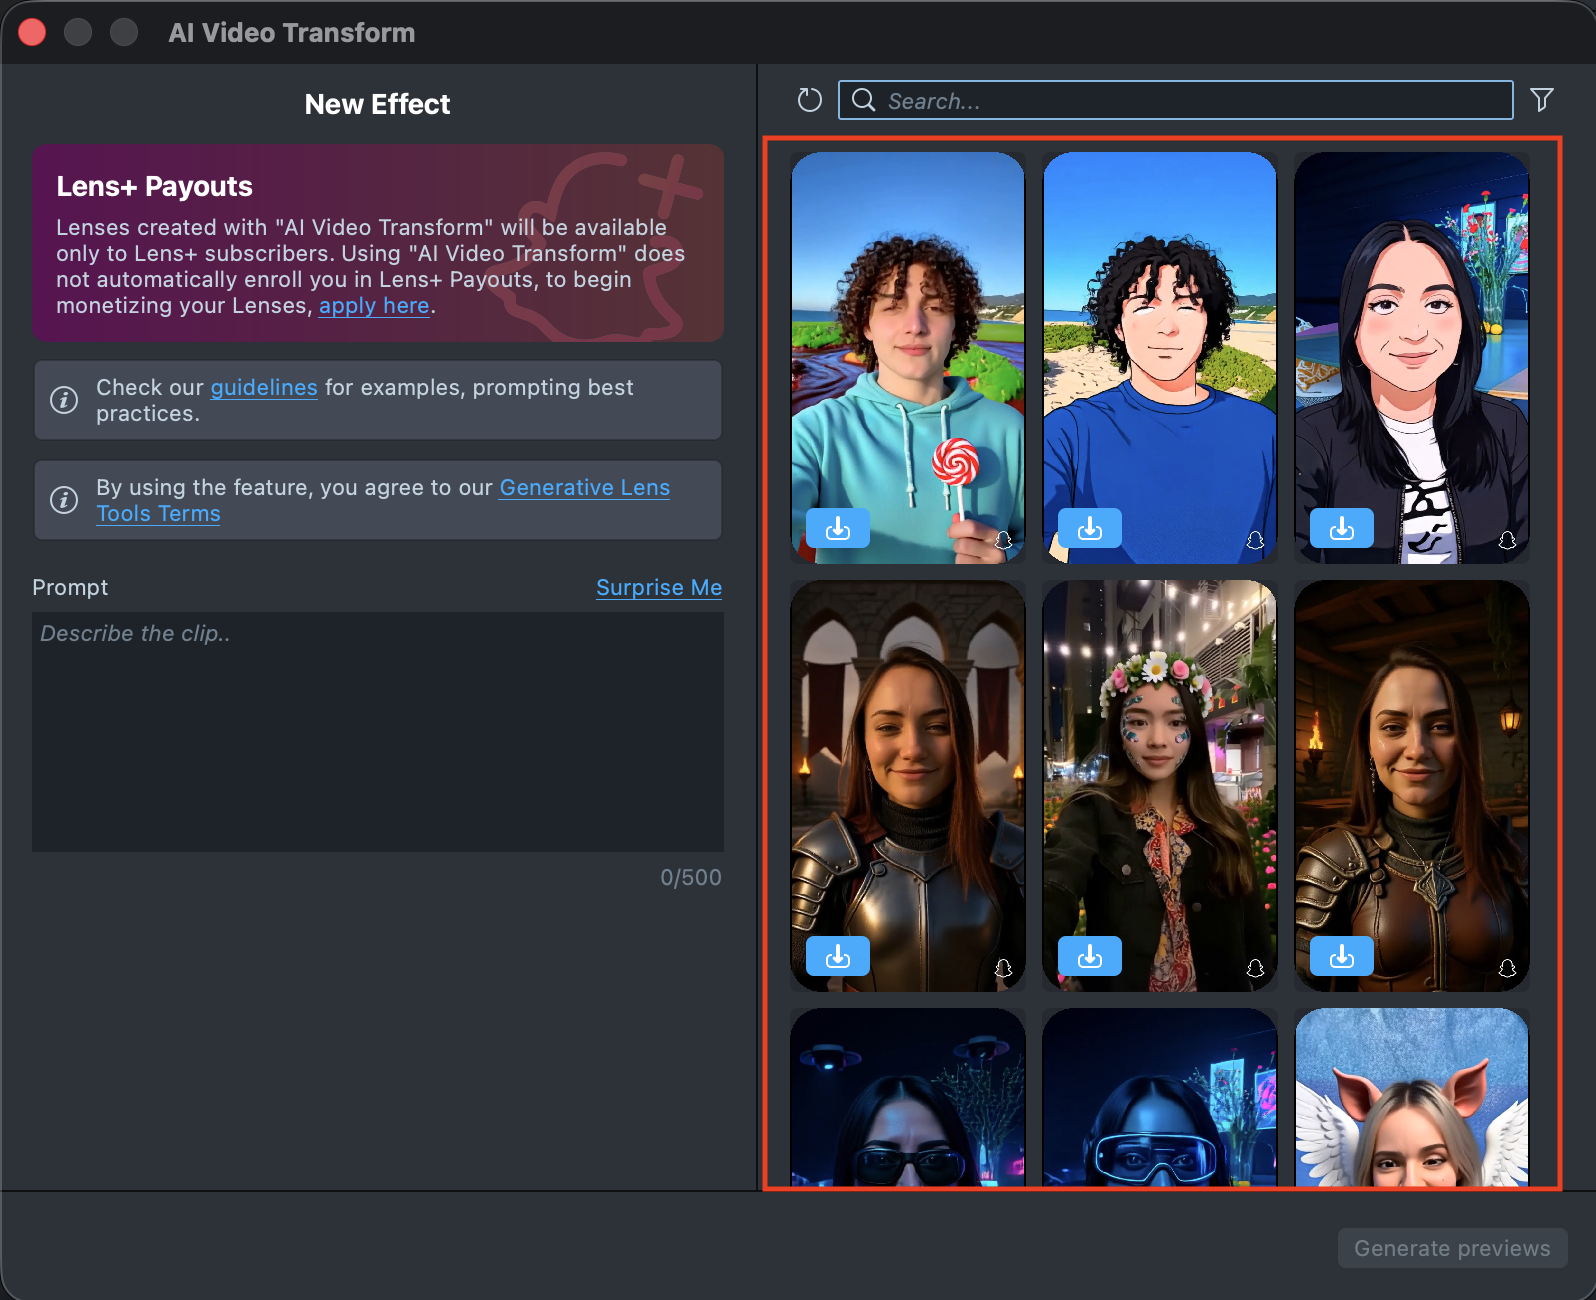
- Search: allows you to quickly find specific effects by name or keyword within your Gallery.
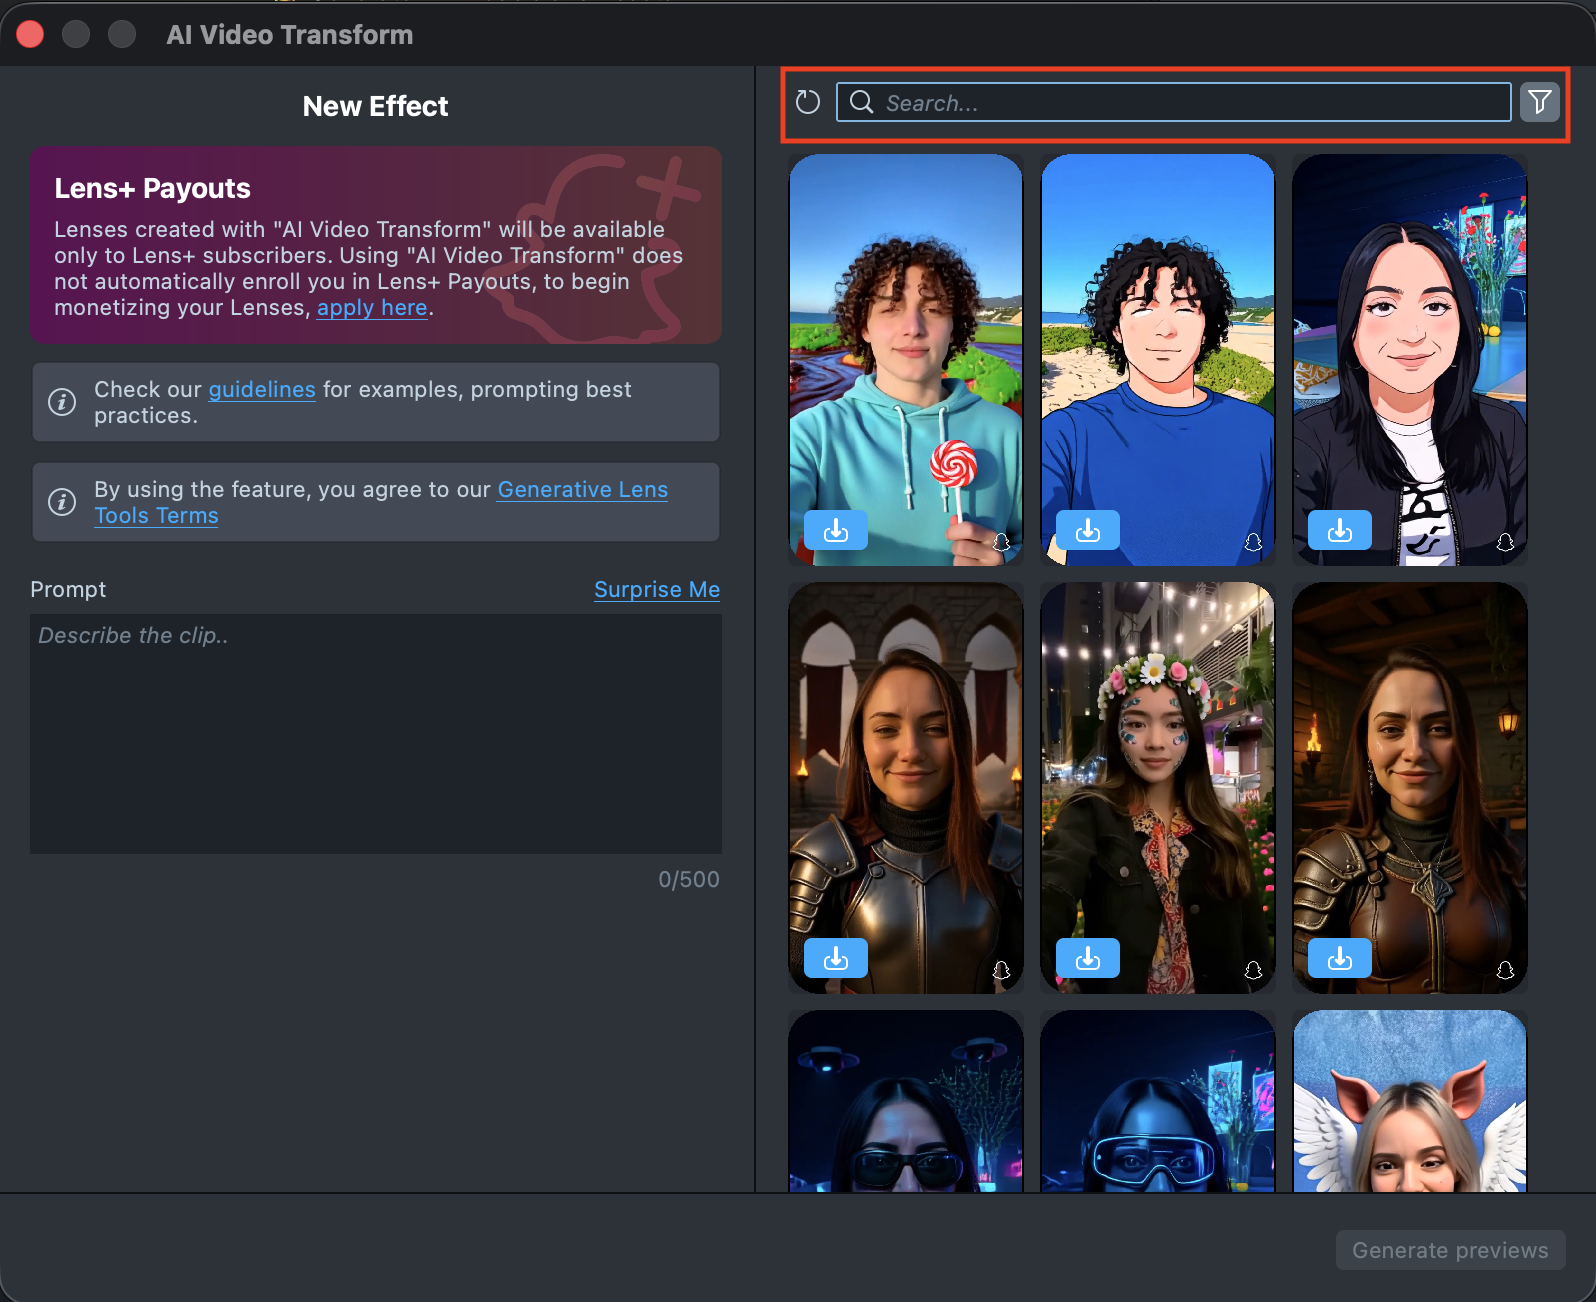
Effect Creation flow
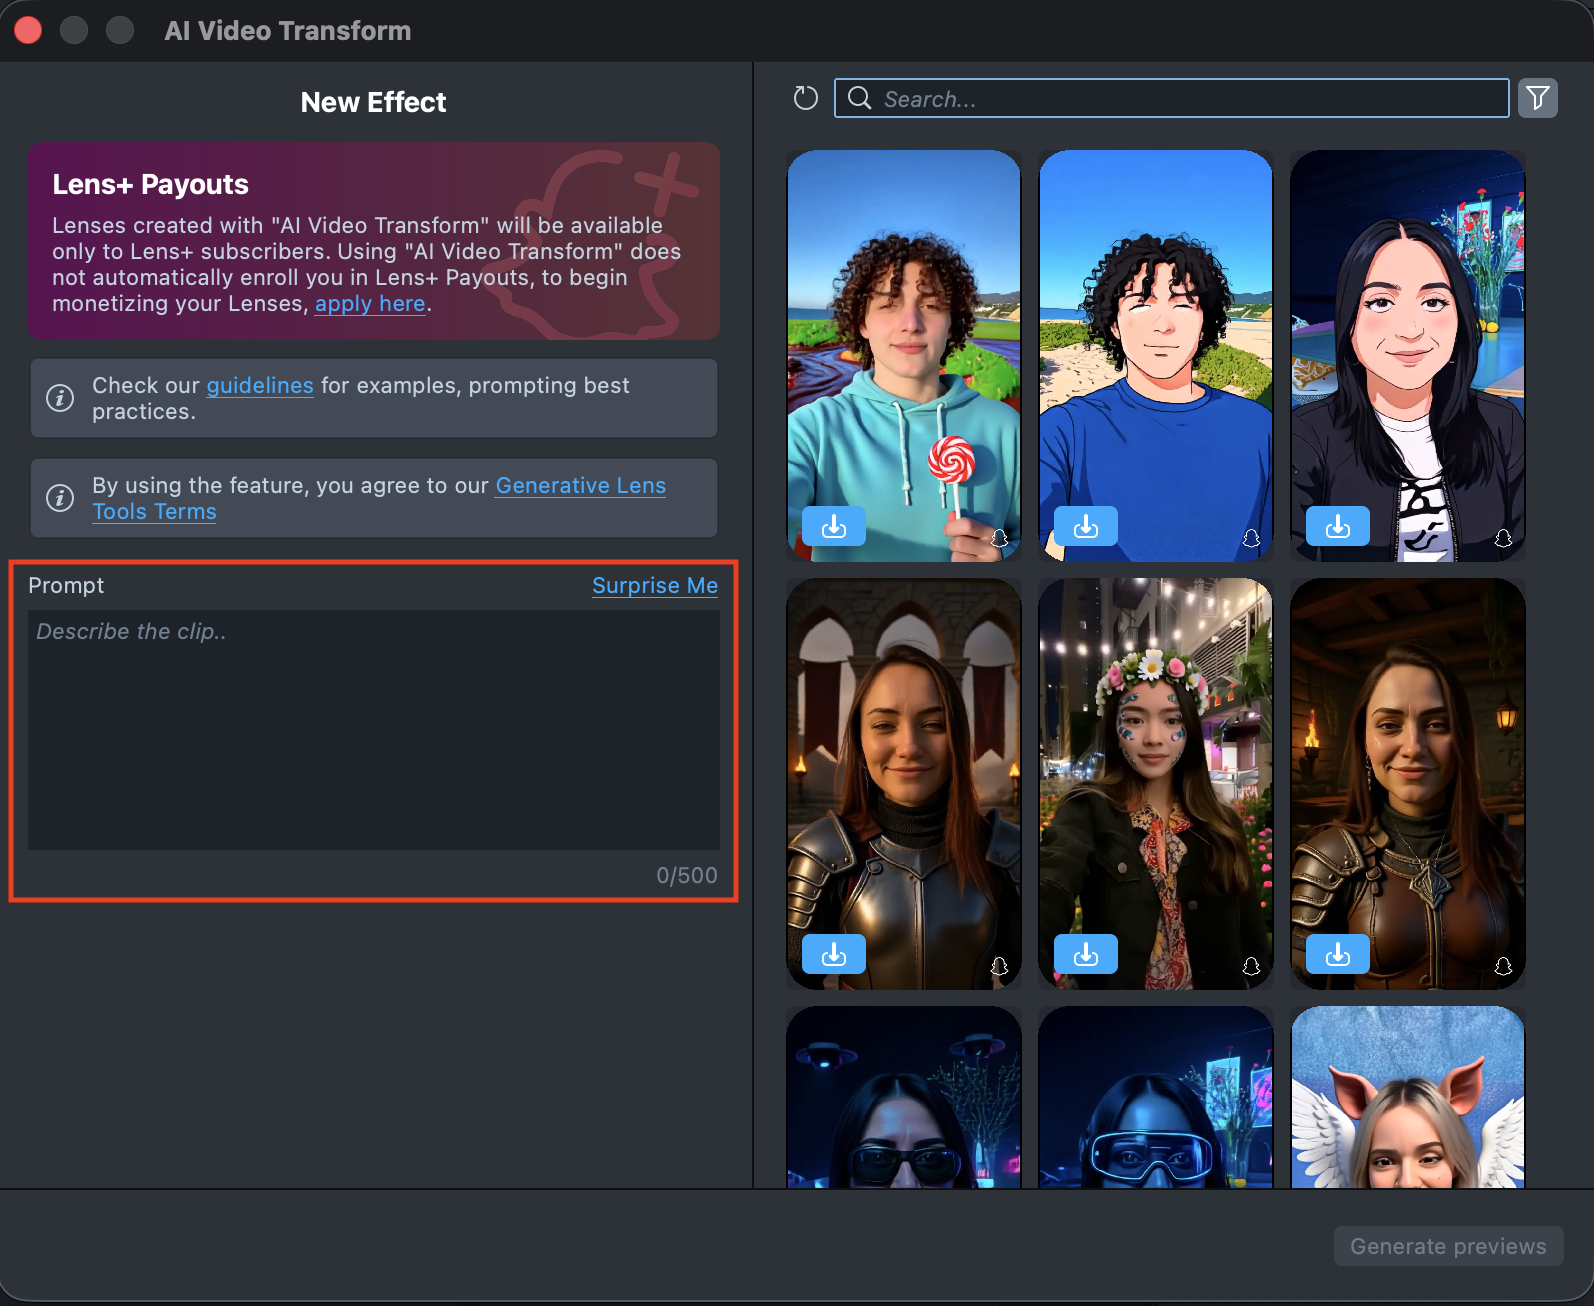
- Enter a text description of the transformation you want to apply. You can use the
Surprise Mebutton to insert one of the default prompts and get familiar with the creation flow.
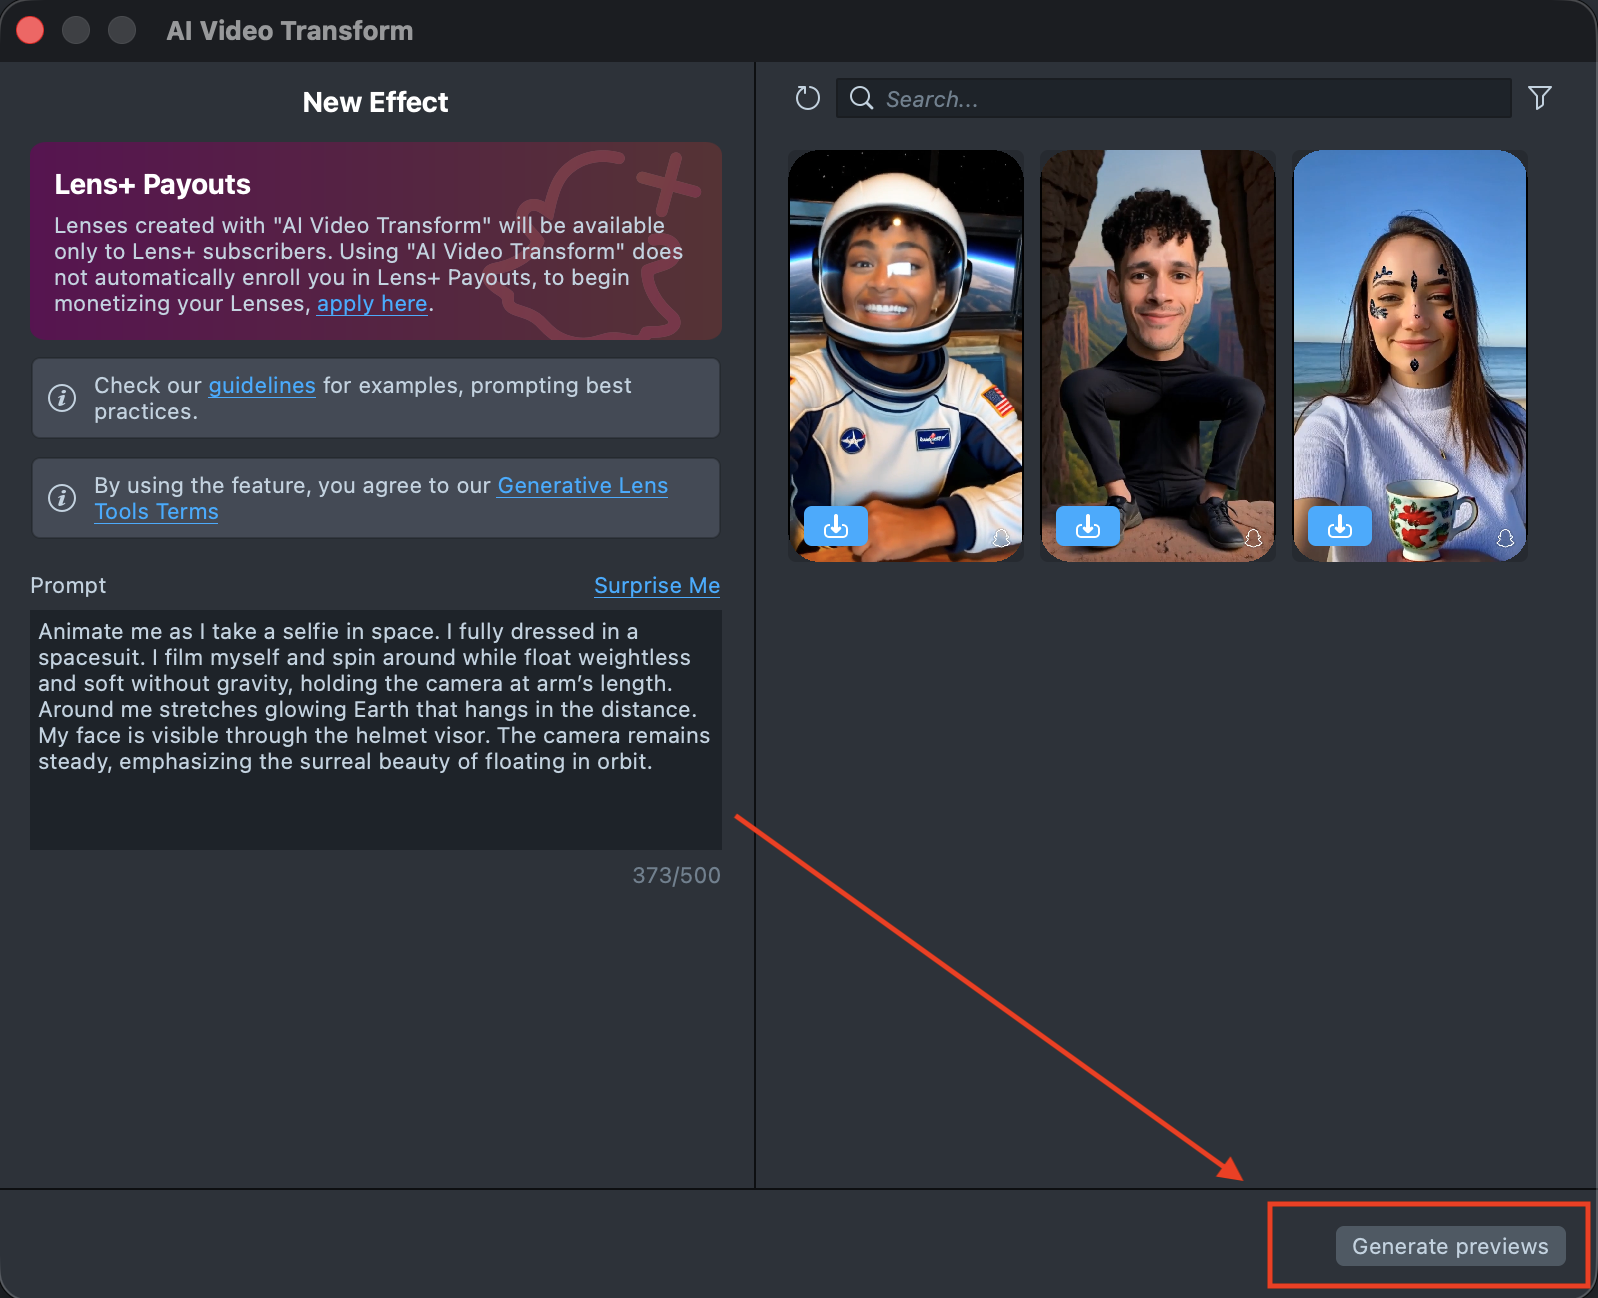
- Once you’ve entered your prompt, click the
Generate previewsbutton to generate a sample of your effect.
-
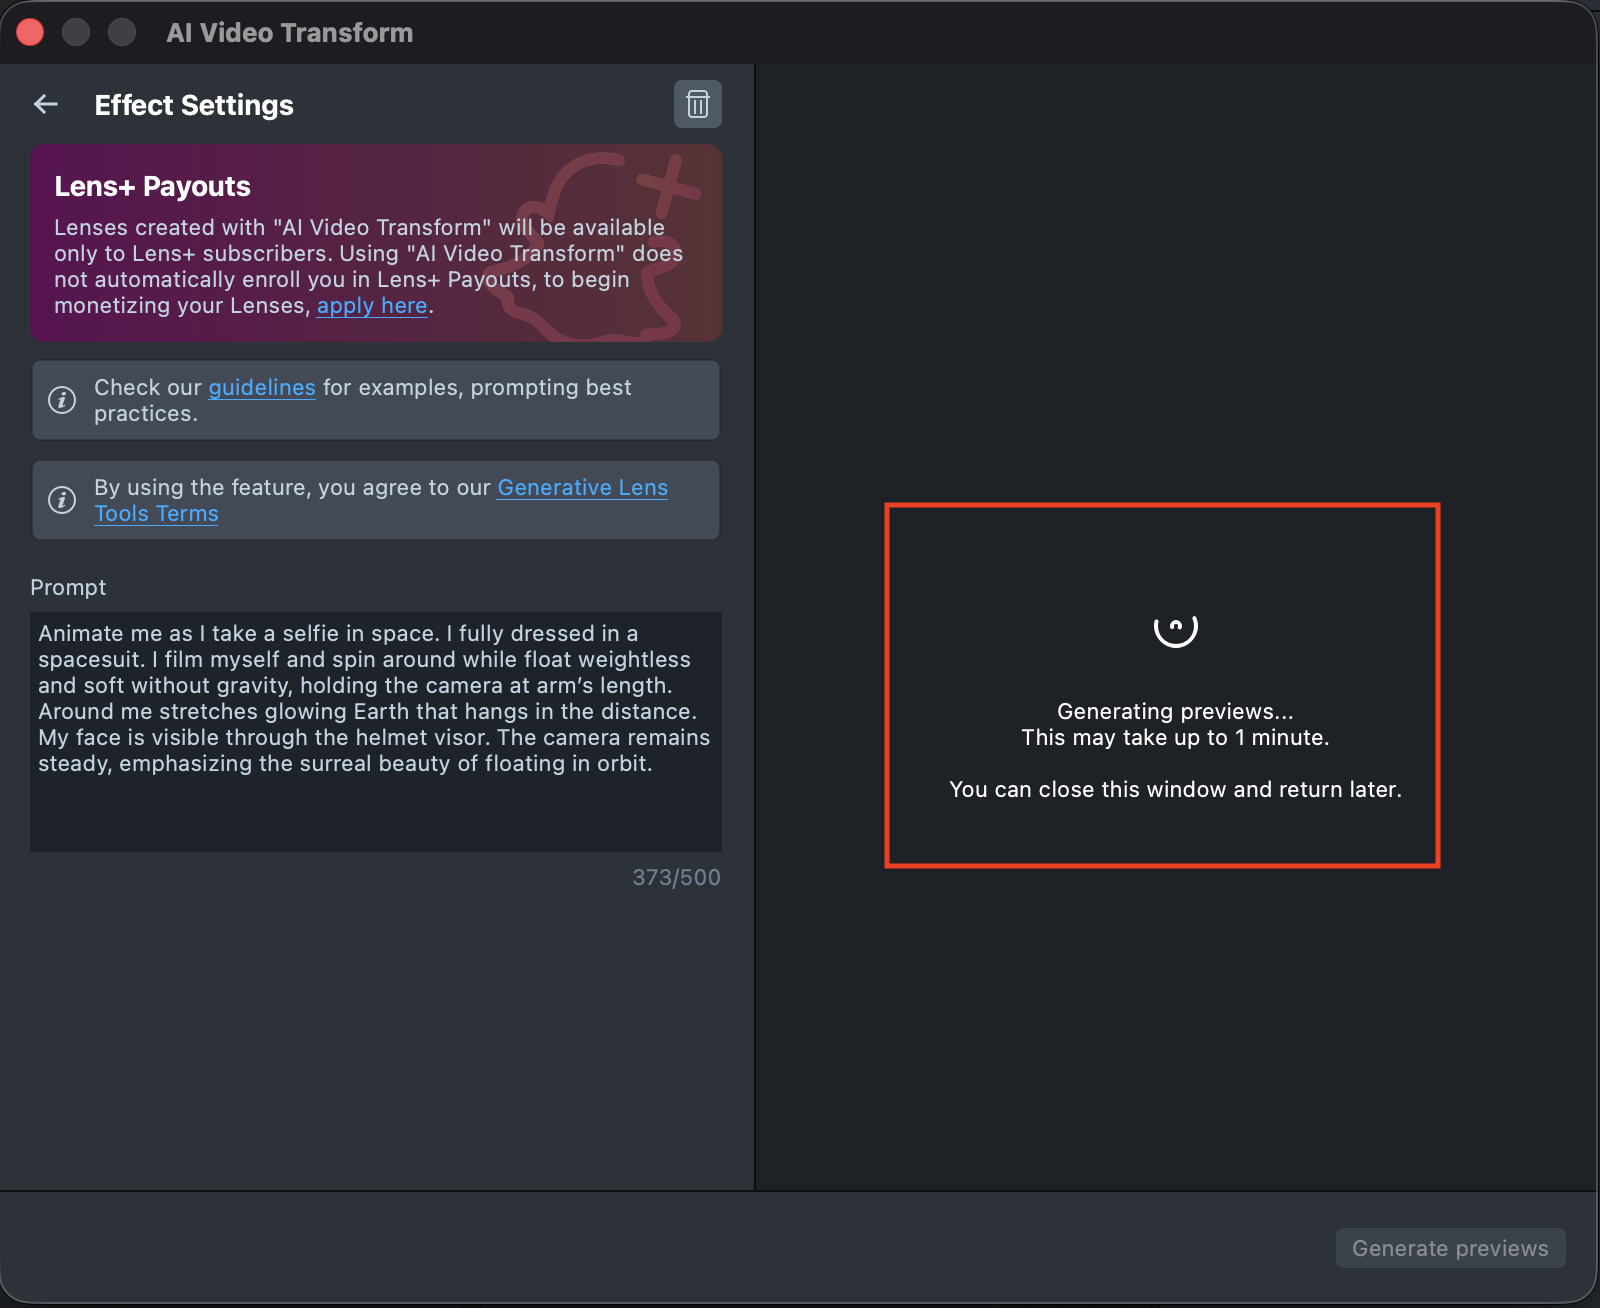
You’ll see a message indicating that preview generation has started. Feel free to close the plugin window or switch to another one - your preview remains in the Gallery, showing its generation progress.
Generating the preview may take up to 1 minute, but you can close the plugin and return later.
-
Once the preview finishes, click its tile in the Gallery to open the details page and review the result.
-
If the preview doesn’t match your expectations, return to the Creation Panel, adjust your prompt, and generate a new preview. Each generation appears in the Gallery as a new effect, without altering the previous one. This way, you can always go back and compare whether the updated effect looks better than the original.
-
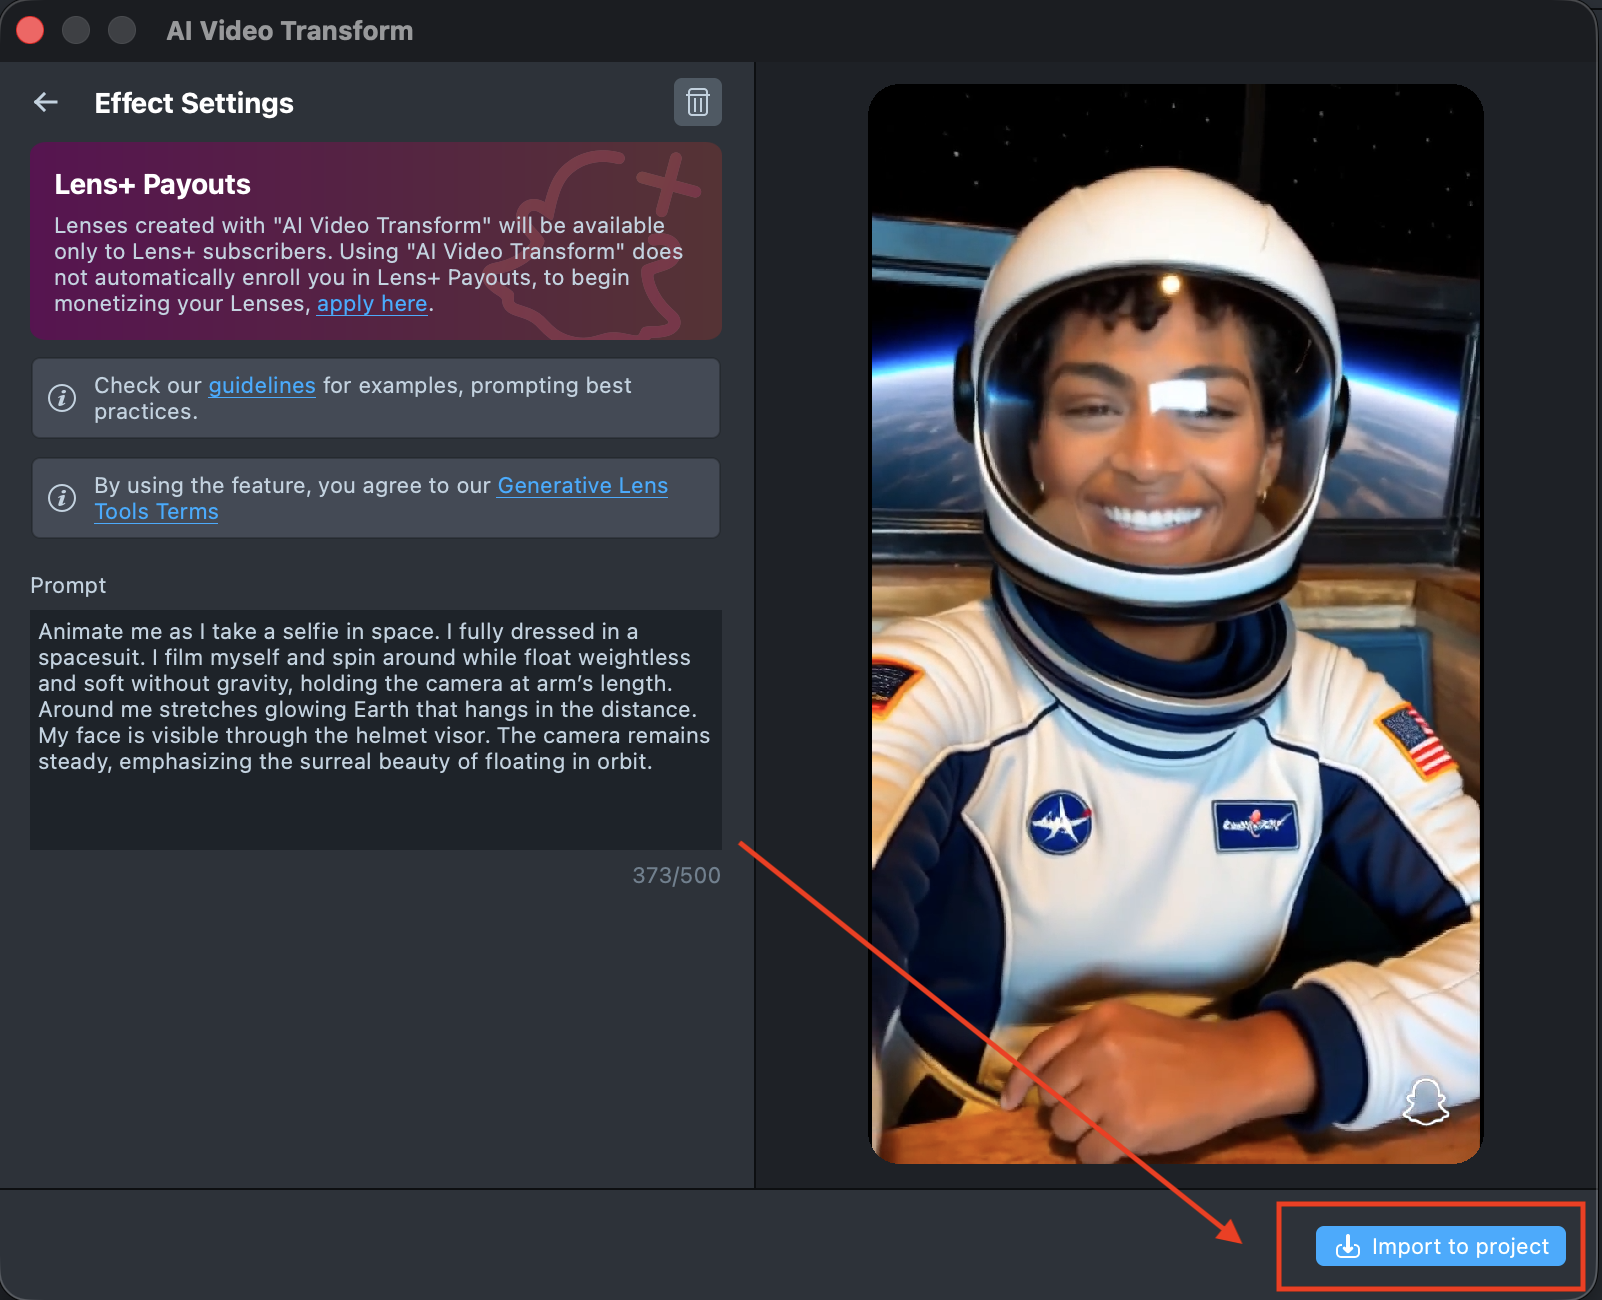
Happy with the preview? Import the effect from the Gallery by clicking the
Importbutton, or clickImport to projecton the details page to add it to your project.
-
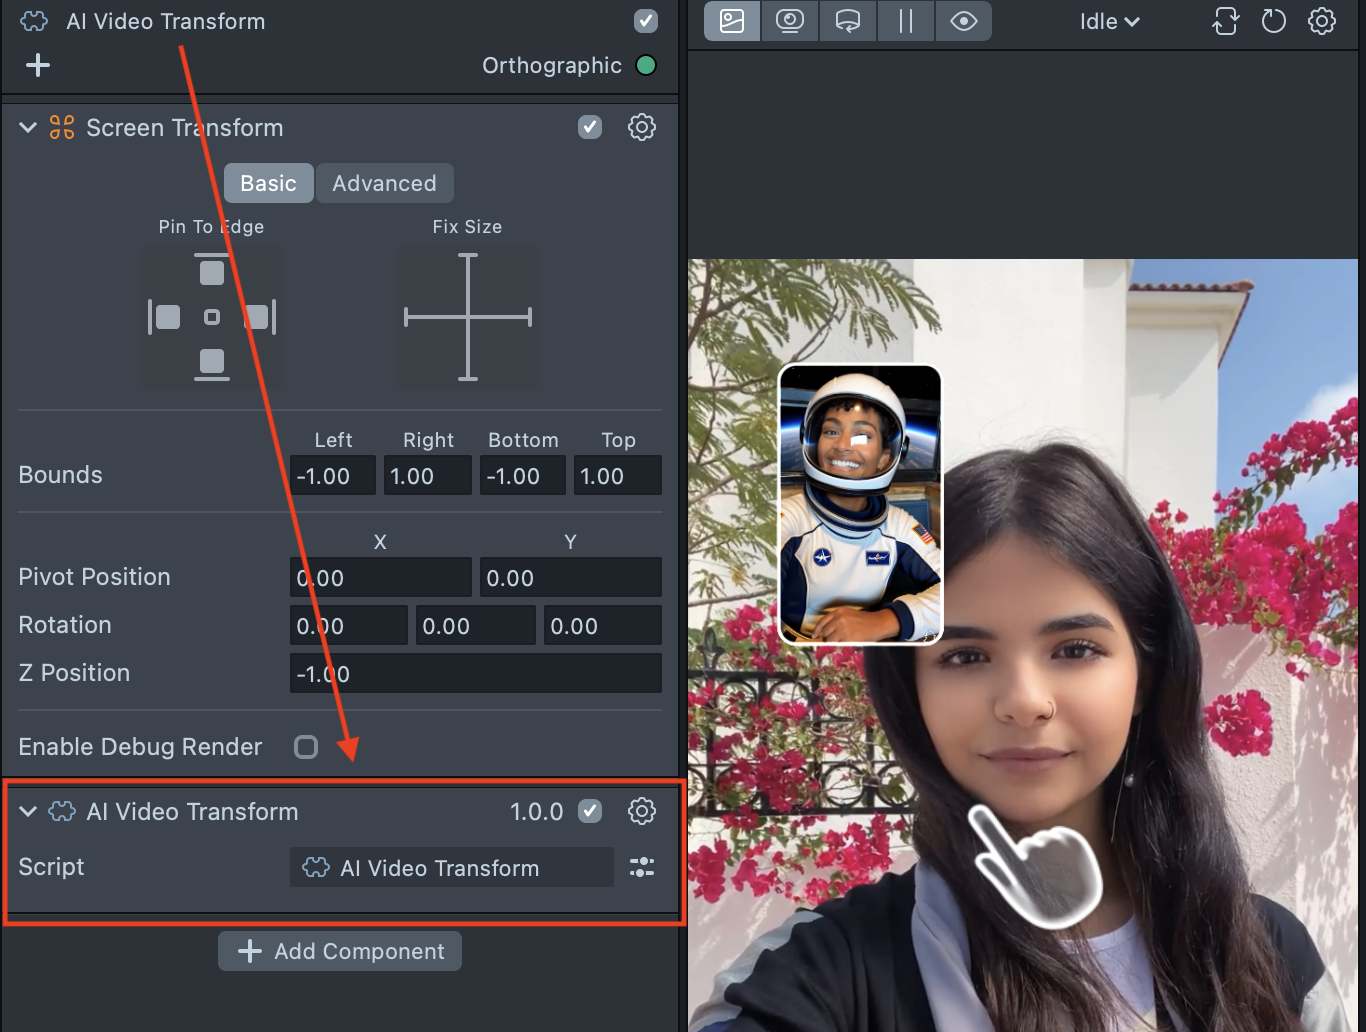
The imported component already includes all the necessary logic and a hint - essentially giving you a ready-to-use Lens. You can tap on the Preview screen or push the project to a device to see the Lens in action. On device, the user records a short video, then the Lens transforms that recording according to your prompt.
The Push to Device feature in Lens Studio sends a Lens to your device, but it only opens if your account has an active Lens+ subscription.
Don't add music, the Music Lyrics component, or the Face Animator component to your project. These components aren't compatible with AI Video Transform and can block Lens publish.
Lens Studio Preview supports the default person only. To test with other people, click "Preview Lens" and try it on your device.
Best Practices for Writing Your Prompt
Getting Started
Quick Tip: Idea → Edit prompt → Generate → Refine. Start small, test often, improve in small steps.
AI Video Transform is video editing, not video generation. Your prompt should describe only the changes to apply to the user’s recorded video. By default, the Lens keeps motion, timing, and camera movement from the original recording.
Start with a clear edit. Decide what should change: outfit, props, style, subject look, or background.
Write a focused prompt. Describe the visual modifications in concrete terms:
- what changes on the main subject
- what changes in the background or full scene
- materials, colors, and other appearance details
Generate and review. Test your prompt, then refine one change at a time.
Keep prompts clear and visual. Focus only on what should change on screen. Avoid inventing new actions, camera moves, or storytelling beats that aren't part of the edit.
Think Like an Editor
Quick Tip: describe only the delta—what should change. Everything you don't mention stays as in the source video.
Treat your prompt as a short edit instruction for the recorded footage.
Consider:
- What should change on the main subject - outfit, props, appearance, or style
- What should change in the background or full scene
- How specific the new look should be - colors, materials, silhouette, era, or art style
Prompts that list clear, concrete edits produce more stable, readable results across varied recordings.
Prompt Structure
Clear structure helps the model interpret your edit accurately.
Recommended structure: subject change → Background or scene change → Style (optional)
Example structure: add [outfit or prop] on the main subject. Change background to [environment]. Change style of the full scene to [look].
Keep descriptions direct and focused on the requested visual modifications.
Supported Edit Types
Use explicit edit language when possible:
- change background to a concrete environment or setting
- add a specific outfit or prop on the main subject
- change style of the main subject or full scene to a specific look
- replace an item the subject holds or wears
- remove a specific element in the scene
For any newly added outfit, prop, or background element, describe appearance in detail—materials, colors, patterns, scale, and condition—not just the category name.
Prompt Length
Quick Tip: short, concrete edit prompts tend to work well: specific enough to guide the change, open enough to ground on the recorded video.
Prompt length can change results a lot.
- Short prompts (< 15 words): work well for a single clear edit, but may feel vague for multi-part transformations
- Medium prompts (~20–60 words): balance clarity and visual detail for most edits
- Long prompts (> 80 words): help with multi-part edits that need rich appearance detail, but avoid adding extra actions or camera moves
Subject Description
Quick Tip: prefer "main subject" / "background" / "full scene" over first-person storytelling.
You can write edits in everyday language such as "make the subject a pirate" or "anime style." For more reliable results, translate those ideas into explicit visual commands, for example:
- add pirate outfit on the main subject, change background to a wooden ship deck at sunset
- change style of the full scene to 2D anime with clean black outlines and flat cartoon shading
The system applies edits to the primary subject and scene in the recorded video.
Testing and Refinement
Quick Tip: if it breaks: simplify → regenerate → gradually add details back.
Testing a few variations helps you find what works.
Try a few prompts. Test 2-3 prompt variations for the same idea.
Compare generations. Run related prompts to see which edit instructions are clearest.
If results break or feel inconsistent:
- Reduce the number of simultaneous edits
- Make appearance details more concrete
- Prefer one primary change before adding supporting edits
- Avoid poetic or abstract language
- Remove invented actions, camera moves, or on-screen text
Well-structured prompts with clear subject and background edits produce the most stable results.
Known Limitations
Keep these model behaviors in mind when you design prompts:
- Complex multi-step storytelling isn't the goal of this tool—focus on visual edits
- Fine details may soften during large style or background changes
- The model may skip some subtle props or accessories
- Abstract vibe-only language often works less well than concrete visual commands
- Requests that invent new motion or camera behavior may not match the source recording
If this occurs, simplify the edit or put the most important changes earlier in the prompt.
Prompt Template Examples
Quick Tip: describe the change first. Be specific about materials, colors, and setting.
These reusable templates and patterns can help you explore different creative directions. Feel free to change them or mix and match.
Outfit Transformation
Change what the main subject is wearing.
Focus on a full outfit with color, texture, silhouette, and style cues.
Add [specific outfit: top and bottom, color, material, silhouette, era/style] on the main subject.
Example: add a tailored charcoal-gray wool suit with a white dress shirt and black tie on the main subject.
Background Replacement
Replace the environment while keeping the subject’s motion.
Focus on a concrete setting with readable visual details.
Change background to [concrete environment with lighting, props, and atmosphere details].
Example: change background to a sunny sandy beach with turquoise water, scattered seashells, and pale blue sky.
Style Transfer
Restyle the full scene or main subject.
Focus on a clear art direction with visual attributes.
Change style of the [main subject | full scene] to [specific look: 2D anime, 3D computer-generated imagery, pixel art, clay animation, watercolor].
Example: change style of the full scene to 2D anime with clean black outlines, flat cartoon shading, and vivid saturated colors.
Props and Additions
Add a prop or supporting element to the subject or scene.
Focus on size, material, color, and how the element sits on or near the subject.
Add [specific prop] on the main subject. Add [specific element] in the background.
Example: add oversize gold hoop earrings and a black eye patch on the main subject, and add weathered wooden crates and coiled rope in the background.
Concept-to-Edit Template
Translate a short theme into coordinated subject and background edits.
Add [theme-matching outfit or props] on the main subject, change background to [matching environment], and optionally change style of the full scene to [supporting look].
Keep prompts focused on visual edits. Avoid inventing new actions or camera moves—the source recording already provides motion and timing.
Example: add a white-and-navy insulated astronaut jumpsuit with mission patches on the main subject, change background to a deep black field of stars with a distant blue Earth, and add floating metallic satellite panels in the background.
Current Limitations
-
Don't add music, the Music Lyrics component, or the Face Animator component to your project. These components aren't compatible with AI Video Transform and can block Lens publish.
-
Lens Studio Preview supports the default person only. To test with other people, click "Preview Lens" and try it on your device.
-
AI Video Transform Lenses are available only to Lens+ subscribers.